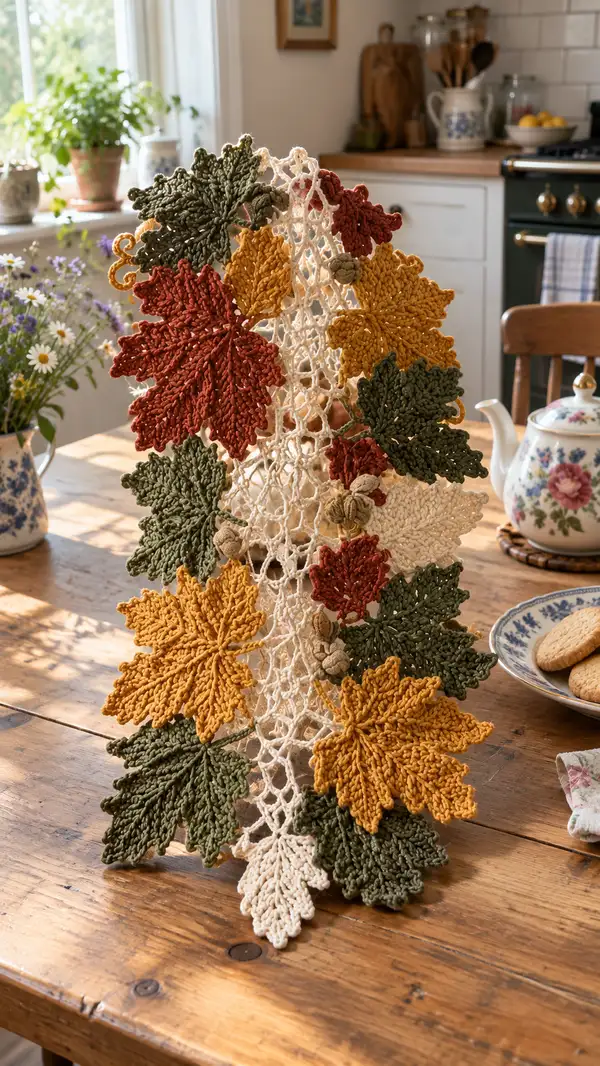
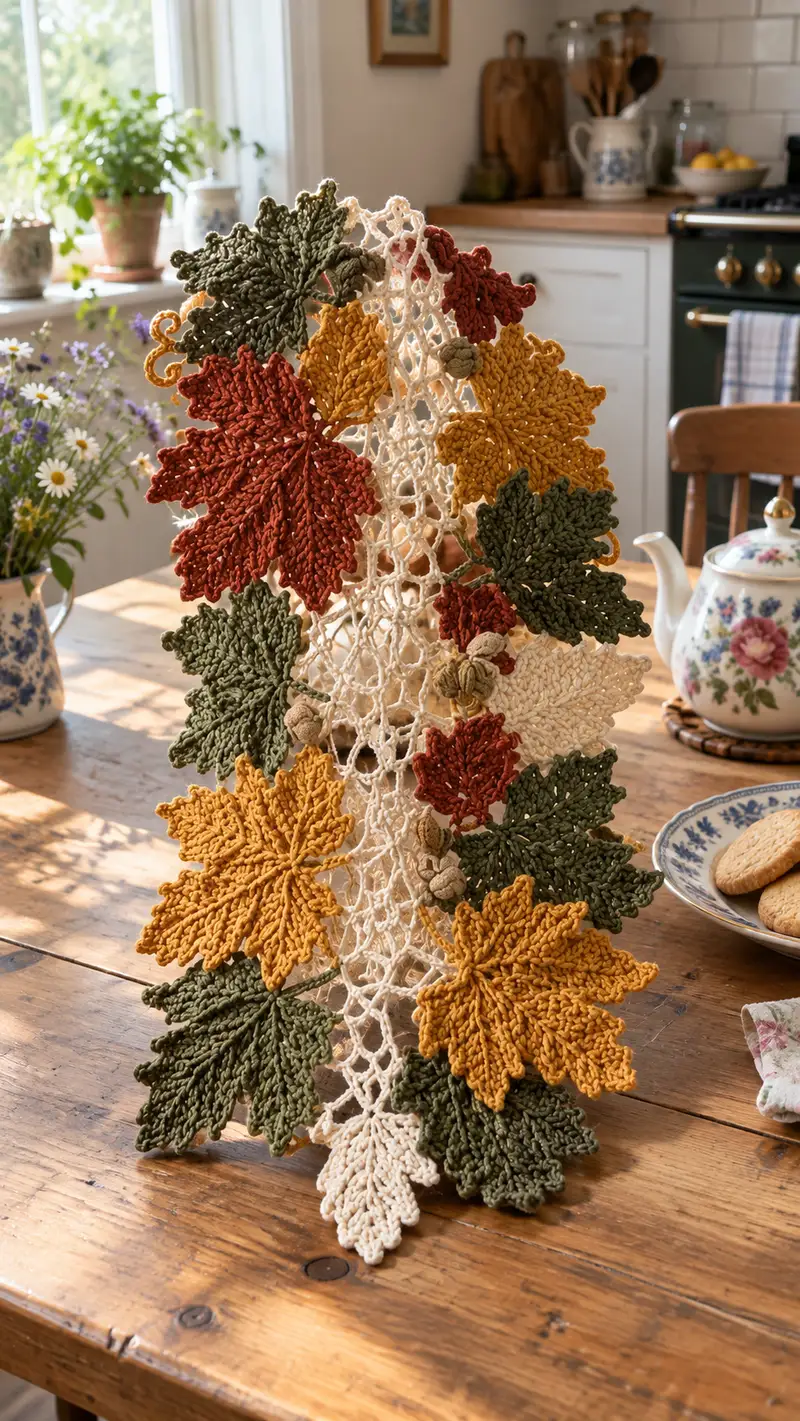
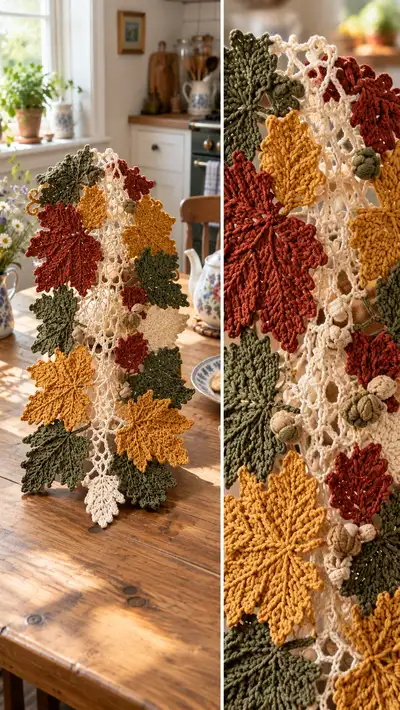
Create a warm, textured table runner filled with layered crochet leaves in mustard, olive, rust and cream. This pattern shows how to make stylized maple-style leaves, tiny acorn bobbles and a lacy central mesh to display them. Finished project is a beautiful seasonal centerpiece that lies upright or drapes across a table for autumnal charm. Detailed instructions, color-change tips and blocking guidance are included for a polished finish.
Progress Tracker
0% Complete
— Overview :
Info :
This pattern is modular: you will make several large, medium and small leaves, a central cream mesh runner, and a handful of small acorn bobbles and tiny leaves. Leaves are worked in rounds and then blocked. The mesh is worked in rows and then joined to leaves by sewing with matching yarn. Numbers below give stitch counts for each round; maintain accurate counts for symmetry.
Info :
Suggested final layout: 6 large leaves, 6 medium leaves and 8 small leaves arranged along a central mesh approximately 90cm long and 18-24cm wide, though you can scale by making more or fewer repeats. Use stitch markers and block each leaf as you finish; blocking dramatically improves lace definition.
— Large Leaf (Make 6 in mustard and rust) :
Round 1 :
6 sc in magic ring (6)
Round 3 :
(1 sc, 1 inc) x 6 (18)
Round 4 :
(2 sc, 1 inc) x 6 (24)
Round 5 :
(3 sc, 1 inc) x 6 (30)
Round 6 :
(4 sc, 1 inc) x 6 (36)
Round 7 :
(5 sc, 1 inc) x 6 (42)
Round 8 :
(6 sc, 1 inc) x 6 (48)
Round 9 :
(7 sc, 1 inc) x 6 (54)
Round 10 :
(8 sc, 1 inc) x 6 (60)
Info :
We now have a round disk that will become the center of the leaf. Place a stitch marker at the start of each 5-stitch cluster to mark 12 equal sections (you will build 12 lobes). Keep counts exact to maintain symmetry.
Round 11 :
1 sc in each st around (60)
Round 12 :
1 sc in each st BLO (60)
Info :
Working BLO on this round creates a subtle ridge that will read as the base of the leaf lobes. Switch to a slightly smaller hook if you prefer crisper petals.
Round 13 :
*(Ch 9, skip next 4 sts, sl st in next st) x 12 (forms twelve ch loops around the circle)
Info :
Each ch-9 loop will become one lobe/petal. Check that loops sit evenly; adjust tension on loops before proceeding.
Round 14 :
Working into each ch-9 loop: (sl st into loop, ch 2, (2 dc, ch 1, 2 dc) in loop, ch 2, sl st in same loop) x 12 — this forms a rounded base for each lobe (no change to central count)
Round 15 :
Into first loop work: sl st, ch1, (sc, hdc, 3 dc, hdc, sc) in loop, sl st to base. Repeat around for each loop to build height and texture. Repeat x12 (12 lobes)
Round 16 :
Working along outer edge of each lobe: (ch1, sc in same st, sc in next 2 sts, hdc in next 2 sts, dc in next 3 sts, hdc in next 2 sts, sc in next 3 sts, ch1, sl st to center petal join) x 12 — Keep the flow even for each lobe.
Info :
Check overall diameter now — large leaf should measure roughly 12–14cm across before blocking. Pin a finished leaf out to the desired shape to guide the next rounds of definition.
Round 17 :
Working from tip back to center to create pointed lobes and tip serrations: For each lobe: attach yarn at outer tip, ch1, (sc, sc, inc, sc, sc) across tip to make a small raised point; sl st to next lobe base. Repeat x12.
Round 18 :
Vein foundation: Join yarn at center with sl st, ch1, sc in same st, *ch6, skip one center st, sc in next center st* x11, ch6, sl st into initial sc to form 12 small chains radiating from center (acts as midrib foundations)
Round 19 :
Working along each ch6 rib: (sl st into first ch, hdc, dc, fpdc around center post of leaf a few sts back, dc, hdc) across each chain to form raised midrib. Repeat for all 12 ribs. No central stitch count change.
Round 20 :
Edge picots: Working around entire outer edge of all lobes: *sc in next st, ch3, sl st into first ch to form small picot* around each lobe edge to create serrated appearance. Aim for 6-8 picots per lobe depending on size.
Info :
Fasten off leaving a long tail (approx. 40cm) to use for sewing the leaf to the central mesh. Block leaf into final shape: pin each lobe gently and steam or wet-block, shaping the lobes to be slightly cupped; allow to dry fully.
— Medium Leaf (Make 6 in olive) :
Round 1 :
6 sc in magic ring (6)
Round 3 :
(1 sc, 1 inc) x 6 (18)
Round 4 :
(2 sc, 1 inc) x 6 (24)
Round 5 :
(3 sc, 1 inc) x 6 (30)
Round 6 :
1 sc in each st around (30)
Info :
Medium leaf uses 10 lobes. Mark ten even positions using stitch markers so the lobes sit evenly around the circle.
Round 7 :
*(Ch 7, skip next 2 sts, sl st in next st) x 10 (creates 10 ch loops)
Round 8 :
Into each loop work: ch2, (2 dc, ch1, 2 dc), ch2, sl st to base x10
Round 9 :
In each lobe: sl st, ch1, sc, hdc, 3 dc, hdc, sc; sl st to base x10
Round 10 :
Outer shaping: (ch1, sc in next 2 sts, hdc in next 2 sts, dc in next 3 sts, hdc in next 2 sts, sc in next 2 sts) around each lobe x10
Round 11 :
Tip shaping: Attach yarn at tip of lobe, (sc, inc, sc) across each tip to create defined point; sl st to next lobe base x10
Info :
Medium leaf should be approx 8–10cm across pre-blocking. Leave 25-35cm tail for sewing onto mesh. Block to open lobes and set veins.
— Small Leaf (Make 8 in cream and accent colors) :
Round 1 :
6 sc in magic ring (6)
Round 3 :
(1 sc, 1 inc) x 6 (18)
Round 4 :
1 sc in each st around (18)
Round 5 :
*(Ch5, sl st to next base st) x 6 (forms 6 small ch loops)
Round 6 :
Into each small loop work: sl st, ch1, sc, hdc, 2 dc, hdc, sc, sl st to base x6
Info :
These are accent leaves; keep them small and delicate. Leave a 20-30cm tail for sewing. Block gently to open the lobes.
— Vein & Texture Detail (per leaf) :
Round 1 :
Attach yarn at center; ch1, sc in same st, *ch5, sc in every 5th center st* to form ribs equal to the number of lobes (for large leaf do 12 ribs, medium 10, small 6)
Round 2 :
Work along each rib: sl st into first ch, hdc, dc, fpdc around corresponding center stitches to raise midrib, then dc, hdc to outer tip. Repeat for each rib. This is a textural pass and does not change central counts.
Info :
Use front-post dc (fpdc) for a pronounced vein; practice on a scrap if new to post stitches. For stronger definition, switch to a slightly larger hook only for the fpdc pass.
— Acorn Bobble (Make 8-10 in beige/brown) :
Round 1 :
6 sc in magic ring (6)
Round 3 :
(1 sc, 1 inc) x 6 (18)
Round 4 :
1 sc in each st around (18)
Round 5 :
(2 sc, 1 dec) x 6 (12)
Round 6 :
1 sc in each st around (12)
Round 7 :
Work 3 rounds of bobble texture: *BLO sc around (12)* x3 to create slightly flattened top for cap
Round 8 :
Fasten off leaving a long tail for sewing. Lightly stuff with polyester fill until cap is plump but not overfilled.
Info :
For a realistic acorn shape, sew a small contrasting cap: with brown, ch4, join to form circle and work a round of 12 sc, then a round of (sc, picot) around to create a scalloped cap. Attach cap to bobble with whip stitch. Leave tail for joining to mesh.
— Central Mesh Runner (Make 1 in cream) :
Info :
The central mesh is worked as an open lattice of chain spaces and treble clusters. You can make the mesh as long as you want; the sample here is approx 90cm long and 18cm wide. Work a foundation chain of 60 chains for approx 18cm width; adjust to suit your gauge.
Row 1 :
Ch60, turn, *skip 3 ch, (sc in next ch, ch5)* across, ending with sc in last ch; turn (creates first row of net with 12 ch5 spaces across — adjust spacing to your chain count)
Row 2 :
Ch4 (counts as tr), work (tr into next sc, ch3, tr into next sc) across to create vertical posts, finishing with tr into turning ch; turn
Row 3 :
Ch1, sc into top of each tr and into each ch3 space, ch5 across each vertical column to recreate net; turn
Row 4-36 :
Repeat Rows 2-3 alternating (tr-post row then sc+ch5 net row) until runner reaches desired length (sample uses 36 rows for approx 90cm). End with Row 3 style to give a neat finish.
Info :
Keep tension consistent to maintain even mesh holes. Use stitch markers at quarter points to help align sewn leaves later. Block mesh flat before joining leaves to avoid sagging after attachment.
— Joining Leaves and Acorns to Mesh :
Info :
Arrange leaves on mesh before sewing. The sample layout alternates leaf sizes along the runner in an overlapping cascade. Pin leaves in place so their sewn tails sit on underlying mesh intersections; leave small margins for layering.
Round 1 :
Thread long tail from leaf to tapestry needle. Starting at the base of leaf where tail begins, position leaf over mesh intersection and whip stitch through both leaf base and mesh loops using invisible mattress stitch, taking small even stitches so join is secure but not visible. Work around the base of the leaf with 12-18 evenly spaced stitches.
Round 2 :
For overlapping leaves, sew the lower leaf first, then position the upper leaf to slightly overlap the outer lobe points; tack upper leaf only at the central base so the lobes sit freely for a natural layered look.
Round 3 :
Sew acorn bobbles to mesh by threading their long tail through a small knot at the mesh intersection and securing with several pass-through stitches; hide ends inside the bobble or trim close after weaving.
Info :
Use contrasting color bobbles sparingly to draw the eye. Add 2–3 clusters of 2–3 acorns spaced along the runner for authenticity. Reinforce joins by sewing through several layers if you plan to move or stand the piece upright frequently.
— Edging & Final Detail Rounds :
Round 1 :
With cream yarn, work single crochet evenly along both long edges of the mesh: (sc in each tr top and ch5 space) to create a stable border. Count to maintain symmetry on both sides.
Round 2 :
Work one round of Crab Stitch (reverse sc) along both edges to give a slight corded finish and help the runner hold upright edges when displayed.
Round 3 :
Optional: Pick up a few stitches and add tiny cream leaf tips at even intervals along both edges by making ch4 loops anchored with a sc, then picot for tips. This softens the edge and ties leaves into the net visually.
Info :
Once all pieces are sewn, wet-block the entire runner pinned into the final arranged shape for 24 hours. Cotton yarn will soften and the lacy mesh will open up, showcasing veins and picot tips.
— Finishing Touches :
Info :
Weave all remaining tails through several stitches on the wrong side and trim. For extra durability, apply a small dab of fabric glue inside acorn caps and at essential joins; test glue on scrap before use.
Info :
Optional metallic thread: Add a single metallic stitch or two near leaf centers to catch light and add subtle shimmer for seasonal table displays.
Info :
Storage tip: When not in use, roll the runner around a cardboard tube padded with acid-free tissue to avoid creasing the leaves; do not fold sharply.
This autumn runner brings seasonal cheer to any table — each leaf and little acorn is a tiny tactile treasure you made by hand. The layered textures and warm palette create a cozy, handmade centerpiece you can be proud of. Pin, stitch, block and arrange until it feels just right — it's a lovely project to give as a thoughtful gift or to enjoy through the season. 🧶🍂