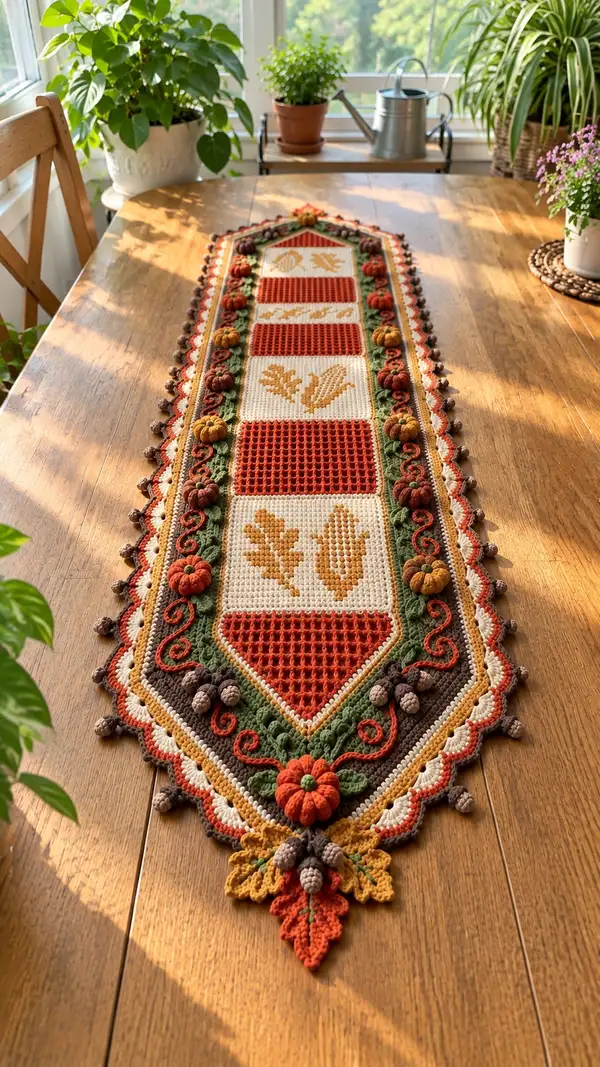
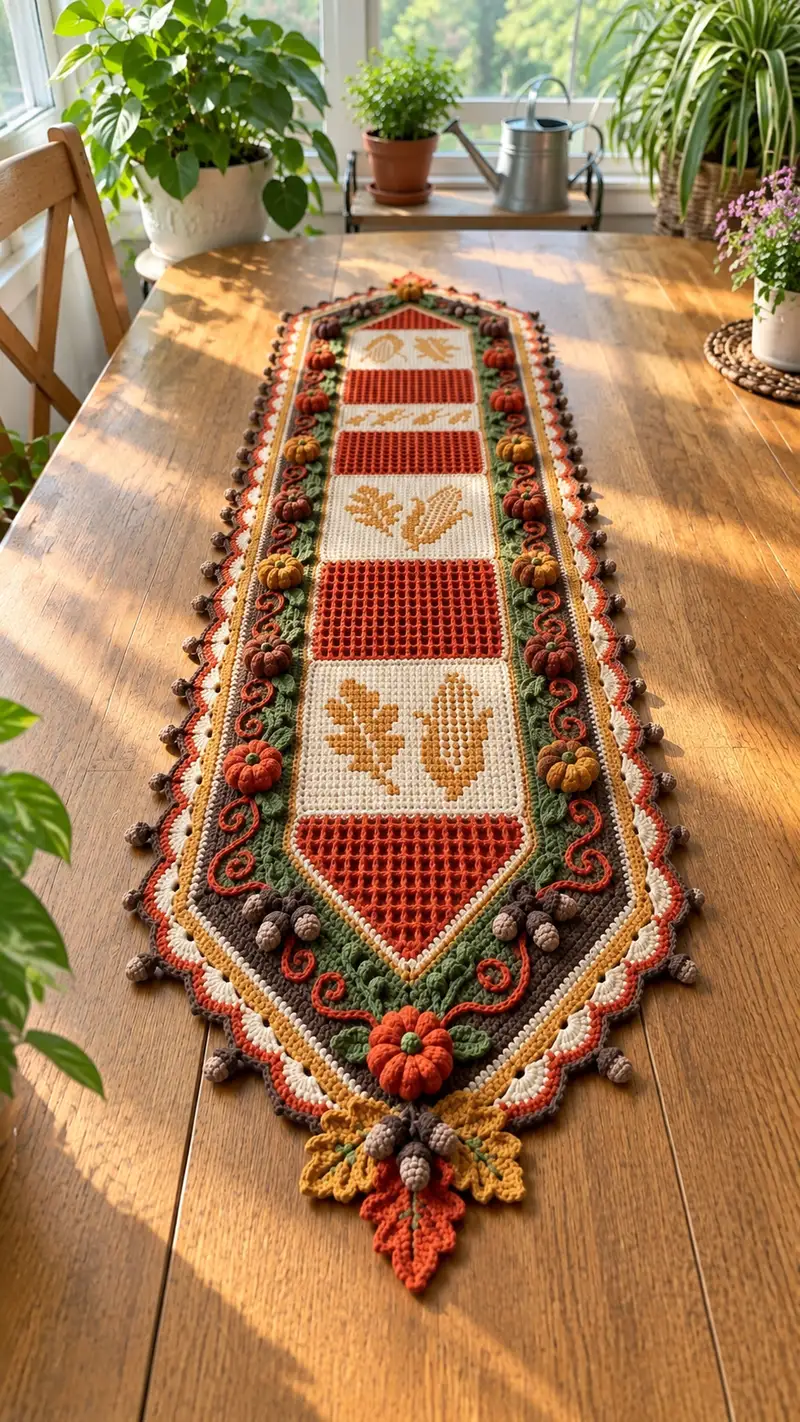
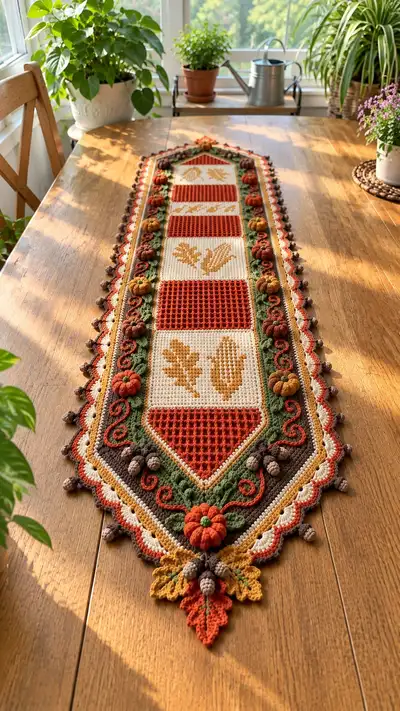
A warm, richly textured table runner inspired by autumn harvest motifs—pumpkins, oak leaves, acorns and corn—worked in earthy rust, gold, cream, brown and green tones. This long, tapered runner features alternating motif panels and textured mesh blocks surrounded by layered borders, raised leaves, three-dimensional pumpkins and acorn bobbles for a dimensional, heirloom finish. Detailed modular instructions allow you to crochet panels and appliques separately and assemble for a neat, durable finish.
Progress Tracker
0% Complete
— Overview & Gauge :
Info :
This pattern is modular: create Panel Module A (motif square), Panel Module B (textured/waffle square), end point triangles, pumpkin appliques, leaf appliques, acorn bobbles and layered border rounds. Join modules and apply borders. Gauge is flexible for a decorative runner, but aim for approximately 8 sc = 2 inches using 3.5mm hook in worsted weight for balanced density. Measurements for the finished runner are approximately 44" long x 9.5" wide at the widest point; adjust yarn/hook to scale.
— Panel Module A: Cream Motif Square (Make 4) :
Info :
This module is worked flat in rows and includes a colorwork leaf/corn motif using surface crochet or tapestry. For simplicity we work in single crochet throughout, using stranded color changes or surface embroidery after the ground is worked. Each square measures 30 sts wide x 30 rows tall. Use a turning chain of 1 (counts as sc).
Round 1 :
Foundation: ch 31, sc in 2nd ch from hook and across, turn (30)
Round 2-6 :
1 sc in each st across, ch 1, turn (30) (work 5 even rows to build base)
Info :
Begin motif chart placement at Row 7. If you prefer, work the full cream ground first and use surface embroidery for the leaf motif later. To inset colorwork, carry contrast yarn loosely on the WS and catch behind SCs.
Round 7-12 :
1 sc in each st across (30) — these rows create a plain cream frame before motif starts
Info :
Rows 13-22 incorporate the mustard motif. Use a chart or work surface crochet: count from center—place motif so it is centered horizontally. Typical motif width here is 16 stitches with 7 stitches of border each side.
Round 13 :
1 sc in first 7 sts, then follow motif row change for next 16 sts (use mustard where motif indicates), 1 sc in final 7 sts (30)
Round 14 :
1 sc in each st across working color as per chart. Maintain floats behind stitches no longer than 5 sts to avoid puckering (30)
Round 15-22 :
Work the next 8 rows of the chart repeating prior row logic; maintain 30 sts each row. After the last motif row stop colorwork and continue with cream ground rows
Round 23-28 :
1 sc in each st across in cream (30)
Round 29 :
Fasten off and weave ends; block square flat. Leave long tail for joining if you intend to join squares by whip stitch (30)
Info :
Blocking tip: dampen lightly and pin to a 8x8" square template to keep sides even. If you used stranded colorwork, ensure floats are not twisted before blocking.
— Panel Module B: Rust Textured Mesh Square (Make 4) :
Info :
This rust square uses a ribbed waffle-like mesh created by alternating chain-space rows with single crochet rows. Finished panel is 30 sts wide x 30 rows tall to match Module A and join easily. Work rows on RS/WS; counts remain 30 per row.
Round 1 :
Foundation: ch 31, sc in 2nd ch from hook and across, turn (30)
Round 2 :
ch1, sc in each st across, turn (30)
Round 3 :
ch3 (counts as tr here for height), sk 2, *tr in next st*, repeat across to last st, tr in last; turn (30 loops visible but 30 st foundation)
Round 4 :
ch1, sc in each stitch and chain space across (30)
Round 5-30 :
Repeat Rounds 3-4 for 13 pairs (rows 5-30) to create mesh and texture, finishing with an sc row. Final count per row remains 30. Fasten off and block.
Info :
If you prefer deeper texture, switch to a back loop only sc on the sc rows to create a ridge. Keep the rust panels the same width as motif squares for clean joining.
— End Point Triangle (Make 2; Mirror) :
Info :
Each tapered end is worked flat in rows to create a pointed chevron at each runner tip. The triangle sits centered under the last panel and matches the full-width dimension (30 sts at base decreasing to 1 at tip). Work in rust to echo center mesh.
Round 1 :
Foundation: ch 31, sc in 2nd ch from hook and across, turn (30)
Round 2 :
ch1, sc2tog over first two sts, sc in remaining until last 2 sts, sc2tog, turn (28)
Round 3 :
ch1, sc2tog at first two, sc across to last 2, sc2tog (26)
Round 4-14 :
Repeat decrease row every RS row until you have 2 sts remaining. The pattern is: ch1, sc2tog, sc across to last 2, sc2tog. Counts: 24,22,20,18,16,14,12,10,8,6,4,2 (after 13 decreases you reach 2)
Round 15 :
ch1, sc2tog (1). Fasten off leaving long tail for neat attach and weave in. Block flat and point to crisp corner.
Info :
Make left and right triangles as mirror images if your stitch pattern has directional texture. Use the rust mesh motif on the triangles (work same tr chain-row pattern on remaining rows if you prefer textured surface).
— Joining Center Modules Into Runner Strip :
Info :
You should now have 4 motif squares, 4 rust mesh squares and 2 end triangles. Layout order as in photo: triangle, rust mesh, motif square, rust mesh, motif square, rust mesh, motif square, rust mesh, triangle. Pin squares together with right sides up and use mattress stitch or whip stitch with matching yarn for an invisible seam. Leave a 1-2 mm gap between squares to prevent bunching.
Round 1 :
Place triangle at end and seam triangle base to the adjacent rust mesh top edge: align 30 sts and sew through both loops for a flat seam; use a long tail and whip stitch across 30 edge sts.
Round 2 :
Seam rust mesh to motif square: join across 30 sts aligning grid; repeat for entire chain until full strip is seamed. Fasten off and weave in ends.
Info :
After seaming, block the entire center strip pinned flat to straighten seams. Measure across to confirm width is ~9.5" (adjust by hook size if needed). Keep RS facing up for border application.
— Raised Vine Band (Make 2 long side bands) :
Info :
These green bands run the full runner length on both sides of the center strip and are built from a foundation chain that mirrors the center strip length (~9 repeats of 30-st panel = length of runner; for accuracy count the seam rows—here we assume 30 sts x 9 panels = 270 sts length). Work the vine as a long strip using post stitches to create raised leaves and a chain for swirl tendrils.
Round 1 :
Foundation: ch 271 (one chain per center st + 1 for turning). Row counts will be function of length; join into your working strip at one end and work along length.
Round 2 :
RS: sc in 2nd ch from hook and across to end, turn (270)
Round 3 :
ch3, *sk 2, (3 dc cluster) in next st, sk 2, ch1, sc in next*, repeat along. This places small clusters for leaf anchors spaced every 6 sts. End with sc to finish evenly (270)
Round 4-6 :
Work 3 rows of sc across to stabilize the band (270)
Info :
Subdivide the length into panel repeat marks every 30 sts—this helps you position small pumpkin appliques later. Use stitch markers at these intervals (every 30 sts) so pumpkins attach centered to each rust block edge.
Round 7 :
Front loop only row: ch1, sc in FLO across (270) — creates a ridge to anchor raised leaves and vines
Round 8 :
Surface crochet vine: with rust yarn, using a yarn needle and ch-stitch surface slip stitch method, embroider a curving S-vine along the band crossing over clusters; secure ends at each panel marker. Alternatively, crochet a thin chain of 6-8 ch for tendril and sew down in swirl shapes between clusters.
Info :
Make two matching bands for both sides. These bands will be seamed to the center strip later and then framed by decorative borders. Keep RS upward to show clusters facing outwards.
— Pumpkins (Make 12 small pumpkins) :
Info :
Pumpkins are 3D appliques made in the round using rust (main), gold or ochre accents for variety and small green stems. Each pumpkin uses a magic ring and is stuffed lightly. After stuffing, create ribs by pulling a length of yarn through segments to form sections and then secure with a stem slip stitch. Make 12: space them evenly along the vine band—photo shows ~6 per side, alternate large and small pumpkins.
Round 1 :
With rust yarn, mr, 6 sc in ring (6)
Round 3 :
(1 sc, inc) x 6 (18)
Round 4 :
(2 sc, inc) x 6 (24)
Round 5 :
(3 sc, inc) x 6 (30)
Info :
Begin to stuff lightly with polyester fill. For small pumpkins only add a small pinch of stuffing to maintain a plump shape without overfilling.
Round 6 :
1 sc in each st around (30)
Round 7 :
1 sc in each st around (30)
Round 8 :
(3 sc, dec) x 6 (24)
Round 9 :
(2 sc, dec) x 6 (18)
Round 10 :
(1 sc, dec) x 6 (12)
Round 11 :
6 dec (6). Fasten off leaving long tail for gathering and shaping.
Info :
Use the long tail to gather the opening: weave tail through the 6 remaining sts and pull tight. Secure firmly. To create ribs: take a separate length of brown or darker rust yarn about 18-20" long and sew it from the bottom center up over the pumpkin surface and back under, repeating for 6-8 segments evenly spaced—tie off at bottom to form sections that look like ribs.
Round 12 :
With green yarn, embroider or crochet a small stem: make 6 sc in a mr, chain 6, sl st back along chain to form a short stem and sew to top center. Weave in ends.
Info :
Make a mix of pumpkin sizes by stopping increases one or two rounds earlier (e.g., stop at 24 sts for medium) and by varying stuffing. Make 12 pumpkins total: 6 in rust, 3 in ochre, 3 in brownish-orange for visual variety.
— Acorn Bobbles & Caps (Make 24 small acorns) :
Info :
Acorns appear as small bobbles along the outermost border. Each acorn is a two-part construction: a small popcorn bobble body and a tiny cap made of a short dome worked in brown with a picot edge. Make 24 acorns total and space them evenly around the scalloped edge as in photo.
Round 1 (Body) :
With dark brown, mr, 6 sc in ring (6)
Round 3 :
Popcorn round: *dc5 in next st, remove hook, insert hook in top of first dc, pull loop through and sl st to close popcorn*, rep to make 4 popcorns around. Fasten off leaving tail; stuff lightly and shape (12 core loops used for base)
Round 4 (Cap) :
With chocolate brown, mr, 5 sc in ring (5)
Round 5 :
Inc in each st (10)
Round 6 :
*sc, picot (ch3, sl st in 3rd ch)* around cap to create textured edge; fasten off leaving long tail for sewing. Sew cap to body and secure with small neat stitches; weave tails.
Info :
Space acorns evenly in the final border by counting scallop points—place an acorn under or between each scallop as desired. Use a small amount of glue behind the cap for extra security if the acorn will be handled often.
— Leaf Appliques (Make 8 large, 16 medium) :
Info :
Leaves are worked flat either in rows (leaf shape) or in rounds with increases/decreases to create a pointed tip and lobed sides. Use mustard and gold for a few leaves and forest green for others. These are sewn to the pointed ends and along vine bands.
Round 1 :
With gold yarn, ch 11, sc in 2nd ch from hook, hdc, dc, tr, dc, hdc, sc across to end, turn (10)
Round 2 :
Work back along the opposite side of chains: sc, hdc, dc, tr, dc, hdc, sc into base chain; sl st to join at tip. Fasten off (symmetrical leaf) — adjusts chain length for bigger/smaller leaves.
Round 3 :
For lobed leaf look: work surface slip stitch veins by drawing a contrasting green yarn from base through center and stitching surface sl sts as three main veins; secure and weave ends
Info :
Large leaves use foundation ch 15-17; medium leaves ch 9-11. Block leaves slightly with steam to flatten before sewing to runner ends and corners.
— Layered Border Rounds Around Entire Runner :
Info :
With the center strip joined and side vine bands positioned but not yet sewn, we will crochet layered borders around the entire perimeter. Borders create the scalloped multi-color finish visible in the photo: first a cream base sc round, then gold ridge, then rust scallops, then green leaf ridge, then outer chocolate picot/acorn scallop. Work around joined panels treating each seam as one st. Use sc in each edge stitch; counts vary across edges due to shaping. We list rounds as universal instructions rather than a fixed stitch count because your panel seam counts may differ slightly—maintain even spacing and count stitches as you go to keep alignment with appliques.
Round 1 :
With cream yarn and RS facing up, join yarn at one of the long edges' seam intersection. ch1, sc evenly around entire runner perimeter, placing 3 sc in each corner point and 3 sc in each point of the triangular ends. Keep stitch counts consistent and distribute extra sts evenly along long sides to avoid puckering. Sl st to join. Fasten off if desired (this is round 1 of border base).
Round 2 :
Join mustard/gold at any point; ch1, sc in each st around the runner, working 2 sc in each corner sc to keep corners neat. Sl st and fasten off. This creates the gold ridge just inside the scallop in the photo.
Round 3 :
Join rust yarn for scallops: *skip next st, 5 dc in next st, skip next st, sl st in next*, repeat around to create uniform rust scallops. At triangular points, work 7 dc in the central st to accent the point. Sl st to join.
Info :
Adjust scallops so that the small acorn bobbles will sit centered beneath each scallop tip. Use stitch markers at even intervals to mark scallop centers before working.
Round 4 :
With forest green, join and work a textured leaf-ridge row: ch3 (counts as first dc), *skip 2 dc of scallop, fpdc (front post dc) around the next sc from the base round, bpdc around next sc*, repeat to create a raised wave. Sl st to join.
Round 5 :
With chocolate brown, work outer picot/acorn loop: *sc in next 2 sts, picot (ch3 sl st in 3rd ch), sc in next 2 sts*, repeat around. When you reach positions where acorns are desired, leave a small loop and sew an acorn onto the loop after finishing all rounds.
Info :
At triangular tips add a decorative cluster: fasten off colors leaving long tails and sew a large pumpkin with two large leaves and three acorns at each triangular tip for the focal cluster shown in the photo.
— Final Attachment & Embellishment Rounds :
Round 1 :
Position the vine band(s) along each side of the center strip: align the band so that the cluster markers at every 30 sts line up with the seam between mesh and motif panels. Use pins to tack in place every 6-8 inches then baste with matching green yarn using a loose whip stitch through both layers. Ensure vine clusters face outward.
Round 2 :
Sew pumpkins at panel markers (every rust mesh seam) using the long tail from sewing; secure pumpkin base with small tight stitches to the band and center strip seam. Alternate pumpkin colors and sizes for a natural look.
Round 3 :
Sew leaves along triangular tips and clustered with acorns—arrange 2-3 leaves under each pumpkin cluster and secure with several small stitches. Tuck stems and weave tails into band for neat finish.
Info :
When sewing any 3D applique, pass your needle through the runner and the applique base multiple times, catching a few loops of the applique to secure from the underside. Avoid visible thread crossing on the RS by sewing through back loops or inside edges.
Round 4 :
Weave in all ends using a yarn needle. Give the entire runner a final blocking session pinned flat to preserve scallops and points. Steam or mist lightly, do not over-wet if yarn is prone to felting.
Info :
Optional: apply a light spray of fabric stiffener on the scalloped edge to help the runner keep shape if it will be used unpadded under heavy centerpieces. Let dry fully before use.
— Care & Finishing Notes :
Info :
To clean, gently spot clean or hand wash in cool water with mild detergent. Air dry flat. If you must machine wash, place runner in a mesh bag and use gentle cycle, but risk of distortion exists. Store flat or rolled; avoid folding across scalloped edges to prevent permanent creases.
Info :
To scale the pattern larger: use a heavier weight yarn and larger hook, and increase panel widths by multiples of 6-10 stitches while maintaining motif centering. For a narrower runner reduce panel counts and make fewer repeats. Always swatch and block to estimate final dimensions.
This Autumn Harvest Table Runner brings seasonal charm and tactile warmth to any table. Every stitch and applique adds depth—from raised vines to tiny pumpkins and acorns—resulting in a heirloom-quality centerpiece. Enjoy the meditative process of building panels, creating little pumpkins, and arranging the finished border clusters. 🧶🍂 Display with pride or gift to someone who loves cozy fall decor. Happy stitching! 🎃✨