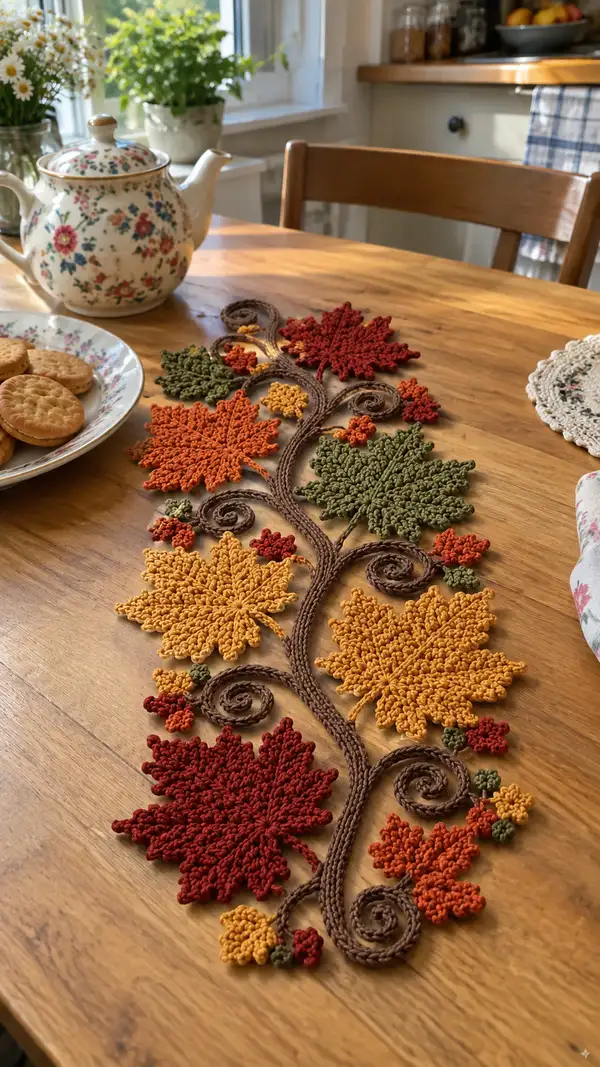
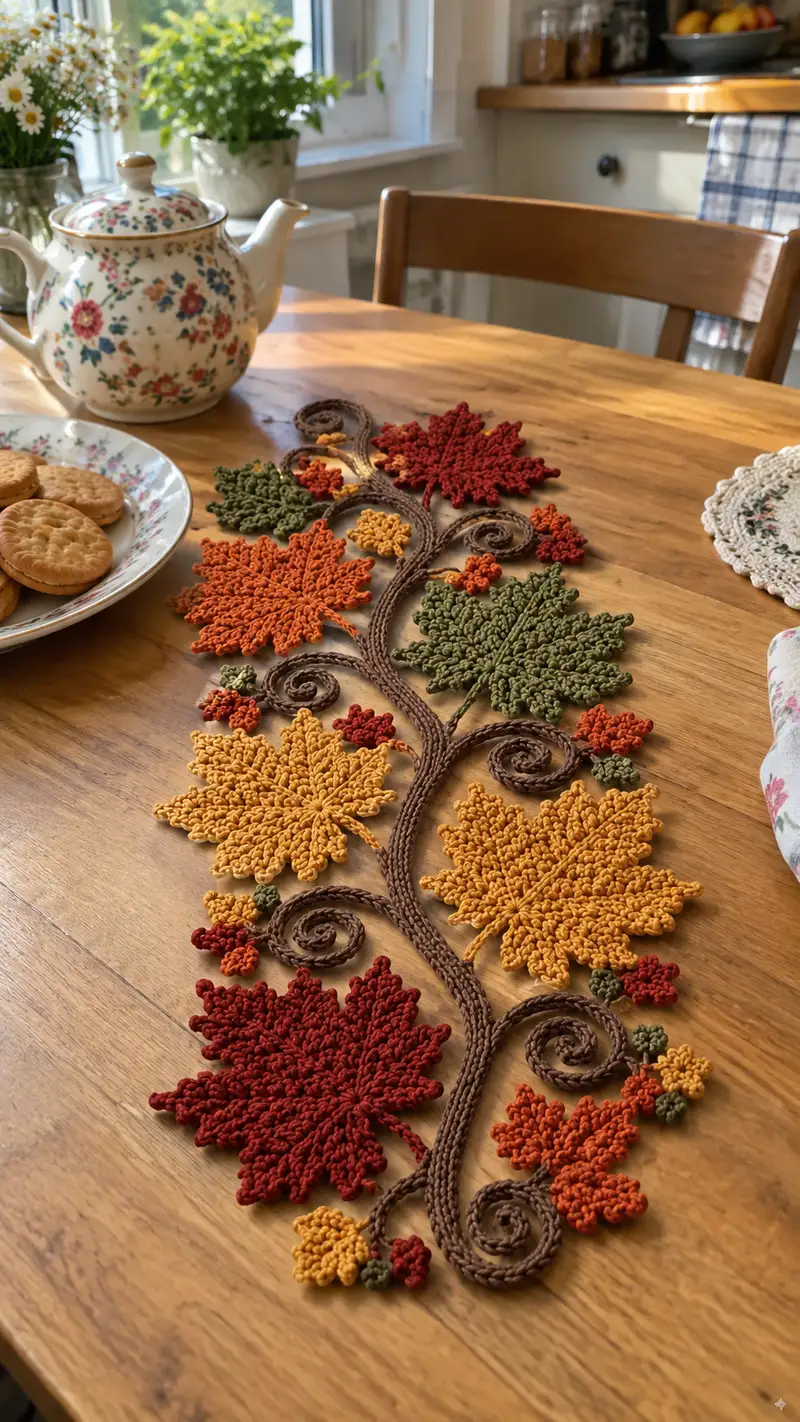
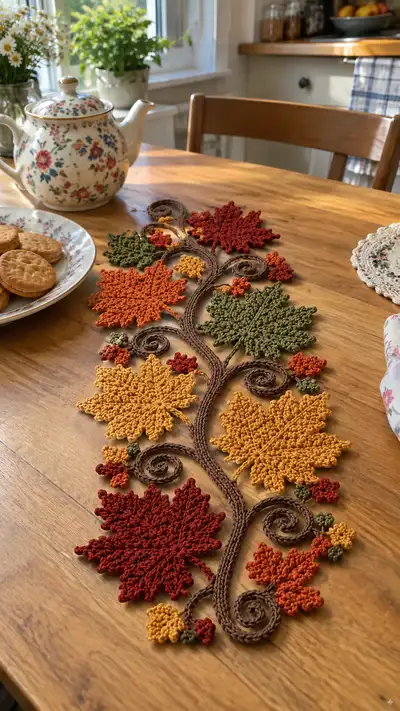
Celebrate fall with a handcrafted table runner of crocheted maple-style leaves, delicate mini leaves and braided vine coils. This elegant runner features warm rust, mustard, olive and deep red yarns arranged along a sculpted spiral vine. The finished piece lies flat and decorative — perfect for a harvest table or cozy kitchen vignette.
Progress Tracker
0% Complete
— Materials & Gauge :
Info :
Use worsted weight cotton for crisp stitch definition. Gauge is not critical for an ornamental runner but aim for a dense fabric: 18-20 sc = 10 cm with 3.5mm hook. Work tightly so leaves lie flat and edges show clearly.
— Construction Overview :
Info :
This runner is built from individual flat maple-style leaves (worked in spiral rounds), small clustered leaves, tiny berry motifs and a sculpted tubular vine cord. All motifs are blocked flat and then arranged and sewn to the braided vine which is laid out in spirals. Use the photos as layout guidance and pin before sewing.
— Large Maple Leaf (Make 6 total, color per layout) :
Info :
Each large leaf is worked from center out in continuous rounds. The leaf has 12 lobes formed by grouped clusters and picot points to create the serrated edge. Use a stitch marker to mark round starts (especially when changing shaping).
Round 1 :
6 sc in magic ring (6)
Round 3 :
(1 sc, inc) x 6 (18)
Round 4 :
(2 sc, inc) x 6 (24)
Round 5 :
(3 sc, inc) x 6 (30)
Info :
Rounds 1-5 form the small center disc. Keep tension even. From Round 6 we begin forming 12 radiating points (lobes). Place markers at the starts of the 12 lobe divisions after Round 5 to help locate lobe base stitches.
Round 6 :
(4 sc, inc) x 6 = 36 total. Now place a removable stitch marker every 3rd stitch to mark 12 segments (36/12=3)
Round 7 :
1 sc in each st (36)
Round 8 :
1 sc in next 2 sts, (1 hdc, ch3, 3 dc in next st, ch3, 1 hdc in same st) into segment base to begin a lobe. Rep across to form 12 small lobe starters (36)
Info :
Round 8 works decorative lobes: the ch3 arms create space for later serrations. Keep the grouped clusters centered in their segment base stitch marked earlier.
Round 9 :
Work into each lobe space: sl st into ch3 space, ch1, (sc, hdc, 2 dc, picot, 2 dc, hdc, sc) into ch3 space. Between lobes work 1 sc in the base stitch. After completing 12 lobes you will return to 36 stitches visually although lobes add texture rather than increasing base count.
Round 10 :
1 sc in each base stitch and in each lobe base (count reads as 36 main anchor points). Work sc evenly around to keep shape flat (36)
Round 11 :
Start defining serrations: 1 sc in next stitch, (ch2, sl st in next stitch to create a small picot loop) x 12 across lobe edges, with 1 sc between each picot loop (36)
Info :
Use a small crochet hook tip to shape picots with uniform size. These picots will be hammered or steamed during blocking to sit outward as leaf teeth.
Round 12 :
Work 1 sc in each st BLO around to create a slight ridge for the leaf figure (36)
Round 13 :
Increase round to fan the lobes: (3 sc, inc) x 9 = 45 (we add breadth across each lobe center areas)
Round 14 :
1 sc in each st (45)
Round 15 :
Working into the lobe tips, make cluster points: *ch1, (sc, picot, sc) in next stitch, skip 1, sc in next 3* rep around giving a pronounced serrated edge (count remains approximately 45)
Info :
If your stitch count drifts due to clusters, prioritize symmetry of 12 lobes over exact count. Aim for consistent repeat across lobes so the leaf looks even.
Round 16 :
1 sc in each st BLO to set the serrated edge (45)
Round 17 :
Begin forming central vein: flop leaf, join yarn at center front base, ch10 (this chain forms the stem tail) sl st back along chain to base to create a narrow cord. Fasten off and weave tail to leaf center; the round count for main leaf remains unchanged (45)
Round 18 :
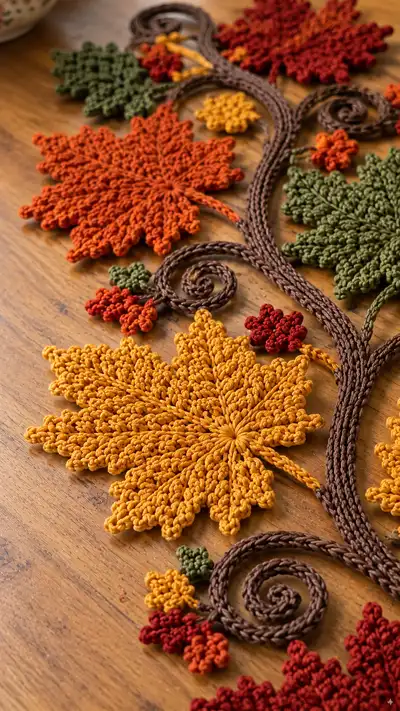
Work decorative ribbing across the leaf: place marker at top center, from center front work 6 surface slip stitches radiating to each lobe tip to suggest veins. These are worked as surface sl st and do not change stitch count.
Info :
Surface slip stitch veins: insert hook from back to front at base, pull up loop and sl st along marked path. Keep tension slightly loose so the cord lays flat.
Round 19 :
Edge finishing: working along serrated edge, sl st around into picot tips, making a small bar of sl sts to sharpen points. Final visual stitch count remains near previous rounds.
Round 20 :
Fasten off leaving a 20 cm (8 in) tail for sewing. Block leaf flat with pins, steam or wet-block pulling picot tips out to create even serrations.
Info :
Repeat the above sequence for all large leaves. Adjust Round 13 increase repeat if you prefer larger leaves: increasing (4 sc, inc) x 9 will yield larger diameter. Block each leaf fully before assembly.
— Large Maple Leaf (Make 1 - Mustard/Golden) :
Info :
Use mustard/golden yarn. Follow Rounds 1-20 of the Large Maple Leaf section exactly. Keep stitch markers in place at segment divisions to ensure symmetry.
— Large Maple Leaf (Make 1 - Deep Rust) :
Info :
Use deep rust yarn. Follow Rounds 1-20 of the Large Maple Leaf section exactly. For a slightly crisper edge, switch to 3.25mm hook on Rounds 11-16 then return to 3.5mm for the base to heighten serrations.
— Large Maple Leaf (Make 1 - Pumpkin Orange) :
Info :
Use pumpkin/orange yarn. Follow Rounds 1-20 of the Large Maple Leaf section exactly. For a slightly cupped leaf, add two short rows of sc inside the center (push one extra sc in 6 radial stitches) prior to blocking.
— Large Maple Leaf (Make 1 - Olive Green) :
Info :
Use olive green yarn. Follow Rounds 1-20 of the Large Maple Leaf section exactly. Green leaf can be smaller if you reduce Round 13 increases to (2 sc, inc) x 9.
— Large Maple Leaf (Make 2 - Deep Burgundy & Rust) :
Info :
Make two leaves to balance runner length, one deep burgundy and one extra rust. Follow Rounds 1-20 for each.
— Small Cluster Leaf / Mini Leaf (Make 12-16 total) :
Round 1 :
6 sc in magic ring (6)
Round 3 :
1 sc in next 2 sts, (ch3, 3 dc in next st, ch3, 1 sc in next 2 sts) rep 3 times to create three small lobes around (12 anchor stitches remain)
Round 4 :
1 sc in each st across, finishing with a small picot on each lobe tip to mimic jagged edges (12)
Info :
Mini leaves are best made in small batches of 2-3 colors; they sit clustered around vine spirals and help blend color transitions between big leaves.
Round 5 :
Fasten off leaving 6-8 cm tail for sewing. Block lightly to open lobes and accent picots.
— Tiny Berry / Bud Motif (Make 20-30) :
Round 1 :
6 sc in magic ring (6)
Round 3 :
(1 sc, picot) x 6 around to create a bumpy berry texture (12)
Round 4 :
Fasten off leaving long tail for sewing. Optionally stuff with a tiny pinch of fiberfill before closing to make a tiny raised berry.
Info :
Make berries in contrasting colors like rust and mustard. Use long tails to sew clusters of 3-5 berries together as in the picture.
— Tubular Vine Cord (Make 3 separate cord lengths then braid or arrange) :
Info :
The vine is made as a tubular crocheted cord using foundation single crochet (fsc) or by crocheting around a long chain to form a hollow tube. Three cords are worked and then either twisted together or braided and stitched in place to get the thickness shown in photos.
Round 1 :
Chain 120 (or desired cord length for one strand). Join to first ch with sl st forming a ring; do not twist the chain if you plan to work around it.
Round 2 :
Work 1 sc in each chain through the back loop only (BLO) around the chain, working into the chain as you go to create a tight tube—approx 120 sc (120)
Round 3 :
Work in continuous spiral: 1 sc in each stitch around for 2-3 rounds to thicken cord. Cord length remains same (120)
Info :
For a more pronounced braid, make three cord lengths of equal length and then lightly plait or twist them. If you prefer a single bulky branch, increase to ch 180 and work 2-3 rounds of sc around for greater bulk.
Round 4 :
On last round, finish with a neat edge: sl st, fasten off leaving long tails for sewing. Repeat to make three cords.
Round 5 :
Layout and braid or twist the three cords together. Tuck one cord under another as you twist to create the spiral vine look. Secure ends with a few whip stitches and weave in tails.
Info :
To create the sculpted coils seen in the photo, coil the braided cord into spirals and tack the underside every 1-2 cm with small discreet stitches to hold the shape. Add a tiny bit of fiberfill in larger coils before tacking if you want them slightly raised.
— Spiral Coils & Decorative Curls (Make as many as desired) :
Round 1 :
Form a coil by spiralling the finished cord on your work surface into the desired diameter (small coil 3-4 cm across, larger coil 6-8 cm). Use pins to hold shape while tacking.
Round 2 :
Tack the coil by running a yarn needle threaded with matching yarn through the underside of the coil at 5-6 equidistant points. Use tiny stitches to avoid surface marks.
Info :
Make several coil sizes to mirror the picture composition. The largest coils anchor leaf groupings; smaller coils and curls tuck between leaves to create movement.
— Stem / Leaf Attachment Loops :
Round 1 :
At the base of each large leaf we added a short chain stem in Round 17 of the leaf. If you prefer, make a separate short cord: ch 12, sc back into chain to form a rope, fasten off leaving tails for sewing. Attach leaf stem to vine using a blind stitch.
Info :
When positioning leaves on the vine, alternate sides and stagger distances so the runner flows diagonally along the table. Leaves in the picture are spaced roughly 10-12 cm apart center to center with small clusters between them.
— Assembly & Layout :
Info :
Arrange the braided vine on a flat surface measuring about 90-110 cm (runner length) depending on your table. Pin coils and leaf positions before sewing. Take a photo of the layout to keep track of placement.
Step :
Position the biggest leaves first alternating sides: start with deep burgundy near one end, then mustard opposite, then pumpkin, then olive, then rust, then golden to the other end to create a balanced color flow as seen.
Step :
Pin leaf stems to vine center using fine pins. Thread a yarn needle with the long tail from leaf base and sew securely through vine cord and into leaf stem, using 6-8 neat stitches. Tie off and weave ends into the underside.
Info :
Use smaller stitches to tack coil edges and mini leaves so front remains clean. If desired, apply a drop of fabric glue under coil centers for permanent hold after sewing.
— Final Finishing Touches :
Info :
Sew small clusters of 3-5 berries and mini leaves into gaps between the large leaves and around coil edges to mimic photograph. Trim and weave in all tails, then press lightly with a steam iron through a cloth to set final shape.
Round :
Optional: Add a thin fabric backing (felt) under coil centers and heavy-traffic areas and tack with matching thread to protect table surfaces.
Info :
Lay the completed runner on the table and admire! If some coils loosen with handling, re-tack underside stitches. Store flat to maintain shape.
This autumn leaf table runner brings the cozy charm of fall straight to your table. Each hand-blocked leaf and sculpted vine coil comes together to form a warm, inviting centerpiece perfect for seasonal gatherings. The rich colors and tactile textures invite touch and admiration, and the modular construction makes it easy to personalize the length and color palette. Enjoy the slow, satisfying process of arranging and stitching each motif — and then savor the compliments when you place it on your table! 🍂🧶