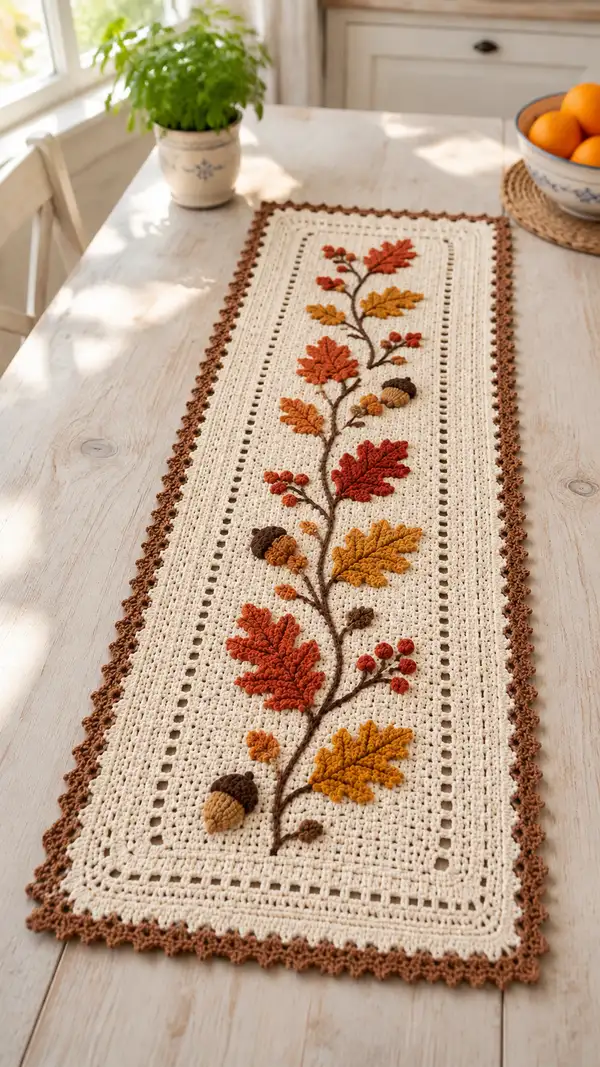
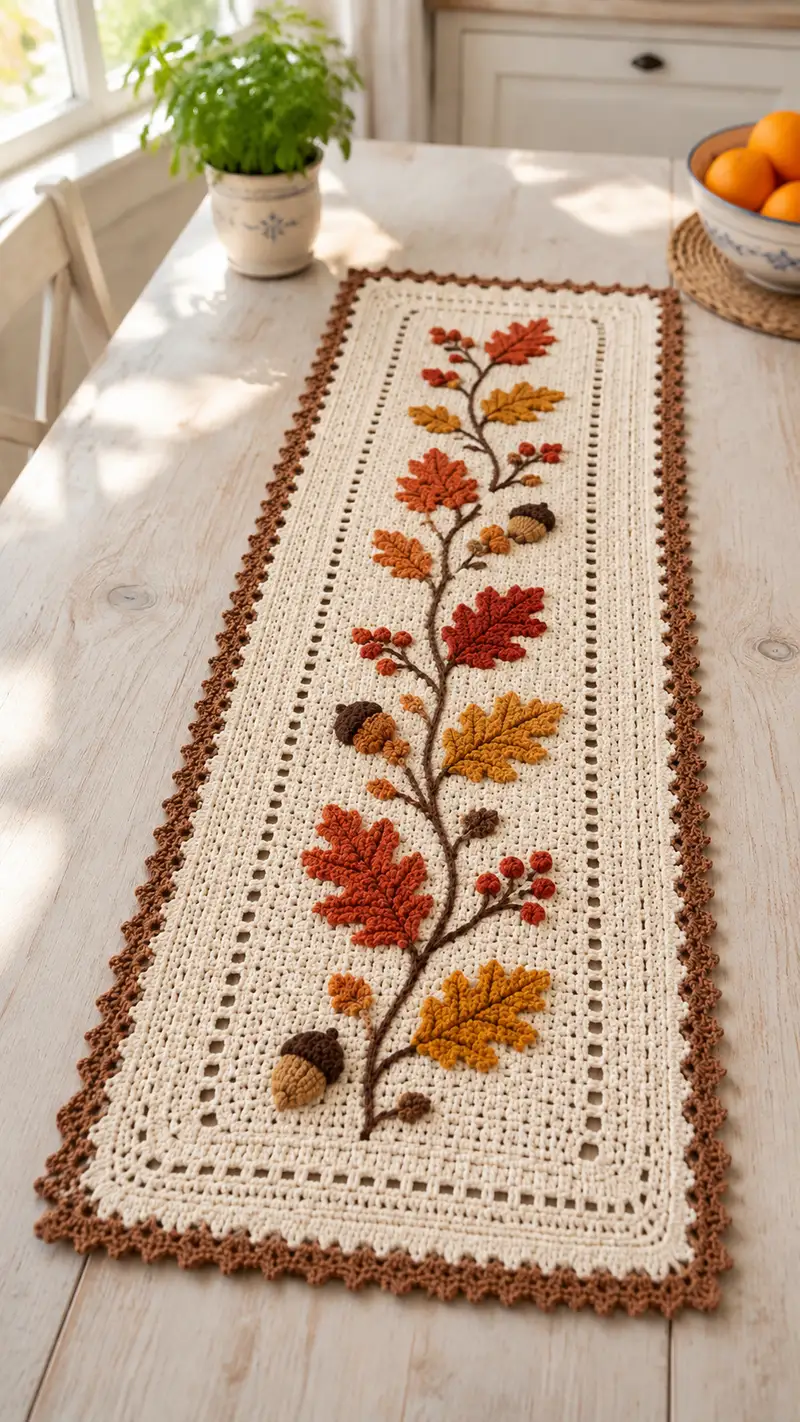
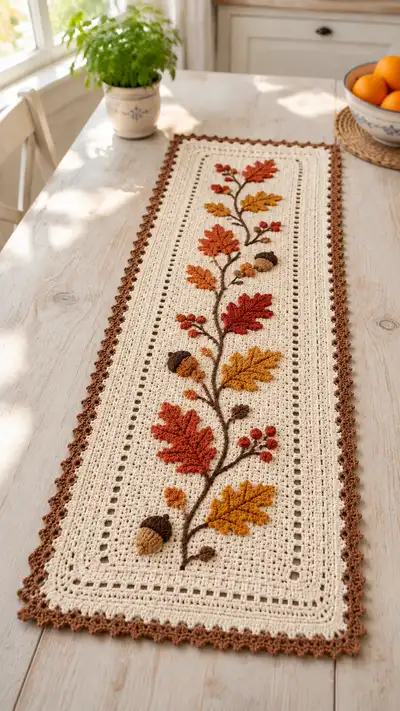
A cozy, rectangular table runner worked in a soft cream background with textured 3D oak leaves, acorns and berry clusters in autumn hues. Features an open-eyelet column framing a central vine and a warm brown scalloped border. The runner layers beautifully on a dining or console table for seasonal decor and is designed for clear step-by-step assembly and finishing.
Progress Tracker
0% Complete
— Notes & Gauge :
Info :
Gauge: 18 stitches x 10 rows = 4 inches in hdc pattern used in main panel (adjust hook if necessary). The runner in the sample measures approximately 12" wide x 36" long after blocking. Adjust foundation chain to lengthen or shorten. Pattern written in continuous rounds joined at the end of each round to keep an even rectangular border. Work right side facing at all times for the central panel; appliques are worked flat and sewn on.
Info :
Color abbreviations for this pattern: MC = Main Color (Cream), AC1 = Rust, AC2 = Mustard, AC3 = Terracotta, BDR = Brown, TAN = Tan. Keep a small bobbin of each accent color to embroider vines and attach appliques.
— Foundation & Main Panel (body of runner) :
Round 1 :
Foundation chain: ch101. Join with sl st to form a flat loop (do not twist). Ch1, 1 sc in 2nd ch from hook and in each ch across (100 sc), 3 sc in last chain (corner made), now working along opposite side of chain edge, 1 sc in each chain (100 sc), 3 sc in last chain (corner). Join with sl st to first sc. Total approximate sts for round: 206 (counts include corner clusters).
Round 2 :
Ch1, 1 sc in same st and around in each st to corner, 3 sc in corner st, continue sc up side, 3 sc in next corner, sc across foundation base, 3 sc in corner; join. Maintain even tension. (206)
Round 3 :
Ch3 (counts as dc), 1 dc in each st around, placing 3 dc in each corner to keep rectangle flat. Join with sl st to top of ch3. (206 dc)
Info :
From this point, rounds keep the same outer stitch count. For rows that include ch-spaces (eyelet rows), count ch-spaces as stitches when measuring; overall number of working positions remains 206. Use stitch marker to mark center stitch on the short edge so you can align appliques and vine later.
Round 4 :
Ch1, sc in each st around, 3 sc in each corner. Join. (206)
Round 5 :
Ch3, dc in each st around to corner; 3 dc in corner; continue dc; join. (206)
Round 6 :
Ch1, sc in each st around; join. (206)
Round 7 :
Eyelet setup: Ch3, *dc in next 4 sts, ch2, sk 2 sts*; rep from * to corner, work 3 dc in corner, continue pattern on next side; join. The eyelet repeats create vertical columns of small square eyelets when repeated in subsequent even rows. (206 positions including ch2 spaces)
Round 8 :
Ch1, 1 sc in each st and in each ch2 space around (treat ch2 as a single working space). Work 3 sc in corner stitches. Join. (206)
Round 9 :
Ch3, 1 dc in each st and in each ch2 space around, placing 3 dc in each corner. Join. (206)
Round 10 :
Ch1, 1 sc in each st around, join. (206)
Info :
At this point the central panel has alternating textures of sc and dc and an eyelet column established. Use this pattern as a stable base for applique placement. If you wish to lengthen the runner, repeat rounds 7–10 the desired number of times before moving to the wide textured band section.
Round 11 :
Ch3, dc in each st around. Join. (206)
Round 12 :
Ch1, sc in each st around. Join. (206)
Round 13 :
Ch2 (counts as hdc), hdc in each st around, placing 3 hdc in each corner; join. (206)
Round 14 :
Ch1, sc in each st around; join. (206)
Round 15 :
Repeat eyelet row: ch3, *dc in next 4 sts, ch2, sk 2 sts*; rep to corner; 3 dc in corner, continue; join. This forms a second set of small eyelet columns evenly spaced. (206)
Round 16 :
Ch1, sc in each st and in each ch2 space around; join. (206)
Round 17 :
Ch3, dc in each st around; join. (206)
Info :
Mark the central longitudinal axis of the runner by placing stitch markers in the row directly between the two eyelet columns (approximate center). This helps align the vine and appliques symmetrically. Use a tape measure to ensure center placement at both short ends.
Round 18 :
Ch1, sc in each st around; join. (206)
Round 19 :
Ch3, dc in each st around; join. (206)
Round 20 :
Ch1, sc in each st around; join. (206)
Round 21 :
Ch2, hdc in each st around; join. (206)
Round 22 :
Ch1, sc in each st around; join. (206)
Round 23 :
Ch3, dc in each st around; join. (206)
Info :
When crocheting around the short ends, ensure your corner clusters are consistently 3 sts to maintain a straight edge. If the runner begins to ruffle, switch to a slightly larger hook for the dc rounds or reduce tension.
Round 24 :
Ch1, sc around; join. (206)
Round 25 :
Ch3, *dc in next 3 sts, ch2, sk 2* repeat across, placing 3 dc in corner; join. This introduces a slightly tighter eyelet spacing toward the center. (206)
Round 26 :
Ch1, sc in each st and ch2 space; join. (206)
Round 27 :
Ch3, dc in each st around; join. (206)
Round 28 :
Ch1, sc in each st around; join. (206)
Round 29 :
Ch2, hdc in each st around; join. (206)
Round 30 :
Ch1, sc in each st around; join. (206)
Info :
At this stage the central panel is approaching finished length. Place removable tape or pins to mark exact positions where larger appliques will be sewn: mark 6 equally-spaced points along center line (for 6 major leaves/acorn clusters). Measurements: place central point at center of runner, then mark roughly every 5.5–6 inches for the other focal elements depending on desired spacing.
Round 31 :
Ch3, dc in each st around; join. (206)
Round 32 :
Ch1, sc in each st around; join. (206)
Round 33 :
Ch2, hdc in each st around; join. (206)
Round 34 :
Ch1, sc in each st around; join. (206)
Round 35 :
Ch3, dc in each st around; join. (206)
Round 36 :
Ch1, sc in each st around; join. (206)
Round 37 :
Repeat eyelet row: ch3, *dc in next 4 sts, ch2, sk 2*; rep to corner; join. This mirrors the eyelet pattern closer to the border for consistency. (206)
Round 38 :
Ch1, sc into each st and ch2 space around; join. (206)
Round 39 :
Ch3, dc in each st around; join. (206)
Round 40 :
Ch1, sc in each st around; join. (206)
Info :
Begin positioning appliques now. Work a few sample leaves and acorns and pin them in place to visualize color balance. If you intend to stitch vines by surface slip stitch, mark the desired vine path lightly with removable pins or basting stitches.
Round 41 :
Ch3, dc in each st around; join. (206)
Round 42 :
Ch1, sc in each st around; join. (206)
Round 43 :
Ch2, hdc in each st around; join. (206)
Round 44 :
Ch1, sc in each st around; join. (206)
Round 45 :
Ch3, dc in each st around; join. (206)
Round 46 :
Ch1, sc in each st around; join. (206)
Round 47 :
Ch3, *dc in next 3 sts, ch2, sk2*; rep across to create a final inner eyelet band; join. (206)
Round 48 :
Ch1, sc in each st and ch2 space around; join. (206)
Round 49 :
Ch3, dc in each st around; join. (206)
Round 50 :
Ch1, sc in each st around; join. (206)
Info :
We will now add a slightly raised textured band to frame the central panel before the scalloped outer border. This band uses BLO rows to create a subtle ridge; change to slightly smaller hook if you want a tighter ridge.
Round 51 :
Ch1, working in BLO, 1 sc in each st around; join. (206)
Round 52 :
Ch3, dc in each st around; join. (206)
Round 53 :
Ch1, sc in each st around; join. (206)
Round 54 :
Ch1, 1 sc in each st BLO to emphasize the ridge; join. (206)
Round 55 :
Ch3, dc in each st around; join. (206)
Round 56 :
Ch1, sc in each st around; join. (206)
Round 57 :
Ch3, dc in each st around; join. (206)
Round 58 :
Ch1, sc in each st around; join. (206)
Round 59 :
Ch2, hdc in each st around; join. (206)
Round 60 :
Ch1, 1 sc in each st around; join. (206)
Info :
Fasten off MC leaving long tail for sewing the border or attach border color (BDR) directly. Block the panel lightly to square up edges and ensure all eyelet columns sit straight. Lay panel on a flat surface for applique placement.
— Outer Border (Scalloped edge) :
Info :
Change to border color (BDR) now. This scallop is worked in rounds across the edge to create a delicate picot/scallop finish. Work evenly and keep tension slightly looser than the central panel so scallops lie flat.
Round 61 :
Join BDR with sl st to any corner st. Ch1, sc in same st and in next 4 sts, *ch3, sk 3, sc in next 5 sts* around, working 3 sc in each corner; join. (206 working positions including ch3 loops)
Round 62 :
Ch1, sc in each sc and 3 sc in each ch3 loop to build scallop base; join. (approx 206)
Round 63 :
Picot scallop: Ch1, *sc in next 2 sts, (ch3, sl st in 3rd ch from hook) picot, sc in next 2 sts, 3 sc in next st* repeat around, placing 3 sc in corner; join. This produces a small pointed scallop. Fasten off and weave ends. (approx 206)
Info :
Trim and weave in all ends. Block the runner to final measurements by gently stretching to square and pinning to blocking mats. Spray lightly with water or steam and let dry completely before applique and embroidery.
— Large Oak Leaf (Make 4 — AC1 Rust or AC3 Terracotta) :
Info :
These leaves are worked flat in rows (we write them as rounds). Each leaf is asymmetric with a central ridge and lobed edges. Use a 3.0mm hook for slightly firmer texture. Make 4 large leaves, approximately 3.5" long each.
Round 1 :
With AC1, ch12. Row 1: sc in 2nd ch from hook and across (11 sc). (11)
Round 2 :
Ch1, turn, 1 sc in next 3 sts, inc, 1 sc, inc, 1 sc, inc, 1 sc, 1 sc (work increases centered to widen midsection). Total: (14)
Round 3 :
Ch1, turn, sc across increasing again at positions to make small lobes: (1 sc, inc) x3 then sc to end. (17)
Round 4 :
Ch1, turn, sc across, then form first side lobe by (sc in next 2, inc) twice, then continue sc across to end. (19)
Round 5 :
Ch1, turn, sc across entire row; by end of row begin shaping tip: sc2tog twice toward the last 6 sts to taper. (17)
Round 6 :
Ch1, turn, sc across; work pointed tip by sc2tog at center two sts; finish last few sts. (15)
Round 7 :
Ch1, turn, sc across but on returning make decorative lobes by working (sc, ch1, sc) as tiny picot-like lobes at predefined points: work 3 lobes on each side evenly spaced. (15 with ch spaces)
Info :
Optional: Embroider a central vein with surface slip stitch in darker brown yarn after leaf is blocked. Lightly shape each lobe with fingers and press while blocking for crisp leaves.
Round 8 :
Fasten off leaving long tail for sewing. Weave in opposite tail end if needed. Make 4 total. (Approximately 3.5" long)
— Medium Oak Leaf (Make 4 — AC2 Mustard) :
Info :
Smaller leaf to add color contrast. Worked same as large leaf but with fewer rows to measure approx 2.5" long.
Round 1 :
Ch9, sc in 2nd ch from hook and across (8 sc). (8)
Round 2 :
Ch1, turn, sc in next 2, inc, sc in next 2, inc, sc to end. (10)
Round 3 :
Ch1, turn, sc across and create small lobes by (sc, ch1, sc) at two positions on each side. (10)
Round 4 :
Ch1, turn, sc across, decrease at tip by sc2tog twice in last 6 sts. (8)
Round 5 :
Fasten off leaving long tail for sewing. Make 4. (approx 2.5")
— Small Leaf / Sprig (Make 6 — AC3 Terracotta / AC1 Rust) :
Round 1 :
Ch6, sc in 2nd ch from hook and across (5 sc). (5)
Round 2 :
Ch1, turn, sc3, inc, sc1. (6)
Round 3 :
Ch1, turn, sc across, shape tip with sc2tog; fasten off leaving long tail. (5)
Info :
These small leaves work nicely clustered near berry clusters. Make 6–8 total in mixed colors for natural variation.
— Acorn — Cap & Nut (Make 3 — TAN body, BDR cap) :
Info :
Acorns are worked in two parts: the acorn body (TAN) worked in a small oval/round and the cap (BDR) worked in rounds with a textured surface. Stuff lightly before closing. Use 3.0mm hook for a firm fabric.
Body Round 1 :
With TAN, mr, 6 sc into magic ring (6)
Body Round 2 :
Inc in each st around (12)
Body Round 3 :
(1 sc, inc) x6 (18)
Body Round 4-6 :
1 sc in each st around to shape cylinder/oval (18)
Body Round 7 :
(1 sc, dec) x6 (12)
Body Round 8 :
Dec 6 (6). Stuff lightly. Fasten off leaving tail for sewing. (6)
Cap Round 1 :
With BDR, mr, 6 sc in magic ring (6)
Cap Round 2 :
Inc in each st around (12)
Cap Round 3 :
(1 sc, inc) x6 (18)
Cap Round 4 :
Working in FLO only, 1 sc in each st around to create a textured ridge (18)
Cap Round 5 :
Ch1, turn, *sc in next 2 sts, picot (ch3 sl st in 3rd ch from hook)* repeat around to create a scalloped cap edge; join. Fasten off leaving tail for sewing. (18)
Info :
Sew acorn body to inside of cap with yarn tail. Stuff body only lightly so it nests inside cap. Add a few surface slip stitches in dark brown to suggest textured ridges on the cap if desired.
— Berry Cluster (Make 5 clusters) :
Round 1 :
With AC1 or AC3, mr, 6 sc in ring, sl st to join. Fasten off leaving tail for sewing. Each berry is approximately 0.3" diameter. Make clusters of 3–6 berries and stitch them together using tails before attaching to runner.
Info :
To make a cluster, work 3–6 berries and tie their tails together, then sew cluster to a small base disc (ch4, join to make a ring) with a few stitches and then attach to runner.
— Stem / Vine (Surface Embroidery & Cord) :
Info :
Stems can be embroidered directly using brown yarn (BDR) with a tapestry needle and surface slip stitch, or crocheted as a thin chain/cord and sewn on. For a raised look, chain a narrow cord and whip-stitch it in place along the marked center line, letting small branches emerge where leaves will be placed.
Method A — Surface Slip Stitch :
Thread BDR onto a yarn needle, insert needle from WS to RS at the base placement point, then work surface slip stitch along an arcing vine path, pulling yarn snug but not tight. Anchor at ends and at each applique point. Use small backstitches to attach berry clusters and acorns.
Method B — Crocheted Cord :
With BDR and 3.0mm hook, ch35 (or desired length for that vine segment), sl st back along chain to create a firm cord. Pin chain in place along marked path and sew through chain and base fabric with matching thread to secure. Trim tails and bury ends into underside of runner.
Info :
For naturalistic appearance, vary stem thickness slightly and add tiny offshoots with ch6 and a single leaf/berry attached. Pin everything before final sewing.
— Assembly & Placement :
Info :
Before sewing, arrange appliques along the central marked axis: 6 major focal points alternating large leaf / acorn clusters and medium leaves with small berry clusters. Pin in place and photograph arrangement for reference before sewing.
Round-by-round Assembly :
1. Lay runner flat. 2. Pin vine (cord or surface slip stitch) along marked center. 3. Attach largest leaf at center point of runner using mattress stitch with long yarn tail; stitch through base of leaf and into body fabric across several evenly spaced stitches, bringing leaf slightly raised for dimension. 4. Add acorn slightly below large leaf, sew at base and add a few anchoring stitches through cap. 5. Space medium leaves and berries alternating up and down the vine and secure each with hidden whip stitch. 6. Embroider vein details using a darker shade of brown in single strand to add realism.
Info :
Sew each applique using matching color tails and a yarn needle. For invisible joins use ladder stitch across the base of each leaf. Add a tiny dab of fabric glue underneath heavy appliques if desired for extra hold while sewing.
Final Finishing :
Weave in all ends on the WS. Trim any excess threads. Block runner again to final shape. Press gently if using a steam iron (use pressing cloth to protect yarn). Let dry completely before use.
Info :
Optional: Add light blush with textile dye or chalk to leaf edges for subtle shading. Use a test scrap to ensure colorfastness.
This autumn table runner brings cozy seasonal charm to any table — soft cream textured ground, rich rust and mustard leaves, warm brown scallops and playful acorns combine to create a handmade centerpiece you'll love. Each applique gives dimension and character, and the pattern is flexible so you can customize color placement and size. Enjoy the relaxing process of stitching leaves and vines, and savor the satisfaction when your runner is blocking and ready to decorate. 🧶🍂