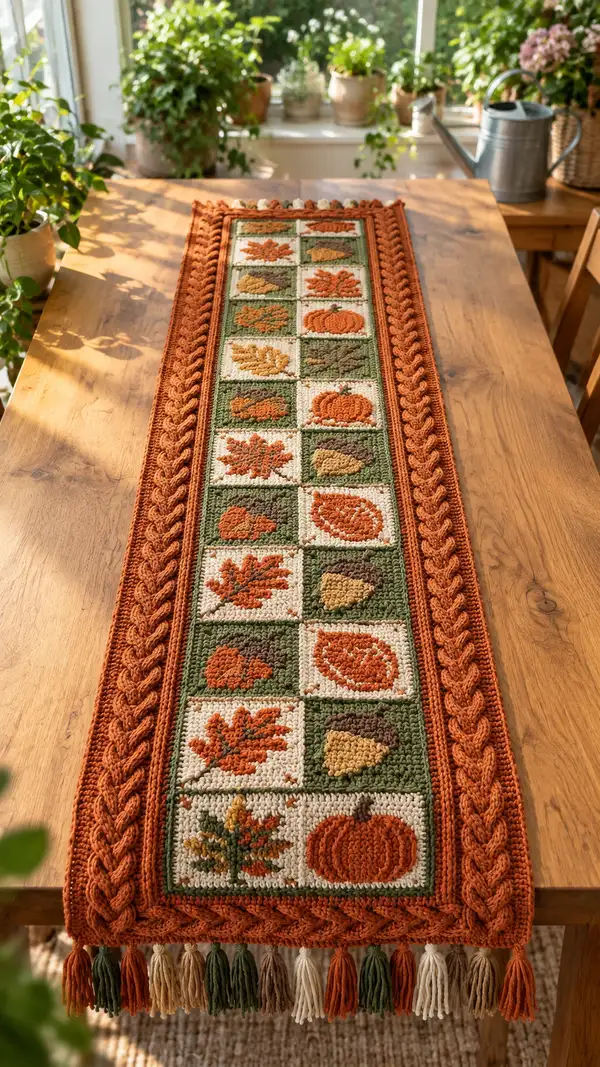
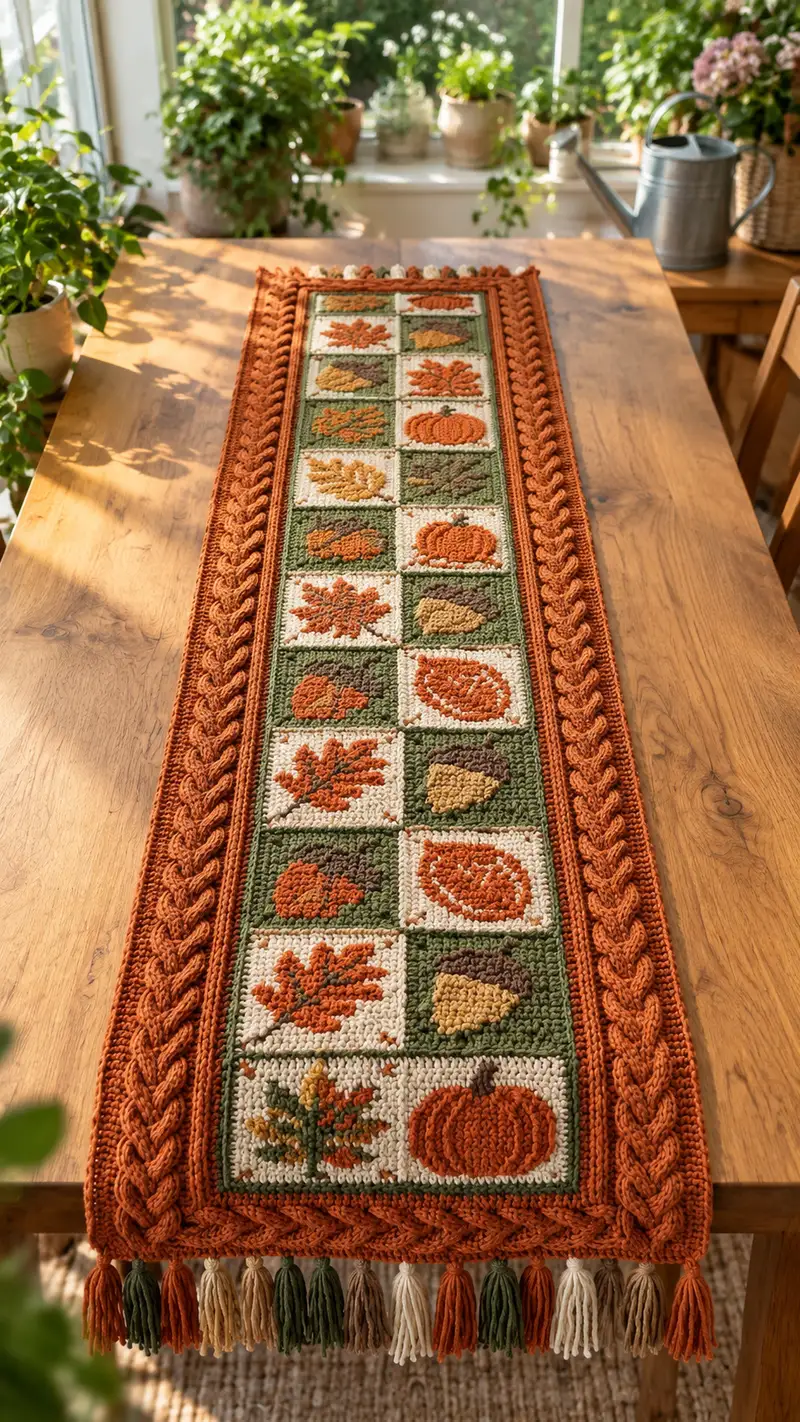
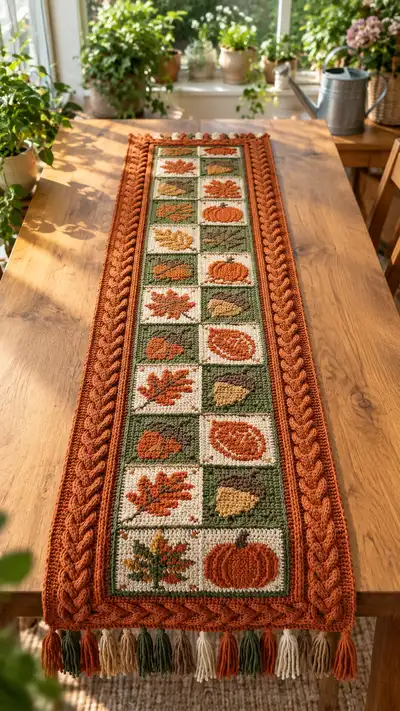
This warm, autumnal table runner features a central strip of 16x16 tapestry squares with pumpkins, leaves and acorns, flanked by raised braided cable panels and finished with tasseled ends. Worked in worsted weight yarn in rust, cream, olive green, mustard and brown, the runner combines simple colorwork blocks with textured border stitches for a cozy farmhouse look. The finished piece sits beautifully on a dining table and showcases a mix of pixel-style tapestry crochet motifs and a bold braided edge. Perfect for seasonal decorating or gifted as a handmade centerpiece.
Progress Tracker
0% Complete
— Notes & Overview :
Info :
This runner is constructed from 22 tapestry crochet motif squares (11 rows x 2 columns), each square worked as a 16-stitch wide by 16-row panel. After making all squares you will add a narrow joining border to form a central panel, then work an applied braided cable panel on each side around the full length, finishing with tassels on both ends. Work tightly for clean colorwork so stuffing or the table surface won't show through. The pattern assumes tapestry technique (carry unused yarn across the WS and catch behind the working stitches). Gauge: one square = roughly 3.5" x 3.5" using 4.0mm hook and worsted yarn; adjust hook if needed.
— Tapestry Square Construction (General) :
Info :
Each motif is worked in rows from bottom to top. You will carry color strands along the WS and catch them every 4–6 sts to avoid long floats. Finish each square with a single-crochet border round and leave long tails for joining. Make squares with RS facing up when joining. When color-changing in a single stitch, change color on the last yarn-over of previous stitch to get a crisp change.
Materials per Square :
Use approximately 12–18g yarn per small square depending on color changes. Keep a small bobbin or separate short lengths for accent colors to avoid bulky joins.
— Stitch for textured pops :
Info :
Puff stitch used for subtle raised areas: yo, insert hook, pull yarn through (repeat 3 times to have 4 loops on hook), yo and pull through all loops, ch1 to secure. Use puff stitches sparingly for pumpkin ribs or leaf veins. Alternatively use 3dc cluster or bobble if you prefer.
— Square Layout and Motif Map :
Info :
Each square = 16 sts across. Two-column layout (left column = Column A, right column = Column B). Top-to-bottom arrangement (Row 1 at top of runner). The pattern below provides full row-by-row colorwork instructions for six motifs: Pumpkin, Maple Leaf, Oak Leaf, Single Leaf Cluster, Acorn, and Mixed Cluster. Make the number of each motif as follows to reproduce photo: Column A (top to bottom): Mixed Cluster, Pumpkin, Leaf Cluster, Oak Leaf, Pumpkin, Maple, Acorn, Leaf Cluster, Pumpkin, Maple, Mixed Cluster. Column B mirrors with alternating backgrounds (cream/green) and the same motif order offset—follow the Assembly Map (Assembly section) to place squares correctly.
— Color shorthand used in motif rows :
Info :
MC = Cream (background), G = Olive Green (alternate background), R = Rust (pumpkin & leaf fill), Y = Mustard (leaf highlight), BR = Brown (acorn cap), DK = Dark Rust/Accent (stems).
— Pumpkin Motif (16 sts x 16 rows) :
Info :
Background is MC unless otherwise indicated. The pumpkin sits centrally using R and DK for ribbing and G for a 1-2 stitch stem at the top. Work Row 1 at bottom of pumpkin and proceed upwards to Row 16 (top of square).
Round 1 :
Row 1 (WS): 16 MC (16)
Round 2 :
Row 2 (RS): 4 MC, 8 R, 4 MC (16)
Round 3 :
Row 3: 3 MC, 10 R, 3 MC (16)
Round 4 :
Row 4: 2 MC, 12 R, 2 MC (16)
Info :
Introduce subtle puff stitch ribs: place small puff passes on rows 6 and 8 in the central pumpkin ribs to add texture later.
Round 5 :
Row 5: 2 MC, 3 R, 6 R (work 2 sets of R but plan to add DK in ribs later), 3 R, 2 MC (16) — visually same as 2 MC,12 R,2 MC
Round 6 :
Row 6: 1 MC, 2 R, 10 R (use DK for 2 central ribs replacing 2 of the R stitches), 1 MC (16) — work 2 puff stitches across the central 4 R stitches: puff on stitch positions 7 and 10
Round 7 :
Row 7: 1 MC, 14 R, 1 MC (16)
Round 8 :
Row 8: 1 MC, 2 R, 2 DK (rib highlight), 8 R, 2 DK, 1 MC (16) — place small puffs on the DK stitches as described previously
Round 9 :
Row 9: 2 MC, 12 R, 2 MC (16)
Round 10 :
Row 10: 3 MC, 10 R, 3 MC (16)
Info :
Place a 2-stem at Row 12 center using G: change to G at the last yarn over of Row 11 to create the stem stitches cleanly. When changing colors, carry unused yarn across WS catching every 4 sts.
Round 11 :
Row 11: 4 MC, 8 R, 4 MC (16)
Round 12 :
Row 12: 6 MC, 4 G (stem centered over pumpkin: 2 stitches), 6 MC (16)
Round 13 :
Row 13: 7 MC, 2 G, 7 MC (16)
Round 14 :
Row 14: 8 MC, 8 MC (16) — top background row
Round 15 :
Row 15: 16 MC (16)
Round 16 :
Row 16 (finish top): 16 MC (16)
Info :
Finish square with one round of sc around edge: 1 sc in each row end and 3 sc in corner (sc, ch1, sc) to keep square shape. Fasten off leaving a 20" tail for joining. Block flat if desired.
— Maple Leaf Motif (16 sts x 16 rows) :
Info :
This motif uses MC background with a central maple shape in R with Y highlights. Rows read bottom to top. Place pointed leaf tip on row 12–13 area.
Round 2 :
Row 2: 6 MC, 4 R, 6 MC (16)
Round 3 :
Row 3: 5 MC, 6 R, 5 MC (16)
Round 4 :
Row 4: 4 MC, 8 R, 4 MC (16)
Round 5 :
Row 5: 3 MC, 2 R, 6 Y (leaf highlight across middle), 2 R, 3 MC (16)
Info :
Use Y sparingly to suggest veins; carry Y across WS and pick up only for required sections to reduce bulk.
Round 6 :
Row 6: 3 MC, 10 R, 3 MC (16)
Round 7 :
Row 7: 2 MC, 12 R, 2 MC (16)
Round 8 :
Row 8: 2 MC, 3 R, 6 Y (center highlight), 3 R, 2 MC (16)
Round 9 :
Row 9: 3 MC, 10 R, 3 MC (16)
Round 10 :
Row 10: 4 MC, 8 R, 4 MC (16)
Info :
Introduce a tiny stem at Row 12 center with DK or G as a 1-2 stitch accent (same approach as pumpkin stem).
Round 11 :
Row 11: 5 MC, 6 R, 5 MC (16)
Round 12 :
Row 12: 6 MC, 4 R, 6 MC (16)
Round 13 :
Row 13: 7 MC, 2 R, 7 MC (16)
Round 14 :
Row 14: 16 MC (16)
Round 15 :
Row 15: 16 MC (16)
Round 16 :
Row 16: 16 MC (16)
Info :
Finish with sc border round, fasten off and leave long tail for joining. If you like, add 1 or 2 puff stitches along the leaf center to lift veins.
— Oak Leaf Motif (16 sts x 16 rows) :
Info :
Oak leaf has a more lobed shape—use R and Y with MC background. Follow row counts to maintain 16 sts per row.
Round 2 :
Row 2: 7 MC, 2 R, 7 MC (16)
Round 3 :
Row 3: 6 MC, 4 R, 6 MC (16)
Round 4 :
Row 4: 5 MC, 6 R, 5 MC (16)
Round 5 :
Row 5: 4 MC, 8 R, 4 MC (16)
Round 6 :
Row 6: 4 MC, 3 R, 6 Y (lobed highlight), 3 R, 4 MC (16)
Info :
Use staggered Y stitches to emphasize lobes. Keep floats short by catching every 3–4 sts on WS.
Round 7 :
Row 7: 3 MC, 10 R, 3 MC (16)
Round 8 :
Row 8: 2 MC, 12 R, 2 MC (16)
Round 9 :
Row 9: 3 MC, 10 R, 3 MC (16)
Round 10 :
Row 10: 4 MC, 8 R, 4 MC (16)
Round 11 :
Row 11: 5 MC, 6 R, 5 MC (16)
Round 12 :
Row 12: 6 MC, 4 R, 6 MC (16)
Round 13 :
Row 13: 7 MC, 2 R, 7 MC (16)
Round 14 :
Row 14: 16 MC (16)
Round 15 :
Row 15: 16 MC (16)
Round 16 :
Row 16: 16 MC (16)
Info :
Finish with sc border round; consider small brown accent at the base to indicate a tiny stem or shadow.
— Leaf Cluster Motif (16 sts x 16 rows) :
Info :
Cluster motif shows a small cluster of leaves in R and Y on G background (this motif uses G as the square background in image). Rows are bottom to top; use short floats to keep clean color transitions.
Round 2 :
Row 2: 6 G, 4 R, 6 G (16)
Round 3 :
Row 3: 5 G, 6 R, 5 G (16)
Round 4 :
Row 4: 4 G, 8 R, 4 G (16)
Round 5 :
Row 5: 4 G, 2 R, 6 Y, 4 G (16)
Round 6 :
Row 6: 3 G, 10 R, 3 G (16)
Round 7 :
Row 7: 4 G, 8 R, 4 G (16)
Round 8 :
Row 8: 5 G, 6 R, 5 G (16)
Round 9 :
Row 9: 6 G, 4 R, 6 G (16)
Round 10 :
Row 10: 16 G (16)
Round 11 :
Row 11: 4 G, 6 Y, 6 G (16)
Round 12 :
Row 12: 16 G (16)
Round 13 :
Row 13: 16 G (16)
Round 14 :
Row 14: 16 G (16)
Round 15 :
Row 15: 16 G (16)
Round 16 :
Row 16: 16 G (16)
Info :
Use small puff stitches on the center R stitches on rows 4 and 6 to create raised berry-like accents if desired.
— Acorn Motif (16 sts x 16 rows) :
Info :
Acorn motif uses BR for cap, R for body on MC background or inverted on G. The cap sits across rows 10–12 with a tapered body beneath and a small stem above.
Round 2 :
Row 2: 6 MC, 4 R, 6 MC (16)
Round 3 :
Row 3: 5 MC, 6 R, 5 MC (16)
Round 4 :
Row 4: 4 MC, 8 R, 4 MC (16)
Round 5 :
Row 5: 5 MC, 6 BR, 5 MC (16) — cap begins
Round 6 :
Row 6: 6 MC, 4 BR, 6 MC (16)
Round 7 :
Row 7: 7 MC, 2 BR, 7 MC (16)
Round 8 :
Row 8: 8 MC, 8 MC (16) — top background
Round 9 :
Row 9: 7 MC, 2 R, 7 MC (16)
Round 10 :
Row 10: 6 MC, 4 R, 6 MC (16)
Round 11 :
Row 11: 5 MC, 6 R, 5 MC (16)
Round 12 :
Row 12: 4 MC, 8 R, 4 MC (16)
Round 13 :
Row 13: 16 MC (16)
Round 14 :
Row 14: 16 MC (16)
Round 15 :
Row 15: 16 MC (16)
Round 16 :
Row 16: 16 MC (16)
Info :
Use a small horizontal bobble (puff) across the cap rows to give the acorn cap a textured knit look; switch to BR and work puff stitches across row 5 or 6 as desired.
— Mixed Cluster Motif (16 sts x 16 rows) :
Info :
Combined small pumpkin + leaf accents on MC background. Intended to show variety with small color blocks in central third of square.
Round 2 :
Row 2: 6 MC, 4 R, 6 MC (16)
Round 3 :
Row 3: 5 MC, 2 R, 6 Y (tiny leaf at center), 3 MC (16)
Round 4 :
Row 4: 4 MC, 8 R, 4 MC (16)
Round 5 :
Row 5: 4 MC, 6 R, 6 MC (16)
Round 6 :
Row 6: 3 MC, 10 R, 3 MC (16)
Round 7 :
Row 7: 4 MC, 8 R, 4 MC (16)
Round 8 :
Row 8: 5 MC, 6 R, 5 MC (16)
Round 9 :
Row 9: 6 MC, 4 R, 6 MC (16)
Round 10 :
Row 10: 16 MC (16)
Round 11 :
Row 11: 16 MC (16)
Round 12 :
Row 12: 4 MC, 6 Y, 6 MC (16)
Round 13 :
Row 13: 16 MC (16)
Round 14 :
Row 14: 16 MC (16)
Round 15 :
Row 15: 16 MC (16)
Round 16 :
Row 16: 16 MC (16)
Info :
Small puff stitches in R and Y on rows 3 and 12 add dimensional detail; use as accent only to avoid excessive bulk.
— Square Finishing (for all squares) :
Info :
After completing 16 rows: with RS facing, join MC and work 1 round sc evenly around square: 3 sc in each corner space for a neat turn. If the square background is G, work sc in G for consistent edge color. Fasten off leaving a 20–24" tail for joining. Block each square gently to 3.5" x 3.5" before assembly for best alignment.
— Make all Motifs :
Info :
Make 22 squares total in the motif order listed in the Layout Map (11 rows by 2 columns). If you want a longer runner simply add more motif pairs repeating the pattern sequence or create extra rows of mixed clusters.
— Joining the Two-Column Central Panel :
Info :
Lay out the 22 squares in the planned order with RS facing up. Use mattress stitch / whip stitch for a flatter join, or slip-stitch join for a decorative ridge. The joins are made between adjacent squares along their 16-st edges. Be consistent with which color edge is used for joining to create a neat grid. Leave an extra 2-row buffer at top and bottom for the braided border attachment.
Round 1 :
Join method A (invisible mattress stitch): Place two squares RS up, align edges. Use long tail and tapestry needle; insert needle under the horizontal bars of the first square, then the second, pulling each pass snug but not tight. Continue across 16 bars to join the full edge. Repeat for each vertical seam to create two columns into one central panel.
Round 2 :
Alternatively, Join method B (crochet join): With RS facing, hold two squares together, sc through both loops across edge working 16 sc (one sc per stitch) to join evenly. Ch1 at corner and continue down next seam. This creates a visible ridge which becomes part of the grid aesthetic.
Info :
When joining, aim for a finished central panel width of about 36–38 sts (2 x 16 plus seam allowance). Keep joins centralized so border rows attach evenly later.
— Prepare for Applied Border :
Info :
With the central panel completed (length ~ 11 squares x 2 columns height = approx 38" depending on your gauge), turnout RS up and make a foundation round around the entire central panel in MC: sc evenly around along outside edges placing 3 sc in each corner. This uniform anchor provides a clean foundation to add braided cable panels and additional rounds.
Round 1 :
Working in MC (if central background is mixed choose MC for continuity): 1 sc in each 3-bar at the top/bottom and 1 sc per stitch along sides; aim for a neat even count. Turn to work cable attachment.
— Braided Cable Panel (worked as applied strip) :
Info :
The two braided cable panels on either side are worked in rust (RUST). Each panel is worked as a long strip worked in rows then joined to the central panel using an applied seam. The braid is achieved with fpdc and bpdc crossings to mimic cable twists. Each cable panel width = 12 sts (measured after last base sc). You will make two identical long strips (left and right) the length of the runner plus 4 extra rows to wrap corners.
Round 1 :
Make foundation chain long enough to match the runner length (central panel height in rows multiplied by 16) plus 2 chains for turning; chain to desired length. Example: for 11 squares tall each 16 rows = 176 rows equivalent; multiply by square height gauge to determine chain length. For practical crochet: join to panel first and then work cable rows in situ to keep length exact.
Round 2 :
Row 1 (RS): sc across foundation chain to create an even base (this forms the first row of the strip). Turn.
Round 3 :
Row 2: ch2 (counts as hdc), *2 fpdc, 2 bpdc, 2 fpdc, 2 bpdc* repeat across to end, hdc into last st. This first texture row defines the columns of the braid. Turn.
Info :
Use fpdc (front post double crochet) and bpdc (back post double crochet) worked around the posts of the previous row to create raised and recessed columns. Each cable cross will be created every 6 rows to simulate twisting.
Round 4 :
Row 3: ch2, 1 dc in each st across working into the back loops only for the next row to create a flat bed for the next cable cross. Turn.
Round 5 :
Row 4: ch2, repeat Row 2 pattern: fpdc and bpdc columns. Turn.
Round 6 :
Row 5: ch2, 1 dc in each st BLO across. Turn.
Round 7 :
Row 6: ch2, cable cross row: To twist the cable, work fpdc around next 2 post stitches, then work bpdc around previous 2 posts (i.e., hold them and cross left over right): skip first pair of posts, insert hook from front to back around the post of the next two stitches then finish the fpdc of the earlier posts — do the crossing as follows: (work fpdc around posts 3&4, then bpdc around posts 1&2) to visually cross columns. Repeat across. Turn.
Info :
Practicing this crossing on a small swatch will help. Cable crosses every 6 rows produce a robust braid. Adjust frequency (every 4 rows tighter braid, every 8 rows looser braid) to taste.
Round 8 :
Row 7: ch2, work 1 dc in each st BLO across to secure the twisted cables. Turn.
Round 9 :
Row 8: Repeat Row 2 (fpdc and bpdc pattern) and Row 3 alternate rows for a total of 12–16 repeat rows until the strip matches the central panel length plus 4 rows for corner wrap. Each 6-row block contains one cable cross.
Info :
Continue repeating cable block: 2 textured rows, 1 bed row, 2 textured rows, 1 cross, then bed row. Count rows carefully to match central panel exactly. The cable strip should have even tension so it lays flat when attached.
— Attaching Cable Panels to Central Panel :
Info :
With RS of central panel facing you, align cable strip along one long side with the right side of cable facing out. Use sc through both layers to join: insert hook through edge sc of central panel and through edge stitch of cable panel, sc through both loops across entire length. Use extra sc at corners to wrap around the corner and continue down the short side if you want the border to fully frame the runner on all sides.
Round 1 :
Join using MC or RUST as preferred: 1 sc through both layers across the long edge working roughly 1 sc per 3 rows of cable bed if stitches are larger; adjust spacing to match density. Fasten off and weave ends securely.
Info :
Repeat for the second cable strip on the opposite side. If desired, you may crochet the cables in place (work cable rows directly onto the panel while anchoring to the foundation sc round), but making strips first gives more control over cable twist.
— Narrow Inner Frame Rounds :
Round 1 :
After cable panels are attached: With RUST (border color) join at a corner and work 2 rounds of sc around the full assembled runner (work 3 sc in each corner), keeping stitches even. This creates a narrow inner frame between central panel and cables. (Number of sc will vary; keep even tension.)
Round 2 :
Round 2: Work 1 round of hdc in each sc to create a soft raised edge that frames the squares and sits just inside the cable braid. Fasten off and weave ends.
Info :
Check that the runner lies flat. If there is slight cupping, add an extra bed row of dc around the flat side only to balance. Blocking can help even out tension differences between tapestry squares and cable panel.
— Outer Braided Border and Finishing Rounds :
Round 1 :
Work 3 rounds of RUST around the outside of the cable panel using the following: Round A: sc evenly around; Round B: *ch3, sl st into second chain to make shallow picot detail* or simply sc for a cleaner look; Round C: fpdc around the cable edge to create a raised finished ridge, spacing fpdc to land on the cable braids for contrast. Fasten off and weave all ends neatly.
Info :
The outer rounds are decorative: choose between a simple sc finish, picot edge, or raised ridge. Picots give a hand-stitched artisan look; a raised ridge complements the cable.
— Tassels (Make tassel sets for each end) :
Info :
Tassels are clustered in alternating colors across the width of the runner's short ends. Use yarn folded to a 4" finished length per tassel (wrap around a 5" card ~25–30 wraps depending on yarn thickness). Trim ends evenly. Make 12–14 tassels per end: colors alternate RUST, G, MC, Y, BR repeating across for a rich spread like the photo.
Round 1 :
Attach tassels evenly spaced: fold tassel loop and use a crochet hook to pull loop through the edge, then pull tails through loop and tighten. Use 12–14 tassels across short end to match visual density. Trim and comb tassels lightly with a small wire or fork for fullness.
Info :
Set tassel positions by measuring the runner width and marking placement with pins. Keep tassel lengths equal by gathering sets of like-color tassels and trimming together on a ruler.
— Final Blocking and Finishing :
Info :
Block the entire runner gently to shape: pin out on a flat surface, stretching slightly so edges lie flat, then steam or wet-block according to yarn instructions. Avoid overstretching braided cable areas. After blocking, inspect joins and weave in all ends at least 1.5" under stitches to prevent unraveling.
Round 1 :
Final inspection: check for consistent tassel lengths, secure any loose floats at motif backs with small stitches, and press lightly with steam to unify texture. Enjoy your autumn centerpiece!
This Autumn Harvest Table Runner comes together from cozy tapestry squares and a bold braided border to create a striking seasonal centerpiece. The mix of motif detail, raised texture, and tassel trim makes it a joyful, giftable project that adds instant warmth to any table. I hope making it brings you as much satisfaction as placing it on your table—happy stitching and autumn decorating! 🍂🧶