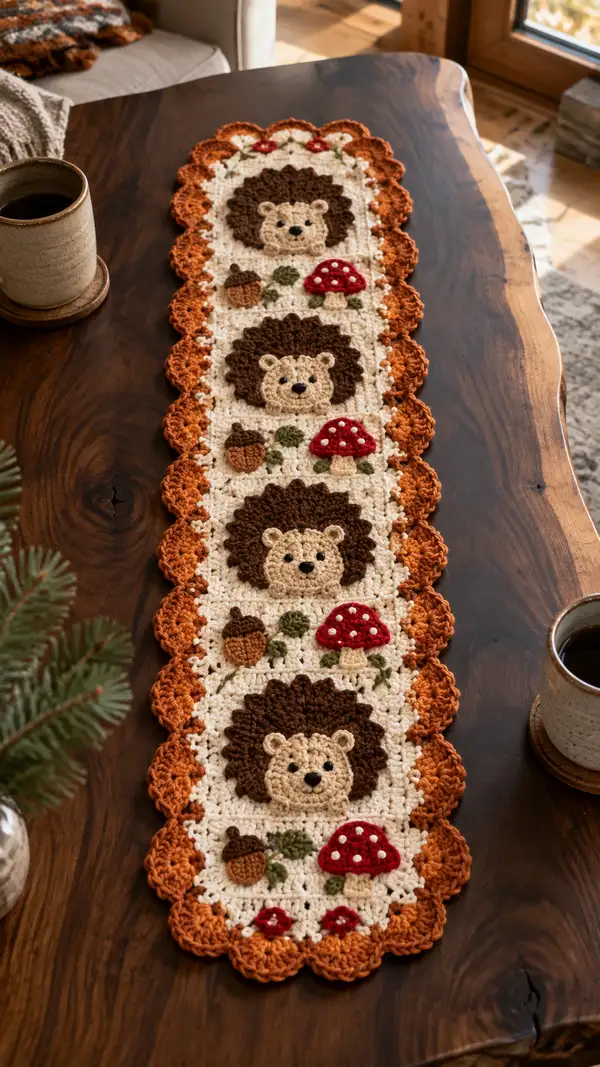
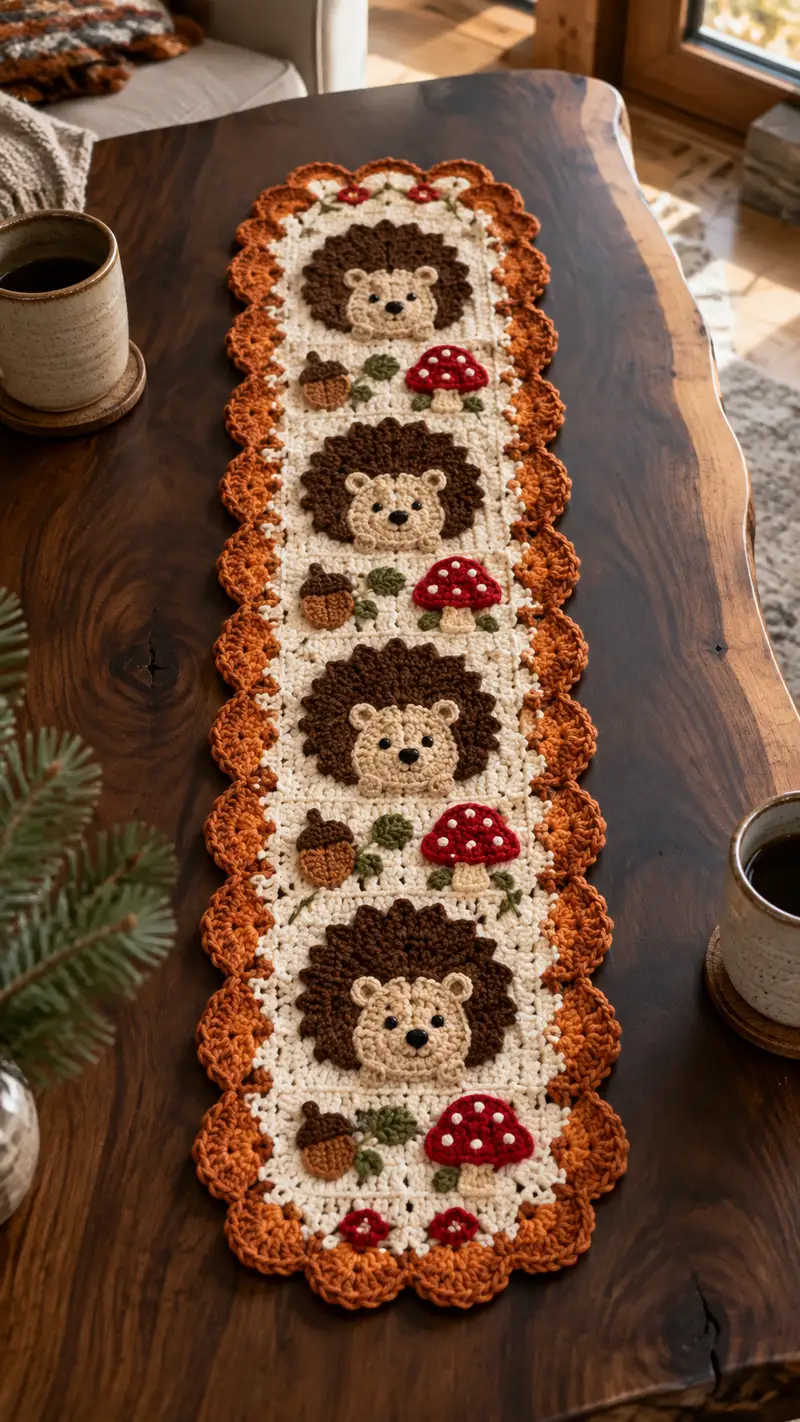
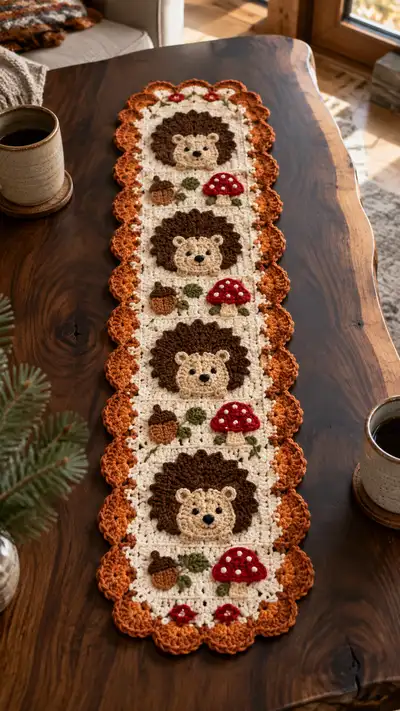
A warm autumn-inspired table runner featuring three sweet hedgehog appliques framed by rustic mushrooms, acorns and leafy details. The runner uses cream, brown and pumpkin tones with a scalloped rust border for a cozy farmhouse look. Repeating square panels are joined into a long runner with a decorative shell edge—perfect for a fall centerpiece. Detailed stitch-by-stitch instructions guide you through each applique, panel, join and finishing border.
Progress Tracker
0% Complete
— Notes & Gauge :
Info :
Gauge is not critical for design but affects final size. With worsted yarn and 4.0mm hook, one completed motif panel measures approximately 8-9 cm (3.25-3.5 in) square. Work tightly enough so applique edges do not gape; adjust hook size down for denser fabric.
Info :
Pattern is modular: make as many hedgehog panels as you like. The sample runner shows 4 full hedgehog panels separated by small sash rows and finished with scalloped border. The instructions give counts and rounds to make an identical three- or four-panel runner; to lengthen, simply repeat panel rows and joining rounds.
— Hedgehog Face (Applique - 'Head') :
Round 1 :
Using Light Tan with 3.5mm hook: 6 sc in magic ring (6)
Round 3 :
(1 sc, 1 inc) x 6 (18)
Round 4 :
(2 sc, 1 inc) x 6 (24)
Round 5 :
(3 sc, 1 inc) x 6 (30)
Info :
This creates the slightly rounded face disk. If you prefer a flatter face, stop here and fasten off leaving a long tail for sewing. Continue to Round 6 for a slightly larger disc.
Round 6 :
(4 sc, 1 inc) x 6 (36)
Round 7 :
1 sc in each st (36)
Round 8 :
1 sc in each st (36)
Info :
Place two small black safety eyes or embroider eyes on Round 5-6 area. Position them approximately 6-8 stitches apart (count along Round 5 / Round 6). If using safety eyes, secure washers now before adding further rounds.
Round 9 :
(3 sc, 1 dec) x 6 (30)
Round 10 :
(2 sc, 1 dec) x 6 (24)
Round 11 :
(1 sc, 1 dec) x 6 (18)
Info :
Fasten off leaving long tail for sewing. Weave a small french-knot style nose with black yarn or sew on a tiny black crocheted nose (instructions below). The face should be relatively flat; avoid stuffing. If you want subtle 3D, add a tiny pinch of stuffing under the nose area before closing.
Round 12 :
Optional small nose (make 1): With Black, magic ring, 6 sc (6). Fasten off leaving long tail to sew in place. Slightly stuff if desired.
Info :
When sewing the nose, position at center below eyes and stitch through several face rounds to create secure attachment. Embroider a small smiling mouth with two short stitches beneath the nose if desired.
— Hedgehog Mane (Surrounding ruffled 'Hair') :
Info :
Use Chocolate Brown and 4.0mm hook. Mane is worked in rounds attached around the face edge to create ruffled, textured spikes. Mane rounds are slightly larger than the face diameter to create a halo effect.
Round 1 :
Join Chocolate Brown with sl st to any stitch of Round 6 of face (if you worked to Round 6), ch1, 1 sc in same st, 1 sc in next 2 sts, (3 dc cluster in next st, 1 sc in next 3 sts) around to create alternating clusters. Work total clusters and sc so final stitch count equals 48 sts with clusters counted as 1 st for placement (48)
Round 2 :
Ch2 (counts as hdc), *skip next sc, in next st work (sc, 3 dc shell, sc) in same st; skip next 2 sts, 1 hdc in next; rep from * around. Adjust to end evenly (48)
Round 3 :
Ch1, 1 sc in each st BLO around to create a base ridge (48)
Round 4 :
Ch2, *in next st work (2 dc, ch1, 2 dc) to form a picot shell, sl st in ch1 space; ch2, skip next st, 1 sc in next; rep from * around. This creates a textured scallop mane edge (48)
Info :
If mane looks too bulky, work Round 3 in FLO instead, or reduce cluster density by skipping more base sts. Fasten off and weave ends to wrong side.
Round 5 :
Optional extra texture round: join a second round of small popcorns between shells: *in base space make 5 dc popcorn, sl st to secure; ch1, 1 sc in next st; rep around (48)
Info :
Trim or tuck tails behind face when sewing onto panel so they do not show through the cream background.
— Eyes, Nose & Ears Details :
Round 1 :
Ears (make 2): With Light Tan and 3.5mm hook, ch2, 3 sc in 2nd ch from hook (3). Fasten off leaving tail for sewing.
Round 2 :
Optional deepen ear: join and sc around ear edge to create thicker ear: 6 sc evenly around (6). Fasten off.
Info :
Sew ears to top of face slightly into mane so they peek out. Position ears on Round 4-5 area of face disk, approximately 10-12 sts apart depending on face size.
— Background Square (Panel that receives the appliques) :
Round 1 :
With Cream/Off-White and 4.0mm hook: ch4, join with sl st to first ch to form ring, ch3 (counts as dc), work 11 dc into ring, join with sl st to top of ch3 (12 dc) (12)
Round 2 :
Ch3, dc in same st, dc in next 3 sts, ch2, *dc in next 4 sts, ch2; rep from * to create 3 ch2 corners; join to top of ch3 (work evenly to have 3 corners) - total approx 16 dc plus 3 ch-2 corners
Round 3 :
Ch3, (dc, ch1, dc) in each ch-2 corner space, dc evenly along sides placing (dc, ch1, dc) at each corner. End with sl st to top of ch3 (approx 28-36 dc depending on spacing)
Info :
We are making a modified square with even sides large enough to accommodate the hedgehog applique. Aim for a finished panel approx 8.5 cm wide. If your square is smaller, add another round of corner increases.
Round 4 :
Ch2, hdc in each dc along side, in corner work (hdc, ch1, hdc) into corner space; continue around (approx 40-44 hdc)
Round 5 :
Ch1, sc in each st around working 3 sc into corner ch1 spaces; join with sl st (44)
Round 6 :
Ch3, dc in each st around, placing (dc, ch2, dc) in each corner; join to top of ch3 (44)
Round 7 :
Ch1, sc in each st around; work an even, tidy edge (44)
Info :
Center the hedgehog face appliqué onto this square before attaching the mane. Position the face so the lower edge sits approximately 1/3 of the way up the square to leave room for mushroom and acorn details beneath.
Round 8 :
Attach background motif by sewing face and mane to square with long tail and yarn needle, using mattress or whip stitch around the base of the face to secure flatly to the square.
Round 9 :
Stitch small flat ears and nose in place and secure all ends; hide ends into the square by weaving through a few stitches and trimming flush.
— Mushroom Applique :
Round 1 :
Cap (make 1 per panel): With Bright Red and 3.5mm hook, ch2, 6 sc in 2nd ch from hook (6)
Round 3 :
(1 sc, 1 inc) x 6 (18)
Round 4 :
Switch to 4.0mm hook and work 1 sc in each st (18) to flatten cap slightly
Round 5 :
Ch1, sc in next 4 sts, sl st in next 2 sts to create a slight tip indentation, sc in remaining sts; fasten off keeping tail for sewing
Info :
Make small white French knots or tiny embroidered dots with White yarn for the toadstool spots. Use evenly spaced dots on Round 2-3 area of cap for consistent look.
Round 6 :
Stem (make 1): With Cream and 3.5mm hook, ch4, in 2nd ch from hook 3 sc, turn, ch1, 1 sc in each across for 2 rows total to create a short flat stem approx 4-5 sts tall; fasten off leaving tail to sew to underside of cap
Round 7 :
Sew stem to cap underside, then attach mushroom to panel beneath hedgehog face about 8-12 sts below center depending on panel proportions. Secure tightly and weave tails.
— Acorn Applique :
Round 1 :
Cap (acorn top) with Chocolate Brown and 3.5mm hook: ch2, 6 sc in 2nd ch from hook (6)
Round 2 :
Sc in each st around (6), sl st and fasten off leaving tail
Round 3 :
Nut body: with Light Tan, ch2, 6 sc in 2nd ch from hook, inc in each st around (12)
Round 4 :
1 sc in each st around (12) - optionally add one more round if you want a larger acorn body (12)
Round 5 :
Sew acorn cap slightly overlapping nut top. Attach to panel next to mushroom with stems/leaves between appliques.
Info :
Make two acorns per panel or one as pictured; secure by sewing through both cap and body into background square so they lay flat.
— Leaves & Vines (small details) :
Round 1 :
Leaf (make multiple): With Olive and 3.5mm hook, ch6, sc in 2nd ch from hook, hdc in next, dc in next 2, tr in last; rotate and work on opposite side: dc, dc, hdc, sc; sl st to base. Fasten off leaving long tail for sewing.
Round 2 :
Vine: with Olive, embroider simple stem lines between appliques using long chain stitches (or surface slip stitch) across the panel. Secure ends and weave in tails.
Info :
Position leaves clustered around mushroom and acorns and along side of hedgehog to create an organic composition. Use pins to arrange before sewing.
— Small Flower Buds (Optional) :
Round 1 :
Tiny Flower: With Red and 3.5mm hook, ch2, 5 sc in 2nd ch from hook (5). Sl st to join and fasten off, secure to panel near bottom corners.
Info :
Make 2-4 small flowers across runner for accent. Add tiny yellow or cream center with a few embroidery stitches if desired.
— Making One Complete Panel Summary :
Round 1 :
Create background square to Round 7 (approx 44 sts), sew hedgehog face (face rounds 1-11 + mane rounds) centered into square, attach ears and nose, then add mushroom and acorn appliques and leaves. Weave all ends and block flat.
Info :
Each completed square should be blocked gently to square with tidy edges prior to joining. Use pins to pull corners into a neat square while steam/hand-blocking.
— Repeat Panel Production :
Info :
Make 4 identical panels for the pictured runner. Alternate positioning of acorn and mushroom between panels if you want slight variety. Make extra panels to lengthen runner.
— Joining Panels and Sashing Rows :
Round 1 :
With Cream and 4.0mm hook, lay two panels RS together and work through both layers: join with sl st at corner, ch1, *sc through both layers along edge aligning st counts, when you reach corner work (sc, ch2, sc) through both layers to create corner; continue around to join two panels. For multiple panels, join successive panels in same manner to create a long strip.
Round 2 :
Alternate joining option: use whip stitch with yarn needle for invisible seam. Match corner and side stitches carefully; use pins before sewing to ensure even spacing.
Round 3 :
Sash Row (between motifs): With Cream, work two rows of sc along inner seams to tidy joins; Row 2 work 1 sc in each st then Row 3 ch3, dc in each st for a subtle raised sash. Fasten off.
Info :
Make sure panels are oriented the same direction so hedgehogs face the same way. If panels were blocked, measure across joins to ensure uniform runner width before border.
— Outer Scalloped Border (Rust/Pumpkin) :
Round 1 :
With Rust and 4.0mm hook, join at any outside corner of assembled strip: ch1, sc evenly around entire outer edge of joined runner, placing 3 sc into corner ch2 spaces to maintain shape; join with sl st (work total ≈ 220-260 sc depending on number of panels)
Round 2 :
Ch3 (counts as dc), *skip 2 sc, in next sc work (5 dc shell), skip 2 sc, 1 dc in next; rep from * around to form large shell motifs; join with sl st (number of shells depends on runner length, keep shells even and symmetrical)
Round 3 :
Ch1, sc in each dc around and in shell spaces, working 3 sc into the center st of each shell to anchor (keep counts consistent) (approx 220-260)
Info :
This creates the big scalloped outer edge visible in the photo. If you prefer a double-toned scallop, switch to a lighter orange on Round 3 and then work Round 4 in rust for contrast.
Round 4 :
Ch2, in each shell (center 5-dc cluster) work (2 dc, ch1, 2 dc) into center to form a decorative picot-like shell; in side dc work 1 hdc; rep around. Fasten off and weave ends.
Round 5 :
Optional edging: with Cream, work a fine picot row in sl st around the outer edges of shells by *sl st in next st, ch3, sl st in 3rd ch from hook to create small loops; rep around for delicate highlight.
Info :
Block entire runner flat after border round to even out scallops and ensure smooth overall shape. Pin outer scallops and lightly steam without pressing too hard.
— Finishing Touches and Embellishment Rounds :
Round 1 :
Attach any remaining small embroidered white dots to mushrooms using small stitches of white yarn. Space the dots evenly and keep them small so they read as spots from a distance.
Round 2 :
Use a small amount of Olive yarn to embroider trailing vines between panels if desired for additional continuity across the runner surface.
Info :
Use tiny amount of black to reinforce nose if sewn nose becomes loose; weave additional stitches through base of nose into face rounds to secure.
— Alternative Border Variation (Layered Shells) :
Round 1 :
If you'd like deeper texture, after Round 2 of scallops add a contrasting second shell row in Rust: work (ch1, sl st into center of previous shell, ch3, 5 dc into same center, sl st to anchor) to create layered effect.
Info :
Layered shells increase border depth and require careful blocking. Ensure both rows have consistent spacing to avoid twisting edges.
— Stitch Counts & Math Check Examples :
Info :
Example: For head increases: R1 6, R2 12, R3 18, R4 24, R5 30, R6 36, R7 36, R8 36, then decrease: (3 sc, dec) x6 reduces 36->30. Verify math when increasing or decreasing in grouped repeats. Keep stitch markers at round starts for reliable counts.
Info :
Example shell math: If you have 240 sc around edge and do shells that occupy 5 sts each with gaps, calculate shells = 240 / 8 (approx) to space evenly. Adjust by adding or removing small filler dc between shells for even spacing.
— Troubleshooting & Tips (Info heavy) :
Info :
Tip: Work appliques for all panels first, then background squares, then block panels and finally join. This assembly line approach saves time and keeps shape consistent. Use the same hook for all panels to maintain uniform size.
Info :
Tip: To avoid visible join tails on right side, weave tails through wrong side and use small hidden whip stitch or mattress stitch when sewing appliques down. Use pins to hold position while sewing.
Info :
Tip: If your runner ends up slightly wider on one end due to blocking variance, steam that end lightly and re-pin to match the other end; small adjustments are normal.
Info :
Tip: Make a test panel to confirm colors and placement before committing to several motif repeats; small color swaps (e.g., lighter mane) can subtly change the runner mood.
— Optional: Convert Panels to Placemat or Table Center :
Info :
Follow same construction but make 2 panels and a wider sash to create single placemat, or 6 panels joined 2x3 for a larger centerpiece. Adjust border shells proportionally.
This autumn table runner brings a little woodland whimsy to any table; each hedgehog, mushroom and acorn is lovingly stitched and assembled for a handmade heirloom. The warm rust scallop edge ties the design together and adds handcrafted charm. Whether placed on your seasonal console or dining table, it creates an inviting focal point that feels cozy and curated. Enjoy the slow, satisfying process of making each panel and watch the runner come to life — happy crocheting! 🧶🍂