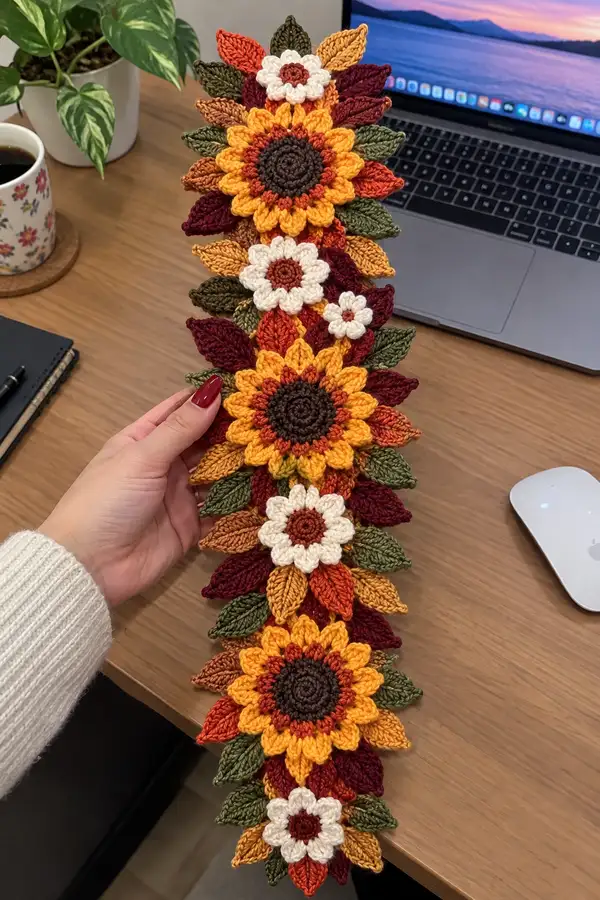
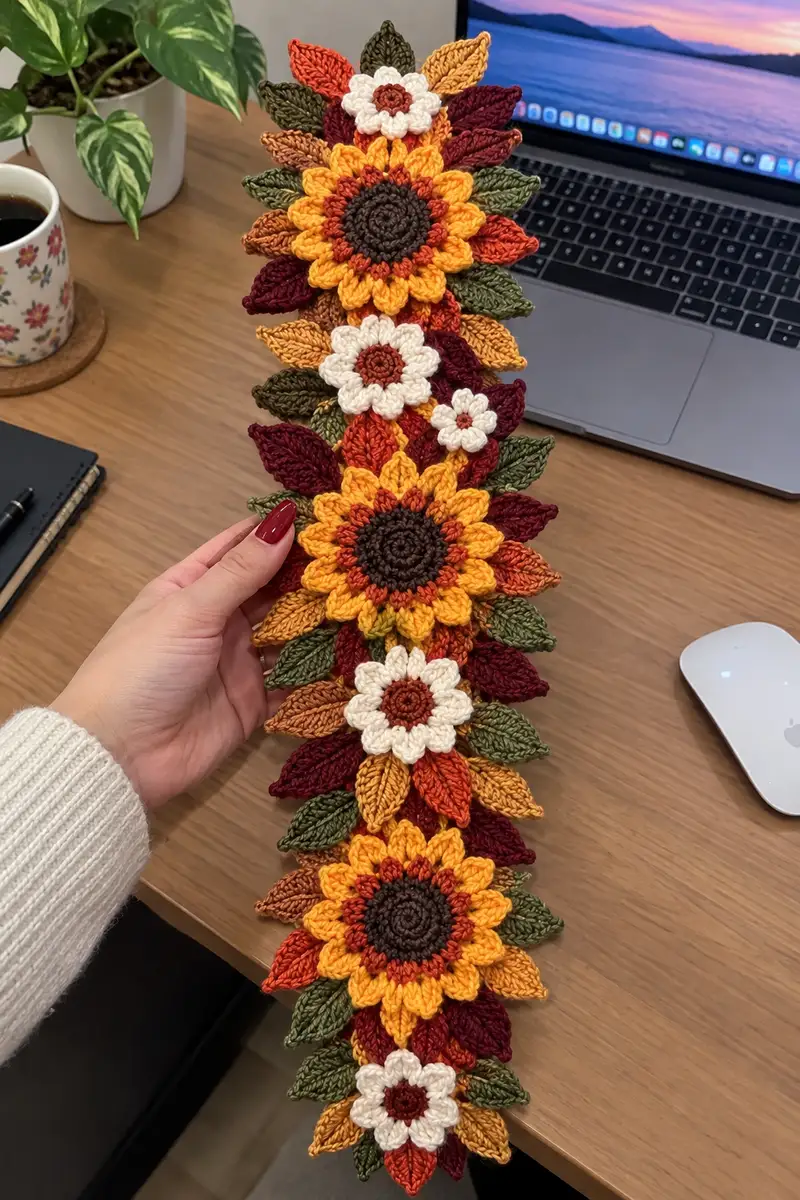
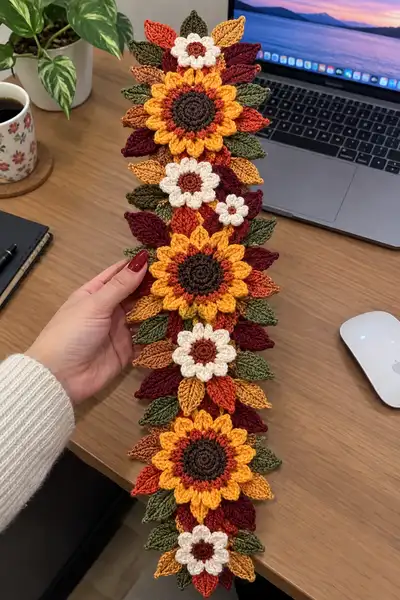
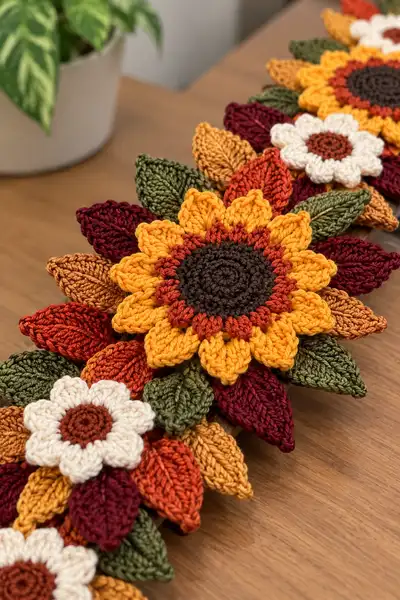
Create a warm, autumn-inspired garland of crocheted sunflowers, small daisies and layered leaves. This pattern reproduces the textured brown centers, bright yellow petals, rust-orange accents and rich green and burgundy leaves seen in the photo. The finished garland is flexible — perfect as a table runner accent, mantel swag, or doorway decoration.
Progress Tracker
0% Complete
— Large Sunflower Center (Make 3):
Round 1 :
6 sc in magic ring (6)
Round 3 :
(1 sc, 1 inc) x 6 (18)
Round 4 :
(2 sc, 1 inc) x 6 (24)
Round 5 :
(3 sc, 1 inc) x 6 (30)
Round 6 :
(4 sc, 1 inc) x 6 (36)
Round 7 :
(5 sc, 1 inc) x 6 (42)
Round 8 :
(6 sc, 1 inc) x 6 (48)
Round 9-10 :
1 sc in each st around (48)
Info :
These rounds create a dense, slightly domed center disc. Use your hook tightly enough to avoid gaps but not so tight the disc curls. If you prefer a smaller center, stop at 42 sts (Round 7) and proceed.
Round 11 :
1 sc in each st BLO (48) — creates a subtle ridge for petal attachment
Info :
Change to rusty orange or chosen accent color for the small scalloped ring. Carry the brown tail inside the disc or fasten off and weave in the end if preferred.
Round 12 :
In rust: (3 sc, 1 inc) x 12 (60) — a slightly wider ring to anchor the first petal row
Round 13 :
In rust: 1 sc in each st around (60)
Info :
This rust ring forms a contrast halo under the petals. You may choose to use a puff stitch round here for more texture: puff (yarn over, insert, pull up 3 times) repeating around, then join.
— Large Petal Template (Make 12 per sunflower):
Info :
Each large sunflower uses 12 petals arranged evenly around the center. Work each petal flat (rows) and then attach to the center. Using a smaller hook (one size down) for petals gives a firmer, sculpted petal.
Petal Round 1 :
Ch 9, sc in 2nd ch from hook and across (8 sc). Turn (8)
Petal Round 2 :
Ch1, sc in each st across (8)
Petal Round 3 :
Ch2 (counts as hdc), hdc in next st, 2 hdc in each of next 2 sts, hdc in next 3 sts, hdc2tog over last 2 sts (10)
Petal Round 4 :
Ch2, hdc across to center, (2 hdc in next st) twice to widen tip, hdc to end (12)
Petal Round 5 :
Ch1, sc across working BLO on this round only to create a defined edge (12)
Petal Round 6 :
Ch1, slip stitch around outer edge back along the opposite side of the chain base to create a smooth, pointed petal tip; fasten off leaving long tail for sewing (no count)
Info :
Alternatively, make petals in one continuous slip-stitch spiral around a chain to shape a more curved petal. Block petals lightly using pins to form a natural curve before sewing to centers.
Petal Attachment :
Pin 12 petals evenly around the rust round (Round 13 of center) spacing them every 5 stitches approximately. Sew each petal to the center through the base using a mattress or whip stitch and hide tails inside the disc.
Info :
To ensure even spacing, count 60 sts from Round 13. Attach one petal at st 1, then every 5th stitch for 12 petals (60/12 = 5). If your count differs slightly, adjust spacing to maintain symmetry.
— Petal Second Layer (Golden Yellow, Make 12):
Round 1 :
Ch 11, sc in 2nd ch from hook and across (10 sc). Turn (10)
Round 2 :
Ch1, sc across (10)
Round 3 :
Ch2, hdc in each st across (10)
Round 4 :
Ch2, (2 hdc in next st, hdc in next 2) x 2, hdc across (14)
Round 5 :
Ch1, sc across BLO to get a ribbed base for attachment (14)
Round 6 :
Ch1, sl st around to make a neat edge, fasten off leaving tail for sewing
Info :
Attach this second layer offset behind the first layer so petals alternate. For a fuller sunflower, you can add a third petal layer worked similarly but slightly larger (chain 13 base).
— Small Decorative Flower (Make 6):
Round 1 :
In brown: 6 sc in magic ring (6)
Round 3 :
Change to cream: (1 sc, 1 inc) x 6 (18)
Round 4 :
*Ch3, sl st into next st to form a petal loop; rep from * around to make 6 petals, join with sl st, fasten off leaving tail (no count)
Info :
These small daisies are flat and are attached to the garland to fill gaps. You can make them slightly raised by replacing chain loops with small clusters (hdc cluster or puff stitch).
— Leaf Template (Make 30+ in assorted colors):
Round 1 :
Ch 11, sc in 2nd ch from hook and across (10)
Round 2 :
Ch1, sc across (10)
Round 3 :
Ch2, hdc in next 2 sts, dc in next 4 sts (tip), hdc in next 2 sts, hdc2tog into final chain to shape tip (10)
Round 4 :
Turn leaf: working along the opposite side of the chain base, hdc in first 2 sts, dc in next 4 sts, hdc in last 2 sts (10)
Round 5 :
Ch1, sl st across the outer edge to create a neat ridge, fasten off leaving long tail for sewing
Info :
For a more sculpted leaf, work round 3 and 4 using front post double crochet (fpdc) on the central rib to create visible veins: on round 4, replace central dc with fpdc.
Leaf Variation :
For elongated leaves: ch 13 base (12 sc), increase dc count to 6 in the center and adapt symmetric return row. For small filler leaves, ch 7 base and use 3 dc in the middle for a mini leaf.
Info :
Make leaves in a mix of olive green, burgundy and burnt orange. Block leaves lightly on a mat with a little steam or water to set shape and dry pinned in the desired curved shape for a natural look.
— Decorative Backing Chain / Garland Spine:
Option A - Crochet Backbone :
Ch 120 (approx. 45-50 cm) or desired garland length. Work 1 sc in second ch from hook and in each ch across to create a sturdy single-crochet strip. Fasten off. This forms a firm spine to which motifs will be sewn.
Info :
If you prefer a more flexible garland, work backbone in a larger chain (ch 140-200) and join flowers and leaves intermittently, allowing some space for drape. For a sturdy mantel runner choose denser backbone (two rows of sc).
Option B - Wire Backbone (Optional) :
Use a thin floral wire wrapped in yarn to create a bendable spine. Crochet around the wire with a slip-stitch tube: ch desired length, slip stitch into each chain to form a thin tube around wire and insert wire before final closing.
Info :
For table runner use: a soft crocheted backbone lies flatter. For a swag with curves or wreath use wire to hold shape. Consider a double-strand backbone for extra support if many heavy motifs will be attached.
— Assembly (Placement Planning and Sewing):
Info :
Arrange motifs on a flat surface before sewing. Place large sunflowers evenly spaced with clusters of leaves and small daisies filling gaps. Typical layout (from one end): small daisy cluster, sunflower, medium leaf cluster, sunflower, small daisy, sunflower, finishing leaves. Use pins to hold pieces during placement.
Assembly Step 1 :
Lay backbone (crochet strip or wire tube) on table. Position the first sunflower so its backline (where petals join the center) overlaps the backbone by 1–2 rows of stitches. With yarn tail and yarn needle, sew through center round and backbone using ladder or whip stitch, pulling gently to flatten seam. Repeat for remaining sunflowers evenly spaced.
Info :
When sewing, make small stitches through the backbone and into the underside of the center to keep attachment invisible on the front. Reinforce with a second pass of stitches if garland will be handled frequently.
Assembly Step 2 :
Sew leaves in layered clusters around each sunflower. Attach larger leaves first behind the sunflower, sewing through the base of the leaf and the underside of the golden petal layer. Add smaller leaves and daisies on top, offsetting them to create a natural, overlapping cluster.
Assembly Step 3 :
For small daisies, attach them by sewing only through the center ring to the backbone and into petals of surrounding leaves so they sit slightly raised. Hide ends on the underside of the backbone.
Info :
Secure every motif with at least 6-8 small stitches around its base for durability. For a cleaner look, weave ends into the backbone strip rather than knotting on the exterior.
— Optional Surface Details & Edging:
Round/Step 1 :
Use brown or rust to add tiny chain loops or French knots (embroidered) in the sunflower center for extra texture. Insert yarn needle from back to front and perform small embroidered bars or knots between stitches.
Round/Step 2 :
Work a decorative picot or crab stitch edge along both sides of the backbone strip to give finished look: join yarn, ch1, sl st in next st then ch3, sl st back into base to create picots; repeat evenly along length.
Info :
Edge work helps hide any sewn-in tails and elevates the piece to look polished. Use contrasting thread color for visible decorative effect or matching color for subtlety.
— Reinforcement and Finishing Touches:
Step 1 :
Weave in all loose ends using a yarn needle, running tails through the underside backbone for secure concealment. Trim close but not flush to avoid the end slipping back through the fabric.
Step 2 :
Block the entire garland lightly: dampen petals and leaves and pin into position on a flat surface to dry. This opens petals and flattens leaves, giving consistent profile across motifs.
Info :
To add gentle structure to petals that curl upward too much, steam-block and pin the petals with a little weight until dry. For a relaxed, wavy garland, skip heavy blocking and pin only to shape locally.
— Variation Ideas & Scaling:
Info :
To scale the garland up, add extra sunflower motifs and increase backbone length. To make a wreath, create many more leaves and closely space flower motifs on a circular backbone (wire tube works best for wreath shape).
Tip :
Use sport or DK weight yarn with a smaller hook for a more delicate garland, or use bulky yarn and a larger hook for a bold, oversized runner; adjust petal chain and stitch increases proportionally (increase chain base by +2 per size jump).
— Full Project Checklist & Extra Info:
Info :
Make 3 large sunflowers (each: center rounds 1-13, petal templates 1-6, second layer 1-6). Make 6 small daisies (small flower rounds 1-4). Make 30 leaves (leaf rounds 1-5) in mixed colors. Crochet backbone strip to desired length or prepare wire tube. Assemble as described above.
Info :
Estimated stitch counts: large center final round 13 = 60 sts, each petal base anchored to approx every 5th stitch (=12 petals). Leaves average 10 sts across their base. Adjust counts if you prefer 10 or 16 petals per sunflower — spacing math: center round sts ÷ desired petals = spacing interval.
Info :
If any motifs are slightly different in size due to tension, use blocking and strategic placement (slightly larger motifs toward the center and smaller to the ends) to achieve visual balance.
Assembling this autumn sunflower garland is a joyful, creative journey — each petal and leaf layered like a little moment of fall. The mix of warm mustard, rust and olive greens creates a rich, cozy accent for any mantel or table. Block and arrange carefully, and you’ll have a durable heirloom-quality decoration to enjoy for seasons to come. 🧶🍁✨