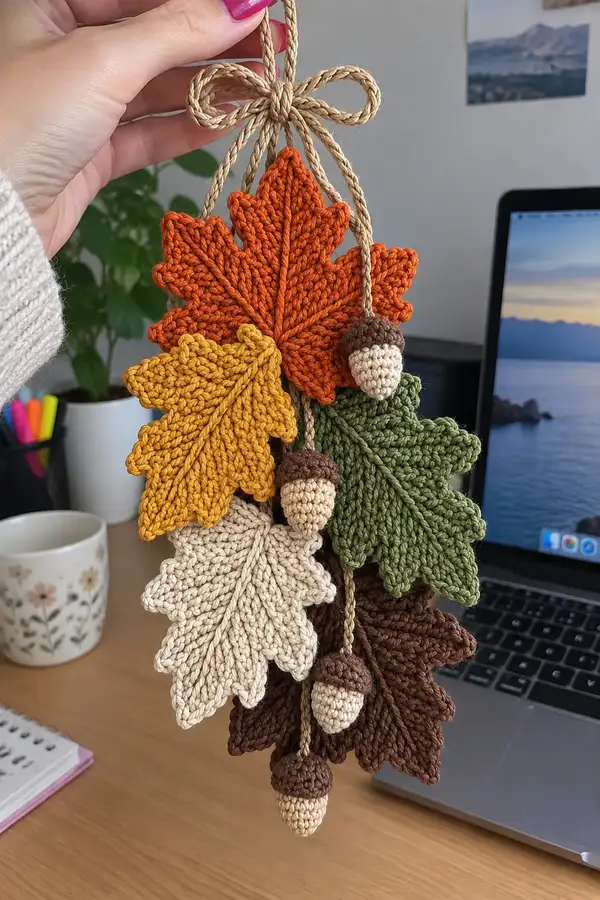
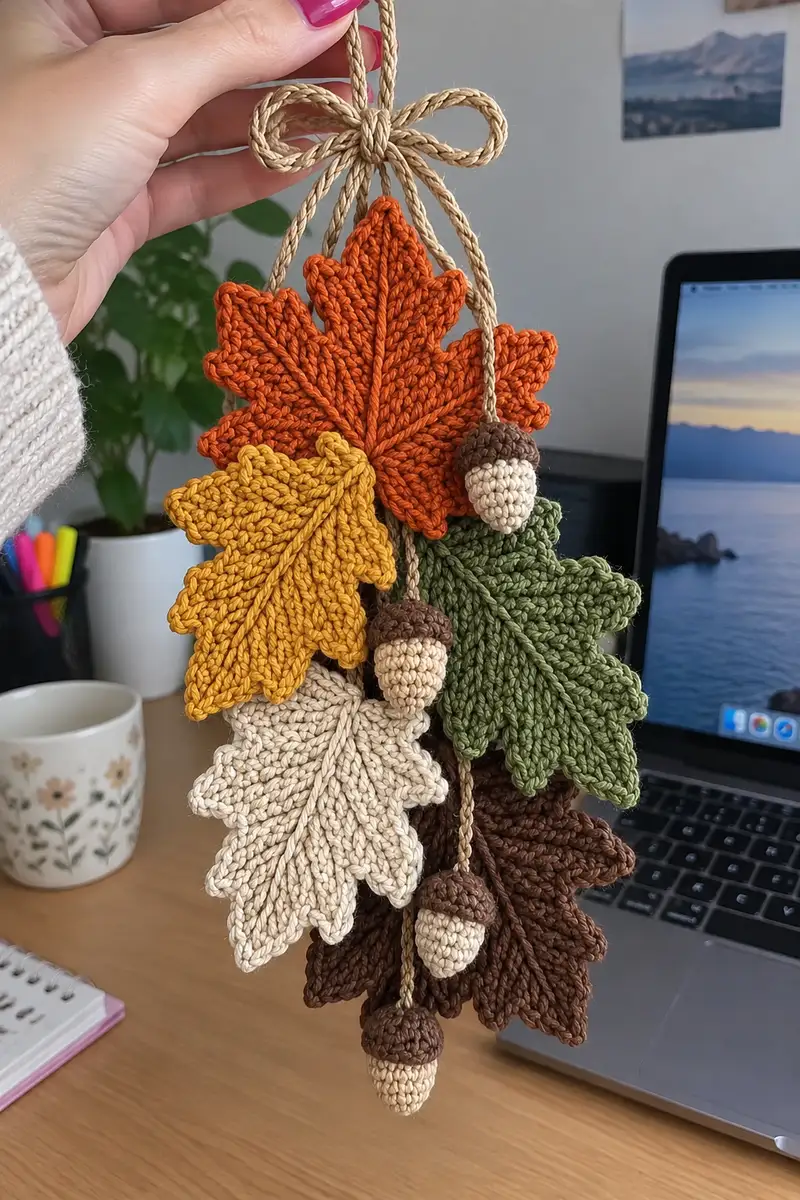
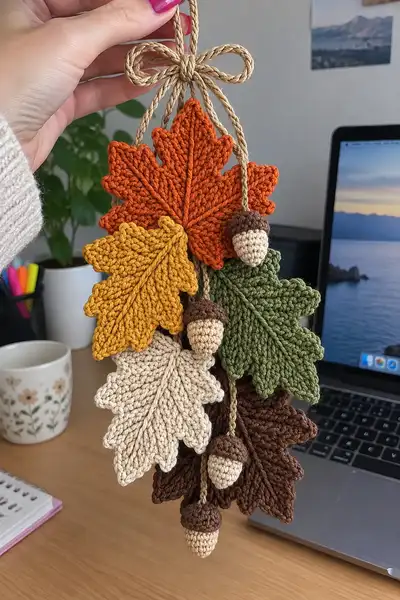
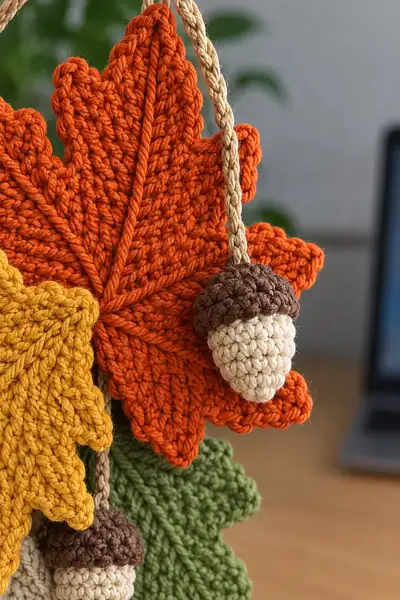
Create a cozy fall garland featuring layered crochet leaves in warm autumn tones and tiny amigurumi acorns. This pattern teaches two complementary leaf shapes (maple-style and elongated oak-style), a textured acorn, and a braided hanging cord. Finished pieces are flat with raised veins and scalloped edges for a realistic hand-stitched look—perfect for doorways, mantel displays, or seasonal gifts.
Progress Tracker
0% Complete
— Materials & Gauge :
Info :
This pattern uses worsted-weight cotton or cotton-blend for crisp stitch definition. Gauge is not critical but aim for a firm fabric: 16 sc x 18 rows = 4 in (10 cm) in single crochet when tension is firm. Leaves are worked flat and acorns in the round. Use a hook 1 size smaller for amigurumi acorns if you prefer a super-tight fabric. Make a small test leaf to confirm size and adjust hook if necessary.
— Maple-style Leaf (Large) :
Round 1 :
Ch 21. This chain will be the central spine base. Count as foundation chain; treat ch 1 as turning space (21 ch total).
Round 2 :
RS: 1 sc in 2nd ch from hook, 1 sc in next 8 ch (total 9 sc along first half of chain), 3 sc in last ch (turning point), now work down opposite side of chain: 1 sc in next 8 ch, 2 sc in next ch (last ch at base). Total sts this round 9+3+8+2 = 22 sc. (22)
Info :
We are building a symmetric leaf by working along one side of the starting chain, creating a tip with 3 sc in the center, and returning along the opposite side. Keep last stitch tension tidy to avoid a gap at the base.
Round 3 :
Ch 1, turn. (2 sc, inc) in first st, 1 sc in next 7 sts, (1 sc, inc) in next 3 sts (over tip cluster), 1 sc in next 7 sts, (inc, 2 sc) in last 2 sts. Count: left increases add 1, tip adds 3, right adds 1+ extra = total (22 + 6) = 28 sc. (28)
Round 4 :
Ch 1, turn. (2 sc, inc) in first st, 1 sc in next 9 sts, (1 sc, inc) x 3 over tip (increase across center), 1 sc in next 9 sts, (inc, 2 sc) in last 2 sts. Increase pattern distributes. Add 6 stitches. (34)
Round 5 :
Ch 1, turn. 1 sc in first 3 sts, (inc, 2 sc) x 2, 1 sc in next 12 sts, (2 sc, inc) x 2 across tip area, 1 sc in next 12 sts, (2 sc, inc) x 2 at base. This round shapes the first subtle lobes. (46)
Round 6 :
Ch 1, turn. 1 sc in first 4, (inc, 3 sc) x 2, 1 sc in next 16, (3 sc, inc) x 2 over tip, 1 sc in next 16, (3 sc, inc) x 2 at base. (58)
Info :
From round 6 onward we begin defining the major lobes. Use stitch markers at the base, tip, and left/right midpoints to track where large increases are placed—this will keep both halves symmetrical.
Round 7 :
Ch 1, turn. 1 sc in first 5, (inc, 4 sc) x 2, 1 sc in next 20, (4 sc, inc) x 2, 1 sc in next 20, (4 sc, inc) x 2 at base. (70)
Round 8 :
Ch 1, turn. 1 sc in first 6, (inc, 5 sc) x 2, 1 sc in next 24, (5 sc, inc) x 2, 1 sc in next 24, (5 sc, inc) x 2 at base. (82)
Round 9 :
Ch 1, turn. 1 sc in first 7, (inc, 6 sc) x 2, 1 sc in next 28, (6 sc, inc) x 2, 1 sc in next 28, (6 sc, inc) x 2 at base. (94)
Round 10 :
Ch 1, turn. 1 sc in each st across this round to even out—no increases. (94)
Info :
Lay the leaf flat now. You should see the general leaf outline forming. If one side looks larger, unpick back a few sts and redistribute increases evenly. Blocking at this stage (pinning flat and spraying lightly with water) will help set shape before adding veins and scalloped edge.
Round 11 :
Ch 1, turn. Work 1 sc in first 6 sts, then start shaping the first deep lobe: (hdc, dc, hdc) in next st to create a small bulge, 1 sc in next 6, (hdc, dc, hdc) across tip center, 1 sc in next 6, (hdc, dc, hdc) in corresponding mirror position, 1 sc to end. Total remains approx. (94) but stitches are rearranged for texture; maintain same count by pairing decreases where necessary.
Round 12 :
Ch 1, turn. 1 sc in each st to stabilize the bulges and blend them into the edge; work evenly across. (94)
Round 13 :
Ch 1, turn. Begin scalloped edge formation: *sc in next 4 sts, (dc, ch 1, dc) all in next st (creates a small point), sc in next 4 sts*; rep across the round mirroring on opposite side. This creates the first scalloped contour. (94)
Info :
Scallop spacing can be adjusted (sc in 3 or 5) depending on how pointy you want the lobes. Keep the count consistent by replacing 1 sc with the picot or small dc cluster as indicated; the overall stitch count will remain similar.
Round 14 :
Ch 1, turn. 1 sc in each st, working into dc clusters as single stitch; this evens the row and strengthens the scalloped points. (94)
Round 15 :
Ch 1, turn. Work surface ridge veins using FLO: 1 sc in first 6, then *FLO hdc in next 6 (pulling front loops), FLO hdc in next 6* across to mark a primary vein position. Continue similarly on mirrored half. This round reorganizes texture only; count remains (94).
Round 16 :
Ch 1, turn. 1 sc in each st to secure veins and even fabric. (94)
Info :
Now add the central spine using surface slip stitch in the next step. This provides the raised center vein visible in photos. Use a long tail or a separate strand in the same color for surface slip stitch embroidery to avoid stretching the leaf.
Round 17 :
Surface slip stitch central vein: With RS facing, join yarn at the base center with sl st, work surface slip stitch up the center of the leaf to the tip, keeping stitches even (do not go through full fabric, just surface loops). Fasten off. Info: This is decorative and does not change stitch counts.
Round 18 :
Ch 1, turn. Work a final edging row for crispness: *sc in next 2, picot (ch 3, sl st in 3rd ch from hook), sc in next 2, sl st in next st* across each scallop, repeat symmetrically. This creates small decorative points around each lobe. Count remains approx. (94).
Round 19 :
Finishing: Fasten off and weave in ends. Pin the leaf flat if desired to set the scallops and central vein. Trim stray fibers. Info: If you want an even firmer leaf, lightly starch and re-block to shape.
— Oak-style Leaf (Elongated) :
Round 1 :
Ch 17. This will be the spine of the elongated oak leaf.
Round 2 :
1 sc in 2nd ch from hook and in next 6 ch (7), 3 sc in last ch (tip), now work down opposite side of chain: 1 sc in next 6 ch, 2 sc in last ch at base. Total (7+3+6+2)=18 sc. (18)
Round 3 :
Ch 1, turn. (2 sc, inc) in first st, 1 sc in next 5, (1 sc, inc) in next 3 (tip), 1 sc in next 5, (inc, 2 sc) in last 2 sts. Add 6 sts. (24)
Round 4 :
Ch 1, turn. 1 sc in first 3, (inc, 2 sc) x 2, 1 sc in next 8, (2 sc, inc) x 2, 1 sc in next 3. (30)
Round 5 :
Ch 1, turn. 1 sc in first 4, (inc, 3 sc) x 2, 1 sc in next 12, (3 sc, inc) x 2, 1 sc in next 4. (36)
Info :
Oak-style leaf uses smaller lobes repeated along the edge. Use stitch markers to mark where each little point will be so increases are evenly spaced along both sides.
Round 6 :
Ch 1, turn. 1 sc in each st across to stabilize shape. (36)
Round 7 :
Ch 1, turn. Begin forming lobes: *sc in next 2, (hdc, dc, hdc) all in next st, sc in next 3* across, mirror on return. This creates small pointed lobes (36)
Round 8 :
Ch 1, turn. 1 sc in each st across to even out the lobe edges. (36)
Round 9 :
Ch 1, turn. Work scallop edging: *sc in next 3, picot (ch 3, sl st in 3rd ch from hook), sc in next 3, sl st in next st* repeat across. (36)
Round 10 :
Ch 1, turn. 1 sc in each st across to secure scallops. (36)
Info :
Surface veins: for oak leaf we add a single central vein and 3 pairs of side veins. Use surface slip stitch or embroidery with a strand of the same color or slightly darker for contrast. Work veins before final blocking to avoid distorting shape.
Round 11 :
Surface slip stitch central vein: Join yarn at base center and work surface slip stitch all the way to tip in even spacing. Fasten off. (No change to count)
Round 12 :
Surface slip stitch side veins: Starting near the base, create short surface slip stitch veins angling to the lobes: 3 on each side, each approx. 6-8 slip stitches in length, fasten off. (No change to count)
Round 13 :
Final round: 1 sc in each st, then fasten off and weave in ends. Block to set shape and scallops. (36)
— Small Leaf Variation (Medium-sized) :
Round 1 :
Ch 13. 1 sc in 2nd ch from hook and next 4 ch (5), 3 sc in last ch (tip), 1 sc in next 4 ch back, 2 sc in last ch (base). (5+3+4+2)=14 sc. (14)
Round 2 :
Ch 1, turn. (2 sc, inc) in first st, 1 sc in next 3, (1 sc, inc) x 3 over tip, 1 sc in next 3, (inc, 2 sc) in last 2 sts. Add 6 sts. (20)
Round 3 :
Ch 1, turn. 1 sc in each st across. (20)
Round 4 :
Ch 1, turn. Scalloped edge: *sc in next 2, picot, sc in next 2* across, fasten off. (20)
Info :
Small leaves are useful to layer under larger leaves for depth. Make several in supporting colors to create fullness in your garland.
— Acorn (Make 4-6) :
Round 1 :
Using light tan yarn: mr, 6 sc in magic ring. (6)
Round 2 :
Inc around (6 inc). (12)
Round 3 :
(1 sc, inc) x 6. (18)
Round 4 :
(2 sc, inc) x 6. (24)
Round 5 :
(3 sc, inc) x 6. (30)
Info :
At round 5 you have reached the widest point of the acorn body. From here we taper downward to form the nut shape. Keep your tension firm to avoid visible stuffing later.
Round 6 :
1 sc in each st around. (30)
Round 7 :
(3 sc, dec) x 6. (24)
Round 8 :
1 sc in each st around. (24)
Round 9 :
(2 sc, dec) x 6. (18)
Round 10 :
Start stuffing firmly but smoothly with polyester fiberfill. Stuff small amounts at a time, smoothing seam lines and keeping a tapered bottom. 1 sc in each st around. (18)
Round 11 :
(1 sc, dec) x 6. (12)
Round 12 :
Dec around (6). (6)
Round 13 :
Fasten off light yarn leaving long tail for sewing. Weave tail through remaining 6 sts, pull to close and secure. Hide tail inside nut. Info: This completes the nut portion.
Round 14 :
Using brown yarn for cap: mr, 6 sc in magic ring. (6)
Round 15 :
Inc around (6 inc). (12)
Round 16 :
(1 sc, inc) x 6. (18)
Round 17 :
Work 1 sc in each st for 2 rounds to build cap height (18, 18).
Info :
Make the cap slightly wider than the underlying body so it sits naturally over the nut. You can texture the cap with a round of slip stitches in spiral or work popcorn clusters for a bumpy look.
Round 18 :
Round of sl st texture: With RS facing, join in first st and work sl st in each st around in continuous spiral which produces a textured cap surface. Fasten off leaving long tail. Attach cap to nut by sewing through cap base and nut top; hide ends inside the acorn. Stuff cap slightly if needed for roundness.
Round 19 :
Optional: Add a short stem by chaining 6 in brown from the cap top, sl st into first ch to create a small loop, fasten off and sew securely. For hanging, leave a longer chain and braid with other cords as instructed later.
— Braided Hanging Cord & Loop :
Round 1 :
Cut three long strands of coordinating yarn (approx. 40-60 in / 100-150 cm each depending on desired hanging length and number of leaves). Fold strands in half, secure center to a small ring or gather and tie a knot to form loop for hanging. This is not crocheted; it is a prepared cord.
Round 2 :
Braid the three strands tightly for approx. 20-25 inches for main drop, leaving ends loose for attaching leaves. Secure ends with a tight knot. Tip: Taper the end of each strand with a few back stitches or a touch of fabric glue to avoid fraying.
Info :
For a more polished look you can make a twisted cord by crocheting a long chain with 3-4 strands held together and slip stitching the chain into a rope. The pictured garland uses a braided natural-fiber look, so choose a non-stretch cotton yarn to mimic that texture.
Round 3 :
Attachment tails: Cut shorter braided strands (approx. 6-12 in / 15-30 cm) to suspend leaves and acorns at staggered heights. Knot these to the main braid at desired intervals, or use a small sewn loop to attach each leaf and acorn securely.
Round 4 :
Finishing loop: Form a decorative bow at the top by tying a separate short braid into a bow and sewing it to the hanging loop. This hides the knot and creates the bow pictured in the photograph.
— Edge Scallop & Veining Details :
Round 1 :
Edge scallops: With RS facing, join yarn at any base point and work *sc in next 2 sts, picot (ch 3, sl st in 3rd ch), sc in next 2, sl st in next st* around each lobe; this sharpens and defines each point on both maple and oak leaves. Fasten off and weave in ends.
Round 2 :
Raised veins: Use surface slip stitch or embroidery with yarn tail or a contrasting strand. For each leaf, start at base and work straight to tip for central vein. Add two to four pairings of side veins depending on leaf size. Use even spacing to keep a natural look. Info: Use a tapestry needle for surface embroidery if preferred over a crochet hook.
Info :
For extra depth, work one round of BLO single crochet around the perimeter before scallops to create a rim that lifts the scallops away from the base slightly. This is particularly effective on cotton yarn which blocks well.
— Assembly & Layering :
Round 1 :
Plan layout: Lay your braided cord flat and arrange leaves and acorns in the order and heights you want; stagger colors for visual balance. The photographed garland uses a cluster approach (two leaves on top, layered leaves in middle, acorns hanging below).
Round 2 :
Pin placement: Use blocking pins to temporarily secure leaf placement on a flat surface or pin them to the braid to ensure they drape the way you want before sewing. This helps finalize exact positions and heights.
Round 3 :
Sew leaves: Using a yarn needle and matching yarn color, attach each leaf to its short braided tail or directly to the main braid by stitching through the leaf base (the two stitches at the base center). Use ladder stitch or whip stitch to sew the base flat and secure with 8-12 small stitches for stability. Fasten off and hide tails.
Round 4 :
Attach acorns: Thread the chain or short braid through the small loop or stem created on each acorn cap. Knot the braid tightly above the cap, and secure with a couple of stitches into the cap base so the acorn does not slide off. For extra durability add a drop of fabric glue under the knot if desired.
Round 5 :
Layering tip: Slightly overlap leaf edges when assembling to create dimension. Sew only at the base so leaves can retain some movement. Consider a small stitch between overlapping leaves to keep them positioned as a cluster.
Round 6 :
Final touches: Once all pieces are sewn in place, hang the garland and step back to ensure balance. Trim any long tails and weave in all ends. Block again if edges need reshaping. Your garland is now ready to display.
— Variation Notes & Colorwork :
Info :
Color changes: Change yarn color between leaf sections or make some leaves variegated by switching colors at the start of a row. For stripes, carry yarn along the wrong side and catch it every 4-6 sts to keep floats small. If crocheting in cotton, color changes reveal clean edges—fasten off between colors for a crisp look.
Info :
Making more leaves: Multiply patterns as needed. The photographed garland contains 6-8 leaves and 4 acorns; adjust quantity to suit your space. For a fuller garland make 10-12 leaves in assorted sizes.
Info :
Storing and washing: Handwash gently in cool water, reshape while damp and lay flat to dry. Cotton yarn can be ironed on low under a damp cloth if needed to reshape scallops.
This autumn leaf and acorn garland is a lovely seasonal accent that combines textural crochet leaves and tiny amigurumi acorns into a cohesive display. Each detailed leaf brings a handcrafted warmth to tabletops, doorways, or mantels — a perfect cozy project to celebrate the changing seasons. I hope this pattern inspires you to make a few extra as gifts or decorations. 🍁🧶