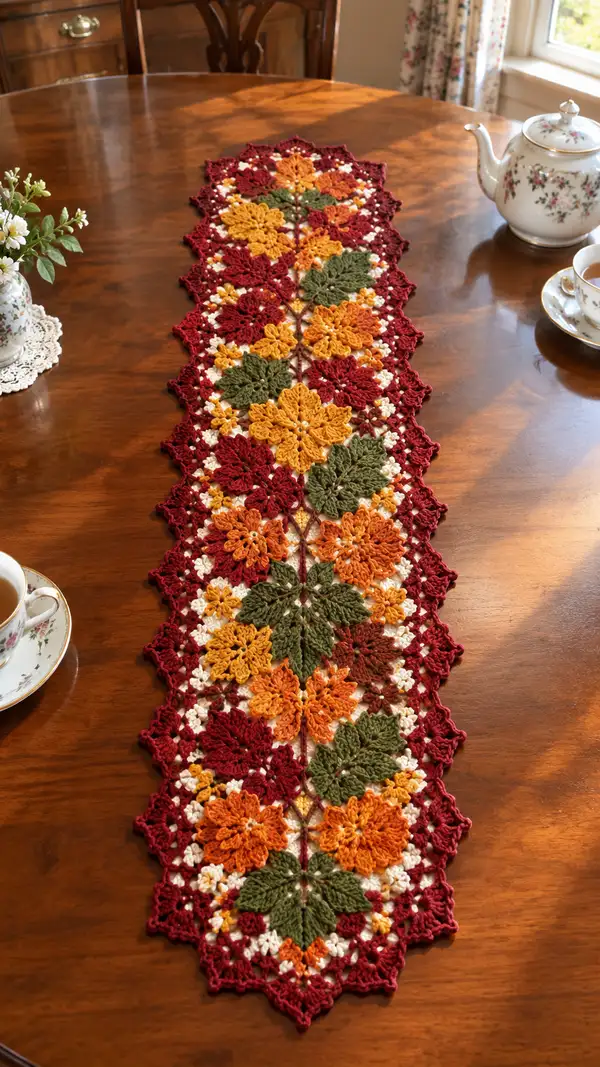
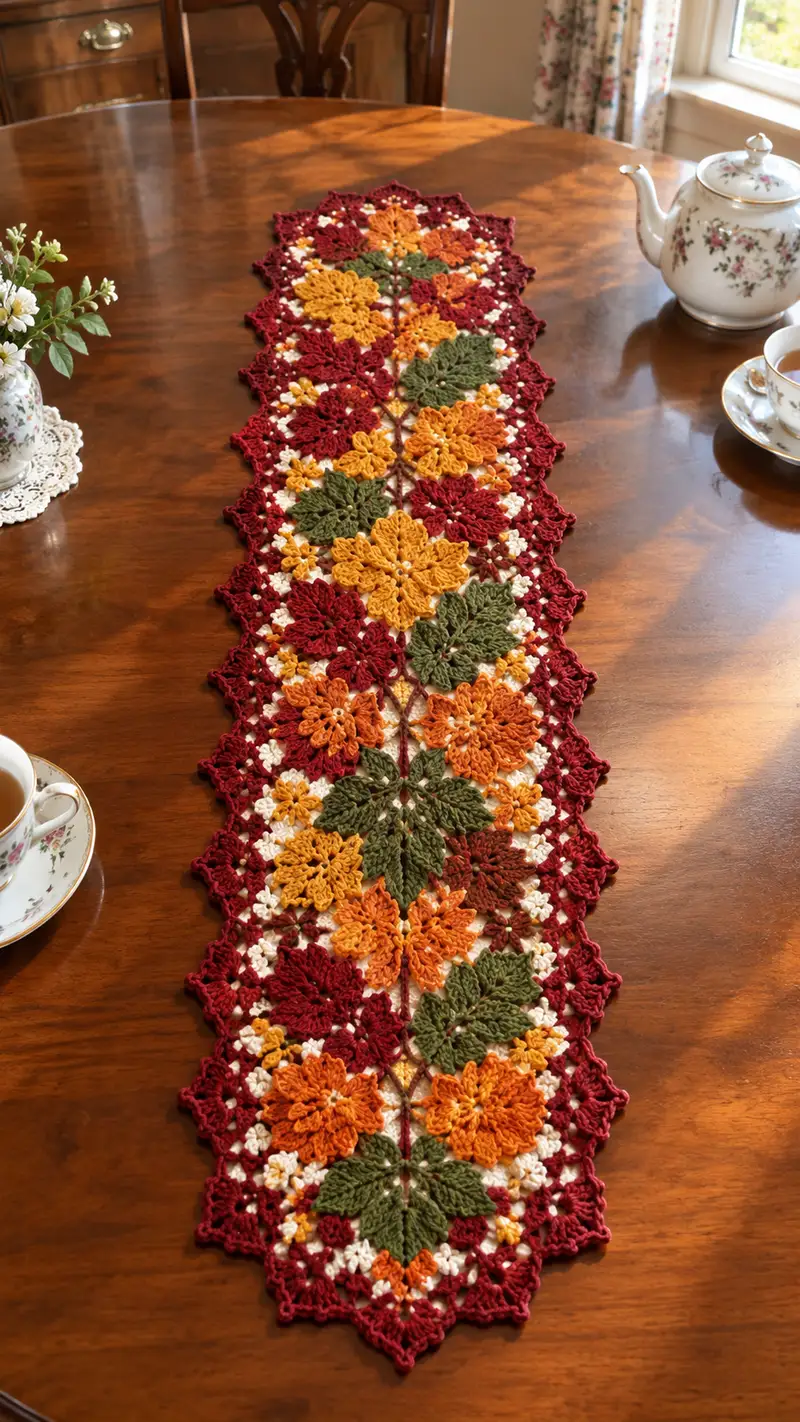
Create a warm, autumn-inspired table runner made from floral and leaf motifs joined into a lacy, elongated centerpiece. This pattern uses warm reds, golds, orange and olive greens with a cream background and a decorative scalloped burgundy border. The runner is constructed from individual motifs joined as you go and finished with a textured edging for a polished look. Perfect for seasonal decor, holiday tables, or as an elegant handmade gift.
Progress Tracker
0% Complete
— Notes & Gauge :
Info :
This pattern is modular: you will crochet individual flower motifs, leaf motifs, and small filler motifs, then join them into an elongated runner. Gauge for a single large flower motif across widest point (before blocking) is approximately 11-12 cm using 3.5mm hook and worsted yarn when following specified stitch counts. Adjust hook if you need slightly larger or smaller motifs.
Info :
Puff stitch: Yarn over, insert hook, yarn over and pull up loop (3 loops on hook), yarn over, insert into same stitch, pull up loop (5 loops), yarn over, insert into same stitch, pull up loop (7 loops), yarn over and draw through all 7 loops, ch1 to close puff. You can make a 5-loop puff if you prefer smaller texture; counts below assume 7-loop puff where labeled 'puff'.
— Large Flower Motif (Make 12 - alternating colors) :
Round 1 :
mr, ch1, 8 sc in mr, sl st to first sc to join (8)
Round 2 :
ch4 (counts as tr), *skip next sc, tr in next st, ch1; rep from * around to create 8 spokes, sl st to top of ch4 (8 spokes)
Round 3 :
Work in ends of spokes: *in ch-space: (ch3, puff, ch3, sl st into base between spokes) x 1 to form petal base; rep around to make 8 petal bases (8 petals)
Info :
Change to petal color now if making multi-color petals. Carry color or fasten off and join as preferred.
Round 4 :
Join petal color in base of first petal, (ch3, puff, ch3, sl st into same sp) to complete petal with a rounded puff center; sl st into next base, rep around to make 8 full puff-petals (8)
Round 5 :
ch1, sc in same st, *ch2, sc in center top of next petal (top of puff), rep around to create chain arches encircling petals (8 sc, 8 ch2 spaces)
Info :
Center decorative cluster: you can optionally add a tiny 5-sc bobble cluster in the center using cream to mimic the tiny cream dots seen in the photo.
Round 6 :
Using cream for small center accent: join cream in any sc, (ch1, sc in same st) x5 to make small 5-sc center, sl st to first sc and fasten off (5)
Round 7 :
Rejoin petal color at back of a petal base, ch1, *sc in next 3 sts along petal edge, (hdc, dc) in center arch space, (hdc) in next arch, sc across base; rep around to shape petal edges and create flat surface (approx. 40 sts total)
Round 8 :
1 sc in each st around to tidy petal edge (40)
Round 9 :
(3 sc, inc) x8 (48)
Info :
Work this round tightly to give the flower body a sturdy shape. Use a stitch marker at round start. This round forms the outer base to join with surrounding filler motifs later.
Round 10 :
1 sc in each st (48)
Round 11 :
(4 sc, inc) x8 (56)
Round 12 :
1 sc in each st (56)
Round 13 :
BLO: 1 sc in each st BLO (56)
Round 14 :
ch1, *sc3tog over next 3 sts making a shallow picot cluster, ch2, sl st in next st to create tiny decorative scallops; rep around (approx. 28 scallops)
Info :
Fasten off leaving long tail (12-15 cm) for joining. Block each flower flat with pins to a gentle round, shaping petals outward so that when motifs are joined they sit evenly.
— Leaf Motif (Make 12) :
Round 1 :
mr, ch1, 8 sc in mr, sl st to first sc to join (8)
Round 2 :
ch2 (counts as hdc), (hdc, ch2, hdc) in first st to start teardrop, *hdc in next 3 sts; at end work (hdc, ch2, hdc) to create pointed tip; sl st to join (12)
Round 3 :
Turn work and along one side of teardrop work: ch1, sc across next 6 sts, (hdc, dc, tr) in tip ch2 space, continue sc across remaining 6 sts on other side; sl st to first sc to close (approx. 22)
Round 4 :
Working along leaf edges: *ch2, (sc, hdc, dc) evenly spaced into next few edge loops to form a textured serration; rep around both sides and finish with sl st at base (approx. 32)
Info :
Leaf vein: with contrasting darker green or same yarn, use surface slip stitches or embroidery to create a central vein following the length of the leaf. Make 3-4 short veins for realistic look.
Round 5 :
(BLO) 1 sc in each st BLO around to define the back ridge (32)
Round 6 :
sc2tog, sc in next 6, *(ch1, puff in next st, ch1, sc in next 3) to add small textured lobes along edges, rep until end, sl st to join (approx. 28-30)
Info :
Fasten off leaving 12 cm tail for joining. Slightly block leaves to flatten and shape if necessary. For a more dimensional leaf, use a small dab of starch spray and pin edges up while drying.
— Small Filler Motif (Make 24) :
Round 1 :
mr, ch1, 6 sc in mr, sl st to join (6)
Round 2 :
ch3, *dc in next st, ch1; rep around for little open spaces, sl st to join (6 dc, 6 ch1 spaces)
Round 3 :
Join cream and work (ch1, sc) into each ch1 space and (sc) into each dc to make compact little clusters; fasten off leaving tail for joining (12)
Info :
These little clusters act as bright highlights between large motifs. Place them in the runner plan so they occupy the triangular gaps and create the cream dotted look shown.
— Small Four-Petal Accent (Make 24) :
Round 1 :
ch4, sl st to form a ring, ch1, *(ch2, 3 dc in ring, ch2, sl st) x4 to make 4 small petals; fasten off (4 petal cluster)
Info :
These are little cornflower-like accents that sit between flowers and filler motifs; crochet them in mustard and burnt orange to echo the image.
— Assembly Plan & Join-As-You-Go Strategy :
Info :
Layout plan: runner is composed of a central column of alternating large flower motifs and leaf motifs linked by crossed joining bars, with small filler motifs and 4-petal accents filling negative spaces. Typical sequence along length: Flower - Leaf - Flower - Leaf - Flower, mirrored symmetrically so runner ends in a point formed by a single flower/leaf cluster. Make the specified number of each motif and block them all flat before joining.
Info :
Join-as-you-go technique used: On the final round of a motif (usually the outer rounds 9-14 for flowers or 5-6 for leaves), you will pick up corresponding chain spaces or sc on the adjacent motif and sl st or sc to connect. Use pins to position motifs and ensure even spacing before joining.
Info :
Suggested joining order for one runner: create 6 central flower motifs, 6 leaf motifs, 12 filler clusters and 12 small accents to make a runner of similar length. Adjust motif counts to increase or decrease runner length.
— Joining Sequence (Detailed rounds used for join-as-you-go):
Round J1 :
Work final joining round on a flower: ch1, sc in next 4 sts, when you reach the edge that meets another motif, insert hook into corresponding sc or ch-space on blocked neighbor and sl st to join, ch1, continue sc around making 6-8 joins per flower as per alignment; finish round and fasten off leaving tail for reinforcement
Info :
Always align motifs on the layout board exactly as they will appear on the finished runner before performing any join-as-you-go stitches. Measure equal distances from motif center to motif center to keep a straight runner edge.
Round J2 :
If joining two petals to a filler: from the filler motif, pick up sl st into the ch-space created by flower round 5 and sl st to adjacent filler sc, ch1 to return, then continue around filler. Secure ends and weave in later.
Info :
When making diagonal cross bars between large motifs, use burgundy yarn: ch8, sc in 2nd ch from hook, sc across chain, then sc into target motif space; make 4 such bars for each crossing to recreate the lattice visible in the photo.
— Border Edging (worked after all motifs are joined) :
Round B1 :
Using burgundy: join in any outside stitch at runner edge, ch1, *sc in next 3 sts, ch3, skip 2 sts, sc in next 5 sts; rep all way around to create a foundation for scallops (maintain counts so scallops fall on motif points)
Round B2 :
Into each ch3 space work (sc, hdc, 3 dc, hdc, sc) to form pronounced scallops; in the 5-sc sections work 5 sc to keep border flat; continue around and sl st to join
Info :
At runner points (the triangular ends), work extra shells by increasing to (sc, hdc, 5 dc, hdc, sc) to create the pointed tip visible in the photo. Block strongly while wet to emphasize scallops.
Round B3 :
Edge finish: *ch1, picot (ch3, sl st into first ch), sc into next sc between scallops to create tiny decorative points; rep around, sl st and fasten off; weave in ends
Info :
Optional: add a final round of small looped picots along scallop edges for extra texture. Use a smaller 3.25mm hook if you want tighter picots.
— Detailed Step-by-Step Joining & Placement (Long form) :
Info :
Begin by placing a central row of flower motifs evenly spaced. Between each pair of flowers insert a leaf motif slightly offset so the tips of leaves overlap the petal edges and create a staggered vertical line. Use 4 small filler clusters arranged into triangular pockets at the 4 corners around each flower where two flowers meet diagonally.
Join Step 1 :
Pick a flower motif and lay adjacent flower to its north-east position. On the outer round of the south-east petal area, sc in next 3 sts, then into the corresponding outer sc of adjacent flower sl st to join. Repeat symmetric joins for each petal meeting point until motifs sit tightly without puckering.
Info :
Do not over-tighten join stitches—allow a small amount of give to maintain lacy look. Reinforce with a second matching sl st if you notice gaps after blocking.
Join Step 2 :
Attach leaf motifs: align the leaf base with the small gaps left between four petals; using leaf tail, whip stitch neatly around base through back loops only to make joins less visible from the right side. For stronger join, make 3 sl st connections evenly spaced around the base.
Join Step 3 :
Attach small filler motifs into triangular spaces: on filler round 3 leave long tail and use that to sew through corresponding scs on flower and leaf bases; tuck ends and weave into underside stitches.
Info :
Work slowly across the runner: join one row completely before starting the next to maintain a straight center line. Use pins to line up centers when joining to neighbor motifs in the next row to avoid an S-curve in the runner.
— Blocking & Finishing :
Info :
After joining all motifs and completing the border, wash gently in lukewarm water with mild soap to relax fibers. Pin the runner to a blocking board to exact measurements, pulling scallops into well-shaped arcs and points. Let dry fully before removing pins.
Info :
Weave in ends carefully on wrong side, and use an invisible stitch for any remaining seam reinforcement. If desired, press with iron on low heat through a damp cloth to flatten any remaining irregularities.
— Optional Size Adjustments & Variations :
Info :
To make a shorter runner, remove one flower-leaf pair from the central sequence and rejoin border accordingly. To make a wider runner, add mirrored columns of the entire motif layout and expand filler motif counts proportionally.
Info :
For a more subtle look, use toning neutrals instead of high-contrast cream. For a festive holiday variant, swap mustard and burnt orange for holly red and gold and add metallic thread to the scallop edges.
— Troubleshooting Tips During Making :
Info :
If scallops pull in too much after border rnd 2, wash and re-block with less tension or reduce dc count in shell from 3 to 2. If join-as-you-go creates wavy seams, loosen tension slightly and add an extra sl st reinforcement every 4 joins.
Info :
Keep a sample motif as a tension gauge. If your motifs are slightly larger, try a 3.25mm hook for border work to keep edge neat and crisp.
Completing this runner is such a rewarding project — the floral motifs and textured scalloped edge make a dramatic seasonal centerpiece. The modular motif approach lets you crochet in small, satisfying bursts and assemble a striking, finished piece that looks far more intricate than the effort required. I hope this becomes a festive staple on your table or a treasured gift for someone special. 🧶🍂✨