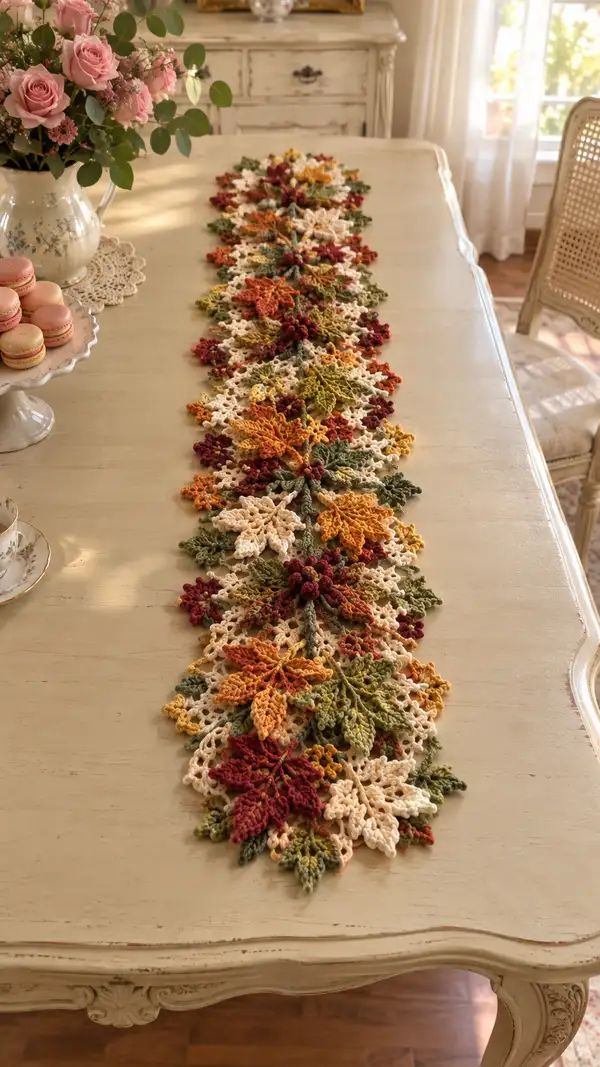
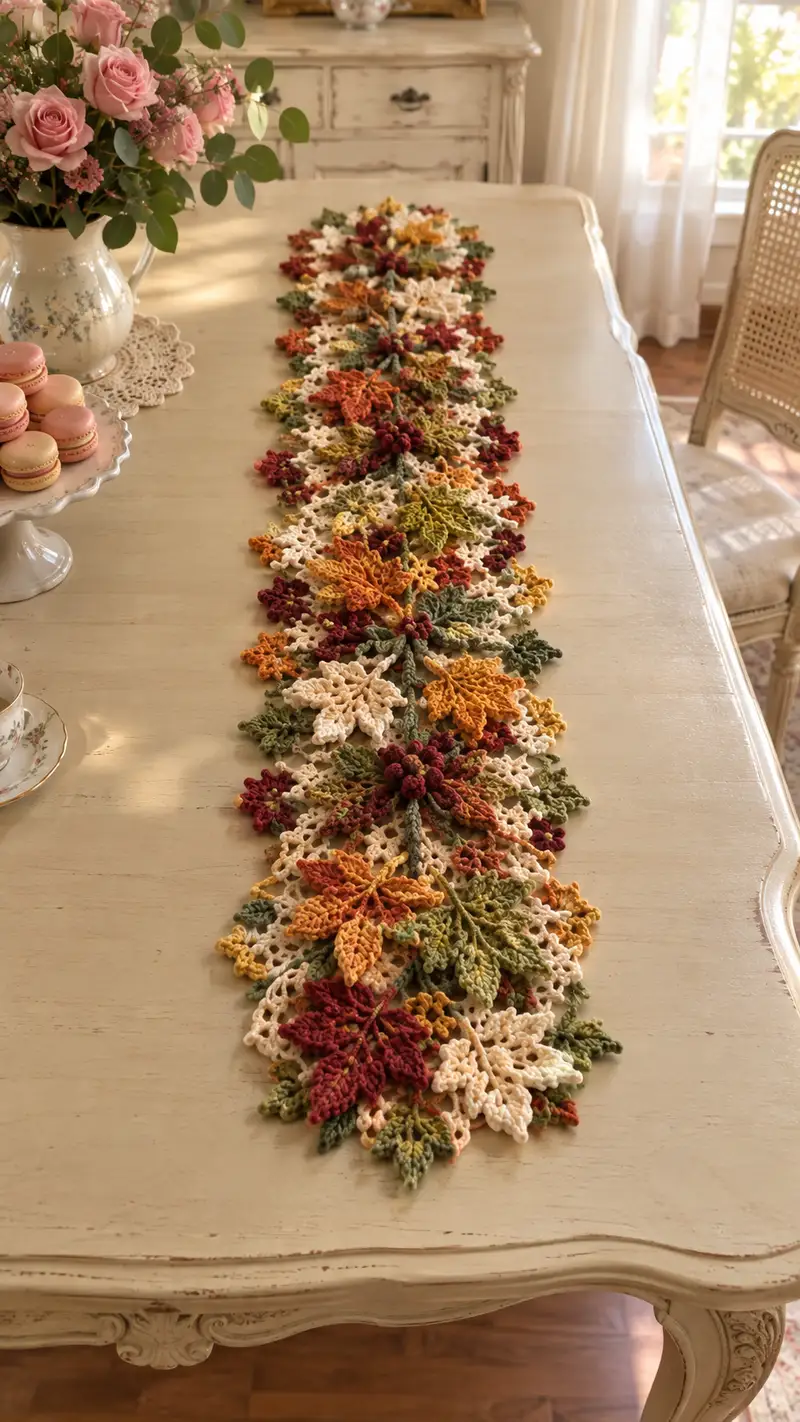
A long, elegant table runner of layered crochet leaves, delicate lace medallions and tiny berry clusters in mustard, cream, olive and burgundy. This pattern recreates the textured autumn centerpiece shown in the photo with modular motifs joined into a continuous runner. Detailed stitchwork, picots and puff clusters give depth and a hand-dyed look—perfect for seasonal decor or an heirloom table accent.
Progress Tracker
0% Complete
— Notes & Gauge :
Info :
Gauge is not critical for this decorative runner but for reference one leaf medallion (finished and blocked) measures approximately 8-9 cm across when worked in DK cotton using a 3.5mm hook. Use a 3.0mm hook for firmer puff clusters if necessary. Work tightly enough that puff stitches close without large holes, but not so tight that picots and lace lose their drape.
Info :
Pattern uses join-as-you-go (JAYG) for many motifs. Where joining instructions are given, pin motifs first and work the joining round into both motif edges as described. Block all motifs before final joining for best results.
— Main 8-Point Leaf Medallion (Make as many as needed) :
Round 1 :
MR, ch3 (counts as dc), 11 dc into ring, sl st to top ch3 to join (12 dc)
Round 2 :
ch3, 1 dc in same st, (ch2, skip next dc, 2 dc in next dc) x 5, ch2, sl st to top ch3 (6 leaf anchors, 12 dc total)
Round 3 :
Work into each leaf anchor: (ch4, (sc, hdc, dc, hdc, sc) worked along a short petal shaping across the ch-2 space, ch4, sl st to next 2-dc cluster top) x 6 (creates 6 small petals around center)
Round 4 :
Change to BLO for a ridged center ring: ch1, 1 sc in each top of petals around (36 sc) - work 6 sc into each petal area to form a firm base (36)
Info :
Switch to main leaf color now (mustard or cream, depending on your color layout). Carry unused yarn or fasten off and rejoin; carrying gives fewer ends but can show on the front if not managed neatly.
Round 5 :
Begin leaf points: [ch6, 1 sc in 2nd ch from hook, 1 hdc in next, 3 dc in next, 1 hdc, 1 sc] sl st to base. Repeat this leaf-point unit 8 times around, spacing evenly using the sc foundation (8 leaf points, each point occupies approximately 4 sc bases)
Round 6 :
For deeper texture work each leaf point: sl st into first ch of the point, (ch1, 1 sc, 1 hdc, 5 dc, 1 hdc, 1 sc) across each point; sl st to base between points (creates fuller petals)
Round 7 :
1 sc in each base between points and into sl sts around to tidy (64 sc total approximate; counts will vary slightly due to chain spacing)
Info :
Work even and stop to steam/block if needed; this is the base medallion. Place a stitch marker at the top of one petal to orient the medallion for later joining.
Round 8 :
Form leaf veins: ch1, working in FLO along each leaf petal underside use (sc, ch3, sc) to create small loops (work 4 small loops per petal). This creates spaces for later raised veins.
Round 9 :
Change color to contrast for vein (olive). Surface crochet using sl st along chosen lines (work from center outward across three petal lobes per leaf). No stitch count change - visual technique only.
Round 10 :
Begin shaping outer scallop: switch to background color (cream) for a lace frame. *Ch7, skip to next petal base, sl st* around, ending with 6 ch7 loops (6 loops)
Info :
Blocking tip: pin each ch-loop out during blocking to open lace. If you prefer a denser runner, work ch5 loops instead of ch7.
Round 11 :
Into each ch7 loop work (sl st, ch3, 3 dc, ch3, sl st) to create lacy arches - this forms the medallion connector points (6 arches)
Round 12 :
Ch3, dc in arch top, (ch2, dc) x 2 into arch, sl st to base; repeat in all arches to create small lace fans. Maintain same number of fan units as arches (6)
Round 13 :
Switch to a variegated or accent shade if desired: at the tip of each leaf point add a puff cluster to mimic leaf curling. Puff cluster: (yarn over, insert, pull up loop) x 4, yarn over and pull through 8 loops, ch1 to close. Work 6 tiny puffs around the medallion, spacing evenly.
Round 14 :
1 sc in each st around the outer fans to tidy edges. Count approximately 72 sc depending on exact tension and previous arches (72 sc approx)
Info :
Place light stuffing or thin interfacing under center only if you want a slightly raised medallion. Do not overfill; this is a flat decorative piece.
Round 15 :
Edge picot round for crisp definition: *sc2tog over two stitches, ch3, sl st into first ch (picot made), 3 sc in next 3 stitches* around to create alternating picot clusters. Final count will be a multiple of the picot cluster repeats; expect ~60-72 stitches.
Round 16 :
Fasten off if you will join later; leave a 20 cm tail for join-as-you-go. Weave in ends after blocking.
Info :
Repeat this Main 8-Point Leaf Medallion in varied colors (mustard, cream, olive) to build the runner length. Alternate colors and blocked orientation for a natural look.
— Secondary Small Leaf Motif (Make many fillers) :
Round 1 :
MR, ch3 (counts as dc), 7 dc in ring, sl st to join (8 dc)
Round 2 :
ch1, sc in same st, (ch4, sl st to next dc top) x 7 forming 8 mini loops for tiny leaf lobes (8 loops)
Round 3 :
Work each loop: into loop work (sc, hdc, 3 dc, hdc, sc), sl st to base between loops. This forms 8 small pointed lobes around center.
Round 4 :
1 sc around to tidy (approx 40 sc depending on tension) and then sl st to start.
Info :
Make these small leaves in mustard, rust, or cream to tuck between larger medallions. They act as fillers and help create the flowing runner edge.
Round 5 :
Optional raised central vein: change to olive, surface sl st from base to tip along one lobe. Fasten off and block flat.
Round 6 :
Fasten off leaving tail for sewing. Make approximately 20-40 small leaves depending on runner length and density desired.
— Long Veined Leaf (Make pairs to layer over medallions) :
Round 1 :
Ch6, join with sl st to form a ring, ch1, 12 sc into ring, sl st to join (12 sc)
Round 2 :
ch3, 1 dc in same st, (2 dc in next st) x11, sl st to top ch3 (24 dc)
Round 3 :
Shape leaf: ch4, (sc, hdc, 3 dc, hdc, sc) in next dc, sl st to next dc repeat to form 6 long leaf lobes on one side (6 lobes)
Round 4 :
Flip and mirror the same along the opposite side to create a long leaf shape: ch4 and work matching lobes opposite, sl st to base.
Round 5 :
Working along center chain from base to tip, use surface single crochet (or sl st) in olive to create a central raised vein. Fasten off and weave tail.
Info :
These long, veined leaves layer beautifully over medallions for a 3D effect. Make them in graduated sizes by adding one additional dc repeat for larger leaves if needed.
— Berry Cluster (Make many for centers and accents) :
Round 1 :
MR, ch1, 6 sc in ring (6)
Round 2 :
Work 6 small puffs in each st around: *puff stitch (yo, insert, pull up loop) x3, draw through all loops, ch1 to close puff* repeated 6 times. Fasten off leaving tail. This forms a mini berry cluster of 6 puffs.
Info :
Use burgundy or deep rust for berries. Make 10-20 clusters depending on runner density. Sew them at medallion junctions and tuck under leaf layers for realism.
— Background Lace Connector Motif (Hex Lace Medallion) :
Round 1 :
MR, ch4 (counts as tr), 11 tr into ring, sl st to top ch4 (12 tr)
Round 2 :
ch1, 1 sc in same st, *ch5, skip next tr, sc in next tr* repeat around to create 6 ch-5 loops (6 loops)
Round 3 :
Into each ch-5 loop work (sc, ch3, 5 dc, ch3, sc) to create open fans; sl st between fan tops. (6 fans)
Round 4 :
Ch1, sc around fans to tidy (approx 48 sc). Finish with sl st and change color to cream for a lacy background.
Info :
These background hex lace medallions sit between leaf medallions and create the long runner negative space. Make one for each junction along the runner length minus one (pattern layout guides included later).
Round 5 :
Edge: ch7 loops between fan points for picot decoration. Into each ch7 loop work (sl st, ch3, 3 dc, ch3, sl st) as a small decorative fan. Fasten off and block flat.
— Assembly & Join-As-You-Go (JAYG) Layout :
Info :
Plan layout before joining. The sample runner in the photo alternates Main 8-Point Leaf Medallions with Hex Lace Medallions connected by long veined leaves and clustered small leaves/berries filling gaps. A good starter layout: [Leaf Medallion - Lace Hex - Leaf Medallion - Lace Hex - Leaf Medallion] repeated to desired length. Use photos as reference to stagger colors and orientations for natural flow.
Round 1 :
To JAYG: with one medallion placed and blocked, align second medallion overlapping the first at 2-3 fan points. Rejoin cream yarn at an outer fan edge of the second medallion and work a joining round of sc along the overlapping fan placing sc through both motif loops at the positions where they meet. Work 1 sc in both motifs through the fan base at each overlap point to secure.
Round 2 :
Continue joining at 6 overlap points or as needed for your layout. Use removable pins to hold motifs. Always join with the background lace color for a subtle seam.
Info :
If you prefer sewing joins, use matched yarn and mattress stitch along the prepared edges, sewing through the fans and ch-loops to hide the seam. JAYG gives a cleaner single-round seam but requires careful alignment.
Round 3 :
After joining medallions, tuck and sew long veined leaves along the runner centerline by stitching them into the outer loops of medallions where the lace fans align. Use ladder stitch or whipstitch through the back loops only to keep the front neat.
Round 4 :
Sew berry clusters at the junction of medallions and leaves using the berry cluster tail. Use 4-6 secure passes through the base of the cluster and the medallion to ensure they do not pull loose. Weave tails inside motifs for best finish.
Info :
When joining, keep the runner flat by alternating which side you join on (slightly offset) so both edges lie evenly. Pin frequently and step back to check overall alignment and symmetry.
— Edge Finishing and Border (Scalloped Edge) :
Round 1 :
With runner assembled and blocked, attach cream yarn along one long edge where medallion fans create small chain loops. Work 1 sc in each visible loop and ch-2 spaces to create a tidy foundation. Count varies with runner length; expect ~10-12 sts per medallion side section.
Round 2 :
Scallop round: *ch3, 5 dc in next 3 stitches, ch3, sl st into next foundation stitch* repeat along entire edge to create a repeating scallop. This will add a gentle rounded finish to the runner edges.
Round 3 :
Reverse the scallop on the opposite side of runner to mirror the finish. Work the same scallop pattern onto the second long edge so runner looks balanced.
Round 4 :
Corner shaping: at each short end of the runner where medallions taper to a point, work small picot tips: *sc2tog, ch3, sl st into first ch (picot), sc in next 3 sts* to produce pointed tips that echo the leaf shapes. Fasten off and weave tails.
Info :
Edge tip: use one round of hdc around for a very delicate ribboned edge instead of pronounced scallops if you want a subtler border.
— Alternative Dense Border (Optional) :
Round 1 :
Attach yarn to runner edge, ch1, work 1 sc in each st around entire runner including short ends; when you reach a gap between motifs, work (sc, ch3, sc) in the ch-space to keep counts even.
Round 2 :
*Work (1 sc, ch5, 1 sc) into every 3 sc across to create elongated loops; these will be the base for a crochet lace fringe if desired. Continue around the runner and sl st to join.
Round 3 :
Into each ch-5 loop work (sc, ch3, 3 dc, ch3, sc) to create fuller scallops. Fasten off and block again to set shape.
Info :
Optional fringe: cut 5 cm lengths of yarn and loop through each ch-3 from Round 2 to create a subtle fringe. Trim to even length and lightly steam to settle fibers.
— Final Finishing Touches :
Round 1 :
Weave in all tails by threading them across the back of motifs through several stitches. Tie no knots on the front; hide tails between layered leaves or under berry clusters.
Round 2 :
Wet-block the entire runner: pin it to the blocking board with pins or wires, spritz with water and shape leaves and picots. Let dry completely for crisp lace. If you want a softer drape, shape and let air-dry without pins.
Info :
Final press: use a gentle steam iron at a distance or a cloth between runner and iron. Do not press too hard—cotton can flatten textured puff stitches if pressed directly.
Round 3 :
Optional: to add slight sheen, brush the dry runner with a 1:10 solution of fabric stiffener and water, smoothing with hands and reblocking into final shape. Allow to dry fully before use.
Info :
Storage tip: store runner flat or carefully rolled to avoid creasing; avoid placing heavy objects on top when not in use so raised berries and leaf veins maintain their shape.
— Pattern Yarn Color Placement Suggestion (sample layout) :
Info :
For the photographed effect: alternate Main Medallion colors in sequence: mustard, cream, olive, mustard, cream. Use burgundy berries clustered every second junction. Insert small leaves of rust and olive between medallions to create organic flow. Change long veined leaves color to olive for natural contrast.
Info :
Scale tip: to lengthen runner, add additional medallion sets or insert extra hex lace medallions between leaves. To shorten, remove a medallion and adjust join pattern so ends finish with pointed tips.
Info :
Cleaning: handwash cold in gentle detergent. Reshape and dry flat. Avoid machine washing to preserve puff clusters and picots.
Completing this autumn table runner is a true joy—watching medallions, leaves and berries come together feels like weaving a miniature fall landscape. The layered textures and warm colors create a show-stopping centerpiece that invites compliments. Take your time blocking and joining for best results; each gentle steam and pin will reward you with an heirloom-quality finish. 🧶🍁✨