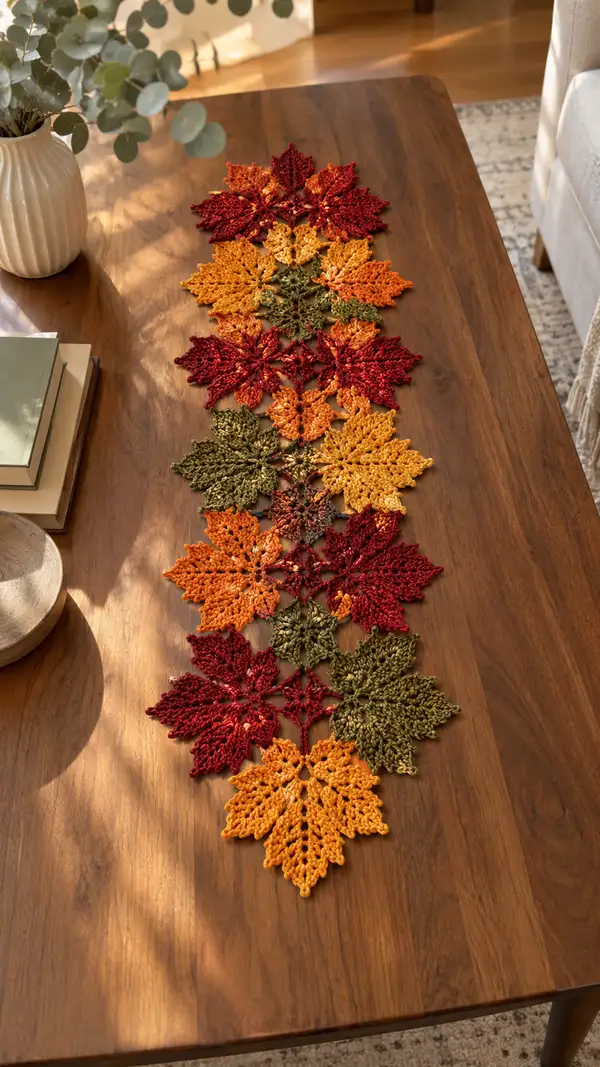
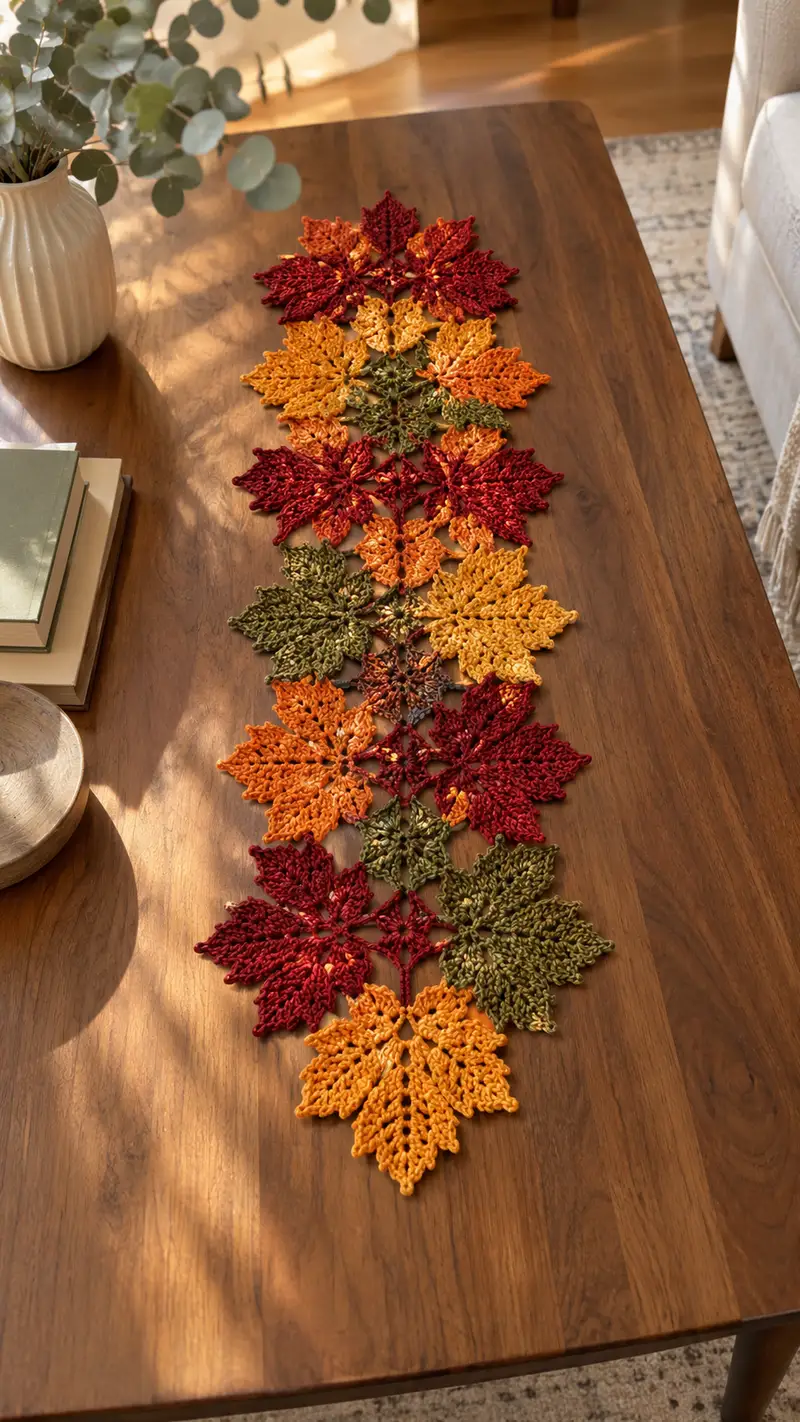
Create a stunning autumn table runner made from linked crochet leaf motifs in warm fall tones. This pattern teaches you how to make large and small maple-style leaves, connector stars, and the finishing joining and edging to assemble a long, elegant runner. The finished piece showcases layered leaves in reds, burnt orange, gold and olive for a cozy seasonal centerpiece. Clear step-by-step instructions and tips for blocking and joining make this a satisfying project for intermediate crocheters.
Progress Tracker
0% Complete
— Notes :
Info :
This pattern describes three primary motifs: Large Leaf, Small Leaf, and Connector Star. Each motif is worked flat in rounds from a small center outward then shaped into pointed lobes using elongated stitches and clusters. All stitch counts are given for the full round (total stitches). Use the same hook throughout to maintain consistent gauge, but if your leaves curl too much or are too loose, change hook size accordingly. Block motifs before joining for a flat, professional finish.
— Large Leaf Motif (make 10-12 for runner) :
Round 1 :
6 sc in magic ring (6)
Round 3 :
(1 sc, 1 inc) x 6 (18)
Round 4 :
(2 sc, 1 inc) x 6 (24)
Round 5 :
(3 sc, 1 inc) x 6 (30)
Round 6 :
(4 sc, 1 inc) x 6 (36)
Round 7 :
(5 sc, 1 inc) x 6 (42)
Round 8 :
(6 sc, 1 inc) x 6 (48)
Info :
Rounds 1-8 create a small, even center that will anchor the lobes. Change to a slightly longer stitch (hdc/dc) for the next rounds to begin shaping the leaf surface. Keep stitch marker at the first sc of each round.
Round 9 :
1 hdc in each st (48)
Round 10 :
1 dc in each st (48)
Round 11 :
1 dc in each st (48)
Round 12 :
1 dc in each st (48)
Info :
These even rounds extend the center into a round disk. For a more textured look, work Round 9 in BLO to create a slight ridge if desired.
Round 13 :
Into next st: (ch3, tr, ch3, sl st into same st) to form first lobe base, *sl st into next 6 sts, (ch3, tr, ch3, sl st into same st) for next lobe* repeat across to create 6 lobes total. End with sl st to join (6 lobe bases)
Info :
Round 13 is a structural round that creates 6 evenly spaced lobe bases around the center. Each lobe base uses the same number of skipped stitches (6) so they are evenly distributed. Adjust spacing if you prefer more or fewer lobes (e.g., 7 or 8) by changing the number of skipped stitches.
Round 14 :
Work each lobe separately: into each lobe base (work sequence): sl st into ch3 space, ch2 (counts as hdc), 3 hdc, 2 dc, 1 tr, 2 dc, 3 hdc, ch2, sl st into same ch3 space to close lobe. Repeat for all 6 lobes (6 lobes completed)
Round 15 :
Working around each lobe edge: from base sl st, ch1, sc evenly across the first half of lobe edge (approx 12 sc per lobe) then at tip increase: (sc, hdc, dc, tr, dc, hdc, sc) to form point, continue sc back down other side (approx 12 sc). Repeat for each lobe (72 sc across all lobes + 6 tips as shaped)
Info :
Round 15 sc counts are approximate and should be distributed evenly along the lobe edge. The tip shaping uses elongated stitches to make a sharp point. If you need a sharper tip, replace tr with dtr at the tip only.
Round 16 :
Working behind the lobes to add serration: attach yarn at base between lobes, (ch3, dc in next st, ch3, sl st into next gap) repeat between each lobe to create decorative joins (12 ch3 loops total)
Round 17 :
In each ch3 loop around edge: (sc, hdc, dc) then sl st to base, repeat across all 12 loops to create textured veins (approx 36 sts)
Round 18 :
Return to each lobe surface and work a central raised vein: from base sl st into center, ch2, (fpdc around post of next st, ch1) x 6 to run up center, end with sl st at tip. Repeat for each lobe (6 veins)
Info :
Front post double crochet (fpdc) used in Round 18 creates raised veins on the leaf surface. Keep tension loose enough to ride over previous rounds without cinching.
Round 19 :
Edge shaping round: sl st to the bottom of first lobe, ch1, sc evenly around lobe edge including between lobes to unify motif. Work 8 sc between lobes to form the connecting scallops; repeat for all lobes (approx 120 sc around full motif)
Round 20 :
BLO: 1 sc in each st BLO around (approx 120) to create a distinct border ridge
Info :
Round 20 in BLO emphasizes the edge and gives a crisp outline for blocking. If you prefer a softer edge, skip BLO and work normal sc. At this stage you can fasten off and weave ends if changing colors for the next detail rounds.
Round 21 :
Attach contrasting yarn at base, ch1, *sc 6, ch3, sc 6 in next area* repeat across to create decorative chain arches between lobes (approx 12 arches)
Round 22 :
In each ch3 arch: (sc, hdc, dc, hdc, sc) to give a leafy scallop (approx 60 sts added)
Round 23 :
Return to lobes: work small picot accents at the tip of each lobe: (sc to tip, ch3, sl st in top of tr/dtr), repeat on each lobe tip (6 picots)
Round 24 :
Work tiny surface slip stitch veins: with yarn held to front loop only, sl st zig-zag across each lobe to emphasize texture. This is worked as decorative detail with no global stitch count change.
Info :
At this point, fasten off and weave in ends. Block the motif by pinning the tips to blocking board and lightly steam or spray starch for crisp definition. Repeat to make the number of large leaves required (10-12 for a long runner as pictured).
Round 25 :
Optional: add a second round of edge picots for extra lace: attach yarn, *(sc, ch3, sl st back into same st) then sc 10* repeat around to produce fine picot edging (approx 60 picots)
Info :
Use this optional round sparingly if you prefer a more open, lacey border. Blocking after this round will open the picots beautifully.
— Small Leaf Motif (make 8-10) :
Round 1 :
6 sc in magic ring (6)
Round 3 :
(1 sc, 1 inc) x 6 (18)
Round 4 :
1 hdc in each st (18)
Round 5 :
1 dc in each st (18)
Round 6 :
Round of 6 lobe bases: *ch3, tr, ch3, sl st into next st* repeat x6 to create 6 small lobes
Round 7 :
In each ch3 sp: (sc, hdc, dc, hdc, sc) to create mini lobes (approx 30 sts)
Round 8 :
Edge round: sl st to base, ch1, sc evenly around including between lobes (approx 54 sc)
Round 9 :
BLO: 1 sc in each st BLO to add ridge (54)
Info :
Small leaves use fewer shaping rounds but the same techniques as large leaves. These are excellent filler pieces and look beautiful in alternating colors placed between big leaves.
Round 10 :
Optional surface veins: with contrasting yarn, ch1, sl st across center and three raised fpdc ribs on top of leaf. Fasten off and block.
— Connector Star Motif (make 9-11) :
Round 1 :
8 sc in magic ring (8)
Round 3 :
(1 sc, 1 inc) x 8 (24)
Round 4 :
1 hdc in each st (24)
Round 5 :
Form star points: *ch4, sl st into next st* repeat around to form eight ch4 loops (8 loops)
Round 6 :
In each ch4 loop: (sc, hdc, dc, hdc, sc) to create eight tiny points (approx 40 sts)
Round 7 :
Sl st to every other point and ch6 between selected points to create open connectors (create 4 larger loops for joining)
Round 8 :
Work into each ch6 loop: (sc, hdc, dc, hdc, sc) to make four larger joining petals (approx 20 sts)
Info :
Connector stars sit between leaves and hold them in a natural offset grid. Use olive or a neutral color for subtle joins. Keep connectors small to maintain leaf focus.
Round 9 :
Optional decorative picots: add (sc, ch3, sl st) at tips of each larger joining petal. Fasten off and block flat.
— Decorative Linking Band (work as needed between motifs) :
Round 1 :
With olive yarn ch 12, join ends to form ring with sl st (12 ch loop)
Round 2 :
In ring: (sc, ch3) x 6 join with sl st to form six ch3 picot loops (6 loops)
Round 3 :
Work into each ch3 loop: sc, hdc, sc to create small connecting nodes (approx 18 sts)
Info :
These linking bands are optional and are used where you want a small open space between motifs or to create small decorative diamonds. They are very quick and use little yarn.
— Assembly & Joining Instructions (Runs across multiple steps - intensive rounds) :
Info :
Block all motifs first. Arrange your motifs on a flat surface following the runner image: a long column alternating large leaf, connector star, small leaf, connector star in repeating sequence. Placement alternates left-right offset so tips interlock. Pin motifs at all joining points to hold placement before sewing.
Join Step 1 :
Using olive yarn and a yarn needle, whip stitch through the back loops of the edge sc on each motif where they touch. Use small, evenly spaced stitches to create a flat join. Start from center of runner and work outward to keep tension even.
Join Step 2 :
Where three motifs meet at a point (two leaves and a connector star), sew all layers together by passing needle through the center points several times and knotting on the back side. Use 8-10 passes for secure joins (no stitch count change).
Info :
For joins that need a little lift, place a small washer of fabric stiffener between motifs before sewing (not necessary but helpful for centerpieces that need shape). Always weave ends into the back of the motif to hide them.
Join Step 3 :
If you prefer visible joins use slip stitch joins: hold two motifs right sides together and work sl st through both loops across touching edge (this will change edging but gives a decorative chain look).
Edge Round 1 :
After joining the full runner, work a unifying edge: Attach yarn at one long side, ch1, sc evenly around outer edge of runner including around petal tips, working sc in each edge stitch created by motif joins (stitch count varies by runner length)
Edge Round 2 :
In each sc around: (sc, ch3, sc) at each lobe tip to form scallops, sc uniformly along straight edges. This creates a soft frame around the runner.
Edge Round 3 :
Optional: Add picot fringe at scallops: (sc, ch3, sl st) in each ch3 to make tiny tassel-like points. Fasten off and weave ends into back.
Info :
Blocking after joining and edging is essential. Pin runner flat stretching leaf tips to the desired length and width. A light steam or spray starch will hold the shape for the season.
— Alternate Color & Size Adjustments (mini tutorial rounds) :
Info :
To change the scale of motifs: use a lighter fingering or sport yarn and a smaller hook and all counts remain the same—motifs will be proportionally smaller. For larger motifs, choose bulkier yarn and larger hook and add an extra even round in center before lobe formation (e.g., one or two rounds of dc to enlarge disk).
Adjustment Round 1 :
When enlarging a leaf, add an extra round of (1 dc in each st) before Round 13 and repeat the lobe base spacing adjusting the number of skipped stitches to maintain even distribution (e.g., skip 7 instead of 6).
Info :
To alternate colors between leaves, change yarn at the end of the BLO border (Round 20 of Large Leaf) by fastening off and joining the next color with a sl st in any base stitch. Weave in ends before blocking for neat joins.
— Finishing Details & Tips (extra technique rounds) :
Info :
When weaving in ends, thread tail through a tapestry needle and follow the path of the last 6-8 stitches, then double back to create an invisible finish. Snip close to fabric. Use a small dab of fabric glue on thick yarn tails if they are likely to slip out during washing.
Tip Round 1 :
To give the runner extra body, lightly spray with fabric stiffener after blocking. Pin natural curves of leaves downward to achieve a slightly cupped, natural look similar to real leaves. Let dry fully before removing pins.
Tip Round 2 :
Store runner flat or rolled to avoid creases. If washing is necessary, hand wash gently in cool water and re-block immediately while damp.
Info :
Pattern completes the motifs and assembly. Total rounds across all motif types and joining steps described here amount to a detailed multi-step process; repeat motifs as needed to match your table length. The sample runner pictured uses 10 large leaves, 6 small leaves and 9 connector stars arranged in alternating offset rows.
This autumn leaf table runner brings the season to your table with textured crochet leaves in rich fall colors. Each motif is full of sculptural detail and the linked layout creates a lovely organic flow down the length of a table. Blocking and careful joining turn a handful of motifs into a coherent heirloom piece you will love to display. 🧶🍂 Enjoy the meditative rhythm of making each leaf and then watching them come together into something beautiful. Happy stitching and cozy autumn vibes! 🍁