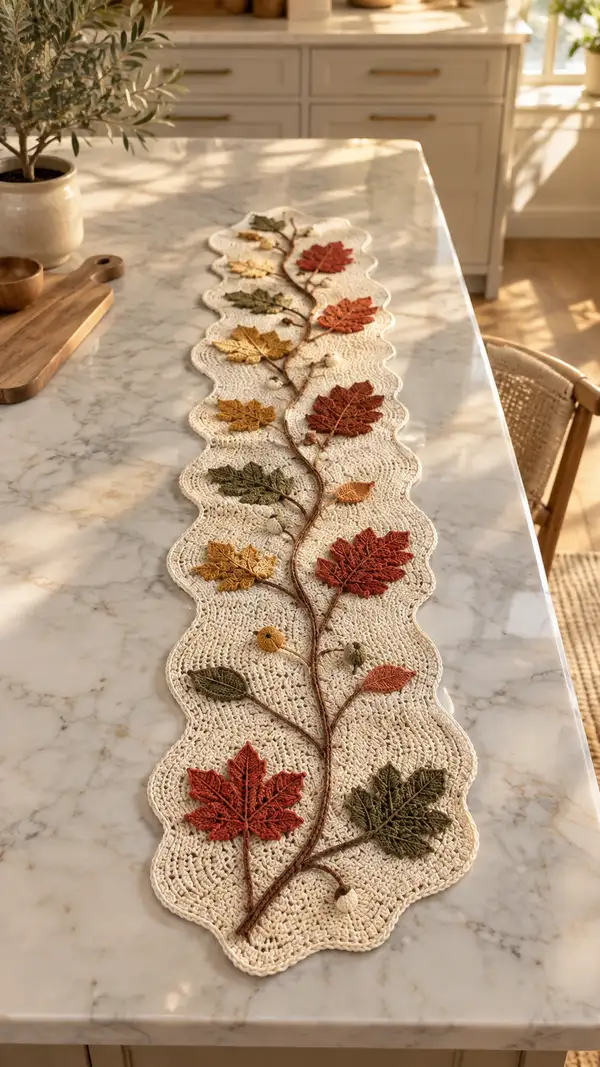
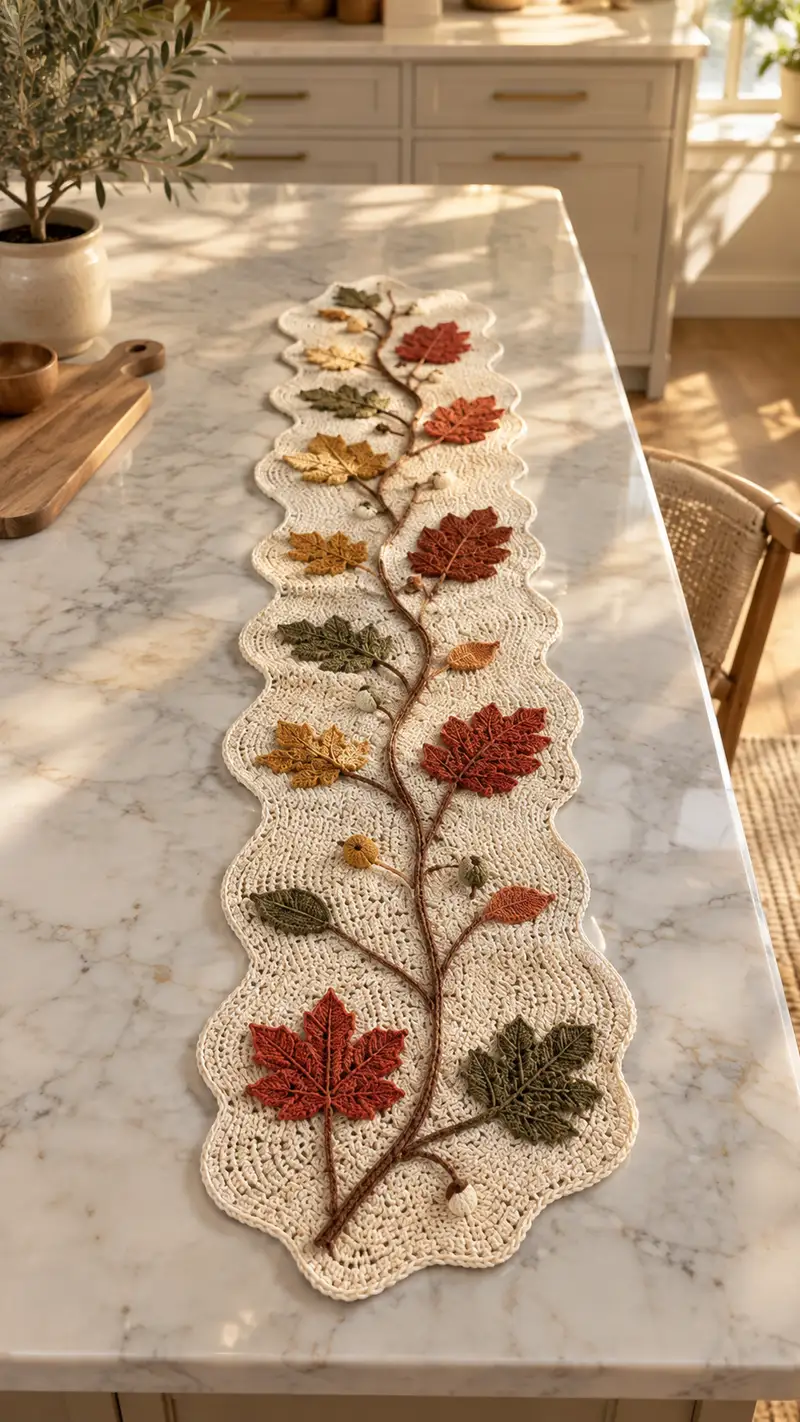
Create a warm, neutral scalloped table runner with hand-appliqued crochet leaves, acorns, and a raised braided stem. The runner features cream openwork rows and colorful fall leaves in rust, mustard, olive and warm green, finished with a scalloped border for a polished look. Perfect for a dining table or sideboard to bring autumn charm to your home.
Progress Tracker
0% Complete
— Materials & Gauge :
Info :
Gauge: 16 dc x 8 rows = 10 cm in pattern using 4.0 mm hook and worsted cotton. Match gauge to ensure scallop size and runner length match photo. Pattern assumes finished runner approximately 90-110cm long and 18-22cm wide (depends on blocking and gauge).
— Base Panel (worked flat in rows) :
Row 1 :
Ch 121 (foundation chain - this gives a nice narrow runner width; adjust by adding multiples of 6 to widen). Turn. (121)
Row 2 :
Working into 2nd ch from hook: sc in next 3 sts, *ch2, sk2, 5 dc shell into next st (shell counted as 5 dc in same st), ch2, sk2, sc in next 3 sts; rep from * across until last 4 sts, end sc in last 3 sts. Turn. Maintain a tidy edge by working the first and last 3 sts in sc. (Count varies depending how many shells fit; maintain edge scs and shells across center)
Row 3 :
Ch1, sc in first 3 sc, *ch2, sk to center of next shell, work 5 dc in center of shell, ch2, sc in next 3 sc; rep across. Turn.
Row 4 :
Repeat Row 3. At this point the panel begins openwork with shells spaced by ch2 arcs. Continue repeating Rows 3-4 for a stable, lacy body.
Info :
Check your row tension frequently; maintain even height by counting shells across a few rows to ensure shells line up vertically. Use stitch markers to mark the center of the panel and ends of shell repeats if helpful.
Row 5-16 :
Repeat Row 3 for a total of 16 rows finished (this builds a section of lacy shells). At Row 16 you should have a flat panel without cupping. (Repeat shell pattern; keep edge 3 sc on each side)
Row 17 :
Begin a gentle repeat variation to give more texture: ch1, sc in edge 3 sts, *ch1, sc in next ch-2 space (placing shorter spacer), ch1, work 5 dc in center of next shell, ch1, sc in next ch-2 space; rep across, end sc in last 3 sts. Turn.
Row 18-26 :
Work Rows 17-18 repeatedly for 9 rows total to lengthen the runner panel. This gives a subtle shift in spacing for visual interest under appliques. Finish Row 26.
Info :
Measure as you work. The panel pictured is approximately 100 cm from end to end once scallops and border are added. If you want a longer runner, add sets of 6-12 shells (increase chained foundation or add sets of 6 stitches) to extend length; maintain the edge scs evenly.
Row 27-40 :
Resume the main shell arrangement (Row 3 repeat) for another 14 rows, ending on a right-side row. Keep edges neat with 3 sc per edge on turning rows. After Row 40, you will prepare for the scalloped border that shapes the wavy edge.
Info :
If you prefer a more open or denser look, switch to a 3.5 mm hook for the entire base to tighten fabric slightly. Blocking will open shells a little so plan accordingly.
Row 41-48 :
Continue working shell rows as in Row 3 for eight more rows to reach the approximate length used in the sample photo. End with a wrong-side row so the scalloped border starts on the RS.
Info :
Fasten off leaving a 50cm tail for seaming into the border later if you plan to work border from a joined round. Otherwise fasten off fully and weave ends; we will pick up loops for an applied scallop edge next.
— Scalloped Border (worked along both long sides and ends) :
Round 1 :
With RS facing and 4.0 mm hook, join cream yarn at center of a short end with a sl st. Ch1, sc evenly across the short end edge (work 1 sc in each row end where practical), working approx 3 sc for each row end. When you reach the long side, work 3 sc in each sc edge for the first 3 edge sc, then *skip into ch2 spaces along side: in each ch-2 space work (sc, hdc, 3 dc, hdc, sc) as a scallop; skip next sc or two as needed to keep scallops even. Continue along length and repeat on opposite short end. Join with sl st to first sc. (Scallops spaced evenly: approx 1 scallop per shell repeat)
Info :
Take time to space scallops evenly. Use pins to mark scallop positions along the side before crocheting to get symmetrical waves on both sides.
Round 2 :
Ch1, sc in same st, *in next scallop work sc, hdc, 5 dc, hdc, sc (enlarge scallop to create smooth wave); rep around all edges. Join with sl st. Fasten off and weave ends. This creates the decorative wavy edge seen in the photo.
Round 3 :
Optional: For a firmer border work one more round in BLO: join yarn, ch1, work sc in each st BLO around to create a slightly raised inner ridge. Fasten off and weave ends. Block the entire panel to open shells and set scallops.
Info :
Blocking tip: Lightly mist with water, pin to measured rectangle with scallops flared, and allow to dry. Use steam carefully for cotton to avoid distortion.
— Leaf, Large Maple Shape (Make 4) :
Info :
These large maple-style leaves are worked flat from center vein outward. Each leaf is a mirrored, worked-around chain center with increases forming lobes. Use 3.5-4.0 mm hook for best definition. Make 4 leaves in rust and deep red shades.
Round 1 :
Make a short chain: ch 11. In 2nd ch from hook work: sc, hdc, 2 dc, tr, 2 dc, hdc, sc (work down one side of chain). Fasten to center by working sc in the opposite side of the foundation chain, mirroring the stitches to create a teardrop base. End with slip stitch to join at center. (Count: creates a center spine of 1 sc at tip both sides)
Round 2 :
Ch1, sc in first st, *in next st inc (2 sc) across the small tip until reaching the base of the central treble, at treble work (sc, hdc, 2 dc, ch1, 2 dc, hdc, sc) to create the main lobe; continue mirror increases back up the other side symmetrically. Sl st to first sc. This forms a wider leaf shape. (Approx st count around 38-44 depending on exact increases)
Info :
Work slowly here to keep symmetry. You can place scrap yarn markers at the center treble to know pivot point for mirroring your increases back up the other side.
Round 3 :
Ch1, sc evenly around the leaf including into ch1 space at mid-lobe to anchor shape. Where you want a notch between lobes, work (sc, ch2, sc) to reinforce the division. Turn ends with sc sl st and do not join; continue working in rounds around for a slight raised edge. (40-46 sts)
Round 4 :
Work 1 sc in each st around, placing a second sc in the base center stitch to keep leaf flat. Where the main lobe sits, work 2 dc cluster in the center area to add height and a defined ridge. Sl st and fasten off leaving long tail for sewing. (st count same)
Round 5 :
Info: Using a contrasting yarn or the same color, embroider veins on the wrong side or right side now using a simple surface slipstitch technique: bring tapestry needle up at the base, surface slip stitch a straight line to the tip to create the central vein, then add diagonal veins branching to each lobe. Secure ends and weave in.
Round 6 :
If you want sharper lobes, add short picot details at each lobe tip: [ch3, sl st to base of ch3]. Add 3-4 small picots evenly around each lobe tip. Fasten off and weave in ends.
Info :
Block each leaf lightly to open stitches and set shape. Use pins on a blocking mat to shape lobes while damp and let dry fully before assembly.
— Leaf, Medium Oak Shape (Make 4) :
Round 1 :
Ch 9. Work sc, hdc, 2 dc, hdc, sc down one side; mirror on the other side and sl st to join center. This produces a narrower oak-style leaf. (Approx 28 sts after first round)
Round 2 :
Ch1, work sc around with slight increases at each lobe base: where you want a rounded lobed edge, work (sc, hdc, 2 dc, hdc, sc) into the relevant chain space to build each lobe. Mirror on opposite side. Sl st to join. (Approx 34-38 sts)
Round 3 :
Work 1 sc in each st around; after completing the round, add surface-embroidery veins: using yarn and a yarn needle, stitch a central vein from base to tip, then add 3-4 small branch veins on each side. Fasten off leaving tail for sewing. (Leaf is flat, moderate thickness)
Info :
For a more textured look, work the final round in BLO to create a visible ridge around the leaf edge.
— Leaf, Small Elliptical (Make 6) :
Round 1 :
Ch 7. Work sc, hdc, 2 dc, hdc, sc along chain and mirroring back. Sl st to join. (Approx 18-22 sts)
Round 2 :
Ch1, sc in each st; add 1 inc (2 sc) at the center base and the center tip to give slightly pointed ends. Sl st and fasten off leaving a tail to sew. Add a simple surface vein with embroidery floss or yarn as desired.
Info :
These small leaves act as filler and look great clustered under larger leaves or near acorns to add scale. Make in mustard and olive colors for contrast.
— Acorns (Make 6 small acorns and 4 medium) :
Acorn Top (cupule) Round 1 :
Using brown accent yarn, make a magic ring, 6 sc in MR (6). (If you prefer not to use MR, ch2 to create a small ring and work 6 sc into first ch).
Round 2 :
Inc in each st around (12). Pull ring tight. (12)
Round 3 :
(1 sc, inc) x 6 (18)
Round 4 :
1 sc in each st (18). Do NOT fasten off; fold top into a cup shape and tack down to form cap with a few stitches so it cups around the acorn body later. Leave long tail for sewing (approx 15-20cm).
Acorn Body Round 1 :
With warm beige yarn make magic ring, 6 sc in MR (6)
Round 3 :
(1 sc, inc) x6 (18)
Round 4 :
1 sc in each st (18)
Round 5 :
(1 sc, dec) x6 (12)
Round 6 :
6 sc; stuff lightly and fasten off leaving tail for sewing to acorn top. Attach body into cup of acorn top, slip a few small stitches through the edge of the cup to secure. Hide tails by weaving through body. For larger acorns repeat body increases one extra round before decreasing and use slightly larger MR.
Info :
To add texture to the cap, surface crochet a few sl st ridges across the top or embroider horizontal lines with darker brown yarn. Sew the finished acorn to the base panel by anchoring through the cap into a shell ch-2 space for a secure hold.
— Stem & Branch Cord (Main Vine) :
Info :
The raised stem seen in the photo is a crocheted cord (I-cord style) worked separately and sewn on top of the runner. Make a long cord with a simple chain-and-sc covering or use a Tunisian/cord technique. The sample uses a warm brown yarn and has gentle curves.
Round 1 :
Chain 120 (or length desired to run most of the runner center). For a mid-length runner, chain approx 120-140 to allow curves; leave extra to trim later. Turn and work into back bumps: sc in 2nd ch from hook and in each ch across - this creates a sturdy cord. Fasten off leaving long tail for sewing. (Approx 119 sc)
Round 2 :
With same brown yarn, join at one end and work a second row of sc to create a rounded, full cord (sc across). If you prefer even thicker cord, work a third sc row. Fasten off leaving long tail for attaching. Optional: insert thin florist wire before completely closing seam to reinforce shape and allow gentle posing; cover with yarn so wire ends are not exposed.
Info :
For a braided stem, make three cords and braid them together lightly before tacking down. For the sample a single thicker cord gives a neat raised line on which leaves are sewn.
— Small Decorative Berries & Buttons (Make 6-8) :
Round 1 :
Ch 4 and join to form ring. Work 8 sc into ring. Sl st and fasten off leaving tail. Pull tight to form a small puff. (8)
Round 2 :
For a puffed berry, thread tail into needle, pull through the center and cinch to form a small round. Sew to runner along the stem path. Optionally add a tiny surface embroidered highlight with cream yarn.
Info :
These tiny elements add scale and realism; vary colors between pale beige and light green for contrast against leaves.
— Assembly & Placement :
Info :
Layout all pieces on your blocked base panel before sewing. Use a photo or sketch to replicate a natural vine shape. The sample shows a central vine that meanders slightly, with leaves alternating left and right in clusters and acorns clustered near the lower end.
Step 1 :
Block base panel fully and allow to dry. Place runner RS up on a flat surface. Position the long stem cord along the centerline; curve it to create natural aisles for the leaves. Pin cord gently using T-pins through the cord and into blocking mat if you used wire, or use sewing pins if you will tack in place later.
Step 2 :
Sew the cord to the base with matching brown yarn using a small whip stitch into the cord and anchoring into the base shells every 6-10 cm. Sew through the cord into the base to keep it flat and stable. Add extra stitches at vine curves for stability.
Step 3 :
Arrange large leaves first. The sample alternates large leaves roughly every 18-22 cm along the stem. Pin each leaf with rust and olive colors alternating; position leaf stems toward the central cord and angle leaves slightly outward for a natural look. Sew through the leaf base and the cord; secure with small invisible stitches and knot down inside the leaf tail. Weave in tails on the wrong side when finished.
Step 4 :
Attach medium leaves between large leaves to create layered composition. Add the small elliptical leaves and berries near junctions and under larger leaves to fill space and add visual weight. Sew all applique elements with matching yarn and small, neat stitches.
Step 5 :
Sew acorns into place near the lower third and middle of the runner. Anchor acorn caps through the base and into nearby shells to prevent movement. Tuck the acorn bodies into shell arches so they appear nestled.
Info :
Tip: Use invisible ladder stitches to attach leaves if you prefer less visible seams. Pin and adjust placement until you are satisfied with the overall balance before final sewing.
— Finishing Touches & Blocking :
Info :
After all elements are sewn on, re-block gently: mist lightly and pin any leaves that need reshaping, paying special attention to scalloped edges. Let dry fully before using. Securely weave and trim all ends.
Final :
Give the runner one last inspection, reinforce any loose stitches at leaf bases or vines, and press lightly if necessary. Your Autumn Leaf Table Runner is ready to display.
Info :
Care: Hand wash cold in mild detergent and lay flat to dry to preserve shape and appliques. Cotton yarn may soften with gentle washing.
This cozy autumn table runner brings handcrafted charm to any table, combining soft neutral base stitches with warm, dimensional leaves and acorns. Each applique adds texture and seasonal color, making it perfect for fall gatherings. I love how the scalloped edge and raised stem give it a timeless, elegant look — it feels like bringing a little bit of the outdoors inside. 🧶🍂