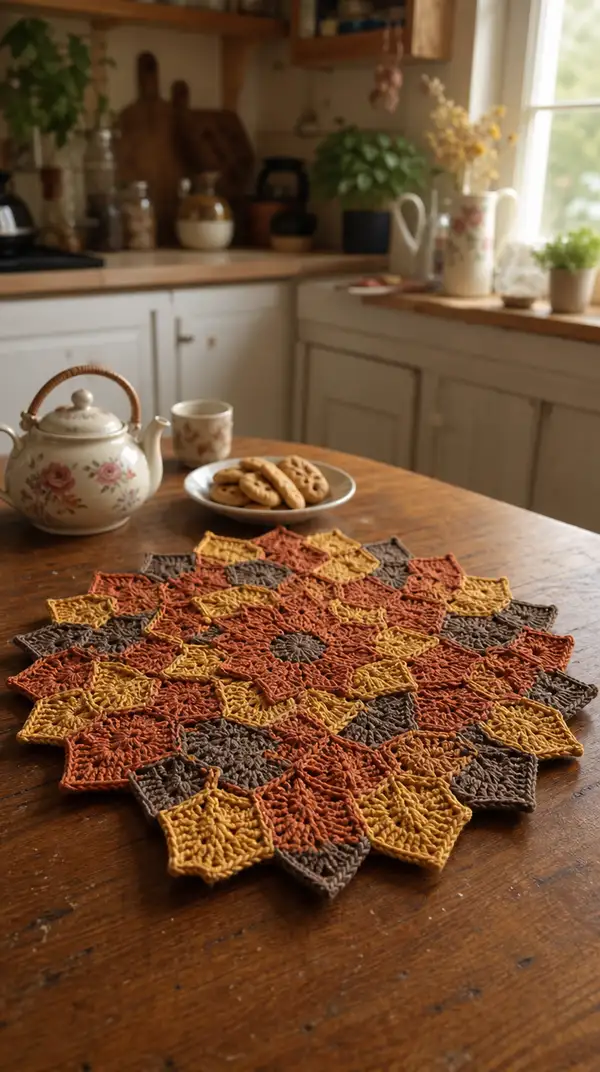
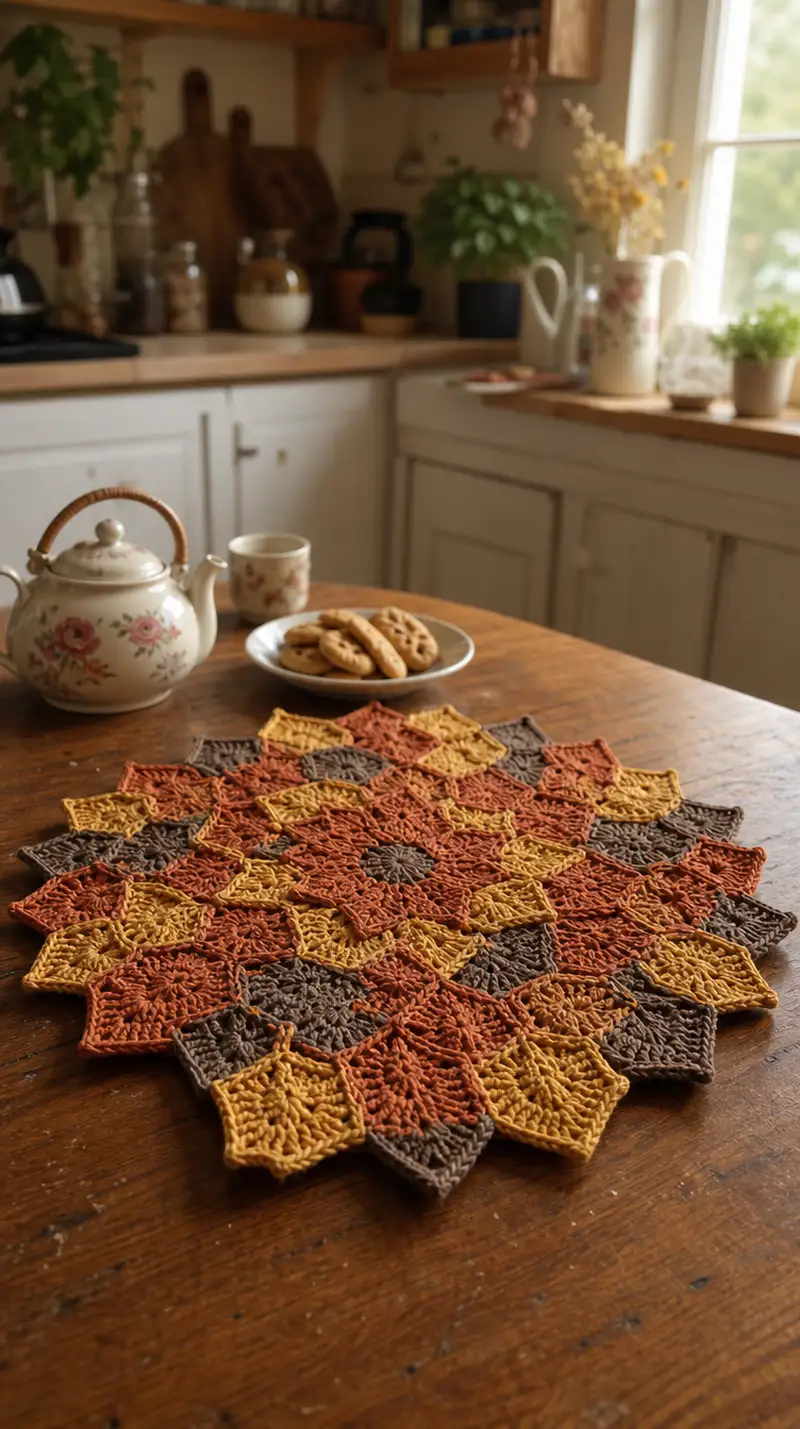
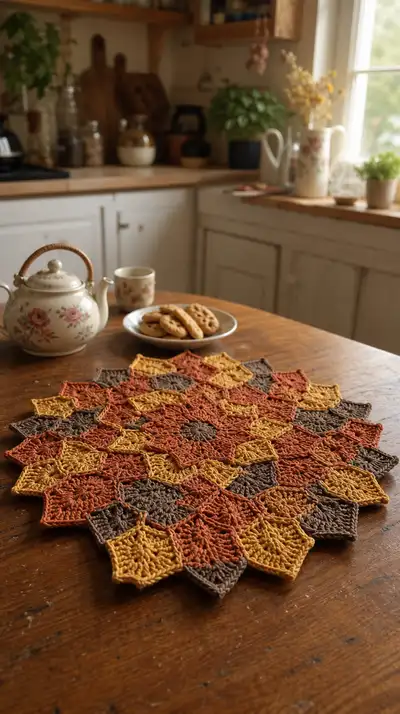
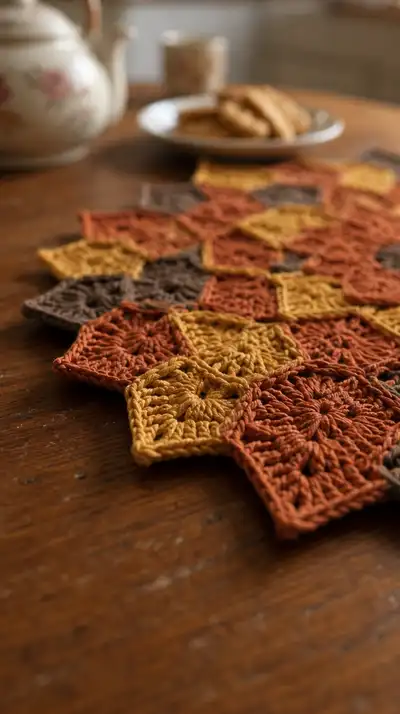
Create a warm, rustic starburst table centerpiece made from joined crochet motifs in rich autumn tones. This pattern uses hexagonal and diamond motifs worked in textured stitches with a join-as-you-go assembly to form a layered star shape. Finished piece lies flat as a decorative placemat or centerpiece and showcases mustard, rust, and deep brown yarns for a cozy seasonal look. Clear rounds, frequent tips, and joining instructions make assembling the motif medallion relaxing and rewarding.
Progress Tracker
0% Complete
— Center Motif (medallion) :
Round 1 :
6 sc in magic ring (6)
Round 3 :
(1 sc, inc) x 6 (18)
Round 4 :
(2 sc, inc) x 6 (24)
Round 5 :
(3 sc, inc) x 6 (30)
Info :
Use main color (rust) for the medallion center. Keep your tension even — this first set of rounds creates the flat base for later textured rounds.
Round 6 :
(4 sc, inc) x 6 (36)
Round 7 :
(5 sc, inc) x 6 (42)
Round 8 :
(6 sc, inc) x 6 (48)
Round 9 :
1 sc in each st (48)
Info :
From Round 9 onward we begin building texture. Place markers at 6 evenly spaced points (every 8 sts) to help locate petal sections used in later rounds.
Round 10 :
(7 sc, inc) x 6 (54)
Round 11 :
(8 sc, inc) x 6 (60)
Round 12 :
1 sc in each st (60)
Round 13 :
*Ch 2, sk 1, 3 dc cluster in next st, ch 2, sc in next 8 sts; rep from * around to create 6 petal points (60)
Info :
When working clusters, keep clusters loose enough to lie flat; push clusters open with your fingers to form petals. The st count remains 60 because clusters are worked into single stitches, not additional increases.
Round 14 :
At each ch-2 petal point: (sc, hdc, 3 dc, hdc, sc) into ch-2 space; continue 1 sc in each remaining st between petal points (60)
Round 15 :
1 sc in each st BLO (60)
Info :
BLO round creates a shallow ridge that helps the medallion sit flat and gives a defined base for joining other motifs later.
Round 16 :
(4 sc, 1 inc) x 12 (72)
Round 17 :
1 sc in each st (72)
Round 18 :
Work decorative picot points around the outer edge: *(sc, ch3, sl st into first ch of ch3) in every 6th st; 1 sc in remaining sts* (72)
Round 19 :
Finish outer texture with 6 elongated star points: At each of the 6 petal positions from earlier marker rows: *sl st to petal apex, ch 5, (dc, tr, dc) in apex, ch5, sl st back to base; rep 6 times* (maintain 72 base stitch count)
Round 20 :
Weave a final round of 1 sc around edge to tidy points and ensure even joins (72)
Info :
Fasten off leaving 20-25cm tail for joining if this medallion will be the central motif. Block gently to flatten and enhance points before assembly.
— Hex Petal Motif (repeat to make multiple units) :
Round 1 :
6 sc in magic ring (6)
Round 3 :
(1 sc, inc) x 6 (18)
Round 4 :
(2 sc, inc) x 6 (24)
Round 5 :
(3 sc, inc) x 6 (30)
Info :
Switch to your second color (mustard) here if creating the color-locked motif shown. Carry the unused yarn inside or fasten off and reattach as desired.
Round 6 :
(4 sc, inc) x 6 (36)
Round 7 :
(5 sc, inc) x 6 (42)
Round 8 :
(6 sc, inc) x 6 (48)
Round 9 :
1 sc in each st (48)
Round 10 :
*Ch 2, sk 1, (2 dc, ch1, 2 dc) in next st (make a small shell); ch 2, 1 sc in next 6 sts; rep from * around (48)
Info :
The small shell clusters create the petal-like squares visible in the photo. Mark the shell positions for ease of joining later.
Round 11 :
Into each 2-dc cluster: (sc, hdc, 3 dc, hdc, sc) in shell space; 1 sc in each of the 6 sc sections between shells (48)
Round 12 :
1 sc in each st BLO to create a clean ridge (48)
Round 13 :
(3 sc, inc) x 12 (60)
Round 14 :
1 sc in each st (60)
Round 15 :
Decorative corner formation for hex points: *At each shell apex, ch4, sl st into shell apex to form point; 1 sc in remaining sts* (60)
Round 16 :
Finish with 1 sc around edge and tidy points. Fasten off leaving a 20 cm tail for joining (60)
Info :
Make the number of hex motifs required for your layout: for the pictured centerpiece you will make 18 hex motifs plus one center medallion, arranged in two rings (adjust quantity to change finished size).
— Small Diamond Motif (connector units) :
Round 1 :
6 sc in magic ring (6)
Round 3 :
(1 sc, inc) x 6 (18)
Round 4 :
(2 sc, inc) x 6 (24)
Round 5 :
1 sc in each st (24)
Round 6 :
Form diamond shape: *ch3, sl st into 3rd ch from hook to form small loop at cardinal points; continue working 1 sc in next 5 sts between loops* (24)
Info :
These diamond/connector motifs fit between hex motifs and fill the negative space; make 12–18 depending on how many hexes you join.
Round 7 :
Work 1 sc in each st BLO (24)
Round 8 :
Edge round: *(sl st, ch2, sl st) around to create small picot spacing at four diamond points; 1 sc in the remainder (24)
Round 9 :
Fasten off leaving long tail for join-as-you-go or sewing (24)
Info :
Make these connectors in the contrasting brown color to help the star visual pop. Use them to visually separate petal hexes and add structure.
— Join-as-you-go Assembly (step-by-step) :
Info :
Layout pieces on a flat surface: place center medallion, then arrange 6 hex motifs around it touching the medallion at the 6 petal points. Use pins to hold placement. Join-as-you-go (JAYG) will be used to attach edge-to-edge for a near-seamless finish.
Round 1 :
Begin with center medallion in position. Join yarn at one of the medallion outer ridge stitches. Ch1, sc around until you reach the first marked petal apex; stop and prepare to join hex motif A.
Round 2 :
Align hex motif edge so its point sits at the medallion petal. With right sides together, work sc into medallion stitch, then insert hook into corresponding edge stitch of hex and sl st to join; continue sc around medallion until next join point (count each join carefully; maintain medallion 72 sts total while creating discrete join points).
Info :
Each join will take 2-4 stitches of both units depending on motif spacing. Keep the joins even by pinning motifs before joining and counting stitches between joins (typical spacing for this pattern: join every 12th base stitch of medallion to the center of a hex edge).
Round 3 :
Continue joining remaining 5 hex motifs in the same manner to complete the first ring of 6 around the center. After joining each hex, fasten off and weave tails through adjacent stitches to secure.
Round 4 :
Now add the second ring of hex motifs. Each hex in ring two will join to two hexes in ring one and to small diamond connectors. Position motifs, then JAYG: sc in hex edge stitch, sl st into neighboring hex edge stitch, ch1 and continue around until all joins are made. Count carefully — typical join pattern uses 60–72 perimeter stitches on each hex edge depending on how you worked your outer rounds.
Info :
If you prefer sewing, use mattress stitch or whip stitch with matching yarn to sew motifs together. JAYG is faster and looks cleaner for flat projects but requires stitch-matching at edges.
Round 5 :
Insert diamond connector motifs into spaces between hex edges: align diamond points into the small gaps formed between two adjacent hex motifs and join at 3 points per diamond using sc through both motifs (use long tails and a yarn needle if hand-sewing).
Round 6 :
After the rings are complete, go around the entire assembled medallion with 1 sc in each visible edge stitch to tidy joins and even the outline (this will stabilize the shape and provide a base for edging rounds) — count should equal the total perimeter stitches which will be approx 240–300 depending on motif count; keep a running tally as you work.
Info :
As you join, occasionally step back and make sure the piece lies flat — if it puckers, loosen the last few join stitches; if it waves, add a few extra sc between joins to relax the fabric.
Round 7 :
Weave in all tails from motif joins by threading yarn through 6–8 sts and trimming close to work; secure by doubling back through the end few stitches.
Info :
Blocking now (before final border) will ensure a flat, even edge and easier border joining. Use pins and a damp towel or light steam from an iron, taking care not to over-stretch the cotton yarn.
— Outer Border & Finishing Rounds :
Round 1 :
Attach border color (brown) at any outer join point. Ch2 (counts as hdc), hdc in same st, *skip 1 st, (sc, ch2, sc) in next st to form small scallop, skip 1 st, 2 hdc in next 2 sts*; rep around to create even scallop-and-ridge texture. Keep count divisible by the repeat used (aim for final multiple of 12 for symmetry).
Round 2 :
1 sc in each st and in each ch-2 space to unify scallops (approx same stitch count as previous round)
Info :
Work this round in BLO to form a subtle ridge between scallops for a handcrafted edge look; this helps the centerpiece keep a defined silhouette on the table.
Round 3 :
*At each scallop apex: (sc, hdc, 3 dc, hdc, sc) to make a pronounced point; 1 sc in each st between scallops; rep around* (st count will grow slightly by 12 if adding a 5-st point at each of 12 apexes)
Round 4 :
1 sc in each st (st count remains consistent from previous round)
Round 5 :
Decorative ridge round: *FLO: 1 sc in each st, but every 6th st work an elongated stitch (hdc tied off with a tr in next st) to create a sunburst texture across points* (st count stable)
Info :
Alternate border colors (brown for outermost, mustard for a secondary ring) to echo the motif colors and reinforce the star shape. Carry yarn behind if working stripes to avoid lots of ends, but be sure to catch floats with small sc stitches every 6–8 sts to secure them.
Round 6 :
Pick up rust accent: Work a picot edging into each point: *sc in next 3 sts, (ch3, sl st into 1st ch to form picot), sc in next 3 sts; rep* (keeps edge tidy and decorative)
Round 7 :
Finish with a tidy reverse single crochet (crab stitch) around entire piece for a rope-like border. This is worked left-handed: sl st into next st, sc behind previous st (maintains same number of stitches as previous round)
Info :
Reverse single crochet creates a firm, decorative finish. If you prefer a softer edge, substitute 1 round of hdc instead.
Round 8 :
Weave in remaining ends by threading through the back loops of several border rounds and trimming close to work.
Round 9 :
Final blocking: pin out each outer point and steam gently or wet-block and allow to dry fully to set final shape.
Info :
If you plan to wash the centerpiece, pre-wash one motif to ensure colorfastness of your yarn; many commercial cottons will soften and will not bleed, but checking is wise.
— Alternate Assembly: Expand the Star (optional) :
Round 1 :
To expand, continue adding hex motifs in a third ring using the same JAYG method. Each new hex will join at 3 points: to two hexes of the inner ring and one diamond connector.
Round 2 :
After adding each new hex, work a single tidy sc round around the new perimeter before adding another ring. This keeps joins stable and makes counts easier to manage.
Info :
Every added ring increases the diameter by approximately 6–8 cm depending on yarn and hook. Plan yardage accordingly — approximately 80g of worsted yarn per ring of 6 additional hex motifs.
Round 3 :
For very large centerpieces, add an extra wide border of up to 6 rounds with texture to stabilize and create a finished, table-ready edge.
Info :
Be aware that adding rings multiplies joins — tack each new motif lightly and inspect joins from both sides to ensure the star stays flat and symmetric.
— Finishing Touches and Care :
Round 1 :
All seams and joins: reinforce by sewing through the join area with a yarn needle and a few small mattress-stitch passes behind the join, especially if this piece will be handled often.
Round 2 :
Optionally, add a light spray starch if you want a slightly stiffer doily that retains crisp points; test on a scrap motif first.
Round 3 :
Care instructions: hand wash cool with mild detergent; reshape and block flat to dry. Avoid harsh agitation to preserve shape and color.
Info :
Store flat or wrapped in tissue to avoid crushing points. If folded, stack motifs with acid-free tissue between layers to preserve fiber and color.
Round 4 :
Final check: run your hand over the piece to find any loose floats or tails; weave them in and secure with small knots if necessary, then trim.
Info :
You now have a finished Autumn Starburst Table Centerpiece. Consider making matching placemats or coasters using the same hex motif scaled down for a coordinated table set.
This Autumn Starburst centerpiece is a beautiful way to add handmade warmth to your table — each hex and diamond motif comes together like puzzle pieces into a radiant star. The textured stitches and warm colors create depth and charm that look especially lovely on wooden furniture. Whether you keep this for seasonal decor or give it away as a thoughtful gift, you'll enjoy the repetitive, relaxing rhythm of motif-making and the satisfying reveal when the rings are joined. 🧶🍂✨