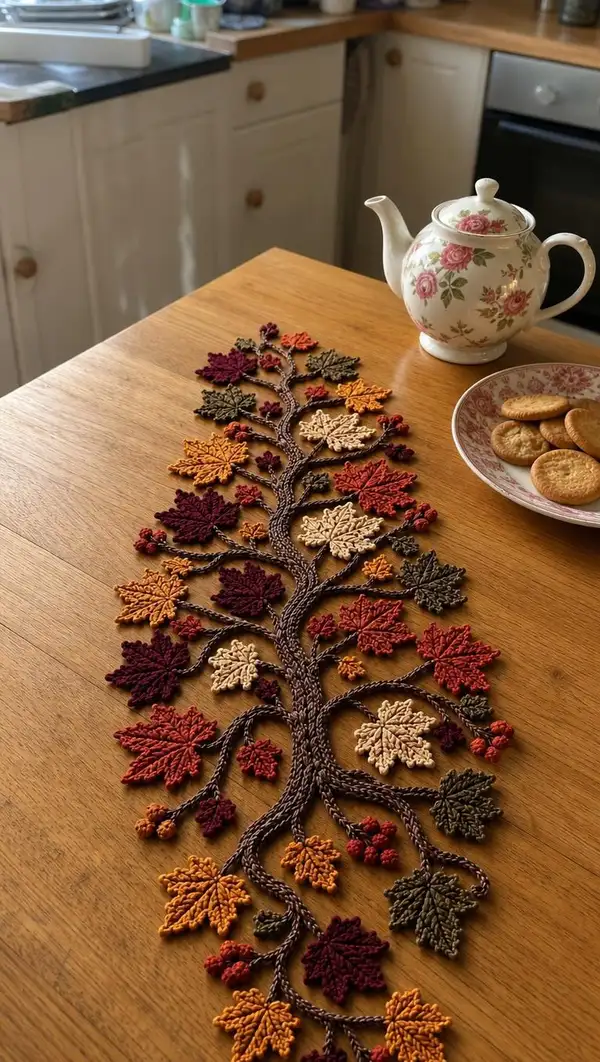
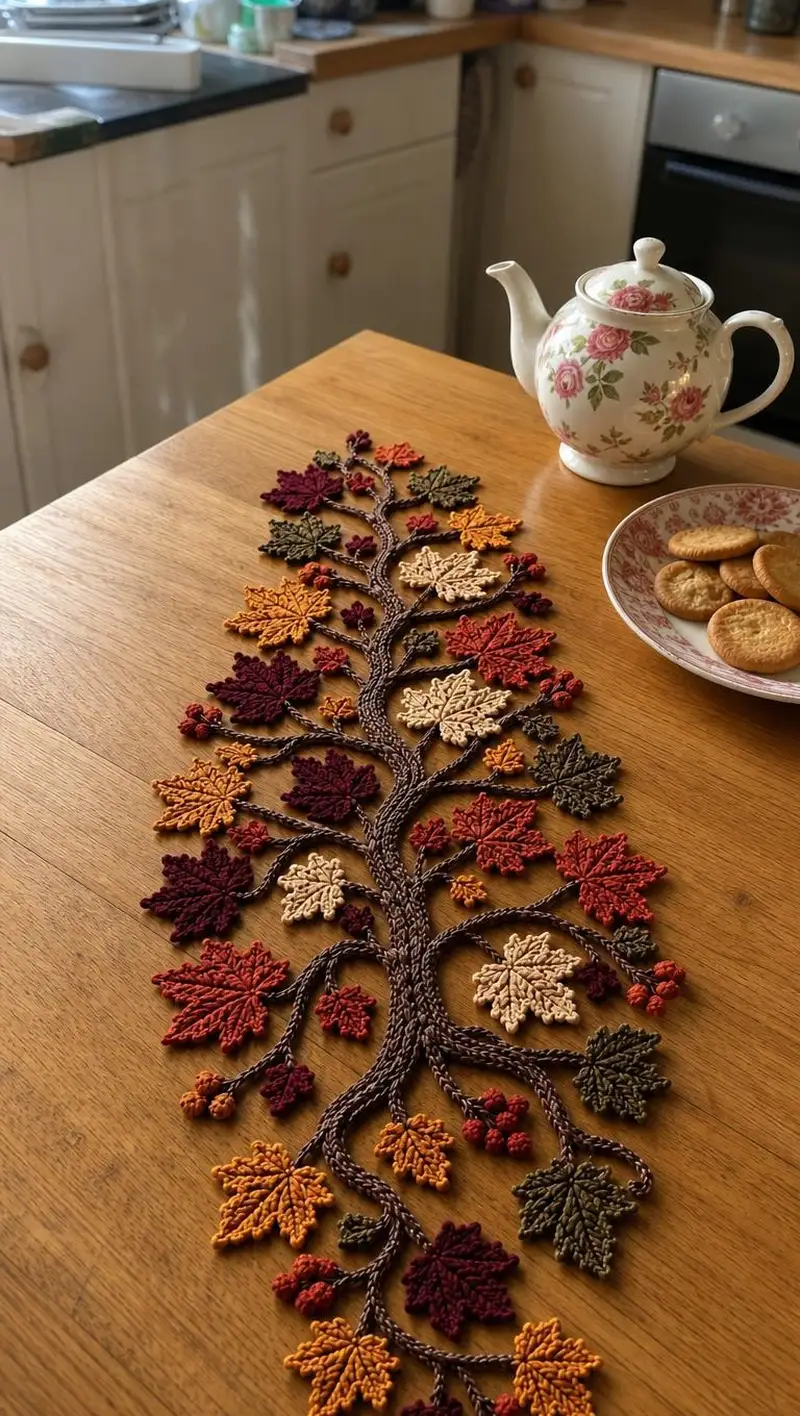
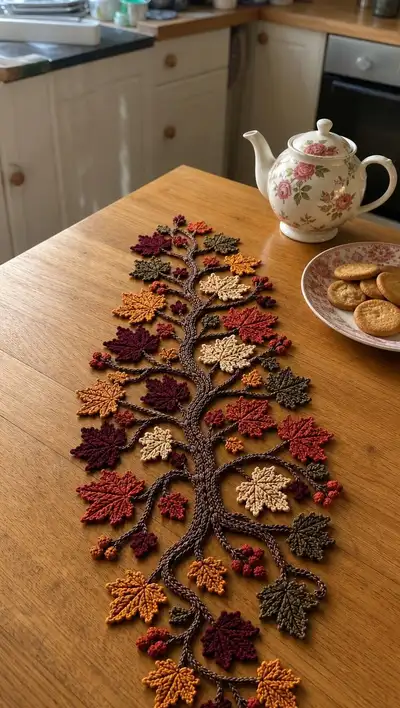
Create a stunning autumn table runner made from crocheted braided trunk, delicate maple leaves and tiny berry clusters in warm fall tones. This pattern recreates the layered, hand-stitched look you see — rich burgundy, mustard, rust, olive and warm tan leaves attached to a twisting trunk that lies flat on a table. The finished piece is decorative, washable (use gentle care) and perfect as a seasonal centerpiece or mantel accent.
Progress Tracker
0% Complete
— Supplies & Gauge :
Info :
Gauge is flexible for this decorative runner. Use a 3.5mm hook with worsted cotton to get dense stitches so leaves have crisp edges. The sample runner photographed measures approximately 34 inches (86 cm) long and 8-10 inches (20-25 cm) at the widest point. Adjust yarn amount and number of leaves to lengthen or shorten.
— Overview :
Info :
This pattern is worked in distinct modules: tubular cords for trunk & primary branches (make 3 and braid), main branches built by splitting and whipping cords, leaves produced in three sizes (Large, Medium, Small), small berry clusters, and final assembly where leaves and berries are sewn onto the braided trunk. Many Info sections are included to help assembly and shaping.
— Trunk Cord (Make 3 identical cords) :
Round 1 :
6 sc in magic ring (6)
Round 3 :
(1 sc, inc) x 6 (18)
Round 4 :
(2 sc, inc) x 6 (24)
Round 5 :
(3 sc, inc) x 6 (30)
Info :
These first five rounds widen the cord base so the trunk has body. Work tightly and place a stitch marker to mark round starts. Use the trunk color yarn (deep chestnut brown).
Round 6-18 :
1 sc in each st (30)
Info :
Work even rounds in continuous spiral (no sl st join) to create a long tube. For the sample runner each cord is worked to approximately 38-40 inches (96-102 cm); stop when you have desired length — you will braid three cords together and the braid will shorten length by roughly 30%.
Round 19 :
(3 sc, dec) x 6 (24)
Round 20 :
(2 sc, dec) x 6 (18)
Round 21 :
(1 sc, dec) x 6 (12)
Info :
Fasten off leaving a long tail for sewing the cord ends together into a braided start. Make three identical cords. If you prefer a slightly flatter trunk, stop at round 18 and do not decrease; braid and then stitch cords together flat.
— Preparing the Braid & Branch Splits :
Round 1 :
Pin the three cord starting ends together on your work surface so they meet evenly for about 1.5" (4 cm); align and sew a 1" (2.5 cm) seam with matching yarn to secure starting point (no stitch count)
Info :
When braiding, perform a 3-strand braid for the first 3-4 inches to form the trunk's base. After that, you will occasionally split off one cord to create a branch: braid two cords for several inches while the third cord is twisted and then pinned out and tacked down with small whip stitches so it sits away from the main braid as a branch.
Round 2 :
Braid 3 cords together for 4" (10 cm) from the base (no stitch count)
Round 3 :
Split one cord off by pinning and sewing its end along a natural curve to create a main branch (no stitch count)
Info :
Work gradually and pin often. The trunk should have a gentle curve — do not tension the braid tight or it will resist laying flat. Secure the main braid with 3-4 longitudinal whip stitches using the trunk color yarn every 2-3 inches so the braid remains flat and stable for attaching leaves later.
— Primary Branch Building (on trunk) :
Round 1 :
At selected split point, leave branch cord unworked for now and braid remaining two cords for 1.5" (4 cm) (no stitch count)
Round 2 :
Fold the trailing end of the split cord back toward trunk and whip-stitch underside for 1" to create a forked shape (no stitch count)
Info :
Branches are constructed by allowing cord segments to detach from the braid and curve out. Use small, nearly invisible whip stitches to tack the underside of each branch to hold shape. Make primary and secondary splits where you will later attach leaves and berry clusters.
Round 3 :
Repeat splitting process 4-6 times along the trunk at irregular intervals to create natural branching (no stitch count)
Info :
Leave 3-5" (7-12 cm) between larger splits so leaves and clusters have space. Pin each branch in place and adjust curvature until you are happy with the silhouette before sewing permanently.
— Large Maple Leaf (Make 7-9) :
Info :
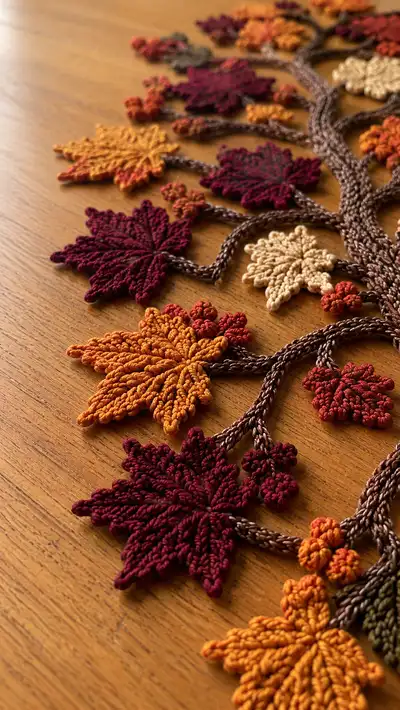
Large leaves in the sample measure about 3.5-4" (9-10 cm) across. Use deep burgundy or rust for variety. You will make a central vein and symmetrical lobes using chains and post stitches to form raised veins.
Round 1 :
ch 12, sc in 2nd ch from hook and across to end (11 sc). Rotate to work back along other side of chain: sc in first chain, sc in next 10 chains (11) — join to center with sl st to form a flat ovoid base (22)
Round 2 :
ch 1, (sc, inc) x 11 around (33)
Round 3 :
ch 2 (counts as hdc), *hdc in next 2 sts, FPdc around next st (to create raised vein), hdc in next 3 sts, (2 hdc in next st) repeat from * around (use appropriate placement so counts total) (approx 44)
Info :
Front post double crochet (FPdc) stitches will create the central raised vein. Place FPdc at the center stitch on each lobe run so the texture appears like leaf veins. Keep tension even — post stitches are taller; to keep edges even, add an extra hdc where needed.
Round 4 :
1 sc in each st BLO around to create distinct edge ridge (44)
Round 5 :
*(hdc, hdc in next st, FPdc around next st, hdc in next 2 sts, sc in next 2 sts) repeat x 4 (increase at tip points for lobes) (48)
Round 6 :
(sc, inc) x 16 (64)
Info :
Shape the leaf by varying where you place increases and post stitches. The counts above are approximate per leaf shape; extend or reduce one or two stitches to make the leaf slightly longer or wider. If stitch counts do not match exactly across your leaves, match visually and block same-size leaves together.
Round 7 :
BLO picot round: *sc 4 in next 4 sts, ch 3, sl st into 3rd ch (picot), sc in next 4 sts* repeat around to form pointed serrated edges (approx 64 with picots)
Round 8 :
Finish with 1 sc in each st around, sl st to join and finish, fasten off leaving 6-8" tail for sewing (64)
Info :
Lightly wet-block the leaf to open lobes and set shape. Pin the leaf flat and steam or spray lightly, shaping points outward. Use the long tail to sew the leaf to a branch later. Make 7-9 large leaves in a mix of colors.
— Medium Maple Leaf (Make 9-12) :
Round 1 :
ch 10, sc in 2nd ch from hook across (9), working back along chain sc 9 (18)
Round 2 :
(sc, inc) x 9 (27)
Round 3 :
ch 2, hdc in next 3 sts, FPdc in next st, hdc in next 3 sts, (2 hdc in next st) repeat around to form small lobes (approx 32)
Round 4 :
1 sc in each st BLO around (32)
Round 5 :
*(sc 3, picot) repeat around for scalloped edge (32)
Round 6 :
Finish with sl st to join, fasten off leaving 5-7" tail for sewing (32)
Info :
Medium leaves are slightly flatter and used in clusters around branch ends. Colors used: mustard, olive, cream. Block lightly to hold shape.
— Small Leaf / Bud (Make 14-20) :
Round 1 :
mr, ch 6, sc in 2nd ch from hook across (5), working back sc 5; sl st to center (10)
Round 2 :
(sc, inc) x 5 (15)
Round 3 :
sc in each st around (15)
Round 4 :
sl st to finish and fasten off leaving 3-4" tail for sewing. No blocking necessary for tiny leaves (15)
Info :
These small leaves and buds provide texture between large leaves and berry clusters. Use bright rust and deeper brown shades for contrast.
— Berry Cluster (Make 18-24) :
Round 1 :
mr, 6 sc in mr (6)
Round 2 :
(sc, inc) x 3 (9)
Round 3 :
1 sc in each st (9)
Round 4 :
Work 3 small bobbles joined: *ch 2, (tr, sl st) in next st to make a tiny bobble* repeat x 3 along edge, join and fasten off leaving short tail for sewing
Info :
Use a skinnier hook (3.0mm) for berries if you want them tighter. Add a tiny pinch of fiberfill only if you prefer slightly plump berries; most photographed clusters are unstuffed and formed by tight bobbles.
— Decorative Veins Option (Optional for Extra Texture) :
Round 1 :
Using contrast color, embroider veins onto each leaf with surface slip stitch from center base to each lobe tip; bring thread up at base and use sl st to create a continuous raised line (no stitch count)
Info :
This technique adds subtle linear detail. Use a long tail and a yarn needle or a tapestry needle to lay the surface sl st. Keep stitches small and even; test on a spare leaf first.
— Assembly Preparation :
Info :
Layout the braided trunk flat on a large table or blocking mat. Arrange leaves and berries along branches in the composition you like. Work from photographed example or improvise: group large leaves spaced along main branches with medium and small leaves clustered nearby and berries at ends and mid-branch junctions.
Round 1 :
Pin each leaf in place with T-pins, spacing large leaves approximately 2-4" (5-10 cm) apart along the trunk; cluster medium and small leaves near branch tips (no stitch count)
Info :
Take photos of your pinned layout so you can replicate spacing if you adjust later. Aim for a visual balance: alternate colors so similar shades are not adjacent, and use berries to fill small gaps.
— Sewing Leaves to Trunk :
Round 1 :
Thread trunk-color yarn on yarn needle; from underside of trunk, bring needle up through trunk and leaf base (use leaf tail) and take 3-4 small whip stitches through leaf base and trunk; travel back under trunk and repeat every 3-5 mm until leaf base is secure (no stitch count)
Info :
Use the long tail left on each leaf for initial sewing. Aim for nearly invisible tacking stitches; hide tail ends by weaving into the underside of trunk braid. Add 2-3 extra securing stitches at the very base of each leaf to avoid looseness when the runner is moved.
Round 2 :
For larger leaves add 2-3 tacking points along the leaf stem and one along midrib to keep leaf laying slightly upturned (no stitch count)
Info :
If you want leaves to appear raised from the trunk, only sew at a small point at the leaf base and a hidden point under a nearby branch to hold stem — this leaves edges free to curl naturally.
— Attaching Berries and Small Leaves :
Round 1 :
Sew berry clusters in small groups of 2-4 under or near leaf bases using short tails and tight whip stitches; secure thoroughly (no stitch count)
Info :
Berries can be sewn in small groups to form pendulous clusters. Use the trunk yarn to make the thread nearly invisible attaching to the underside of the braid so berries appear naturally attached.
— Final Edge Treatment :
Round 1 :
Using contrast or trunk color, work a decorative sl st ridge along both long edges of the braided trunk: *sl st every 4th braid twist, ch 1 between each sl st* continue entire length (approx number varies with length)
Info :
This simple stitch secures the braid edges and provides a finished look. It also helps keep the braid flat on the table. If you prefer a softer edge, work 1 sc every few stitches along the braid edge instead.
— Optional Backing (For Stability) :
Round 1 :
Cut a thin piece of felt or cotton batting shaped to the runner's curve. Secure it to underside with ladder stitch using trunk yarn every 1" to 2" (no stitch count)
Info :
Backing helps the runner lie flat on a table and protects delicate leaves when moved. Felt should be cut slightly smaller than braid outline to remain hidden.
— Variation: Flattened Cord Trunk (Alternate Method) :
Round 1 :
Work a single wide flat cord instead of three braided cords: ch 6, sc in 2nd ch from hook and across, continue working in joined rounds increasing to width then work even for length. Use BLO rounds to create ribbed edge. Example initial rounds: ch6, sc across (5); join, round2 (sc, inc) x 5 (10); round3 1 sc in each st (10) work even until length achieved (no precise stitch count — tailor to width desired)
Info :
This flatter trunk uses fewer assembly steps but yields a different look. Choose the method that matches the pictured runner or your personal preference.
— Finishing Touches :
Round 1 :
Weave all loose ends at least 2" into the underside and trim. Use craft glue sparingly on the undersides of leaves if you want extra security, but test on scrap first (no stitch count)
Info :
Give your runner a final light blocking if necessary to make leaves uniform. Place on flat surface and press gently — avoid heavy moisture on cotton that may warp the braid; steam is best sparingly.
Round 2 :
Optional: add small beads or metallic threads sparingly to leaf centers for delicate highlights — sew on with fine thread (no stitch count)
Info :
Your runner is now ready to display. For washing: spot-clean only or hand wash gently and reshape while damp; lay flat to dry to maintain shape of braid and leaves.
— Pattern Notes & Tips :
Info :
Do not worry if every leaf is not identical — slight variation adds to the organic look. When in doubt about placement, follow a balanced mix of colors rather than symmetry for a natural, wild-branch effect.
Info :
For a longer runner add more cord length and additional leaves: increase counts proportionately (one extra large leaf for every 4-5" of additional trunk length is a good rule of thumb).
Info :
Keep a small notebook of placement as you sew so you can reproduce the design later or create mirrored versions for table pairs.
This autumn runner brings the texture and colors of a crisp fall day right to your table. Each crocheted leaf and cluster adds character and warmth, finished with a braided trunk that looks handmade and elegant. As you assemble each leaf you'll feel the piece come alive — it's a lovely seasonal accent and makes a heartfelt gift. 🍂🧶 Place it on your table, mantel, or shelf and enjoy the little moments of handmade charm! 🍁