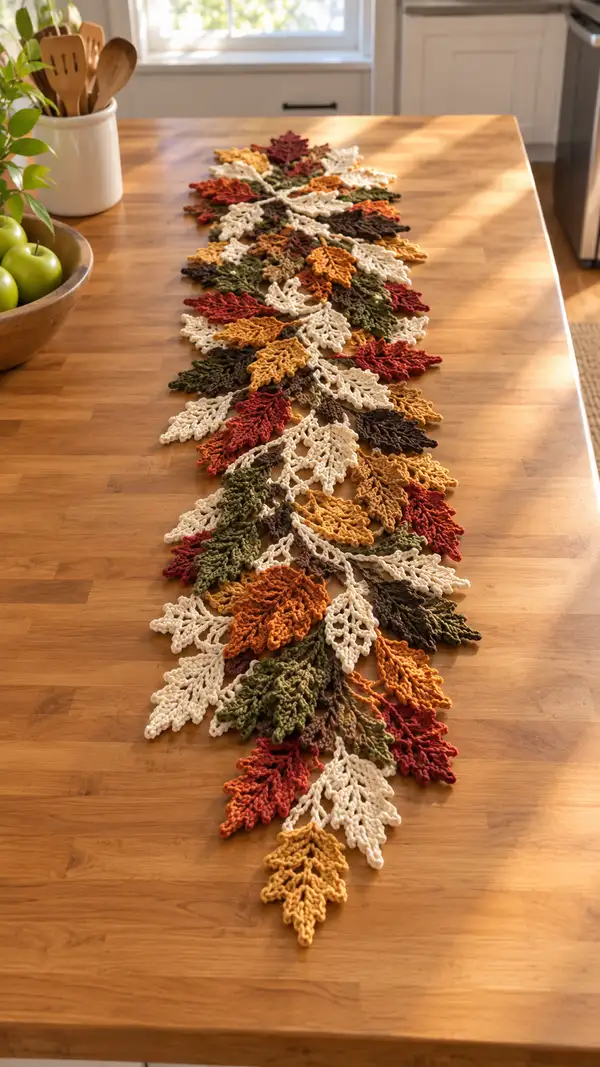
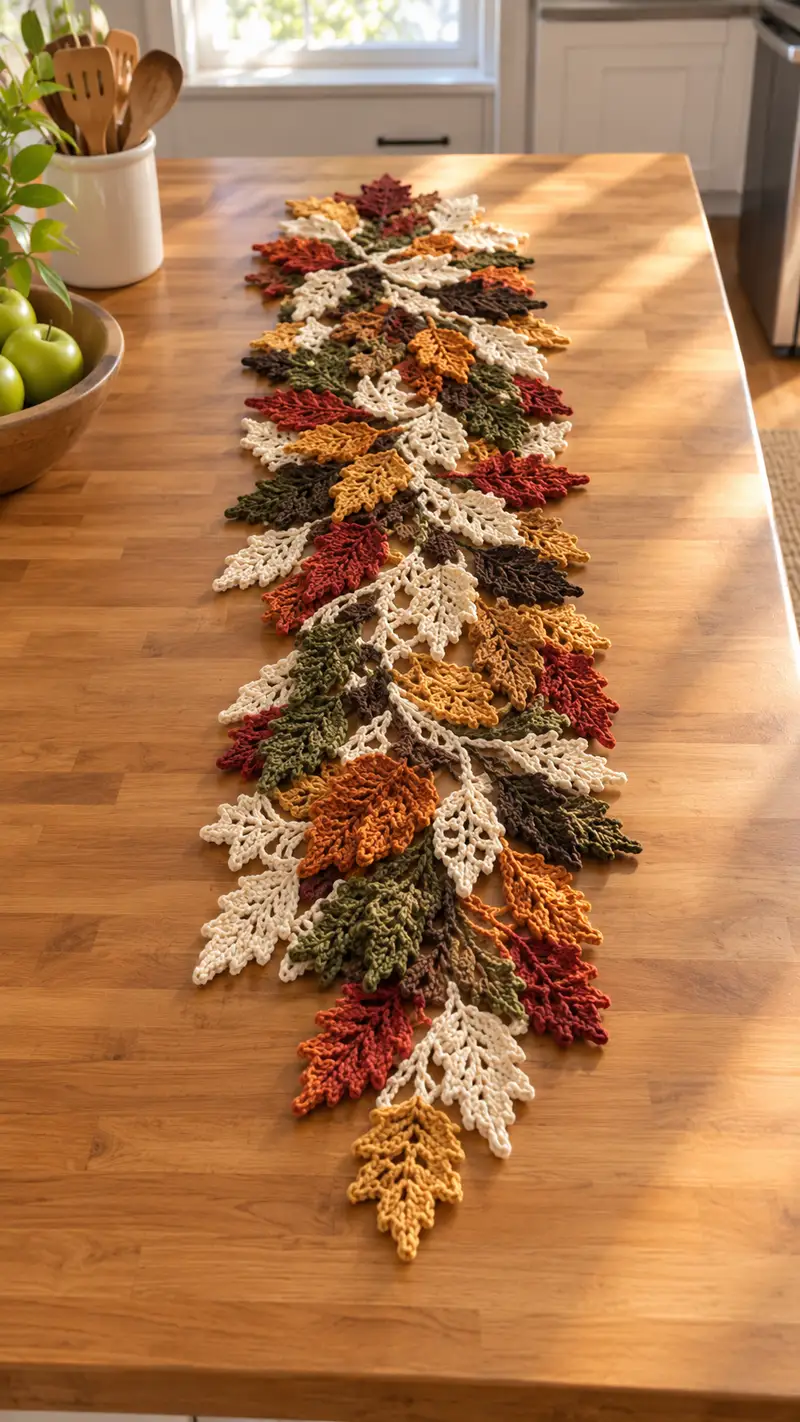
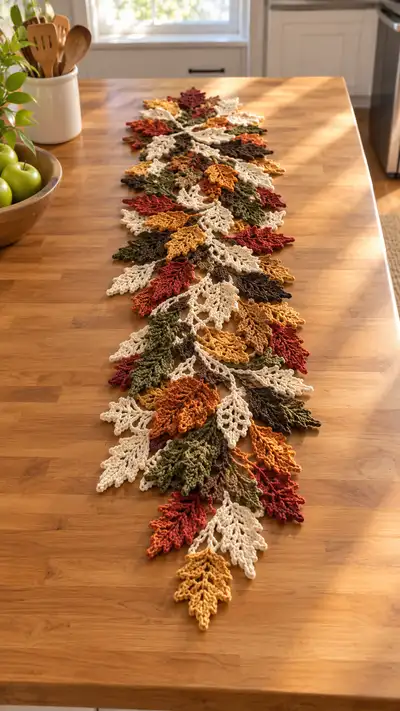
A layered table runner made of crocheted autumn leaves in cream, rust, mustard, olive, and chocolate tones. This pattern teaches several leaf sizes, textured edges, and a simple joining method to create a cascading runner. Perfect for seasonal decorating, the open lacy leaves layer beautifully for a natural, hand-crafted look.
Progress Tracker
0% Complete
— Pattern Overview :
Info :
This pattern is modular and uses three leaf sizes: Large Leaf, Medium Leaf, and Small Leaf. Each leaf is worked in the round from a center magic ring to a broad leaf body, with textured surface stitches and picot serrations forming the edge. After making the leaves you will create a flexible central chain spine and join the motifs in a cascading arrangement. Block leaves before joining for best results. Counts shown include total stitches at the end of each round and are calculated for worsted weight yarn and a 4.0mm hook.
Info :
Before you begin, select your color palette and plan how many of each leaf size you will make. The sample runner in the photo uses roughly 18 large leaves, 20 medium leaves and 24 small leaves for a table approximately 60-70 inches long; adjust motif counts to lengthen or shorten your runner.
— Large Leaf :
Round 3 :
(1 sc, inc) x 6 (18)
Round 4 :
(2 sc, inc) x 6 (24)
Round 5 :
(3 sc, inc) x 6 (30)
Info :
These first increases establish the central body of the leaf. Work loosely enough to maintain a flat base; do not over-tighten. The leaf will extend outwards in the next rounds using taller stitches to create an elongated shape.
Round 6 :
(4 sc, inc) x 6 (36)
Round 7 :
(5 sc, inc) x 6 (42)
Round 8 :
(6 sc, inc) x 6 (48)
Info :
Switch to dc and tr stitches to begin forming the leaf 'veins' and lobes. For a textured surface, alternate dc clusters with chains to open up lacy holes that mimic natural leaf venation.
Round 9 :
1 sc in each st (48)
Round 10 :
(3 sc, 1 hdc, 1 dc, ch 3, sl st in next st, 1 dc, 1 hdc, 3 sc) repeat across to mirror shaping (48)
Info :
Work Round 10 as a repeating motif along the current round to build a slightly lacy, worked-in pattern; counts remain 48 as the sculpted stitches occupy existing stitches rather than increasing total stitch count.
Round 11 :
1 sc in each st (48)
Round 12 :
(2 sc, dec, 1 hdc, ch 4, 1 hdc, dec) x 8 (40)
Info :
Begin gentle decreases to elongate the leaf and narrow toward the tip. The ch-4 loops create decorative openwork spaces that will be blocked into valleys between the lobes.
Round 13 :
1 sc in each st (40)
Round 14 :
(2 sc, 1 dc cluster in next 3 sts, 2 sc) x 8 (40)
Round 15 :
1 sc in each st (40)
Round 16 :
(1 sc, dec) x 10 (30)
Info :
At this stage the leaf should be visibly narrower. Pin the leaf on your blocking mat to test how the shape behaves; small gentle pulls at the tip will produce a more pointed leaf when blocked.
Round 17 :
(2 sc, dec) x 6 (18)
Round 18 :
(1 sc, dec) x 6 (12)
Round 20 :
Fasten off leaving 20 cm tail for sewing. Weave tail back through center and secure (6)
Info :
Create serrated edges by working a separate picot edging around the outer perimeter before fastening off if you prefer more pronounced points. Use a 3.5mm hook for picots to tighten the edge slightly for crisper points.
Round 21 :
Join here to add decorative edge: join yarn at outermost point, ch1, sc around edge placing picots (ch3, sl st in 3rd ch) after every 6 sc to form serrations. Count depends on leaf perimeter (approx 24 picots)
Info :
Blocking tip: wet block and pin leaf into an elongated diamond shape. For sharper points, use small dabs of steam from an iron held above the leaf (do not press directly) while pinned.
Round 22 :
If adding a central vein: with contrasting yarn, surface slip stitch from base to tip along center of leaf. Secure ends. (no change in core stitch count)
Round 23 :
Optional: Add small chain loop at base for joining later: ch 12, sl st back down to create stem loop. Fasten off and weave in ends.
Info :
Large Leaf summary: this structure creates a broad central leaf with textured surface and serrated edges. Make as many as you need in varied colors. Keep tails long for assembly—20 cm is recommended for secure joining without knotting in visible areas.
— Medium Leaf :
Round 3 :
(1 sc, inc) x 6 (18)
Round 4 :
(2 sc, inc) x 6 (24)
Round 5 :
1 sc in each st (24)
Info :
Medium leaves follow a simpler shaping path, useful to fill gaps and add layered depth. Work the round 6-10 using a mix of hdc and dc clusters for texture while keeping totals stable.
Round 6 :
(1 sc, 1 hdc, 1 dc) x 6 (24)
Round 7 :
1 sc in each st (24)
Round 8 :
(3 sc, dec) x 6 (18)
Round 9 :
1 sc in each st (18)
Round 10 :
(2 sc, dec) x 6 (12)
Info :
Use picot or small chains along the outermost edge to create a serrated finish. For a more lacy medium leaf, skip a sc occasionally and replace with ch 2, sl st to form eyelets.
Round 11 :
(1 sc, dec) x 4 (8)
Round 13 :
Fasten off leaving 15 cm tail for joining. Add optional surface vein with contrasting yarn.
Info :
Medium Leaf summary: smaller and faster than the large leaf, medium leaves are ideal for breaking up larger color blocks. Make a variety of colors to layer for a natural look.
— Small Leaf :
Round 3 :
(1 sc, inc) x 6 (18)
Round 4 :
1 sc in each st (18)
Round 5 :
(2 sc, dec) x 6 (12)
Info :
Small leaves provide delicate highlights between larger motifs. Use them liberally in cream and mustard to keep the runner feeling light and airy.
Round 6 :
(1 sc, dec) x 4 (8)
Round 8 :
Fasten off leaving 12 cm tail for sewing. Optionally add tiny picots at edge: join, (sc, ch3, sl st) around 6 times to create tiny teeth.
Info :
Small Leaf summary: these are quickest and will be used as accents. If you prefer, substitute a crocheted small maple or oak-shaped leaf using dc shells instead of rounds for variety.
— Connector Stem and Spine Chain :
Round 1 :
Create a foundation chain for the runner spine: ch 200 (or desired length). This chain will lay along the center underside of the runner and serve as a place to attach leaf bases. Adjust length to fit your table—200 ch yields roughly a 60-70 inch runner in sample.
Info :
If you want a denser runner with less spacing, reduce the chain by increments of 10. For more open, airy look, increase chain length. Mark attachment points every 6-8 chains to space leaves evenly.
Round 2 :
Work a single crochet back across the foundation chain to strengthen spine: ch 1, sc in 2nd ch from hook and in each ch to end. Fasten off. (199 sc across - exact dependent on chosen length)
Info :
Work this row with slightly tighter tension than your leaves so the spine sits flat and holds shape. You may stitch a second row of sc if you want a thicker trunk; in sample the spine has 2 rows of sc for extra stability.
Round 3 :
Optional: add small loop points along the top side of the spine where leaves will be joined: ch 6, sl st into same sc to form a small loop, sk 6 sc, repeat across. Loops will ease joining by allowing you to sew leaf stems onto loops rather than through the spine body.
Info :
Mark join points with stitch markers or contrasting scrap yarn at every 6th sc or as your layout requires. This makes attaching consistent and avoids crowding clusters in one spot.
— Joining Leaves to Spine (Method A: Sew-On) :
Round 1 :
Arrange leaves along spine before sewing. Lay your spine on the table and place leaves overlapping so each leaf base aligns to a marked point. Alternate large, medium, small for organic look.
Info :
Try several layout variations: denser clusters in the center tapering to fewer leaves at the ends gives a natural fall. Take a photo of your layout to reference during sewing.
Round 2 :
Using long tails left from each leaf, thread a yarn needle and sew through spine sc and leaf base loop using a whip stitch or mattress stitch. Use 6-8 secure stitches per leaf base, catching several spine rows for sturdiness.
Round 3 :
Rotate leaf slightly as you sew to achieve natural spread; sew additional small leaves onto top of larger leaf bases to create layered clusters. Fasten off and weave in ends.
Info :
For invisible joins, use a matching color yarn and small neat stitches; for visible decorative joins, use a contrasting color and visible blanket stitch to add interest. Keep stitches tight so leaves do not droop but avoid puckering the spine.
Round 4 :
Check placement frequently: after sewing 4-6 leaves, flip runner over and check underside for bulky knots. Reposition stitches as needed to lay flat.
— Joining Leaves to Spine (Method B: Crochet-On) :
Round 1 :
Alternatively, attach leaves with slip-stitch crochet to the spine loops: position leaf base over a loop, join yarn at leaf base, work sl st through spine loop and leaf base stitch around with 6-8 sl st to hold. Fasten off and weave ends.
Info :
Crochet-on joins produce a flatter result and are slightly quicker. They also make it easier to adjust spacing on the fly because you can remove the sl st and reposition before fastening off completely.
— Decorative Joining Clusters :
Round 1 :
For clusters where several leaves meet, secure the smallest leaf first, then layer medium and large leaves sewn through both the leaf base and spine using hidden stitches to create a cohesive cluster. Use extra stitches for cluster stability (10-12 stitches total across pieces).
Info :
Clusters should alternate color and size: place a cream small leaf under a rust medium and a mustard large leaf to mimic natural layering and avoid same-color stacking. Step back often and view from the end of the table to check balance.
— Edge Lace and Finishing Rows :
Round 1 :
Once leaves are joined, add an optional lace edge along the outer spread of leaves: join yarn at outermost spine sc, ch 1, sc evenly along spine edge, at each leaf tip sc into tip and ch 3 picot, sl st back, continue along outer margin to end.
Round 2 :
Repeat lace around opposite edge of runner if desired for symmetry. Fasten off and weave in all tails securely. Total number of sc will vary widely depending on runner length and number of leaves.
Info :
Edge lace can be subtle or dramatic—use a matching color for soft finish or a dark brown to frame the runner. Keep the edge light to avoid adding bulk that prevents leaves from lying flat.
— Blocking and Final Shaping :
Round 1 :
Wet block each leaf: pin center down, stretch edges gently to desired elongated shape, pin serrations to crisp points and allow to dry completely. For severe curl use a gentle steaming technique from above the pins (do not touch iron to yarn).
Info :
Blocking is the most important step to achieve the lacy, natural look. Without proper blocking, leaves may remain rounded and not overlap as in the inspiration photo. Invest time in blocking evenly for consistent results across motifs.
Round 2 :
Once dry, sew leaves to spine and re-position any pins you used for shaping. If the runner still feels floppy, stitch a second row of single crochet along the spine to reinforce where leaf bases are attached.
Round 3 :
Final trim: weave in all loose ends, hide tails between layers of leaves and trim close. Ensure no long tails will show when runner is in use.
Info :
For storage, loosely roll the runner with acid-free tissue between folds to maintain leaf shape; avoid folding along sharp leaf points to prevent permanent creases.
— Color Layout Suggestions :
Round 1 :
Suggested repeating pattern for a 60-70 inch runner: Large (rust), Medium (cream), Small (olive), Large (mustard), Medium (brown), Small (cream) and repeat. Adjust as needed to avoid repeating same color too closely.
Info :
Randomization: to get the natural look in the photo, do not use a strict repeating color sequence across the whole runner—create small groups of colors that repeat later in a different order to mimic how leaves fall naturally.
— Notes on Scale and Customization :
Round 1 :
To make a shorter runner, reduce the number of leaves and shorten the spine chain. To make a table centermat instead, create a circular hub of leaves joined into a ring rather than a linear spine (use same joining principles).
Info :
If you prefer a denser runner, make more medium and small leaves between large ones. If you want a minimalist version, use only large leaves spaced farther apart for a bold, simplified look.
Round 2 :
Care tips: spot-clean with a damp cloth for light spills; hand wash gently in cold water and reshape while damp for deep cleaning. Avoid machine washing to maintain edges and blocking.
Finishing this runner is so satisfying — each crocheted leaf adds up to a flowing, autumnal table display that feels both handmade and refined. Arrange, block, and join at your own pace, and you’ll end up with a piece that brings warmth and texture to any room. 🧶🍁 I hope it becomes a seasonal favorite on your table. Happy crocheting! 🌟