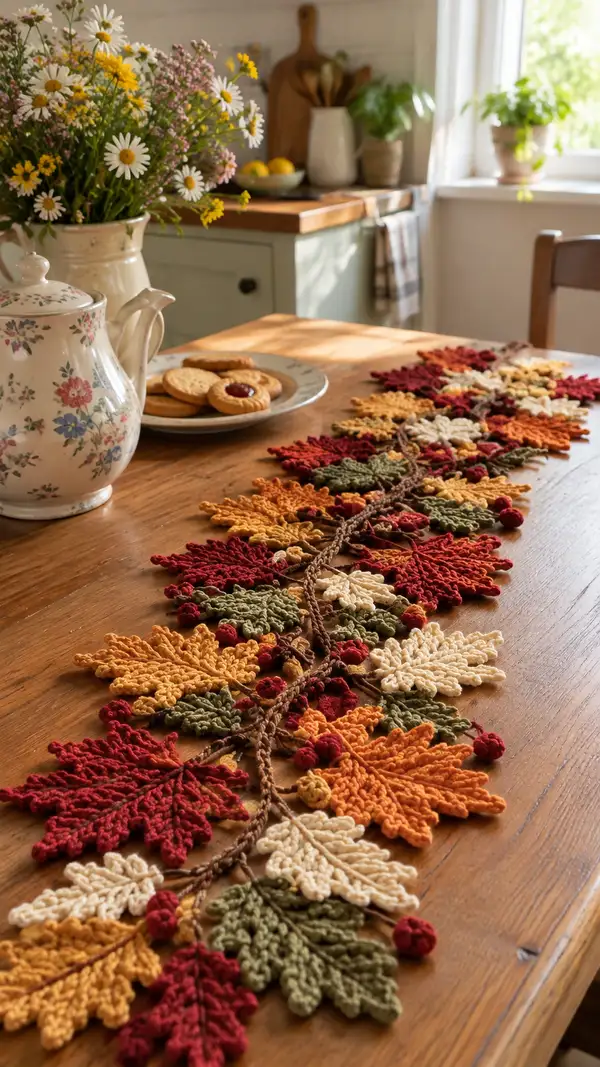
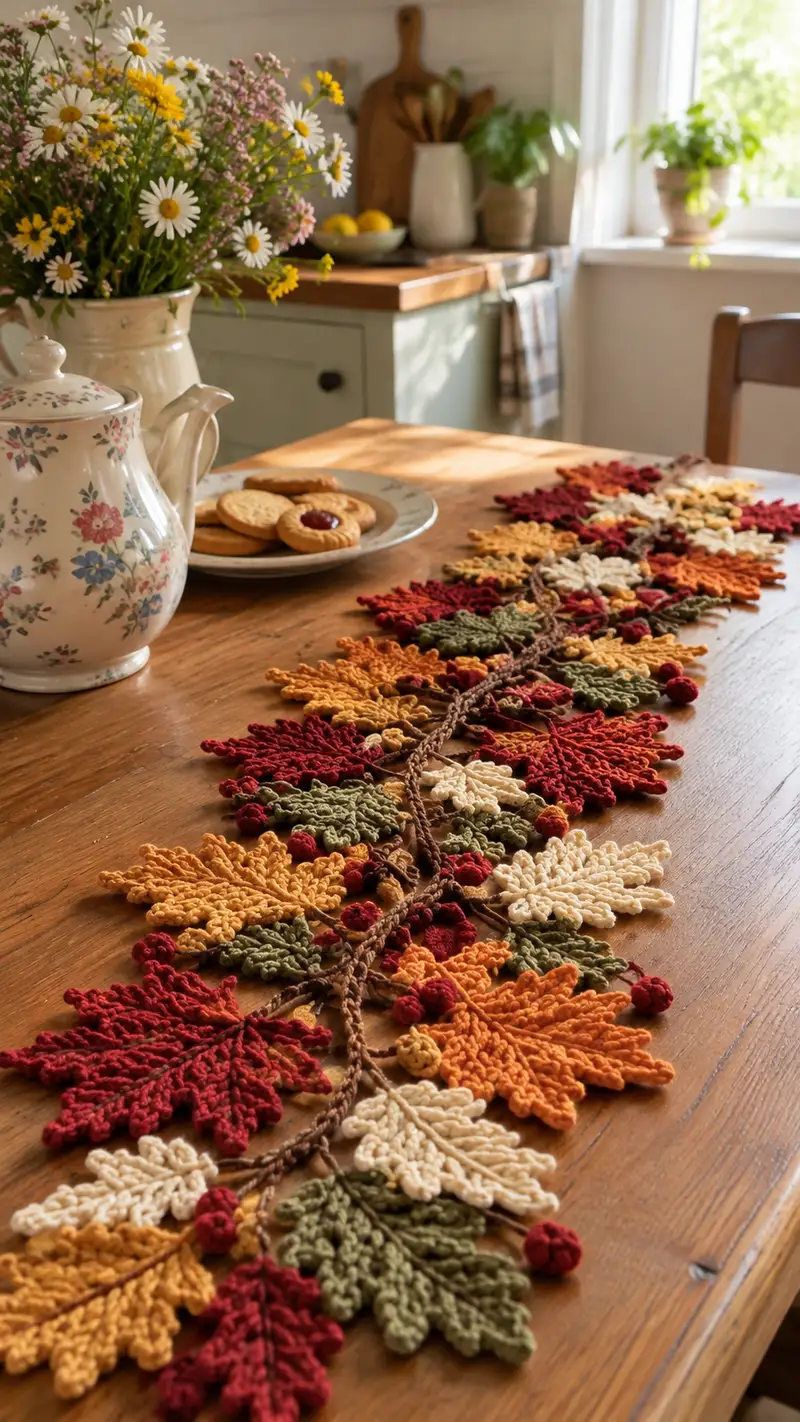
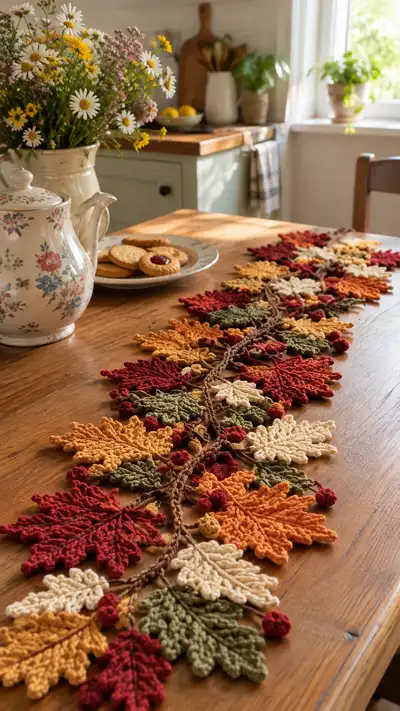
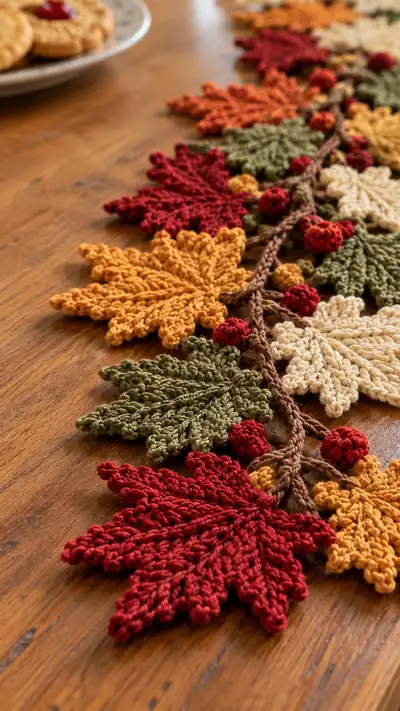
Create a warm, seasonal table runner made from layered crochet leaves, berries and a braided vine. This pattern uses textured leaves in deep red, mustard, olive and cream, linked along a rustic brown cord. The finished runner adds cozy autumn charm to any table and is perfect for seasonal decor or gifts.
Progress Tracker
0% Complete
— Overview & Gauge :
Info :
This table runner is modular. Make leaf motifs in sizes listed, plus berries and a braided vine for joining. Gauge is not critical but we recommend a firm fabric: 18 sc x 16 rows = 4 in (10 cm) in worsted cotton using 3.5mm hook. For crisp leaf edges work slightly tighter than usual.
Info :
Decide desired runner length and count motifs: a sample runner of approximately 36-40 in (90-100 cm) uses 12-14 large and medium leaves arranged staggered with smaller filler leaves and 20+ berries. Adjust motif counts to fit your table.
— Large Maple-Style Leaf (Make 4-6 in deep red and orange) :
Round 1 :
ch 10, sc in 2nd ch from hook and across to end (9 sc). Rotate and continue along opposite side of foundation chain: 1 sc in same last ch and sc back along chain to beginning to create a thick oval base (18 sc total) (18)
Round 2 :
ch 1, 2 sc in first st, 1 sc in next 7 sts, (1 sc, inc) in next st to make small point, 1 sc in next 7 sts, 2 sc in last st; join with sl st to first sc — creates slightly expanded base (22)
Round 3 :
ch 2 (does not count), dc in same st, dc in next 8 sts, (dc, ch1, dc) in center stitch to form central lobe, dc in next 8 sts, dc in last stitch — work evenly on both sides to maintain symmetry (24)
Round 4 :
ch 1, sc in each st around working extra sc in the ch1 space of the center lobe (26)
Round 5 :
ch 1, sc in next 3 sts, hdc in next 2 sts, dc in next 4 sts, (tr, ch1, tr) in center lobe ch1 space, dc in next 4 sts, hdc in next 2 sts, sc in remaining sts — this begins shaping defined lobes (28)
Info :
At the end of Round 5, you should have a central prominent lobe and two side lobes forming; keep tension even. Count stitches frequently so both sides mirror each other exactly.
Round 6 :
ch 1, sc in next 4 sts, (hdc, dc) in next 3 sts, (tr, ch1, tr) in center lobe, (dc, hdc) in next 3 sts, sc rest of round (30)
Round 7 :
ch 1, sc in each st BLO for this round to create a defined ridge at the base of lobes (30)
Info :
Working BLO here forms a small ridge that reads like the leaf base; this helps the leaf lift off the surface slightly and shows shadow on the runner.
Round 8 :
ch 2, dc in next 3 sts, dc3tog over next 2 sts to create a small notch, dc in next 3 sts, (dc, ch1, dc) in center lobe, mirror on other side (30)
Round 9 :
ch 1, sc in each st (30)
Round 10 :
Begin forming individual serrated points for each lobe: *ch 3, skip 1 st, sl st in next st, sc in next 2 sts* repeat around to form shallow picot edges (30 plus picot clusters)
Round 11 :
ch 1, insert hook into base of each picot and work sc, hdc in next, dc into center of lobe to create raised ridges, continue around making sure central ridge gets extra dc to create vein effect (30)
Round 12 :
ch 1, work front post dc (fpdc) along the center stitchline of the center lobe on both sides to create a raised midrib: *fpdc next 2 sts, sc next 2 sts* repeat across center area (30)
Info :
Use fpdc and bpdc strategically to create the central vein and secondary veins. The raised texture is key to achieving the carved leaf look.
Round 13 :
ch 1, sc in each st but where you want deeper serration, make (sc, picot) sequences: this increases surface texture and tiny tips (30)
Round 14 :
ch 1, dec round shaping edges to form taper at leaf tips: *sc 4, dec* repeat around (25)
Round 15 :
ch 1, sc in each st (25)
Round 16 :
Work a last decorative round: *sc, ch2, sl st in next st* around to give a scalloped edge and stabilise the points (25)
Round 17 :
Fasten off leaving long tail for sewing. Weave tail through edge sts and pull gently to flatten and secure shape. Block flat using pins and steam to set shape.
Info :
Blocking is essential: pin leaf to desired shape and steam lightly. Use starch spray if you want more rigidity for a table runner that doesn't curl.
— Medium Oak-Style Leaf (Make 6-8 in olive and mustard) :
Round 1 :
ch 8, sc in 2nd ch from hook across (7 sc). Continue along opposite side of chain with sc to produce a thick oval (14)
Round 2 :
ch 1, 2 sc in first st, sc in next 5 sts, 2 sc in last st, continue along back: 2 sc in last st, sc in next 5 sts, 2 sc in first st (18)
Round 3 :
ch 1, sc next 3, hdc next 4, dc next 4, hdc next 4, sc rest (18)
Round 4 :
ch 1, work symmetrical lobes with *(sc, picot, sc) in every other stitch* across to make a serrated edge and texture (18)
Round 5 :
ch 2, fpdc along center spine: *fpdc next, sc next* repeat creating a subtle raised central vein (18)
Info :
Oak-style leaf is slightly narrower than maple. Keep the body slightly firmer so it lies flat; avoid too many picots here compared to the larger leaf.
Round 6 :
ch 1, sc in each st but add 2 sc at the base to slightly enlarge connection point for sewing to vine (20)
Round 7 :
ch 1, sc around (20)
Round 8 :
ch 1, work one round of hdc in each st to add body thickness and definition (20)
Round 9 :
ch 1, sc around decreasing slightly toward tips: *(sc 3, dec)* x 5 (15)
Round 10 :
ch 1, sc around (15)
Round 11 :
Edge detail: *(sc, picot) in every other stitch* around for crisp serrated edge (15)
Round 12 :
Fasten off and leave tail for sewing. Pin and steam-block to flatten and shape lobes carefully.
Info :
Make several medium leaves in varying placements for a natural, layered look. Alternate colors when blocking so edges don't stick together.
— Small Filler Leaf (Make 8-12 in cream and olive) :
Round 1 :
ch 6, sc in 2nd ch from hook and across (5 sc). Continue on opposite side to form small oval foundation (10)
Round 2 :
ch 1, sc next 2, hdc next 2, sc next 2, sc around back (10)
Round 3 :
ch 1, sc in each st, add small picot tips at the three outer points: *(sc 2, picot)* three times (10)
Round 4 :
ch 1, sc around to tidy edges (10)
Round 5 :
Fasten off leaving long tail for sewing. Block flat and press gently to set shape (10)
Info :
These small leaves fill gaps and support larger leaves visually; use cream and olive to lighten and add contrast.
— Little Berry (Tiny Round Bobble - Make 20-30 in red and mustard) :
Round 1 :
Make a magic ring, ch 1, 6 sc in magic ring (6)
Round 2 :
Increase in each st: inc x6 (12)
Round 3 :
Sc in next st, *2 hdc in next st* repeat for 6 bumps to make a fuller sphere feel (18)
Round 4 :
Sc in each st around (18)
Round 5 :
Dec round: (sc 2, dec) x 4 (12)
Round 6 :
Dec around: (sc 1, dec) x 4 (8)
Round 7 :
Finish with 4 dec (4) and stuff lightly if desired. Pull tail to close, weave in securely leaving short tail for sewing. Optional: attach with a few stitches through centre of berry to vine.
Info :
For a textured berry, after Round 3 switch to loop stitch or make a bobble stitch cluster in Round 4 before decreasing. For a flat berry, stop at Round 4 and fasten off leaving tail; flatten and stitch to vine.
— Acorn Cap Accent (Optional - Make 6-8) :
Round 1 :
Make a magic ring, ch 1, 6 sc in ring (6)
Round 3 :
Work 1 sc in next st, *(sc, picot, sc) in next st* repeat to create textured cap appearance (12)
Round 4 :
Work sc around and fasten off leaving long tail for sewing to berry or vine (12)
Info :
Sew acorn caps over small mustard-coloured bobble shapes to create a natural acorn accent. These are decorative and optional.
— Braided Vine & Branches (Make as long as your runner — sample 36 in) :
Info :
The vine is created by making three long cords and braiding them together, then crocheting short branches out from the braid which you will sew leaves to. Alternatively, work a long chain and then cover it with sc to form a thick cord.
Cord Method A - Long Chain Covered :
ch 150 (adjust for runner length). Join with sl st to first ch to make a loop if you want continuous cord or leave as chain. Work 1 sc in each chain across to cover and create a firm cord (150)
Cord Method B - Three-Strand Crochet Cord (sample) :
Make 3 separate cords: ch 60 and sc back along chain to make a firm cord, fasten off (60). Repeat to make three cords. Braid the three cords together tightly and use a few whip stitches in brown yarn to secure ends. This creates a rustic braided vine.
Round 1 :
After braiding, work a few rounds of sc along the braid if desired to flatten and tidy: *sc in each twist crossing* for 1 full pass along braid length (length varies)
Info :
Where you want branchoffs, leave a longer loose loop when covering the chain or add a short 6-8 ch loop which will be the base for sewing a leaf cluster. Plan branch spacing in advance (approx every 2-3 in or as desired).
Branch Creation :
At desired branch point, join yarn, ch 8, sc back along chain to create a short branch cord. Fasten off leaving tail for sewing. Make branches of varied lengths to mimic natural growth.
Info :
Make branches in three sizes: short (6 ch), medium (10 ch), long (14 ch). Use medium and short branches for attaching medium and small leaves, and long ones for large leaves. Stagger left/right along vine for organic look.
— Joining Leaves to Vine (Assembly preparation) :
Info :
Position leaves along vine before sewing. Place large leaves at wider intervals and cluster medium and small leaves around them, tucking edges under other leaves slightly to create depth. Pin everything in place using sewing pins.
Round 1 :
Use the long tails left on each leaf to whip-stitch to the vine and branch base: thread leaf tail through yarn needle and sew several invisible stitches through braid and leaf base, then tie a secure knot on the back and weave tail in for security.
Info :
For extra hold, after sewing each leaf, tack a second stitch through a nearby leaf to anchor it into place, creating an overlapped cluster effect. Keep stitches small and hidden on the back side.
— Decorative Joining Stitches and Veining (Optional) :
Round 1 :
With contrasting thread (slightly darker or lighter than leaf color), embroider a central vein: bring yarn up at base, run small backstitches along centerline to tip and return, then tie off on back. Work secondary veins as short backstitches radiating to lobes.
Info :
Embroidery adds realistic veins that catch light. Use the same yarn but a smaller needle or substitute tapestry thread for delicate lines. Make sure embroidery is shallow and does not create holes on the front right side.
— Final Edge & Finishing Touches :
Round 1 :
Once all motifs are sewn to the braid, add a finishing round of slip stitch around exposed braid and branch join points to tidy and hide tails. Use brown yarn and small, even sl st along the braid edges.
Round 2 :
Attach berries: sew berries into clusters of 1-3 at chosen places with a few stitches through braid then through berry tail. Add acorn caps where desired by sewing small textured caps over mustard bobbles.
Info :
Step back frequently and evaluate the composition. Rotate runner and add leaves or berries to balance color and shape. Trim any long tails and weave ends securely into the braid or leaf backs.
— Optional: Extra Textured Veins Using Surface Crochet :
Round 1 :
With same-color yarn, use surface slip stitch to outline each lobe and define edge ridges. Work sl st around perimeter and across center to create a raised look (work slowly to keep lines even).
Info :
Surface crochet is a delicate finishing technique. Keep tension loose and use a small hook if necessary to keep the surface lines from pulling the leaf inward.
— Care & Storage :
Info :
Spot clean with mild soap and cold water. To store, roll runner loosely and place in breathable bag; avoid heavy stacking to prevent crushing the leaves. Re-block after storage if any curling occurs.
Info :
If you want a more permanent stiff runner, lightly starch leaves after blocking and let dry flat before assembly.
Finishing this autumn leaves table runner is such a satisfying seasonal project — each crocheted leaf and tiny berry comes together to create a layered, natural composition filled with texture and color. The modular construction lets you customize length, scale and palette for your table. I loved arranging the leaves and watching the runner take a life of its own. 🍁🍂🧶