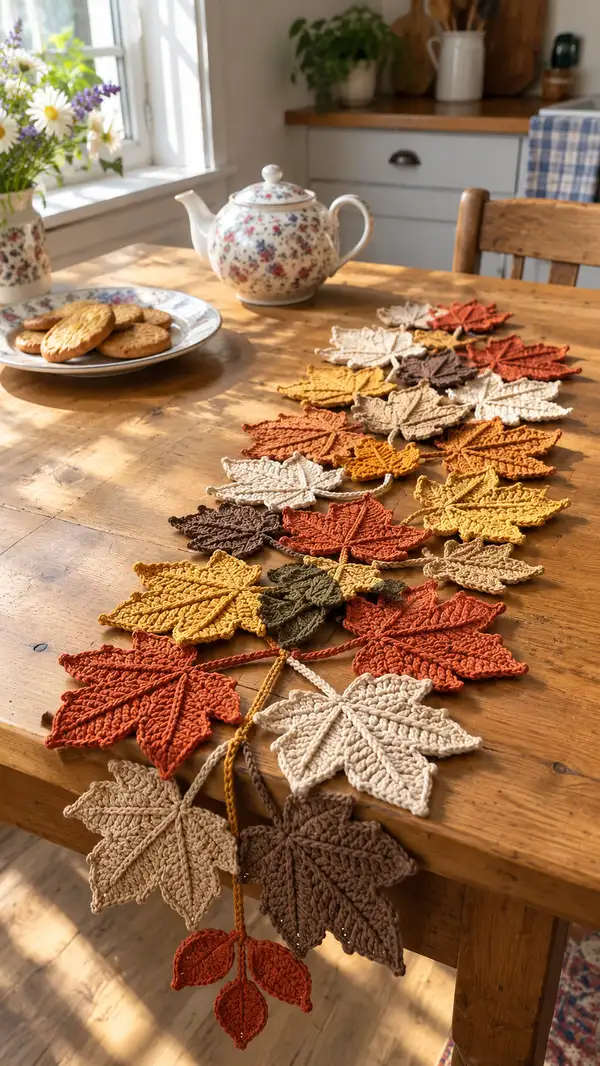
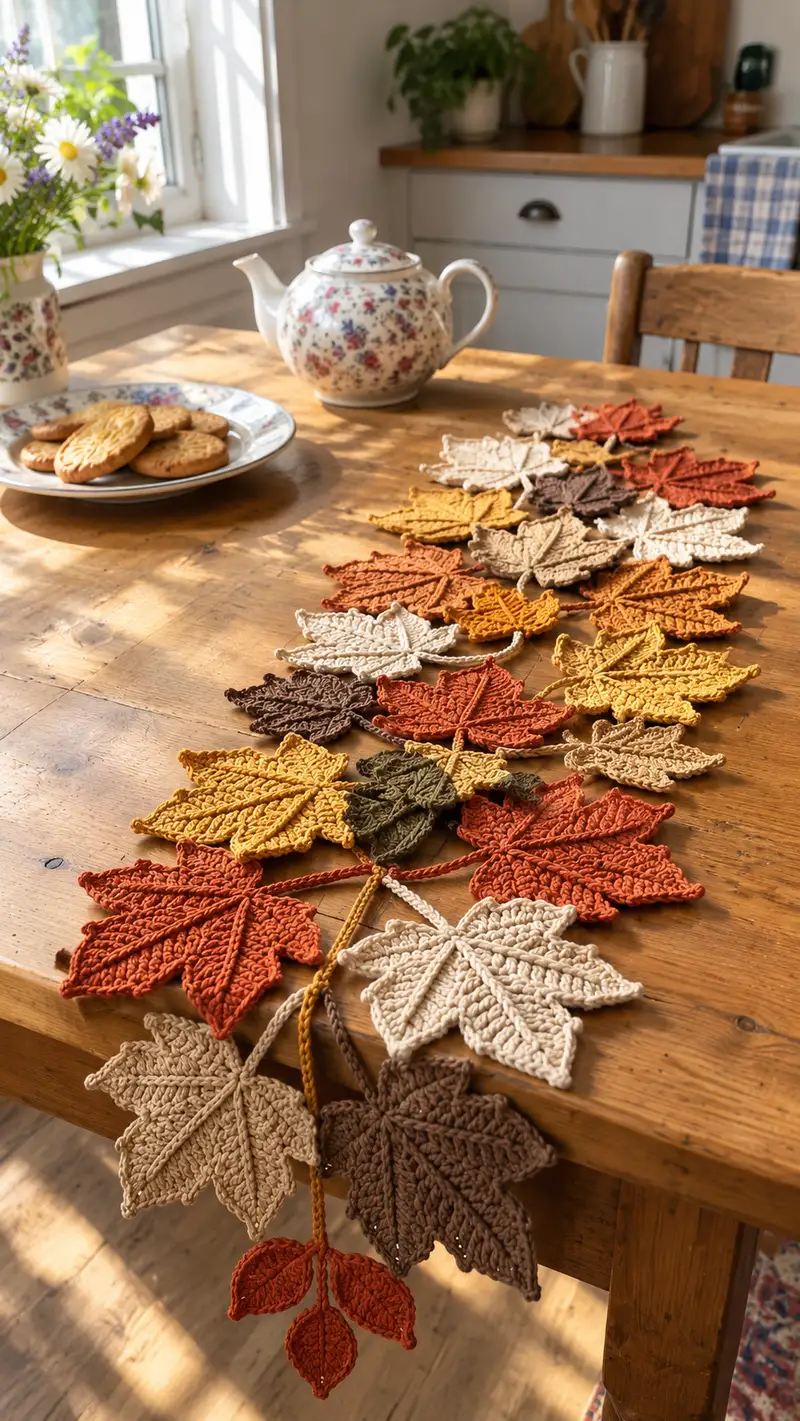
Create a warm, seasonal table runner made from individual crocheted maple-style leaves in rich autumn tones. This pattern shows how to crochet layered large, medium and small leaves, braid stems and join them into a flowing runner. Perfect for a harvest table, mantel or seasonal centerpiece — the finished runner features textured ribs, pointed lobes and braided stems for a handcrafted fall look.
Progress Tracker
0% Complete
— Overview :
Info :
This pattern assembles an autumn leaves table runner using three leaf sizes: Large, Medium and Small. Each leaf is worked flat from a central spine (foundation chain) and shaped by working along one side of the chain to the tip, then mirroring along the other side back to the base. Raised veins are made with post stitches and BLO rounds. After making leaves you will crochet braided stems and join leaves into a runner. Pattern assumes basic knowledge of sc, hdc, dc, post stitches and working along both sides of a chain.
Info :
Gauge is not critical for decorative runners, but consistent tension will keep leaves uniform. Using worsted cotton and a 4.0 mm hook yields large leaves approx 14-16 cm wide across lobes and 15-18 cm long from base to tip. Make a swatch for preferred texture.
— Large Leaf (Make 8-10) :
Round 1 :
Ch 26. Counted chain length = 26 (this is the center spine foundation)
Round 2 :
1 sc in 2nd ch from hook, 1 sc in next 3 ch, 1 hdc in next 3 ch, 1 dc in next 6 ch, 1 hdc in next 3 ch, 1 sc in next 4 ch — now work 3 sc in last ch (tip turning point) (forward side end)
Round 3 :
Working down the opposite side of foundation chain: 1 sc in next 4 ch, 1 hdc in next 3 ch, 1 dc in next 6 ch, 1 hdc in next 3 ch, 1 sc in next 3 ch, sl st into first sc to close (approx total sts on leaf edge = 34)
Info :
Check shape at this point: leaf should lie flat with a rounded tip made by 3 sc cluster. If too narrow, use a larger hook next time. Place a stitch marker at base center for reference when adding ribs.
Round 4 :
Ch 1, turn to work into RS: BLO 1 sc in each st around starting at base center and working up one side to tip and down to base on other side (34)
Round 5 :
Ch 2 (counts as hdc), 1 hdc in next 2 sts, 1 dc in next 6 sts, 1 hdc in next 6 sts, 1 sc in next 4 sts, dec over next 2 sts at base center to tighten join, sl st to join (structure now more defined, total approx 33)
Info :
Work rounds in BLO for the first few rounds to create a slight ridge along the outside edge. This gives a crisp border that mimics the leaf edge. Insert stitch marker at the tip to know where the top is.
Round 6 :
Ch 1, 1 sc in next 2 sts BLO, (1 sc, inc) in next st (increase at lobe crease), 1 sc in next 4, (hdc, dc, hdc) cluster in center top 3 sts, 1 sc in next 4, (inc, 1 sc) at mirror lobe crease, 1 sc in remaining sts back to base (total ~36)
Round 7 :
Ch 1, 1 sc BLO in each st (36)
Round 8 :
Ch 3 (counts as dc), dc in next 2 sts, hdc in next 6, sc in next 6, BLO sc in next 4, BLO hdc in next 6, dc in next 6, sl st to join (36)
Info :
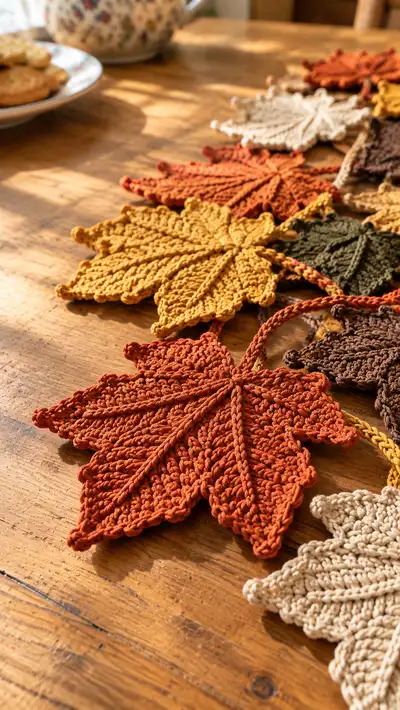
Begin the central rib: working down the center spine, you'll create raised ridges with FPdc and BPdc (front and back post double crochet) or alternatively use dc around post to mimic ribs. Plan rib placement at even intervals radiating from base to tip — typically 6 ribs for a 6-lobed maple look.
Round 9 :
Ch 1, 1 sc BLO across all sts to emphasize border ridge (36)
Round 10 :
Turn work to WS. Identify 6 even points along the leaf where ribs will sit (divide total edge into 6 sections). Ch 1, sc in first rib base, then ch 3, turn and work a short column: 1 tr, 1 dc into next ch for rib (see rib instructions below). Return and sl st into next base stitch. Repeat for each rib base along leaf (work each rib separated by 4-6 sc along edge).
Info :
Rib detail method: For each rib work a short vertical column built by ch 3, 1 tr into turning chain, then sl st back into the next base stitch on the leaf body to secure. After all ribs are placed, you will cover them with post stitches from RS to form raised veins.
Round 11 :
RS: Ch 2 (counts as hdc), working around rib columns use FPdc (front post double crochet) along the row of stitches that sit either side of each rib to lift them. Work 1 FPdc around the rib column base, then 2 sc between ribs to maintain spacing. Total sts remain approx 36 but texture changes.
Round 12 :
Ch 1, 1 sc BLO in each st (36)
Info :
If your ribs look flat, add another pass of BPdc on the reverse side behind each FPdc to fully wrap the rib for pronounced height. Use same stitch count but work post stitches around the ribs.
Round 13 :
Ch 1, 1 sc in next 3 sts, (inc) in next st, 1 sc in next 5 sts, 1 hdc in next 6 sts (across tip cluster), 1 sc in next 5 sts, (inc) at mirror position, 1 sc remaining (approx 38)
Round 14 :
Ch 1, sc BLO across (38)
Round 15 :
Ch 3, 1 tr in next 2 sts, 1 dc in next 8 sts, 1 hdc in next 8 sts, 1 sc in next 6 sts, sl st to join (38)
Round 16 :
Ch 1, 1 sc BLO across all sts to define edge (38)
Info :
At this point leaf edge is nearly final size. If you want a slightly larger leaf, repeat an increase round (like Round 13) adding one extra inc per lobe to add 6 sts total. Keep symmetry by mirroring increases on both sides.
Round 17 :
Ch 1, start central spine shaping: locate center stitch at base, work 1 sc in center base, ch 10 (this chain will become the stem base), sl st back into center base to anchor stem. Then sc in remaining edge sts to finish leaf (38)
Round 18 :
Ch 1, 1 sc BLO in each st; work along stem chain 1 sc in each ch to bulk it slightly (38 + stem length 10)
Info :
To make the stem thicker, work two rows of sc along the stem chain (returning in opposite direction). Leave a long tail at the stem base for sewing or braiding later.
Round 19 :
Decorative scallop: *ch 3, sl st into next st*, rep around at tips of lobes (use 6 scallops) to add tiny points at lobes (st count unchanged)
Round 20 :
Ch 1, 1 sc BLO across to tidy scallop joins and reinforce edge (38)
Info :
Fasten off leaving a 30-40 cm tail for sewing. Weave tail to the wrong side and secure. Make 8-10 large leaves alternating colors to create a varied palette along runner.
— Medium Leaf (Make 10-14) :
Round 1 :
Ch 20 (foundation spine length = 20)
Round 2 :
1 sc in 2nd ch from hook, sc in next 2, hdc in next 3, dc in next 4, hdc in next 3, sc in next 4, 3 sc in last ch (tip cluster) (forward side)
Round 3 :
Work back down opposite side: sc in next 4, hdc in next 3, dc in next 4, hdc in next 3, sc in next 2, sl st into first sc (approx 28 sts)
Round 4 :
Ch 1, BLO 1 sc in each st around to form tidy border (28)
Round 5 :
Ch 2, 1 hdc in next 3 sts, 1 dc in next 6 sts, 1 hdc in next 3 sts, 1 sc next 4 sts, sl st to join (28)
Info :
Add 4 ribs for medium leaf. Mark four even rib positions along leaf edge with pins or stitch markers before starting ribwork.
Round 7 :
RS: At each marked rib base ch 3, turn and make 1 tr into chain to form small rib, sl st back into body; repeat for all 4 ribs. Maintain even spacing between ribs.
Round 8 :
Ch 1, 1 sc BLO across to emphasize edge and lock ribs (28)
Round 9 :
Decorative tip: *ch 2, sl st into next st* repeat around tip to create small picots (picots added but stitch count stays consistent)
Round 10 :
Ch 1, 1 sc across entire leaf including picot joins (28)
Info :
Fasten off leaving a 25-30 cm tail for attaching to braided stems. Medium leaves give repeating texture and fill gaps between larger leaves.
— Small Leaf (Make 12-16) :
Round 1 :
Ch 14 (foundation spine = 14)
Round 2 :
Sc in 2nd ch from hook, sc in next 2, hdc in next 2, dc in next 4, hdc in next 2, sc in next 2, 3 sc in last ch (tip) then work back down opposite side sc in rest (approx 20)
Round 3 :
Ch 1, BLO 1 sc across to neaten edge (20)
Round 4 :
Ch 1, 1 sc in next 2 sts, inc in next st, 1 sc in next 4, inc in next st, 1 sc last sts (approx 22) to give tiny extra fullness to lobes
Round 5 :
Ch 1, sc BLO across (22)
Info :
Small leaves are great for trailing ends. Leave 20-25 cm tail at stem base for sewing. Fasten off and weave in ends neatly.
— Mini Cluster Leaves & Berries (Optional, Make 4-6) :
Round 2 :
Sc in 2nd ch from hook, sc next 2, hdc next 2, sc next 3, 3 sc in last ch and return along opposite side 1 sc each = total approx 14
Round 3 :
Ch 1, sc BLO around (14)
Round 4 :
For berry: ch 2, 6 sc in magic ring, pull tight, sl st close, fasten off leaving tail to sew berry cluster to leaf base (6)
Info :
Use mini clusters to add interest between leaves and near the runner ends. Sew berries into groups of 2-3 for natural look.
— Stem & Braided Cord (Make stems to join leaves) :
Round 1 :
Attach yarn at the base tail of a leaf. Ch 40 (or desired stem length). This is the stem chain (length variable). For a long runner chain can be 35-60 ch depending on spacing.
Round 2 :
Turn, 1 sc in 2nd ch from hook and each ch across (39 sc along stem). Fasten off leaving long tail for sewing. Repeat to make 6-8 stems per runner cluster, using varied lengths.
Info :
To create a thicker cord: make three stem chains of similar length, then tie their ends and braid loosely. Use yarn needle to stitch braid closed at ends. Braid provides sturdy joining cord that resists twisting on the table.
Round 4 :
Alternative cord: use a 3-strand chain braid (I-cord style) by working a narrow tube: ch 4, 3 sc in 2nd ch from hook around, continue in spiral until desired length, fasten off and flatten by sewing the first round to the tube base (tube width approx 3 sc).
Info :
Keep stems flexible by avoiding overly tight sc in stem chains; a slightly loose tension allows easy braiding and natural drape when laid on a table.
— Leaf Joining & Runner Assembly :
Round 1 :
Decide layout: Lay out leaves on table in desired pattern. Alternate large and medium leaves with small leaves filling gaps. Leaves should overlap slightly at lobes for a cohesive runner look. Typically 8 large + 10 medium + 12 small yields a runner approx 120-150 cm depending on stem spacing.
Info :
Position stems under leaves so braid meets at points where you want to anchor. Use pins to hold leaves and stems in place. Trim long tails so sewing will be neat and secure.
Round 3 :
Sewing method: Using long tail from each leaf stem and a yarn needle, whip stitch stem base to braid cord or directly to neighboring leaf stems. Use 6-8 secure stitches per join, then pass needle through a couple of leaf edge stitches to lock join internally. Weave in ends at least 4 cm.
Info :
For overlapping joins, sew the top leaf to the one beneath along a few stitches at the lobe edges to keep runner stable. Avoid stitching around entire leaf so it maintains some lift and texture.
Round 5 :
Reinforce: After initial joins, flip runner and check underside joins. Add additional stitches where stems feel loose. Create small invisible ladder stitches along the braid to lock leaves at even distances (approx every 10 cm).
Info :
Finish ends with a small tassel or cluster of 3 small leaves attached to braid end. This gives a polished finish and stops braid unraveling. Stitch tassel base thoroughly.
— Edge Finishing & Optional Border :
Round 1 :
If you want additional cohesion, crochet a narrow border along the entire runner braid: join yarn at braid end and ch 1, sc evenly along braid, sl st to finish. This neatens the center line visually.
Round 2 :
For decorative edging along leaf overlap areas: in the RS, join yarn at leaf edge, ch 1, sc around the exposed edges of leaves where two leaves overlap to create continuity. Work 1 sc in each visible st; for a scalloped look add picots every 6 sts.
Info :
Take care not to add weight with heavy borders that might make runner sit oddly on the table. Keep edge work minimal and consistent to maintain graceful drape.
— Blocking & Finishing Touches :
Round 1 :
Lightly block leaves if desired: pin each leaf to a board to open lobes slightly and steam briefly from a distance or apply light starch. Do not press hard; cotton responds well to gentle steaming to set shape.
Info :
Weave in all loose ends on the WS using yarn needle; hide tails under ribs or braid strands. Trim any tiny stray fibers. Optional: add a few small beads or wooden acorns sewn into clusters for rustic detail.
Round 3 :
Final assembly check: Lay runner on table and shift leaf positions for most natural drape. Remove pins and ensure all joins secure. If the runner needs to be more rigid for centerpieces, add a thin interfacing strip under braid during final sewing to stabilize.
Info :
Store flat or rolled to avoid creasing. Hand wash gently in cool water and reshape; cotton yarn will relax and soften after gentle laundering.
— Stitch & Rib Techniques (Detailed Info Section) :
Round 1 :
FPdc and BPdc ribs: To make pronounced veins, work FPdc around a post or vertical rib column from RS. Insert hook from front to back around the post, yarn over and complete dc. On WS wrap with BPdc to encase the column if extra height needed. Each FP/BP pair wraps one rib without changing base stitch count.
Round 2 :
Short column ribs: When making rib columns from the WS of leaf, ch 3 and work a tr into the turning chain, then sl st back into adjacent base st on leaf body. Later cover column with FPdc on RS to secure and integrate the rib.
Round 3 :
Using BLO: Work specified rounds in BLO to create a visible ridge at the edge. Insert hook into back loop only when indicated; counts remain the same but fabric appears ridged.
Info :
Always practice rib technique on a scrap leaf to judge height and density before applying to final pieces. Adjust number of post stitches to fit leaf scale.
— Color & Layout Suggestions :
Round 1 :
Suggested color arrangement: Alternate larger leaves in burnt orange and mustard, add medium olive and brown between them, and scatter small cream leaves for contrast. Keep darker colors as anchors near runner center to frame centerpiece items.
Info :
For a longer runner, repeat leaf pattern sequences and add more braided stems. For a narrower runner simply use fewer stems and smaller leaf counts. The modular nature of this design makes scale adjustments straightforward.
— Notes on Quantities & Layout Examples :
Round 1 :
Example A - Short center runner (approx 90 cm): 4 large, 4 medium, 6 small leaves with 6 stems braided to 80 cm.
Round 2 :
Example B - Long table runner (approx 150 cm): 8 large, 10 medium, 12 small leaves with 10 stems braided to 120 cm, adding 3 small leaf clusters to each end.
Info :
Make a mock layout before final sewing to visualize balance and ensure color distribution looks natural. Move leaves slightly until you find a flowing distribution that mimics natural fallen leaves.
Creating this autumn leaves table runner will fill your home with cozy seasonal charm and delightful texture. Each crocheted leaf adds a hand-crafted element that looks beautiful layered across a wooden table. The modular design means you can adapt length, color and density to suit any celebration or everyday display. 🍂🧶✨ Enjoy arranging the leaves and making it truly your own—happy crocheting!