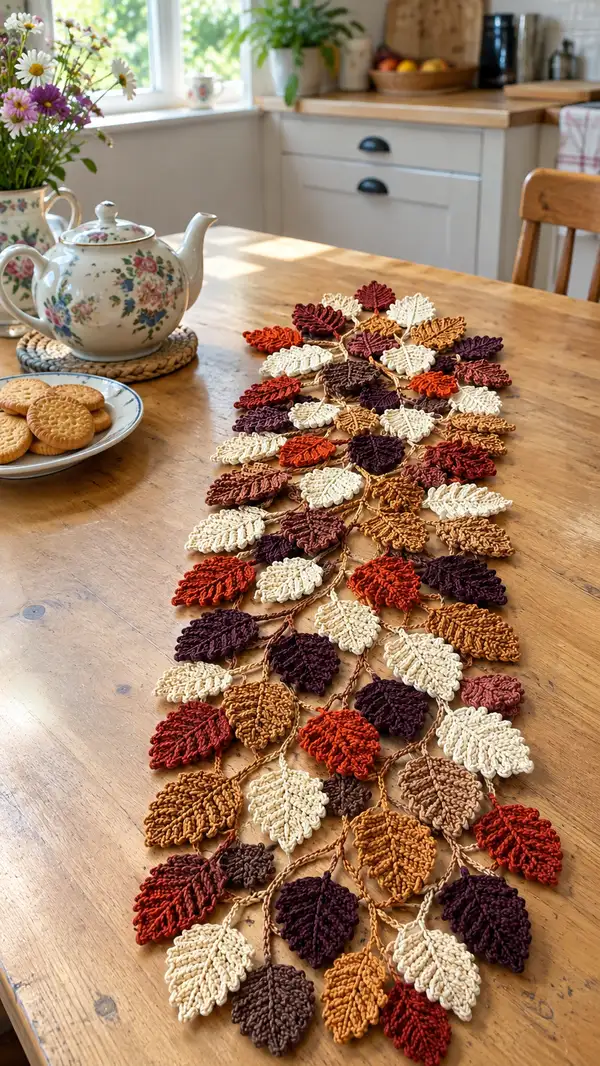
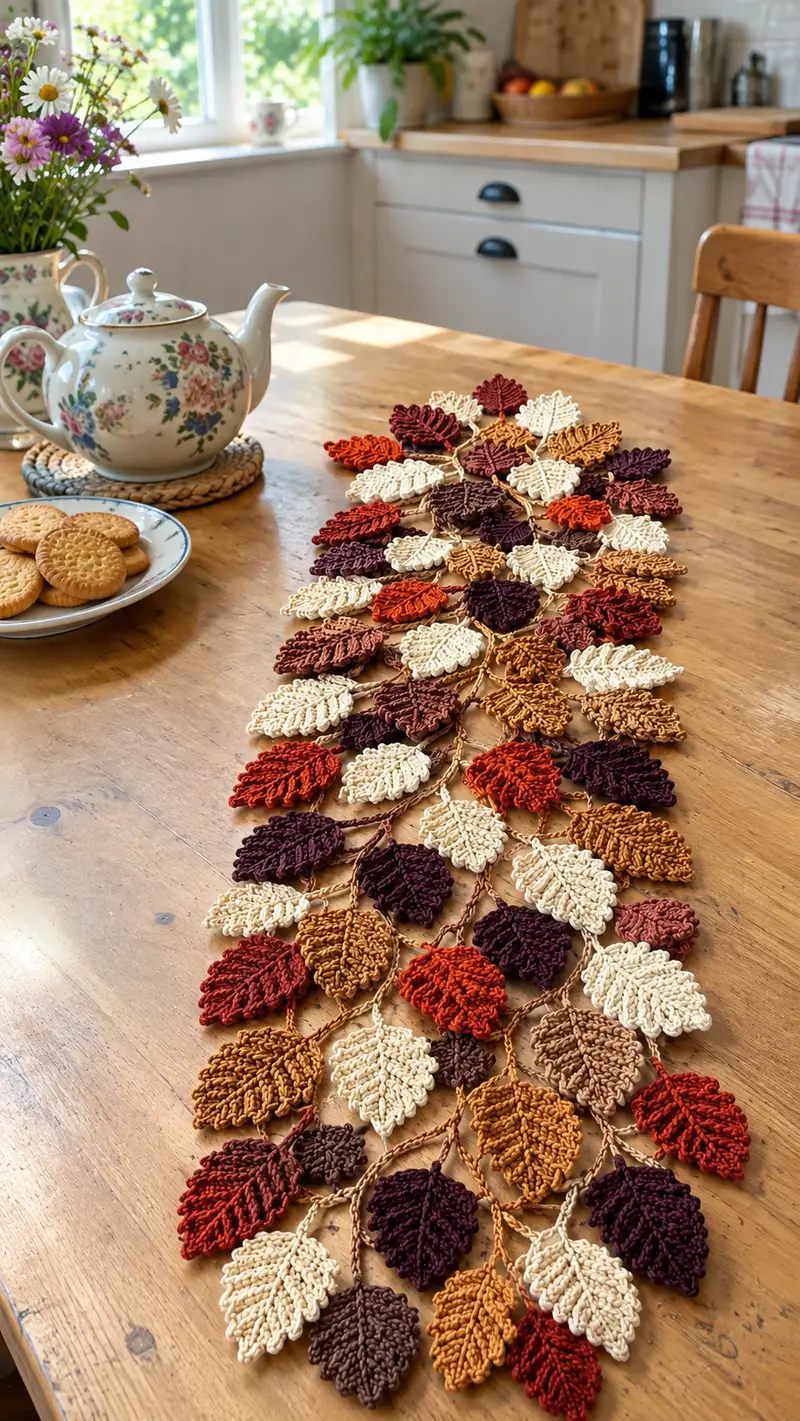
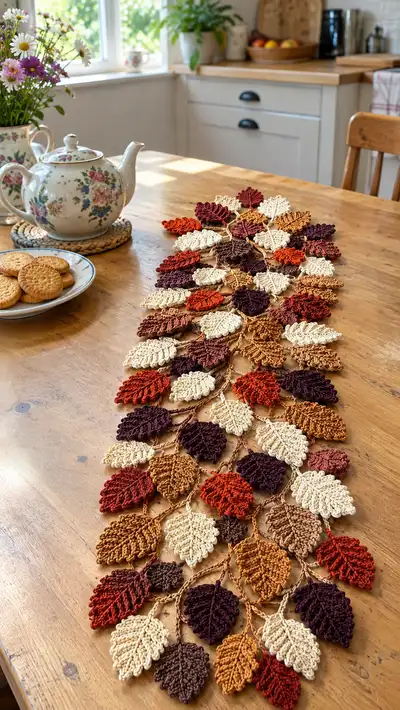
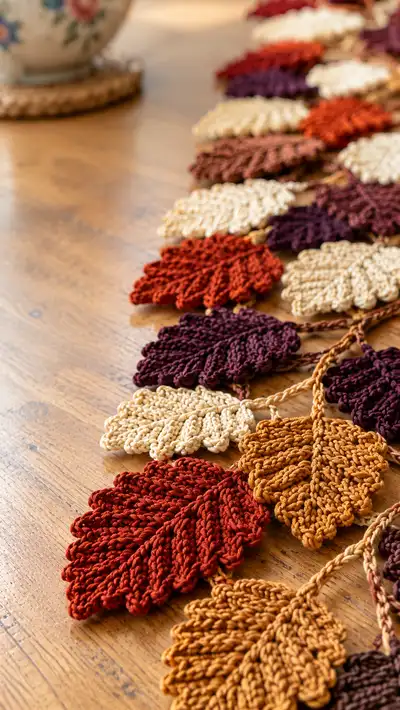
A warm, autumnal table runner made from individually crocheted leaves in rich fall tones and linked together into a flowing garland. This pattern recreates the layered leaf texture and braided stems seen in the photo with clear step-by-step instructions and lots of assembly tips. Perfect for decorating a table for seasonal gatherings or as a long decorative runner for a mantel.
Progress Tracker
0% Complete
— Overview :
Info :
This runner is constructed from repeated leaf motifs in four sizes (Large, Medium, Small, Tiny). Each leaf is worked flat around a central spine and textured using post stitches to mimic leaf veins. After making the required number of leaves, you join them by crocheting chain stems and slip-stitch joints in a staggered grid to create the lattice effect seen in the photos. The pattern below gives explicit round-by-round instructions for each leaf size, stems and joining technique, with assembly notes and finishing tips.
Info :
Work leaves flat in rows (these are labeled as 'Rounds' for clarity in this pattern). Use stitch markers to mark the center stitch of each row when instructed. Maintain consistent tension to allow stacking and uniform joins. Block each leaf flat before joining.
— Gauge & Measurements :
Info :
Gauge is not critical for this decorative runner but affects scale: one Large Leaf (as written) will measure approximately 10-11 cm wide (at the widest point) and about 12-13 cm long. Using the suggested worsted cotton and 3.5mm hook, an assembled runner of 12 staggered columns of leaves and 7 rows will measure approximately 110-120 cm long. Adjust by adding/removing leaves or altering yarn weight and hook size.
— Large Leaf (Make 18-24) :
Info :
Large leaves are the full-size motif used throughout. Choose your color and make the number of leaves you need for your runner layout. This large leaf is worked from a long foundation chain to create a defined central spine and a symmetric right and left side.
Round 1 :
Ch 22. Sc in 2nd ch from hook and in each ch across to last ch (21 sc). Work 3 sc in last ch (creates the tip). Continue working on the opposite side of the foundation chain: sc in each ch back toward the beginning, ending with 1 sc in the final base chain (21 sc). Total sts this round: 21 + 3 + 21 = 45 (45)
Round 2 :
Ch 1, turn. Sc in each of the first 10 stitches, hdc in next 5 stitches, dc in next 1 (center tip cluster), hdc in next 5, sc in remaining 24 stitches. Maintain total: 45 sc-equivalent stitches (45)
Info :
For clarity, mark the exact center stitch (st 23) after this round with a removable stitch marker. This marker denotes the central spine entry and will help with symmetrical post-stitch placement on subsequent rounds.
Round 3 :
Ch 1, turn. 1 sc in each st across (45). When you reach the center spine stitch (st 23), make a fpdc around the stitch directly below in the previous round to start the raised vein; continue sc in the rest of stitches. Total (45)
Round 4 :
Ch 1, turn. 1 sc in each of the first 10 sts, fpdc in next 1 (marking the first vein), 1 sc in next 1, fpdc in next 1, sc to the tip area and make 3 sc in tip, then mirror: sc along opposite side using fpdc at mirror positions. Total (45)
Round 5 :
Ch 1, turn. Sc in each st (45). On this and subsequent even rounds, maintain sc to keep the leaf dense and flat. (45)
Info :
From round 3 onward, create raised veins by substituting 1 sc with 1 fpdc every 3-4 stitches moving outward from the center on both sides. fpdc and bpdc are both single-stitch placements and do not change overall stitch count.
Round 6 :
Ch 1, turn. 1 sc in each st across, with fpdc at stitches 18, 21 (center), and 24 to reinforce a central trio of veins. Total (45)
Round 7 :
Ch 1, turn. Sc in each st across (45)
Round 8 :
Ch 1, turn. Sc across replacing every 4th st on either side of the center with a bpdc to create an alternating vein texture; keep counts identical (45)
Round 9 :
Ch 1, turn. Sc in each st across (45)
Info :
At rounds 3-10 you are building the raised texture; insert your tapestry needle occasionally to weave tails into the body of the leaf so they remain hidden in the ribs formed by fpdc and bpdc.
Round 10 :
Ch 1, turn. 1 sc in each st (45)
Round 11 :
Ch 1, turn. Sc 6, (hdc, dc, hdc) in next 3-st segment across the tip area to increase a scalloped tip ridge, then sc remainder, maintaining total count by replacing single stitches with clusters in the tip area only (45)
Round 12 :
Ch 1, turn. Sc across (45)
Round 13 :
Ch 1, turn. Sc in first 9, fpdc in next (vein), sc in next 3, fpdc, sc to tip, 3 sc in tip, mirror back with fpdc at mirror locations; keep 45 sts total (45)
Round 14 :
Ch 1, turn. Sc in each st (45)
Info :
Edge scallops: on rounds 11-14 you can use 2nd-loop sc (BLO or FLO) to create a textured edge if you prefer a more pronounced leaf border. This keeps stitch count identical while adding texture.
Round 15 :
Ch 1, turn. 1 sc in each st (45)
Round 16 :
Ch 1, turn. Work 1 sc across but on the last 6 sts on each outer edge replace every other sc with a hdc to soften the margin; overall stitch count remains 45
Round 17 :
Ch 1, turn. Sc across (45)
Round 18 :
Ch 1, turn. 1 sc in each st, placing a final fpdc on the center spine st to emphasize the main vein. (45)
Round 19 :
Ch 1, turn. Sc in each st (45)
Round 20 :
Ch 1, turn. Sc across. Finish with a neat sl st in the first st and fasten off leaving a 20 cm tail for joining. Weave end under ribs. (45)
Info :
Fasten off and weave tail through the back of the leaf along existing ribs. Block flat and set aside to dry before joining. Repeat steps to make the desired number of large leaves.
— Medium Leaf (Make 20-30) :
Info :
Medium leaves use a shorter foundation chain and fewer rounds but follow the same construction logic as the large leaf. They fit neatly between large leaves to build the layered look.
Round 1 :
Ch 18. Sc in 2nd ch from hook and across to last ch (17 sc). 3 sc in last ch (tip). Sc back across opposite side (17 sc). Total 17 + 3 + 17 = 37 (37)
Round 2 :
Ch 1, turn. Sc in each st (37). Mark center (st 19).
Round 3 :
Ch 1, turn. 1 sc in each st but replace st 16 and st 22 (three stitches around the tip area) with fpdc to form a pronounced center vein. Total (37)
Round 4 :
Ch 1, turn. Sc across (37)
Round 5 :
Ch 1, turn. Sc in each st, using bpdc on every 5th stitch from center outward to create subtle ribs (still 37)
Round 6 :
Ch 1, turn. Sc across (37)
Round 7 :
Ch 1, turn. Sc 6, (hdc, dc, hdc) in next 3 sts near tip, sc remainder, keeping 37 sts total (37)
Round 8 :
Ch 1, turn. Sc across (37)
Round 9 :
Ch 1, turn. Sc across with fpdc at center and mirrored fpdc on both sides (37)
Round 10 :
Ch 1, turn. Sc across; fasten off leaving 18 cm tail for joining. Block flat. (37)
Info :
Medium leaves require fewer rounds to get a similar density; the post stitches create the visual ribbing. Make the stated number to fit your runner pattern.
— Small Leaf (Make 30-40) :
Round 1 :
Ch 14. Sc in 2nd ch from hook and across to last ch (13 sc). 3 sc in last ch. Sc back across other side (13 sc). Total 13 + 3 + 13 = 29 (29)
Round 2 :
Ch 1, turn. Sc across (29)
Round 3 :
Ch 1, turn. Sc across replacing center st (st 15) with fpdc and adding a fpdc two stitches either side to create small ribs (29)
Round 4 :
Ch 1, turn. Sc across (29)
Round 5 :
Ch 1, turn. 1 sc in each st; on the tip make 3 sc cluster to retain shape; fasten off leaving 15 cm tail for joining (29)
Info :
These small leaves are the quickest to make and fill gaps. They bring the dense layered look and help the runner drape naturally.
— Tiny Leaf (Make 10-20) :
Round 1 :
Ch 10. Sc in 2nd ch from hook and across (9 sc). 3 sc in last ch. Sc back across (9 sc). Total 9 + 3 + 9 = 21 (21)
Round 2 :
Ch 1, turn. Sc in each st (21)
Round 3 :
Ch 1, turn. Sc across making a fpdc in center (st 11) for a tiny vein (21)
Round 4 :
Ch 1, turn. Sc across; fasten off and leave 10 cm tail for joining. Block flat. (21)
Info :
Tiny leaves are optional but lovely to tuck into the edges for a finished look. Because they are small, they add the final detail without bulk.
— Stem & Chain Connector (Make many) :
Info :
Stems are made by chaining and using simple slip-stitch braids to connect leaves. The photo shows braided or twisted chain links; here you will create 3-strand crocheted braids and also single-chain connectors depending on spacing.
Round 1 :
Using chosen stem color, ch 50 (or desired connector length). This long chain will be folded and braided - treat this chain as the center spine of a stem connector. (ch 50)
Round 2 :
Row: Fasten off leaving a long tail for sewing. Make two more chains of similar length in two different colors (or same color) so you have three chains to braid. Prepare at least 40-60 connector chains for a runner of the length seen in the image.
Info :
To create a crocheted braid: hold three chains together at one end and tie or sl st them together to secure. Braid the chains and then secure the other end with a tight knot or a sl st. Alternatively, use a 3-chain plait technique by crocheting a long chain and slip-stitching across to form a flat braided cord.
Round 3 :
Optional cord: Make a narrow cord by ch 60, insert hook into 3rd ch from hook, yoh and pull through creating a loop; repeat along chain to produce a single-cord i-cord effect. This will remain flexible for joining. (ch 60)
Round 4 :
Info :
Make enough cords so each leaf has a connector to link to adjacent leaves; plan your layout before joining. A dense runner uses 1 connector between nearly every neighboring leaf; a sparse layout uses fewer connectors and longer chains.
— Joining Leaves (As-You-Go and Sew-Join Methods) :
Info :
You can join leaves using two methods: 1) as-you-go join by working sl sts through both leaf edges and the connector cord; 2) sew-join using a tapestry needle and the tails left on each leaf. The as-you-go method produces a neat, crocheted-looking lattice and is the recommended method for this runner.
Round 1 :
Lay out your leaves in the desired staggered pattern. Start with a central row: align a Large Leaf and place a Medium Leaf to its immediate right so tips are slightly staggered. Position the connector cord along the left edge of the Medium Leaf where you want it to attach.
Round 2 :
Using the tail left on the leaf or a yarn end you bring to the connecting point, insert hook through the edge rib (between two outer stitches) of the Large Leaf, then through the next stitch on the connector cord and work a sl st to join. Repeat sl st every 3-4 stitches along the joining edge to create a flexible seam. Typically use 4-6 sl sts per side depending on leaf size.
Round 3 :
Info :
When joining, make sure the leaves are slightly offset on the cord to create the overlapped layered look. Do not pull tightly — leave a small amount of slack so the leaves can drape naturally. Fasten off and weave ends securely after joining several leaves.
Round 4 :
As you add adjacent leaves, join them at two points along their inner edge to the same connector cord, forming a V-shaped connection that echoes the look in the photograph. This creates small 'nodes' where 2-3 leaves meet and a more natural cluster effect.
Round 5 :
For denser clusters, join three leaves at a node: join Leaf A to the cord, then place Leaf B above and join to the same cord with sl sts just slightly offset, and finally join Leaf C just below — stitch through all three edges for a single neat knot-like node.
Info :
Use matching color tails to reduce visible joins. If you want a visible decorative join, use a contrast color and stitch small decorative knots at nodes for interest.
— Lattice Construction & Layout :
Round 1 :
Plan your runner layout on the floor or table first. The photo shows a staggered diamond/lattice of leaves; we recommend arranging columns of alternating Large and Medium leaves with Small and Tiny leaves filling gaps. A recommended layout for a runner ~110 cm long: 6 columns across by 10 rows long (adjust by adding more leaves).
Round 2 :
Start at one end and work along a central stem: join Leaves in pairs or triplets along braided cords as described. When you finish a cord, stitch its end to the adjacent cord at a cross point with 3-4 sl sts to secure the lattice intersections.
Info :
As you build, periodically measure across the runner to ensure it remains straight and symmetrical. Pin larger leaf groups in place when dry-blocked to keep the final shape consistent.
— Edge Finishing & Border :
Round 1 :
After joining all leaves, tidy the outer edges by working a single-row border of slip stitches along the outermost chains and ribs where the connectors meet the leaves. Work sl st in the outermost loops, catching connector chains at points where they cross the edge every 6-8 sl sts to keep the runner tidy.
Round 2 :
For a decorative scalloped edge, pick up 5 sl sts, 3 sc in same stitch, skip 3, sl st in next 2; repeat around very loosely to avoid pulling leaves inward.
Info :
Edge finishes are optional but recommended to reduce snagging and make the runner easier to move. Keep border light to preserve the organic leaf shapes.
— Finishing Touches & Blocking :
Round 1 :
Block each leaf flat using a damp towel and pins or spray-stretch method, pinning ribs so veins remain pronounced. Allow to dry fully before final joining to reduce distortion.
Round 2 :
Weave in all tails using a yarn needle, following the rib tunnels so tails stay hidden. Trim ends flush once woven at least 3 cm into the motif.
Round 3 :
Press lightly if needed with a warm iron through a cloth for a crisper look (only use if yarn fiber allows). Re-block if pressing has softened edges.
Info :
Blocking is the single most important finishing step to achieve the flat, crisp leaf look. Even tiny leaves benefit from a light blocking to coax the ribs outward.
— Optional Variations :
Round 1 :
Work leaves with a small picot at the tip for vintage character: at the tip replace 3 sc with (sc, ch 3, sl st in first ch) to make a tiny pointed finish. Keep all other stitches consistent so the join points remain accurate.
Round 2 :
To make a denser runner, add more small leaves between larger leaves and shorten connector chains to 20-30 ch. More connectors means more nodes and a fuller visual effect.
Info :
You can also use variegated yarns for a multi-hued leaf without changing color at each leaf. Work each leaf in variegated yarn for an organic, tonal runner.
— Notes on Color Changes :
Info :
For each leaf, fasten off at the end of the last round and weave in ends. If you prefer to carry color up the back, do so only on adjacent rounds and ensure carried yarn does not show through ribs. I recommend fastening off and restarting for clean color transitions.
— Troubleshooting & Tips :
Info :
If your leaves cup or ruffle, block more aggressively and check your hook size. If leaves flatten too much, try a slightly larger hook or add more rounds to create bulk. When joining cords, keep tension even to avoid puckering at joins.
Info :
Before committing to a final layout, drape your leaves loosely on the table to check spacing, then pin and join progressively from the center outward to keep symmetry.
This Autumn Leaves Table Runner brings the beauty of fall indoors with a handmade touch! Each leaf is textured with raised veins and joined into a flowing lattice of color for a cozy seasonal centerpiece. The modular construction makes it easy to adapt length and density to your table and style. I hope you enjoy stitching these little leaves as much as I did — the final drape and layered look are simply delightful. 🍂🧶