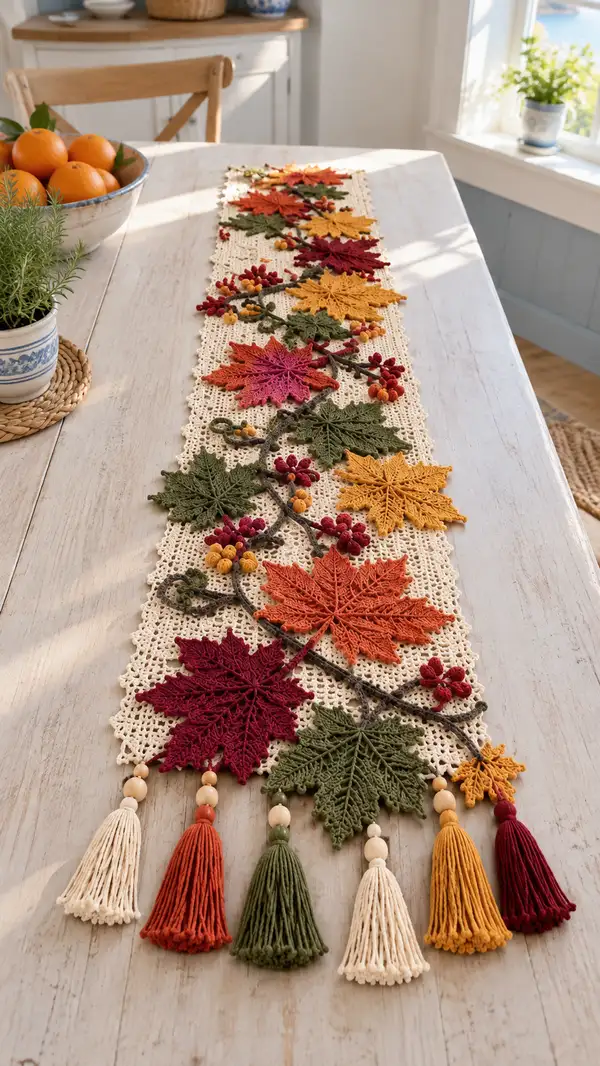
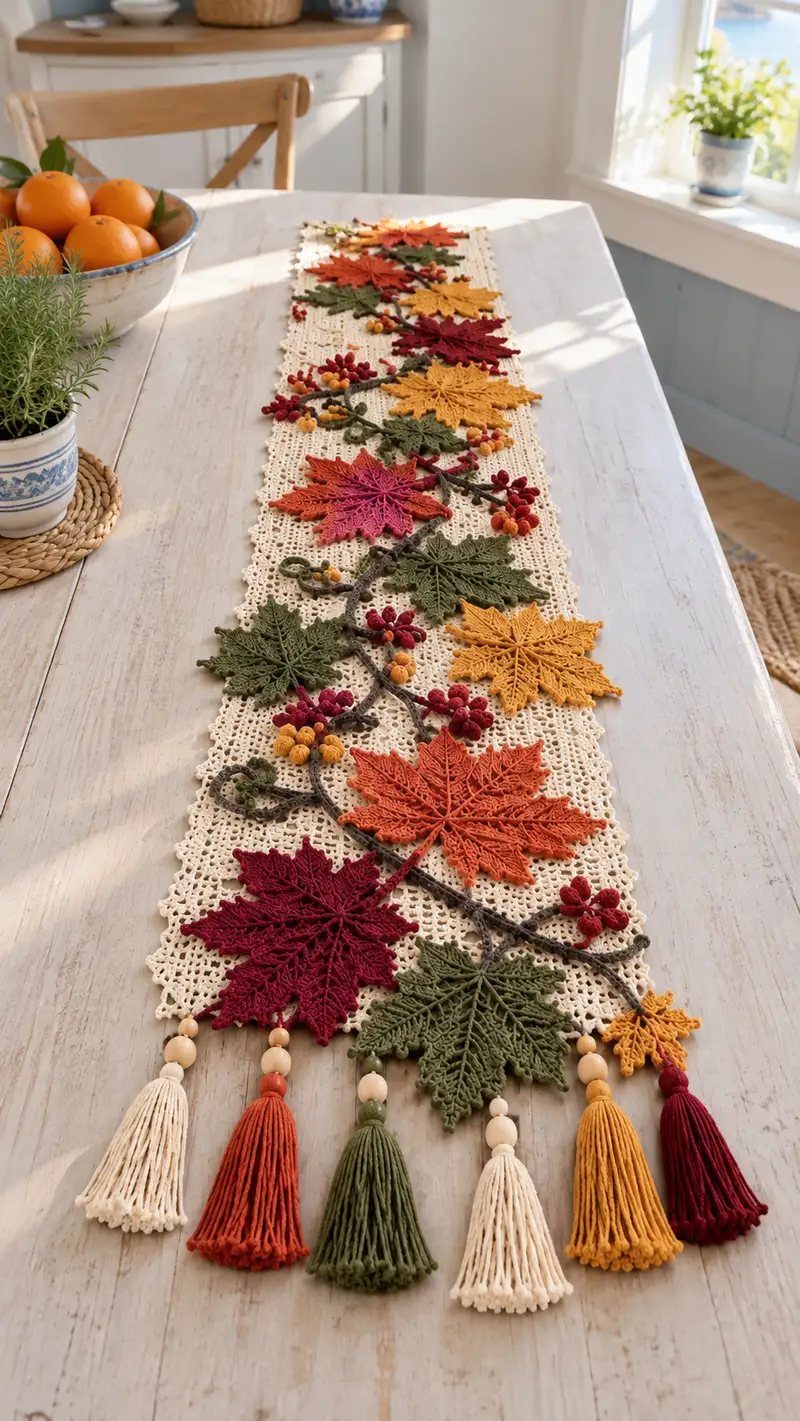
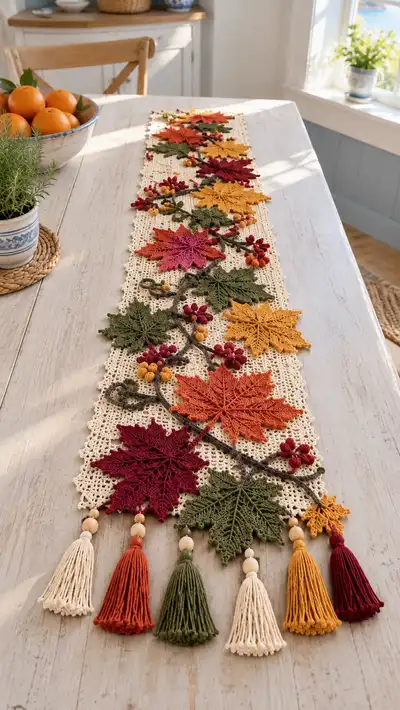
A long, elegant crochet table runner inspired by fall foliage, featuring lacy ivory mesh, richly colored maple leaf appliques, braided vine, clustered berries, and tasseled ends with wooden beads. The runner showcases multiple layered leaves in shades of burgundy, rust, mustard and olive, connected by a textured brown vine for a natural, handcrafted centerpiece.
Progress Tracker
0% Complete
— Materials & Gauge :
Info :
Gauge for mesh base: 10 squares (lace mesh blocks) = 10 cm in pattern used with 3.5mm hook and worsted cotton; gauge can be flexible for decorative runner. Finished sample measures approximately 10.5" x 48" as photographed; adjust foundation chain and row count to lengthen or shorten.
— Base Mesh (Make 1) :
Row 1 :
With ivory yarn, foundation chain 121 (or any odd multiple of 4 plus 1 to reach desired width). Turn. (121 ch)
Row 2 :
Sc in 2nd ch from hook, *ch 3, sk 3 ch, sc in next ch; rep from * to end (this creates a 1-sc/1-lace block repeat). End with sc in last ch. (approx 30 sc + 30 ch-3 sps)
Row 3 :
Ch 1, turn. Sc in first st, *ch 3, sk ch-3 sp, sc in next sc; rep to end. End with sc in top of turning chain. (same count as Row 2)
Row 4-8 :
Repeat Row 3 for a total of 8 rows of mesh to build base foundation. Keep edges tidy by maintaining the sc at beginning and end of each row. (counts unchanged)
Info :
Work evenly and measure as you go; the photographed runner has 60 rows. For a medium runner, make 60 rows; for a narrower runner, reduce to 40 rows; add more rows for a longer runner. Block the base when finished to square the edges.
Row 9-20 :
Continue in pattern (Row 3). Check width and keep edges straight. After Row 20, mark positions every 8–10 inches where leaf clusters will be placed using removable pins for placement reference.
Row 21-40 :
Repeat Row 3 until you reach Row 40 (or desired midpoint). Keep piece flat by blocking short sections while working—this prevents puckering when appliques are added. (mesh rows total as desired)
Info :
Edge scallop will be added after appliques are attached. If you prefer to add scallop before appliques, hold off until placement is confirmed. Use blocking to square the runner before sewing on leaves and vine.
Row 41-60 :
Continue repeating Row 3 for Rows 41–60 (or to your chosen length). Fasten off and weave in ends. Block flat and let dry completely before applique work. (end base mesh)
— Large Maple Leaf Motif (Make 8-10) :
Round 1 :
With chosen leaf color, make a magic ring. Work 6 sc into ring. (6)
Round 2 :
Inc in each st around. (12)
Round 3 :
(1 sc, inc) x 6. (18)
Round 4 :
(2 sc, inc) x 6. (24)
Round 5 :
(3 sc, inc) x 6. (30)
Round 6 :
(4 sc, inc) x 6. (36)
Round 7 :
1 sc in each st around. (36)
Info :
These rounds form a solid center from which the lobes and veins will be worked. Keep tension even; do not fasten off. We will form lobes by working chains and shaped clusters around this center.
Round 8 :
*Ch 5, sk 4 sc, sl st in next sc (first point); rep from * 8 times around to create outline loops. You will have 8 ch-5 loops acting as point anchors. Adjust loop length if you want deeper points. (loops x 8)
Round 9 :
Working into first ch-5 loop: sc, hdc, 3 dc, hdc, sc (a small fan). Sl st to next anchor sc. Rep into each ch-5 loop to create 8 fans. (fans x 8)
Round 10 :
Work a row of sc along base between fans: sc in each sc and sl st between fan bases to tidy junctions. (approx 36 sc)
Info :
Begin creating the central veins: we will crochet elongated posts and reversed stitches to mimic leaf veins. Use FPdc and BPdc to add texture. Keep counts consistent around petals.
Round 11 :
Locate the central top fan; ch 1, turn work so you can work a central rib: in center sc of fan work FPdc, ch 7, sl st into base sc to form a raised midrib chain; continue around creating a rib at each leaf quarter using FPdc into base and sl st to secure. (8 ribs)
Round 12 :
Work from point to center to deepen lobes: into each fan work (sc, hdc, 2 dc, tr, 2 dc, hdc, sc) to lengthen points. Sl st to next fan base. This increases point depth while keeping center count stable. (point repeats x 8)
Round 13 :
On one side of each rib, work (3 sc, sl st, 3 sc) into small spaces to define serrated edges; on the opposite side mirror the stitches. This step sculpts the jagged maple leaf edge. (edge stitches added)
Round 14 :
Work reverse single crochet (crab stitch) around the entire leaf edge to give a lifted, finished look. Work evenly across points and valley spaces. (edge finished)
Info :
After Round 14, block leaf flat, pulling each point gently to sharpen corners. Pin into place and mist with water; allow to dry fully. Blocking greatly improves leaf definition.
Round 15 :
Optional surface embroidery: with contrasting shade and tapestry needle, couch a thin line along the raised rib chains to emphasize veins. Use 2 strands for subtle contrast. Fasten off and weave in ends. (leaf complete)
Info :
Make leaves in multiple colors (burgundy, rust, mustard, olive). Photograph shows alternating colors placed lengthwise. Make 8–10 large leaves for a medium runner; add small leaves if you prefer denser coverage.
— Small Maple Leaf (Make 6-8) :
Round 1 :
With contrasting color, magic ring, 6 sc into ring. (6)
Round 2 :
Inc in each st around. (12)
Round 3 :
(1 sc, inc) x 6. (18)
Round 4 :
1 sc in each st around. (18)
Round 5 :
*Ch 4, sl st in next sc; rep around to form 6 small loops for points. (loops x 6)
Round 6 :
Into each loop work (sc, hdc, dc, hdc, sc) to create short lobes. Sl st to base between lobes. (mini points x 6)
Round 7 :
Work picot edging: *(sc, ch 3, sl st in top of ch) in base spaces; rep around for a decorative finish. Fasten off and block. (small leaf complete)
Info :
Small leaves fill gaps and add scale contrast. Block and shape similarly to large leaves. Use mustard and olive shades for small leaves for color balance.
— Berry Cluster (Make 16-20) :
Round 1 :
With berry color, magic ring, 6 sc into ring. (6)
Round 2 :
Inc in each st around. (12)
Round 3 :
(1 sc, inc) x 6. (18)
Round 4 :
1 sc in each st around. (18)
Round 5 :
Switch to 3.0mm hook if you prefer denser berry. (Info) Fill berry lightly with small amount of fiberfill—do not overstuff to maintain rounded shape.
Round 6 :
(1 sc, sc2tog) x 6. (12)
Round 8 :
Sc2tog x 3. (3) Fasten off leaving tail, thread through remaining sts and pull closed. Weave tail to back. Make clusters of 3–7 berries using varying sizes; sew clusters to vine and near leaf bases.
Info :
For a natural cluster, make several small berries in two sizes and two colors (deep red and golden rod). Secure clusters by sewing through berry bases to vine and runner.
— Braided Vine / Stem (Make 1 long vine) :
Round 1 :
With dark brown yarn and 3.5mm hook, ch 120 (or desired length to snake down center of runner). This will be the base chain for vine. (120 ch)
Round 2 :
Sl st in 2nd ch from hook and each ch across to create a cord. If you prefer a thicker vine, work 1 sc in each ch across instead. (cord formed)
Round 3 :
Optional: For a textured vine, with cord flat, work FPdc and BPdc around cord base every 4th st to create nubs and roots. Work along full length as desired. (textured cord)
Round 4 :
Make small branches by leaving a ch-8 loop every 15–20 stitches and working back along the chain with sc to anchor. These will be points to attach berries and small leaves. (branch loops x approx 6–8)
Info :
An alternative method is to crochet an i-cord using hdc in back loops or a 3-row i-cord technique for a plumper vine. Both techniques work well; the i-cord yields a more rope-like stem.
Round 5 :
Leave long tail at both ends for sewing. Twist and shape vine into desired sinuous S shape before securing to mesh base. Use pins to temporarily hold the vine in position on blocked base prior to sewing. (vine complete)
— Joining Leaves and Vine (Applique) :
Info :
Pin vine along runner center in the composition you like. Arrange larger leaves along the vine alternating sides, with small leaves and berry clusters filling gaps. The photograph shows leaves spaced approx every 6-8 inches with slight overlap for layered dimension.
Step :
Using tapestry needle and matching thread, sew vine to mesh base through the cord foundation only. Use whip stitch or sl st method—take small stitches to keep seam nearly invisible. Anchor at intervals every 5–8 stitches to prevent shifting.
Step :
Lay a large leaf over vine where desired. Using matching yarn strand and yarn needle, sew leaf down along the central rib first, then tack down the base of each point to the mesh. Use invisible ladder-like stitch along vein and quick overhand in point valleys. Make sure stitches go through both leaf and mesh to secure flat.
Info :
Sew small leaves and berries last so you can place them in gaps for a natural cluster. For layered realism, slightly lift some leaf edges with a single securing stitch so leaves sit above base rather than flush.
— Edge Scallop & Finishing Border :
Round 1 :
With ivory yarn and 3.5mm hook, join at runner corner. Ch 1, sc evenly along short side edge to tidy (work approx 1 sc per mesh loop). Turn corner with (3 sc, ch 2, 3 sc) for rounded corner. (edge tidy)
Round 2 :
Along long edges: *ch 3, sk 1 ch-space, sl st in next space; repeat to create small picot spaces. For a scallop, work (5 dc) into every 6th ch-space along edge, sl st to join between scallops. Repeat along both sides.
Round 3 :
Work a final round of reverse single crochet (crab stitch) along outermost edge to create a raised border. Fasten off and weave in ends. (border finished)
Info :
Work border after appliques to ensure scallops do not catch leaf points. If you prefer a more delicate look, work a single round of picots only.
— Tassels & Beaded Ends (Make 6 tassels) :
Step 1 :
For each tassel, wrap chosen yarn around a 4" high template 40 times for a full tassel. Slide loops off and tie a 6" tail around top to secure. Trim bottom loops and even ends to desired length. (tassel body)
Step 2 :
Thread tassel top through wooden beads: place 1–2 beads on the top tail before knotting to secure bead. Use fabric glue if bead hole is loose. Repeat for each tassel in color order (photo shows cream, rust, olive, cream, mustard, burgundy).
Step 3 :
Sew tassels to runner end at designated edge points (space evenly across end: 6 tassels across edge). Secure with backstitch and knot, then hide tails inside bead or under runner edge. Trim tassels evenly. (tassel finish)
Info :
For firm attachment, stitch through bead and runner once, then wrap securing thread around tassel top under bead before final knot. This prevents tassel slipping in use.
— Final Assembly & Blocking :
Step 1 :
Lay runner on blocking mat. Pin into perfect rectangle and steam or mist lightly to finalize lace base and smooth seams around appliques. Re-shape leaf points as you pin and let dry fully.
Step 2 :
Check all applique joins, reinforce any loose stitches, and weave in all ends. Test bead and tassel security by gentle tug; add extra threads if needed. Trim any stray fibers and perform final lint removal.
Info :
For a more durable runner, gently hand-wash in cool water and reshape, or spot clean only. Avoid heavy machine laundering to preserve applique shape and beads.
This autumn leaves table runner brings a warm handcrafted touch to any tabletop. The layered crochet leaves, textured vine and playful tassels create a lovely seasonal centerpiece you'll be proud to display. I hope making it brings you quiet, creative joy and a table full of compliments. 🧶🍂✨