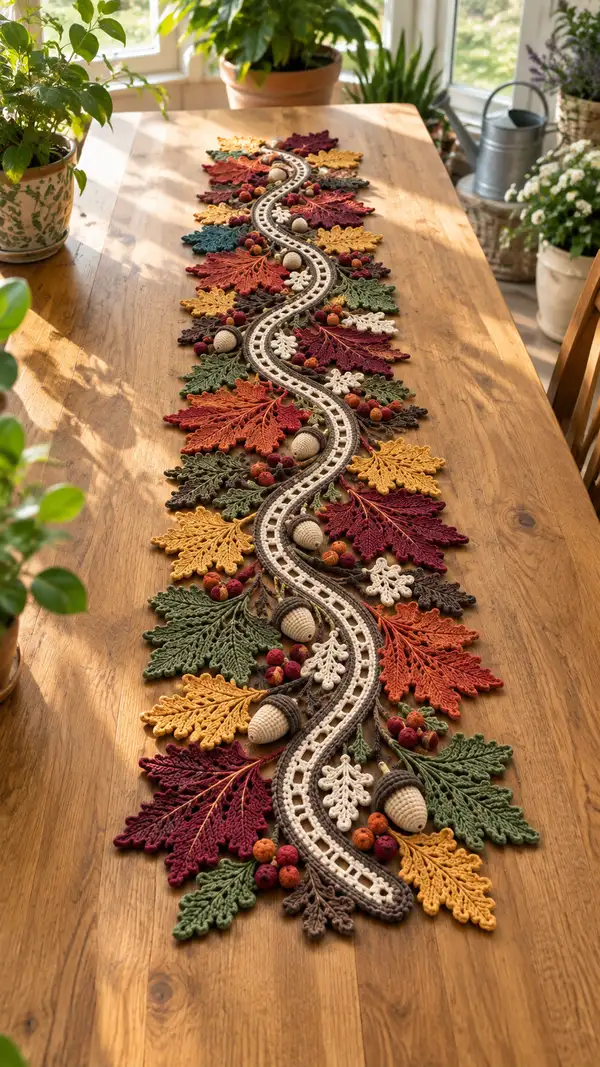
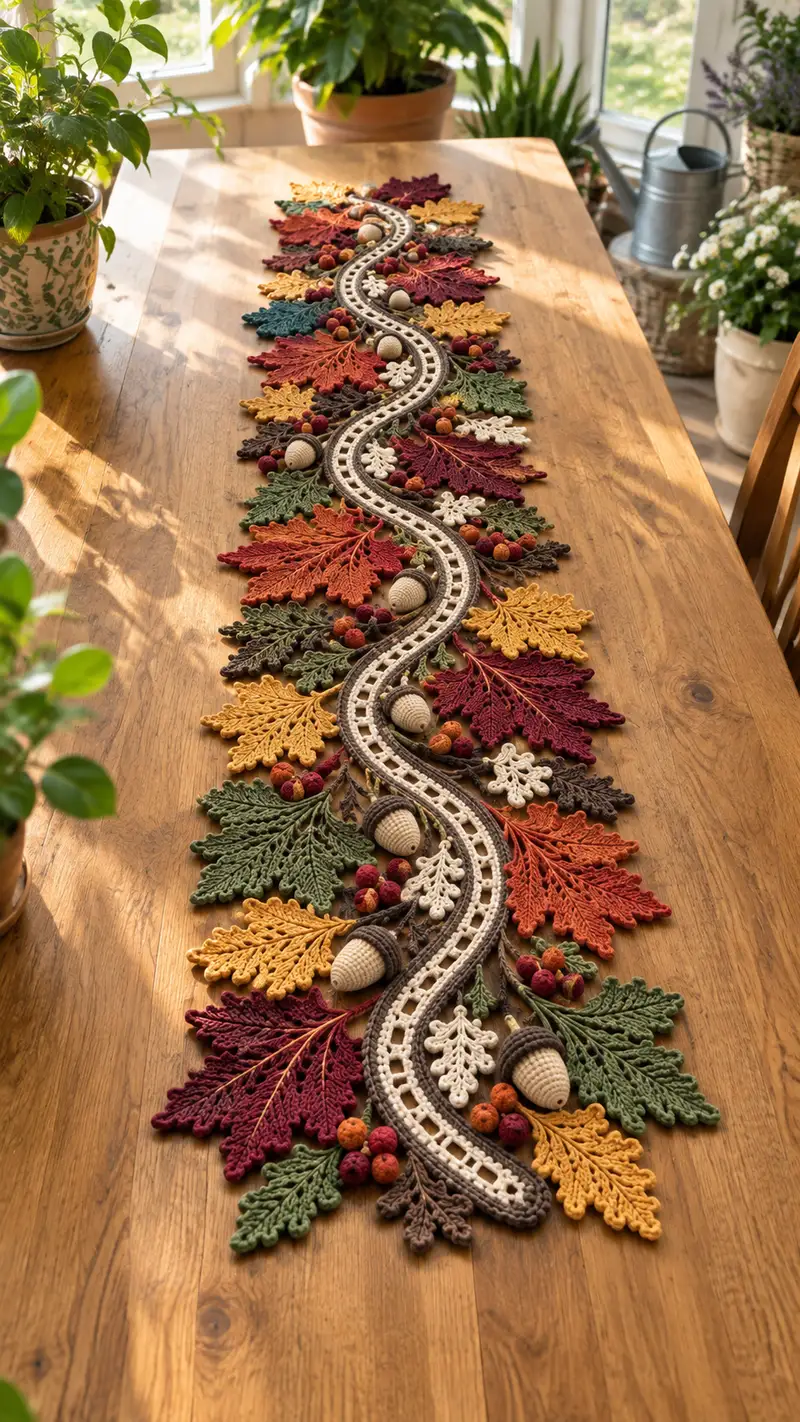
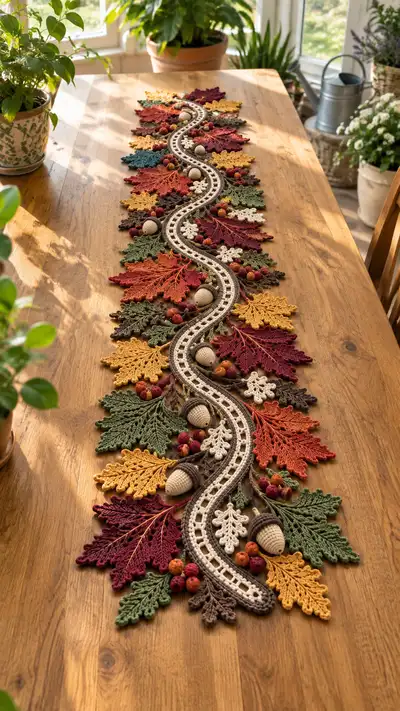
Bring the warmth of fall to your table with this richly textured crochet table runner. Featuring sculpted autumn leaves, delicate oak sprigs, handcrafted acorns and tiny berries, and a sinuous openwork central band, this runner is perfect for seasonal decor. Worked in warm jewel tones—mustard, rust, deep red, olive and chocolate—with creamy accents, it layers texture and color for a handmade statement piece.
Progress Tracker
0% Complete
— Materials & Gauge :
Info :
Gauge is not critical for this decorative runner, but for consistent motif sizing aim for approximately 20 sc x 10 rows = 10cm/4in using worsted weight yarn and 3.5mm hook.
Info :
Work motifs slightly tension-tight for crisp stitch definition. Block leaves gently to open lace and create an even shape before assembly.
— Central Sinuous Openwork Band :
Round 1 :
Make foundation ch 220 (or desired runner length multiple). Join with sl st to form a ring, being careful not to twist (220 ch).
Round 2 :
Ch 1, sc in each ch around, join with sl st to first sc (220). This round builds base for tube. Info: Place a marker at the join.
Round 3 :
Ch 3 (counts as dc), *sk 2 sc, 1 dc in next sc; rep from * around to create a slightly lacy fabric (approx 147 dc, 73 skipped). Join with sl st to top of ch-3 (220 base sts remain but work done in pattern).
Info :
If your runner length is different, make foundation chain an even multiple and maintain pattern repeat. This band later becomes a tubular raised element with two rows forming edges.
Round 4 :
Ch 1, sc in each st around working into spaces created by previous row and into dcs to stabilize (220 sc). Join with sl st (220).
Round 5 :
Ch 2, hdc in same st, *ch 2, skip next sc, hdc in next sc; rep to end. Join with sl st to ch-2. (110 hdc, 110 ch-2 spaces)
Round 6 :
Ch 1, sc in each st and sp around, working sc into each ch-2 space twice to maintain evenness (220 sc). Join with sl st.
Round 7-10 :
Repeat Rounds 3-6 twice more to build height of band. Maintain stitch count: base structure remains 220 stitches equivalent circumference when counted across both layers.
Info :
At this point your band is a flat strip with lacy windows. To create a raised twin-rail effect, we will fold and join edges forming a thin tube with defined border ridges.
Round 11 :
Fold band so that Round 2 aligns with Round 10 edges. Using right side out, sc through both layers around seam working 220 sc total (one sc in each corresponding st through both layers). Join with sl st. This joins the band into a narrow tube.
Round 12 :
Ch 1, sc in each st around in BLO to create an outer ridge (220). Join with sl st.
Round 13 :
Ch 1, sc in each st around in FLO to create an inner ridge (220). Join. Info: These two ridges define the raised twin-rail effect seen in the photo; work them tightly for contrast.
Round 14-20 :
Work 7 rounds even: 1 sc in each st around (220). Keep tension even and occasionally pin the band flat to prevent twisting.
Info :
To create the curving S-shape later, when assembling, leave the band flexible. For a stronger ridge edge, work one of these rounds working 1 sc in BLO only to emphasize texture.
Round 21 :
Change to contrast cream if desired at the outer ridge: sl st to outer ridge, ch 1, sc in each outer ridge st working a decorative openwork: *ch 3, skip 1 sc, sc in next st; rep around (approx 110 ch-3 loops). Join.
Round 22-28 :
Ch 1, sc around working into loops and ridges to refine open squares between rails, 220 sc equivalent. Continue to add one decorative pass every 3-4 rounds to keep the band visually interesting (maintain counts consistent across circumference).
Info :
You may add a narrow I-cord edge by working 3 sc in same join every 10 sts along the seam for a beaded effect. Keep the band long and measure against your table length to center when assembling.
Round 29-36 :
Continue 8 rounds even sc (220). Finish with a neat sl st round along one edge to hide join. Fasten off leaving a long tail for sewing ends during assembly.
— Large Decorative Leaf (Maple-ish) : (Make 10 in assorted colours)
Round 1 :
With leaf color, ch 10, sc in 2nd ch from hook and across (9 sc). Turn – this creates the small stem base (9).
Round 2 :
Ch 1, sc across (9). At end turn, ch 1 and continue to work along foundation turning to create a narrow base: sc 3, 3 sc worked into last ch to create point, continue on opposite side of chain, sc 9 back to beginning, working evenly (21 sc total). Info: This round creates a small continuous oval foundation for leaf center.
Round 3 :
Ch 3 (counts as dc), dc in next 2 sts, *(ch 2, skip 1, dc in next 3); rep across to the tip, work 3 dc around tip sts, rep * along return side mirrored. End with join to top of ch-3. Total dc groups create a central rib structure (approx 28-34 dc depending on shaping).
Round 4 :
Info :
Work the leaf backbone (central vein) using heights: sc and hdc worked in central chain to create stiff ridge. Mark the central top stitch to use as reference for shaping the lobes.
Round 5 :
Ch 1, sc across entire edge working increases at five points to shape symmetrical lobes: *(2 sc in next st, sc in next 3, dec over next 2) x 5 across both sides. Count should be even and near 40-44 sc after increases.
Round 6 :
Ch 1, 1 sc in each st making sure to place small increases near edges to create undulating leaf points: (approx 44 sc). Info: Work tightly on the edges to retain shape; use BLO on this round if you want a slightly cupped leaf.
Round 7 :
Start decorative picot and point shaping: *sc 3, ch 3, sl st back into 3rd ch for picot, sc 5, (inc in next st) repeat across to form serrated edge. Final count approx 52-56 sc with picot points around edge.
Round 8-10 :
Refine shape: 1 sc in each st across two rounds (52-56), then use a final round of *sc2tog every 8 sts to slightly taper the base (approx 48 st). Info: Add surface vines by making long chains attached to base that will later be stitched as visible veins.
Round 11 :
Surface veins: Attach contrasting yarn at the center base with sl st and work a chain across the length of the leaf to the tip then sl st back along that chain using sc into each base stitch to create a raised vein. Anchor at tip with sl st. Info: Use back-post dc along this surface rib to emphasize the vein.
Round 12 :
Add side veins: at 6-8 intervals on either side of center vein, work short chain loops of ch6 anchored back to the body with sc to form ribbing that resembles leaf venation. Block each leaf flat and pin points gently to shape.
Round 13-16 :
Finishing rounds: tidy edges with 1 sc around, adding a small decorative slipped picot-tooth at each point: *sc3, ch 3, sl st into first ch for picot; rep. Fasten off leaving tail for sewing (approx 48-56 sts depending on shaping). Info: Block immediately to shape serrated edges and open lace.
— Medium Oak-ish Leaf (Make 12)
Round 1 :
Ch 6, turn, sc into 2nd ch from hook across (5 sc). This forms narrow stem base.
Round 2 :
Ch 1, sc across (5). On last ch, work 3 sc into last chain and continue along opposite side of foundation chain creating a teardrop base (11 sc).
Round 3 :
Ch 3, dc2tog, ch 2, *dc3 in next 3 sts forming lobes, ch 2, dc3tog; rep across both sides to create lobed oak shape (approx 20-24 dc depending on repeat). Info: Keep a marker at the center tip for symmetry.
Round 4 :
Ch 1, sc across including into ch-2 spaces to close gaps (22-24 sc). Add small increases at each lobe base to flare shape (approx +6 sts). Count now approx 28-30 sc.
Round 5 :
Edge round: *sc in next st, ch 2, picot (ch3 sl st to 3rd ch), sc 4 in next sts to form a small pinched lobe; rep around finishing symmetrical lobes. Fasten off leaving tail for sewing and blocking (approx 30-34 sc and 6-8 picots). Info: Steam-block to open lobes slightly.
— Delicate Sprig (Small White Accent Leaves) : (Make 14)
Round 1 :
With cream, ch 8, sc back along chain to form narrow leaf base (7 sc).
Round 2 :
Attach to center, ch 4, sl st into leaf body every 2 sts to create little scalloped sprig 1: (approx 6 small scallops)
Round 3 :
Work 1 sc along base and secure. Use contrasting tan to embroider vein from base to tip with surface slip stitch. Fasten off, leave tail for securing into assembly.
Info :
These small sprigs add contrast and visual rest points among the larger bold leaves; place them in clusters near acorns and berries.
— Acorn (Make 6-7) :
Round 1 :
With cream (nut), make magic ring, 6 sc in MR (6)
Round 2 :
Inc in each st around (12)
Round 3 :
(1 sc, inc) x 6 (18)
Round 4 :
(2 sc, inc) x 6 (24)
Round 5 :
(3 sc, inc) x 6 (30)
Round 6 :
(4 sc, inc) x 6 (36)
Info :
Begin stuffing gently to form rounded nut shape. Use polyester stuffing and add small amounts as you increase so the shape is even.
Round 7 :
1 sc in each st around (36)
Round 8 :
1 sc in each st around (36)
Round 9 :
(4 sc, dec) x 6 (30)
Round 10 :
(3 sc, dec) x 6 (24)
Round 11 :
(2 sc, dec) x 6 (18)
Info :
Continue stuffing to fill the acorn. Leave a small opening for joining the cap later; fasten off leaving a long tail to sew to the cap.
Round 12 :
(1 sc, dec) x 6 (12)
Round 13 :
6 dec (6). Fasten off and close. Weave tail securely.
Acorn Cap - Round 1 :
With dark brown, 6 sc in MR (6)
Round 2 :
Inc in each st around (12)
Round 3 :
(1 sc, inc) x 6 (18)
Round 4 :
1 sc around in BLO for a ridged cap (18)
Round 5 :
Work 1 round of sc in each st changing to working over the lower cream head to shape as a snug cap: (18). Fasten off leaving long tail to sew cap to nut. Info: You can create a textured cap by alternating sc and hdc rounds or using front-loop stitching to create a woven look.
Acorn Finishing :
Place brown cap over cream nut, adjust fit, then sew through both layers around edge using yarn needle with long tail from cap. Add a short stem by anchoring a short chain of 6-8 sts from top center and securing back down with sl st. Optionally glue on a small wooden bead beneath the stem for extra realism.
— Small Berry Balls (Make Many clusters of 3-7) :
Round 1 :
With berry color, MR, 6 sc in MR (6)
Round 2 :
Inc in each st around (12)
Round 3 :
(1 sc, inc) x 6 (18)
Round 4 :
1 sc around (18). Info: Stuff very lightly or not at all for small, slightly flattened berries; for fully round berries, add small stuffing now.
Round 5 :
(1 sc, dec) x 6 (12)
Round 6 :
6 dec (6). Fasten off leaving tail for sewing into clusters. Trim a small bit of yarn on the berry's surface and roll gently between palms to matte slightly so they read like felted berries.
— Long Twining Stem / Tendrils (Make 10 strips)
Round 1 :
Ch 80 (or desired stem length). Row 1: sc in 2nd ch from hook and across (79 sc). This creates a narrow flat stem.
Round 2 :
Ch 1, turn, sc in each st across (79). Fasten off leaving long tail to stitch into runner. Info: Work stems in dark brown or olive and twist them during assembly to give a natural look.
— Small Filigree Ivy (Make 12)
Round 1 :
Ch 8, sc back along chain to form base (7 sc). Attach along stem to make tiny alternating leaves: *ch 5, sc in 2nd ch back to form a scallop; rep 4 times then fasten off.
Round 2 :
Attach cream or tan and add single surface slip-stitch veins to each tiny leaf. These act as highlights between large leaves.
— Assembly & Layout :
Info :
Before assembly, block every leaf flat and pin to shape. Lay out central band in an S curve down table center. Arrange large leaves alternately on each side, overlapping edges so motifs look natural. Place acorns and berry clusters near junctions and under leaf points for realism.
Info :
Tip: Build the runner in mirrored halves and then stitch halves together under the central band to keep seams tidy. Use a neutral yarn tail to whipstitch motifs to the band and to each other, concealing joins beneath overlapping leaves and stems.
Round 1 :
Pin central band centrally along your layout. Using long tail from band, whipstitch through inner ridge into the underside of leaves at points where you want the leaves to sit (approx 6-10 stitches per leaf anchor). Info: Sew tight but not so tight the band flattens.
Round 2 :
Sew twining stems along the edges of the band, partially covering the join. Secure them every 3-4 cm with small whipstitches. Tuck ends under leaf bases and secure with additional stitches.
Round 3 :
Sew acorns in clustered groups of two or three along the central curve, anchoring each acorn at its cap base to a leaf or stem with 6-8 small stitches so they sit slightly raised. Arrange berries in groups and sew through their centers to secure them to stems and leaves.
Round 4 :
Attach delicate sprigs between larger leaves and near acorn clusters. Weave ends of sprigs under leaf edges and secure. Add a few single berries in negative spaces to fill gaps.
Info :
When joining two halves of runner, place central band ends overlapped by 3-5 cm and sew from underside in ladder stitch across the overlap so top looks seamless. Reinforce joins at a second pass if runner will be handled frequently.
Round 5 :
Edge finishing pass: With dark brown, work a final decorative edging around the outermost tips of leaves and the runner outline using crab stitch (reverse sc) for a slightly raised finished edge. Work carefully to maintain smooth curves.
Info :
Weave in all tails on the underside of the runner. Use small hidden stitches to lock ends. If desired, spray-starch lightly and re-block runner flat for a crisp tabletop finish.
— Variation Notes & Finishing Touches :
Info :
To add depth, use two strands of slightly different shades held together on some leaves when crocheting to create subtle variegation. You can also add metallic thread accents along veins for festive sparkle.
Info :
For a more rustic look, add small burlap ribbon tassels at each end of the runner or attach wooden beads near acorns. If you prefer a more durable runner, back the underside with light fusible interfacing or felt cut to the runner outline, stitched discreetly in place.
Completing this autumn table runner is like arranging a tiny harvest on your tabletop — rich colors, crisp leaves and sculpted acorns come together in a warm seasonal display. Every motif is a small, pleasurable project on its own, and stitching them together becomes a meditative, creative finish. Place it down the center of your table and enjoy the compliments it will earn — this piece is sure to become a seasonal favorite. 🍁🧶✨