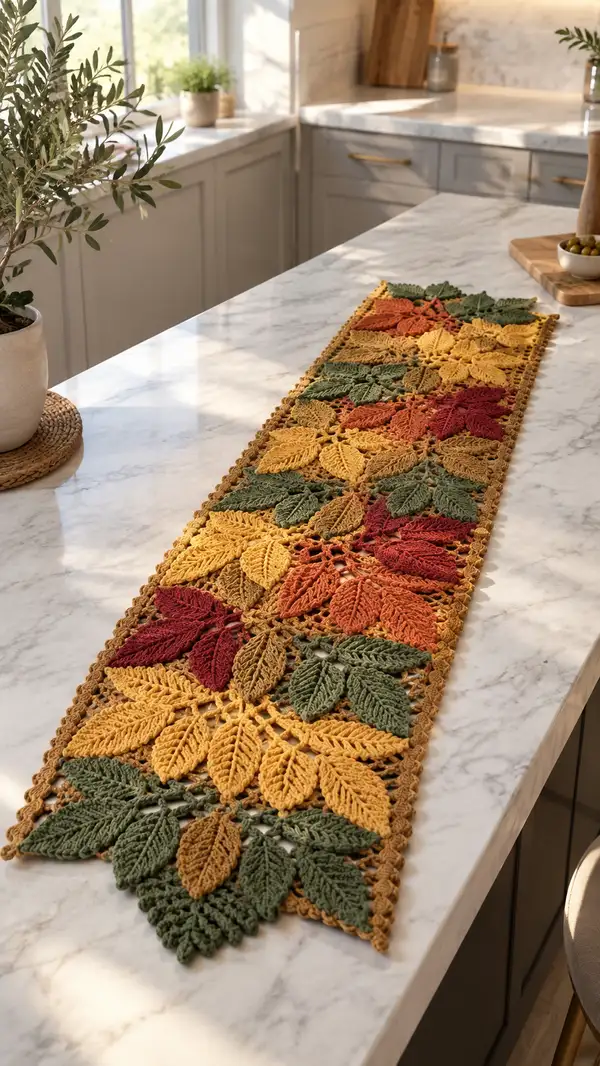
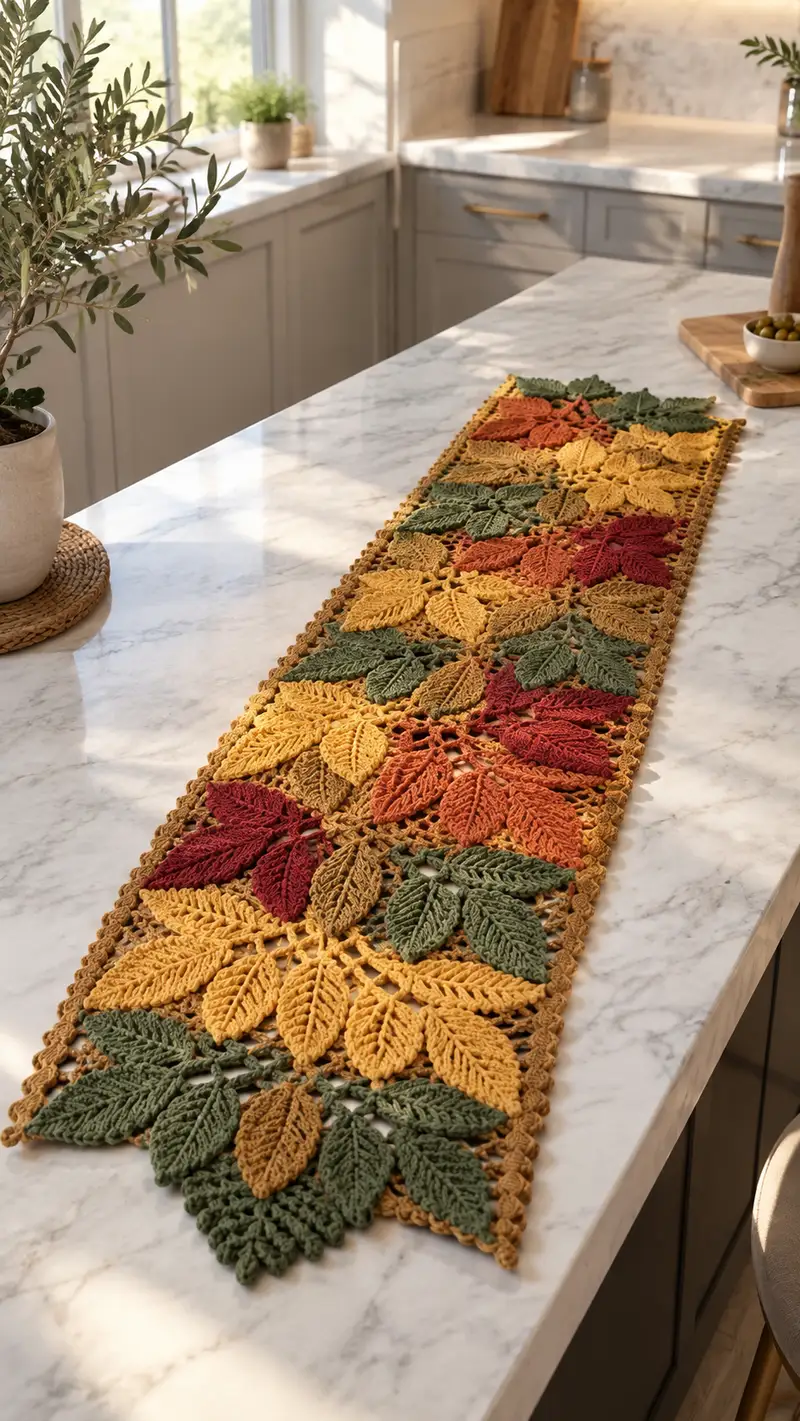
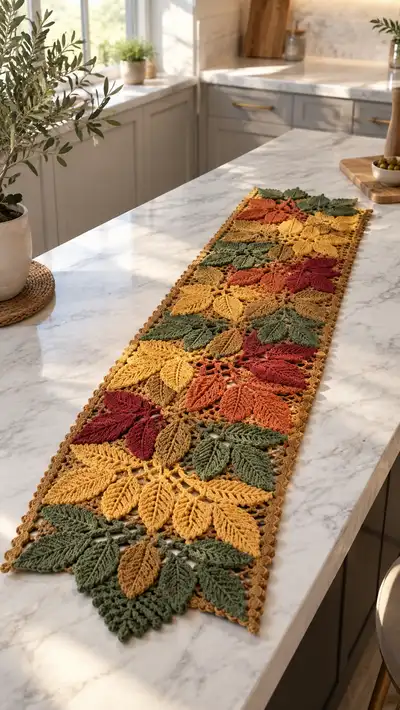
A warm, autumn-inspired table runner made from joined leaf motifs in rich fall tones. This pattern combines layered 3D leaves, delicate openwork connectors, and a scalloped border to create a long, elegant runner that lays beautifully on a dining or kitchen island. Finished in mustard, olive, rust, deep red and warm gold, it’s a statement piece that brings seasonal charm to your home.
Progress Tracker
0% Complete
— Notes & Gauge :
Info :
Runner in photo measures approximately 11-13 in wide by 60-70 in long. Gauge is not critical for this table runner but for consistent motif size, aim for 18 dc x 10 rows = 4 in with a 4.0mm hook in worsted weight. Work tightly enough that leaf edges hold their shape but not too tight to prevent lacework.
Info :
All motifs are worked in joined-rounds unless otherwise specified. Right side is the outer/display side. We recommend blocking each motif individually to identical size before joining for an even finished runner.
— Leaf Motif (Make 48 leaves, or as many as needed for your runner layout) :
Round 1 :
Ch 6, sl st to form a ring, ch 2 (counts as first dc), 11 dc into ring; join with sl st to top of ch 2 (12 dc). (12)
Round 2 :
Ch 1, sc in same st, ch 2, skip next st, sc in next st, ch 2; rep across to make 6 ch-2 loops around; join with sl st to first sc. (6 ch-2 loops)
Info :
These chain loops will be the base for the leaf lobes; ensure loops are evenly spaced. Place a marker at the first sc for orientation.
Round 3 :
Work into first ch-2 loop: (sc, hdc, 3 dc, hdc, sc) all into loop. Move to next ch-2 loop and repeat (sc, hdc, 5 dc, hdc, sc) for larger lobes on alternating sides to begin leaf shaping. Complete around and join with sl st to first sc. (Count depends on your sequence but keep symmetry across the loops—6 lobes total)
Round 4 :
Ch 1, sc in first sc, ch 3, 3 dc cluster into the center dc group of previous round to begin vein height, ch 3, sc into opposite sc to anchor, repeat across each lobe to define center section. Join with sl st. (6 clusters)
Round 5 :
Begin central vein: Attach yarn at center top of a lobe. Ch 1, sc, hdc, dc, tr into center space, tr dec over 2 loops (gives height), then reverse down the other side using dc, hdc, sc to mirror. Fasten off. Repeat to form each leaf lobe around center so the leaf begins to take a pointed shape. Work evenly to keep leaf symmetry.
Info :
Work one leaf base at a time to keep the central rib well defined. Use a contrasting wash of steam blocking later to flatten the leaf veins if desired.
Round 6 :
Rejoin at base of any lobe. Ch 3 (counts as dc), 2 dc in same space, (dc in next dc, 2 dc in next dc) around to create a fuller petal base; this increases the leaf width slightly. Join with sl st to ch-3. (Approx 24 dc total)
Round 7 :
Ch 1, sc in each st around but work sc2tog over each pair of increases to maintain an even edge: (sc in next 2 sts, sc2tog) rep around until join. (Approx 18-20 sc)
Round 8 :
FLO: Ch 2, dc in each st FLO around to create defined ridges, join. (18-20 dc)
Info :
Using FLO here creates the textured ridge on the top side of the leaf. If you prefer a flatter leaf, work full dc into both loops instead.
Round 9 :
Ch 1, sc decrease shaping towards point: (sc, sc, dec) rep across until you reach the tip; fasten off and weave in tail into the back. Leaf should now be pointed with a slightly raised midrib. (Approx 12 sc)
Round 10 :
Make a second leaf piece for layering: repeat Rounds 1-9 but stop one round earlier on Round 7 to create a slightly smaller leaf for the layered effect. Fasten off leaving long tail for sewing. (Smaller leaf)
Info :
Each finished leaf is made from two nested pieces (a full-size base and a slightly smaller top leaf) to create the dimensional look. The smaller leaf is sewn onto the larger leaf along the center with its tip offset by 2-3 sts to give depth.
Round 11 :
Sewing the layers: Place the smaller leaf centered on the larger leaf. Using the long tail from the smaller leaf and a yarn needle, whipstitch through the middles along center line (5-7 stitches depending on leaf length), then knot and weave tail. Leaves should be slightly cupped when finished.
Round 12 :
Optional vein embroidery: With contrasting or same color yarn and a tapestry needle, couch a thin chain of surface slip stitches or embroidery floss down the center on the right side to accent the midrib. Secure ends on wrong side and weave in. (This is decorative.)
Info :
Make leaves in the five palette colors: mustard (largest number), olive, rust, deep red, and golden brown. Keep the number of each color consistent across panels for an even pattern repeat.
— Leaf Cluster Square (Make 12 squares or to desired runner length) :
Round 1 :
Start with a central ring: Ch 6, sl st to ring, ch 3 (counts as first dc), 11 dc into ring; join. (12 dc)
Round 2 :
Ch 1, sc in same st, ch 5, sk next dc, sc in next dc; rep around to form 6 ch-5 loops; join with sl st. (6 loops)
Round 3 :
Into each ch-5 loop: work (sc, hdc, 3 dc, hdc, sc) to form 6 petal anchors. Join. These will be the attachment points to sew individual leaves. (6 petals)
Round 4 :
Position 6 prepared leaves around central ring. Using yarn tails from leaves or a coordinating yarn, sew each leaf base into one petal anchor so leaves radiate out forming a star/flower of leaves. Arrange colors per your layout plan (ex. mustard, olive, rust alternating). Fasten off and weave ends. (6 attached leaves)
Info :
Each square uses 6 leaves: place them symmetrically around the central ring with leaf tips alternating directions. Pin leaves before sewing to ensure consistent orientation and spacing.
Round 5 :
With the background/border color (warm gold), join yarn at any gap between leaves. Ch 3 (counts as dc), work (2 dc, ch 3, 3 dc) into each gap between pairs of leaves to create a corner-like arc; work dc evenly across the top of each leaf to form a rounded square; join. (Creates 6 arcs)
Round 6 :
Ch 1, sc evenly across arcs and along leaf bases to create an even transition. At each space between arcs, ch 5 and sc into the next space to create linking loops for joining squares later. Join. (Count depends on spacing)
Info :
Keep stitch count consistent across all squares. You can adjust ch-5 linking loop length to change spacing between squares in the final runner.
Round 7 :
To strengthen square corners: into each of the four corner arcs work (sc, hdc, 3 dc, hdc, sc). Along sides work 1 sc in each sc and 2 sc in the center of each leaf base for even tension. Join. (Even side stitches)
Round 8 :
FLO round for texture: Ch 2, dc in each st FLO around the square to create a visible ridge; join. (Even stitch count retained)
Round 9 :
Ch 1, sc around, making (sc, ch 3, sc) at midpoint of each side to create visible connector spines. Fasten off. Repeat to make the number of squares necessary — in the pictured runner there are 12 squares joined in a long, single-column formation (12 squares x 6 leaves = 72 leaves). Adjust number of squares to desired runner length.
Info :
Layout suggestion: 12 squares for a long runner. For shorter table, make fewer squares or produce multiple columns and join side-by-side for a wider runner.
— Joining Squares (join-as-you-go) :
Round 1 :
Decide orientation and layout of squares (arrange colors to balance palette). Place two completed squares RS together where they will join. Using background color yarn, start at a corner and sc through both loops of corresponding edge sts to seam them together by matching side stitches, continuing across to seam full side. Use mattress stitch if preferred for invisible joins. Fasten off and weave ends.
Round 2 :
Join next square by aligning linking loops formed on Round 6 of squares. For each ch-5 link on square A, work sl st into corresponding ch-5 link on square B to create a flat, flexible join. Space sl sts evenly and keep tension loose so joins remain flexible. Repeat down the entire length to join all squares in a single column.
Info :
For a more decorative seam, use a contrasting color and a reverse single crochet (crab stitch) along the join to highlight the seams as design features. If you want hidden joins, sew through inner loops only and avoid right-side ridges.
Round 3 :
If you prefer a reinforced seam, after linking loops are connected, from RS work 1 sc in each connecting space across the seam to secure. This creates a small ridge visible on RS which can add to the textured look.
Info :
Work gently when joining; too tight joins will pucker the runner and distort leaf shapes. Pin before joining every seam to maintain alignment.
— Decorative Small Connector Motif (Optional filler squares, make as needed) :
Round 1 :
Ch 8, sl st to ring; ch 3, 15 dc into ring, join. (16 dc)
Round 2 :
Ch 1, sc in each st around; join. (16 sc)
Round 3 :
Ch 4, sk next st, sc, ch 4, sk next st, sc repeat to create 8 ch-4 loops; join. Into each ch-4 loop work (sc, 3 dc, sc). Join and fasten off. These small motifs can be used to fill in end pieces or to create tapered edges on the runner.
Info :
Use these motifs sparingly at ends if you want pointed tips or to change the runner’s overall shape. Match color to adjacent leaf square for a seamless look.
— Scalloped Border (Work around the entire assembled runner) :
Round 1 :
With background/edge color join anywhere on outer edge. Ch 1, sc evenly around whole runner edge placing (sc, ch 3, sc) at each corner point and around each leaf tip to create small loops for shells. Keep counts even so shells align. Join. (Count will depend on runner perimeter)
Round 2 :
Into every ch-3 loop on the edge work (sc, hdc, 5 dc, hdc, sc) to create full scallop shells. Join with sl st. (Shells equal number of ch-3 loops)
Info :
The shells give a finished, tactile edge that echoes the leaf shapes. If you prefer a more subtle border, substitute a single round of reverse single crochet for a neat rope-like edge.
Round 3 :
Ch 2, dc in each st across shell base to create a neat ridge; in the center of each shell work 3 dc cluster into the top of the shell for additional texture. Join. (Even stitch count across border)
Round 4 :
Finish: Ch 1, work crab stitch (reverse sc) around the perimeter for a firm, textured finish; fasten off and weave all tails securely. This closes any small gaps and gives a crisp border line.
Info :
If you want a larger scallop, add an extra round of dc clusters prior to the crab stitch and adjust counts to keep shells centered over leaf tips.
— Alternative Border Variation (Lacy edge) :
Round 1 :
After Round 1 sc border, ch 5, sk 2 sc, sl st in next sc; rep to create picot loops and give a delicate lacy frame. Join. (Number of loops depends on perimeter)
Info :
Use this lacy edge if you prefer a lighter look that emphasizes the lacework between the leaves rather than a heavy scalloped edge.
— Finishing & Blocking :
Info :
After joining and finishing the border, block the runner. Soak in lukewarm water, gently squeeze out excess, then pin to blocking mat to desired rectangular dimensions, spacing pins at each leaf tip and shell. Allow to dry completely. Blocking will open lace spaces and flatten leaf shapes for a professional finish.
Info :
Weave in all ends on wrong side using yarn needle. Trim tails close. If you used safety wool or fiber prone to fuzzing, consider steam blocking instead of wet blocking per yarn manufacturer instructions.
— Cutting & Color Change Tips :
Info :
When changing colors for leaves or border, cut yarn leaving 5 in tail to weave in later, or carry yarn loosely across the back of the motif and pick up as needed. Avoid carrying multiple colors across large distances to keep the wrong side tidy.
Info :
To minimize ends, try to work two leaves in the same color consecutively so you can join one to the next and avoid extra tails. If using many colors, keep a small labeled bag for each color to prevent tangles.
— Full Project Layout & Suggested Counts :
Info :
Photo runner layout suggestion: 12 leaf-cluster squares joined in a single column. Each square uses 6 leaves = 72 leaves total. Use color distribution mustard: 28 leaves, olive: 16 leaves, rust: 14 leaves, deep red: 8 leaves, warm brown/gold: 6 leaves. Adjust to taste.
Info :
To make a wider runner, create two columns of squares and join columns side-by-side using the same joining method, then apply border around the whole assembled rectangle.
— Care Instructions :
Info :
Handwash or gentle machine wash on cool in a mesh bag depending on fiber. Reshape while damp and lay flat to dry. Avoid harsh detergents and direct high heat for synthetic-blend yarns.
Info :
If placing on high-use surfaces, consider creating a backing fabric sewn to the underside of the runner to protect delicate beadwork and reduce snagging.
This elegant Autumn Leaves Table Runner brings seasonal color and handcrafted detail to any table. Each leaf is lovingly layered and arranged to mimic the natural scatter of fall foliage, creating a warm, textured centerpiece. The lacy connectors and scalloped border complete the look for a cozy, polished finish. Make one to celebrate the season, and enjoy the slow and satisfying process of bringing this runner to life. 🍂🧶