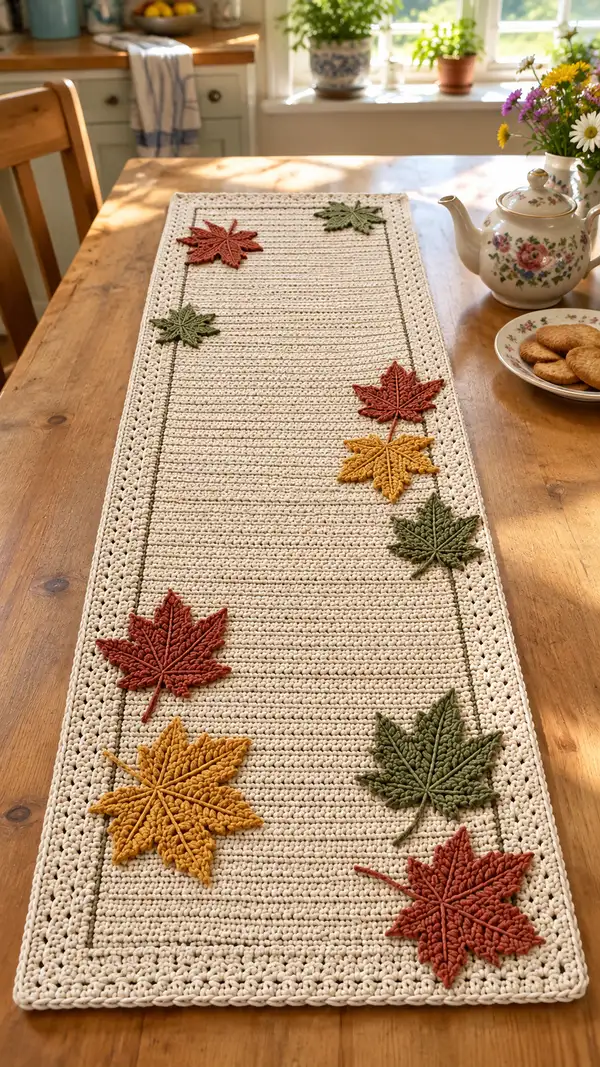
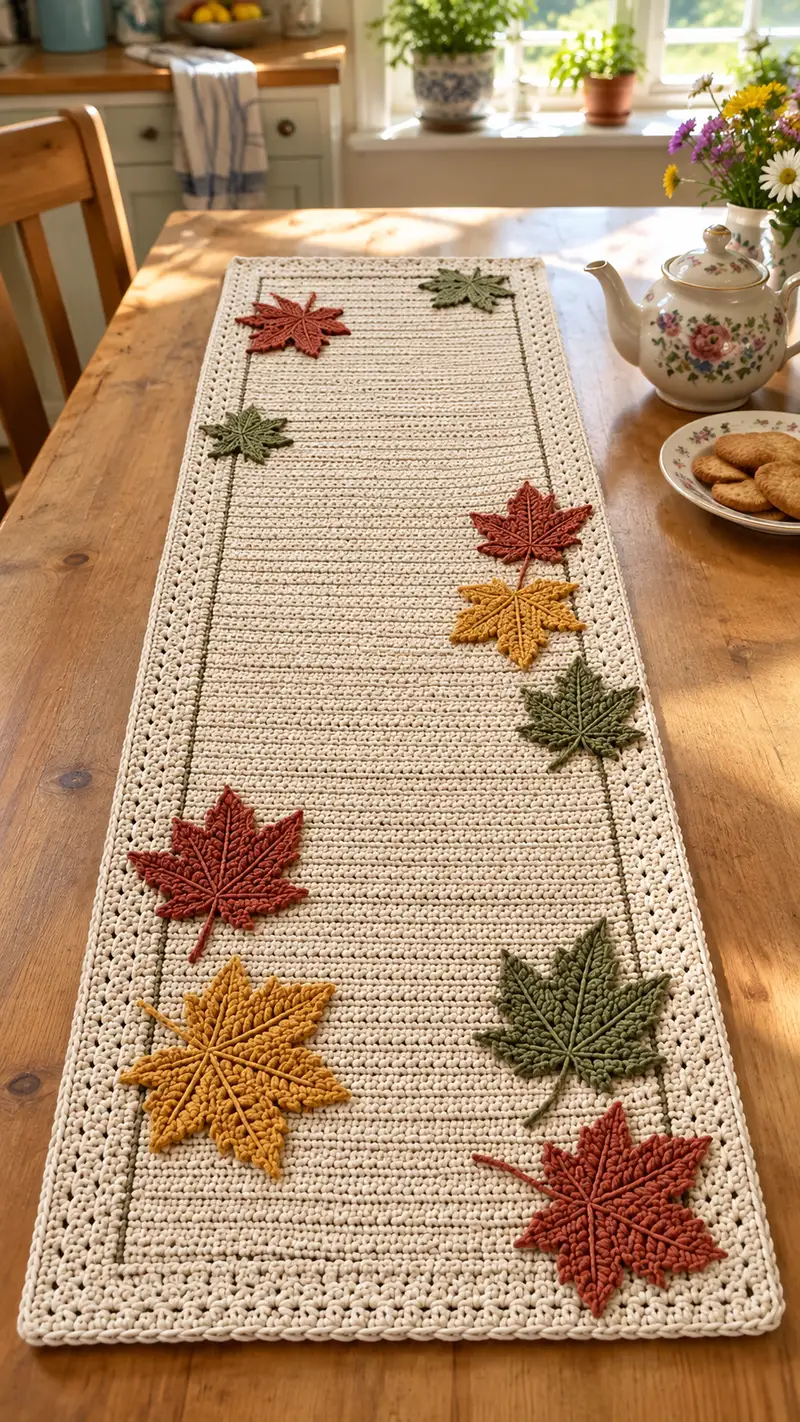
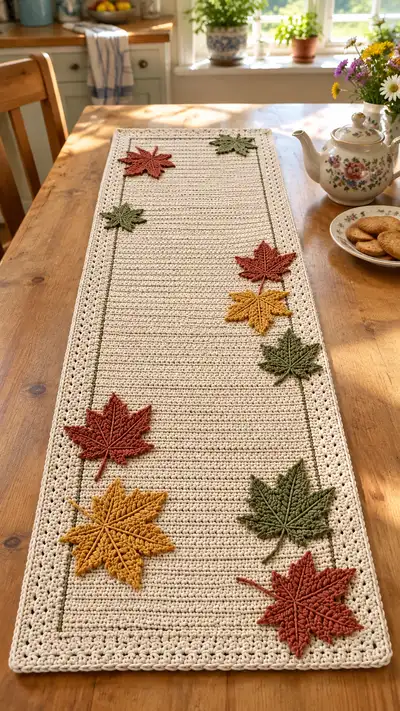
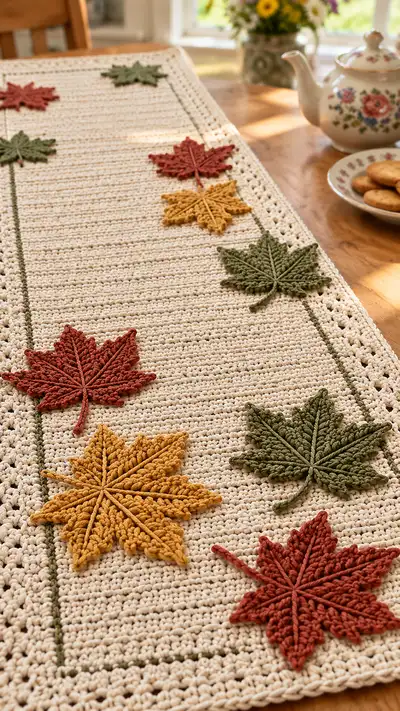
A cozy rectangular table runner worked in a soft cream cotton with a delicate lacy outer border and a thin olive inner frame. Rich autumn maple leaves in rust, mustard and olive sit as appliques along one side for seasonal charm. Textured rows and a neat scalloped edge give this runner a handmade, heirloom feel—perfect for a fall tablescape or everyday warmth.
Progress Tracker
0% Complete
— Runner Body :
Note :
Work the runner flat in rows for the central panel. This creates a dense, table-friendly fabric. Adjust foundation chain if you want a narrower/wider runner; the pattern below gives instructions for a runner approximately 12-14 inches wide before borders (foundation ch 121).
Round 1 :
Foundation: Ch 121. Row 1: Sc in 2nd ch from hook and in each ch across. (120)
Info :
Tension: Aim for firm, even tension so stuffing or tableware won't show through the stitches. Use a stitch marker at the end of each row to track row count when necessary.
Round 2 :
Ch 1, turn. Sc in each st across. (120)
Round 3 :
Ch 1, turn. Sc in each st across. (120)
Round 4 :
Ch 1, turn. Sc in each st across. (120)
Round 5 :
Ch 1, turn. Sc in each st across. (120)
Info :
Keep edge stitches neat by working into the very top chain or stitch of the previous row; consistent edge stitch placement makes the later border attachment easier.
Round 6 :
Ch 1, turn. Sc in each st across. (120)
Round 7 :
Ch 1, turn. Sc in each st across. (120)
Round 8 :
Ch 1, turn. Sc in each st across. (120)
Round 9 :
Ch 1, turn. Sc in each st across. (120)
Info :
Measure length as you go. This pattern uses 40 rows for the central panel before adding the inner frame and borders; you can lengthen or shorten the panel by adding/removing sets of two rows to keep the stitch rhythm even.
Round 10 :
Ch 1, turn. Sc in each st across. (120)
Round 11 :
Ch 1, turn. Sc in each st across. (120)
Round 12 :
Ch 1, turn. Sc in each st across. (120)
Round 13 :
Ch 1, turn. Sc in each st across. (120)
Round 14 :
Ch 1, turn. Sc in each st across. (120)
Info :
Texture option: To add subtle ribbing, work alternating rows in BLO (back loops only) every 6th row. This will create a horizontal ridge; if you choose that, keep notes to maintain the pattern symmetry through the panel.
Round 15 :
Ch 1, turn. Sc in each st across. (120)
Round 16 :
Ch 1, turn. Sc in each st across. (120)
Round 17 :
Ch 1, turn. Sc in each st across. (120)
Round 18 :
Ch 1, turn. Sc in each st across. (120)
Round 19 :
Ch 1, turn. Sc in each st across. (120)
Info :
If you prefer a more open fabric, you may substitute every 8th row with a row of hdc; but note tableware may snag. The pattern shown uses all sc for stability.
Round 20 :
Ch 1, turn. Sc in each st across. (120)
Round 21 :
Ch 1, turn. Sc in each st across. (120)
Round 22 :
Ch 1, turn. Sc in each st across. (120)
Round 23 :
Ch 1, turn. Sc in each st across. (120)
Round 24 :
Ch 1, turn. Sc in each st across. (120)
Info :
Counting tip: Mark the first and last stitches of several rows with removable markers to ensure even row widths and to help when you begin to add the inner frame and borders.
Round 25 :
Ch 1, turn. Sc in each st across. (120)
Round 26 :
Ch 1, turn. Sc in each st across. (120)
Round 27 :
Ch 1, turn. Sc in each st across. (120)
Round 28 :
Ch 1, turn. Sc in each st across. (120)
Round 29 :
Ch 1, turn. Sc in each st across. (120)
Info :
If you plan to place leaves along one long edge, leave that edge smooth; this pattern places appliques along the right long edge when working RS facing you.
Round 30 :
Ch 1, turn. Sc in each st across. (120)
Round 31 :
Ch 1, turn. Sc in each st across. (120)
Round 32 :
Ch 1, turn. Sc in each st across. (120)
Round 33 :
Ch 1, turn. Sc in each st across. (120)
Round 34 :
Ch 1, turn. Sc in each st across. (120)
Info :
At row 36 you will switch to the inner frame color (olive). Work rows 35-40 in main color, then change yarn on final stitch of row 40 to olive to begin the inner frame around the panel.
Round 35 :
Ch 1, turn. Sc in each st across. (120)
Round 36 :
Ch 1, turn. Sc in each st across. (120)
Round 37 :
Ch 1, turn. Sc in each st across. (120)
Round 38 :
Ch 1, turn. Sc in each st across. (120)
Round 39 :
Ch 1, turn. Sc in each st across. (120)
Round 40 :
Ch 1, turn. Sc in each st across. Fasten off cream leaving long tail to seam to the inner frame later if desired. (120)
Info :
At completion of Row 40 the central panel is done. Confirm measurements and block lightly before adding the inner frame so edges sit flat.
— Inner Frame (Green) :
Info :
We will work a slim rectangular frame in olive/green yarn around the central panel using a sewn-on technique or single crochet around approach. The sample uses a sewn thin cord: ch a chain long enough to go around the inner edge and sew in place. Alternatively, sc around the panel for 4 rounds.
Round 41 :
With olive, join at one corner along RS with sl st. Ch 1, sc evenly along the long side edge across 120 sts, working 1 sc for each row end along short ends (approximately 40 sc per short end). This round will have approximately 320 sc total depending on exact row counts; maintain even spacing.
Info :
If sewing a chain frame: ch enough to trace the inner rectangle and whip stitch in place with hidden stitches. The sewn cord yields a flatter framed look and is what the sample shows.
Round 42 :
Ch 1, turn (working in rounds now). Sc in each st around the inner edge; at corners work (sc, ch 2, sc) to ease the corner. Count will stay roughly the same but note four ch-2 corners. (approx 320)
Round 43 :
Sc in each st around in BLO to create a slight ridge for the inner frame. (approx 320)
Round 44 :
Sc in each st around. Fasten off and weave ends. This creates a neat thin internal frame that echoes the leaf stems. (approx 320)
Info :
Place markers at the positions where leaves will be attached along the right long edge before adding the outer border. Typical spacing: leaves at 4-6 inch intervals depending on runner length—sample shows 8 leaves spaced roughly evenly along the right edge.
— Outer Border (Cream) :
Info :
The outer border is worked in rounds around the entire panel to produce the lacy scalloped trim. Join at a corner and work evenly with corner increases.
Round 45 :
With cream, join at a corner with sl st to side. Work sc evenly along the short end edges through the top loops of the row ends. At corners work (3 sc, ch 2, 3 sc) to create a full corner cluster. This establishes the border base. (st count will vary but keep clusters symmetrical)
Round 46 :
Sc all around in the round into each st and into ch-2 corners: 1 sc in each sc, (3 sc, ch 2, 3 sc) in each corner. This evens the edge and readies for shell rounds.
Round 47 :
*Ch 3, sk 2 sts, sc in next st, ch 3, sk 2 sts, sc in next st* repeat along long sides. At corners work (ch 3, sc in corner ch-2, ch 3). This starts the open shell motif aligning with the sample lace border.
Round 48 :
Sc in each sc and in each ch-3 space around. At corners sc into corner space and work 2 sc into corner ch-2 to stabilize. (border remains flat)
Round 49 :
Shell round: In ch-3 spaces along the long sides work (2 dc, ch 1, 2 dc) to create small shells. On the short ends maintain distribution so shells align. Corners: (2 dc, ch 2, 2 dc) in corner space.
Round 50 :
Sc in each st around to pull the shell edges flat and even out tension.
Round 51 :
Repeat Round 49 shell pattern to deepen the scallop. (This creates the decorative border visible in the photos.)
Round 52 :
Sc around once more to tidy edges. Fasten off and weave in ends thoroughly. Block border gently to form neat scallops.
Info :
Blocking tip: Pin each scallop to the same width to keep a consistent scallop shape; damp-block with a spray bottle and allow to dry fully.
— Leaf Pattern (Make 8) :
Info :
Each maple leaf is worked flat starting with a central spine chain and worked in symmetrical rounds/rows to produce 7 main lobes typical of a maple. The sample uses a combination of front post/puff-style stitches to achieve the raised veins. The leaf pattern below is worked as a motif in 14 rounds; repeat these rounds for each leaf, changing colors as desired for rust, mustard and olive.
Leaf 1 — Round 65 :
With chosen leaf color, ch 21. This creates a spine of 21 chains (the central vein). (21)
Round 66 :
Row 1 (RS): 1 sc in 2nd ch from hook, sc across until last ch. (20) Turn. This establishes a base ridge for subsequent lobes.
Round 67 :
Row 2: Ch 1, turn. 1 sc in each st across (20). Fasten off short tail for later joining if desired. Fold chain spine to start shaping lobes.
Info :
We will build each lobe by working clusters along the spine on alternating sides, expanding then decreasing to form pointed lobes. Keep stitches tight for a defined leaf shape.
Round 68 :
Join at the midpoint of the chain (count 10th ch). Ch 1, sc in joining stitch, ch 3, turn — this begins the first small central lobe. Work short petals on both sides symmetrically by working into the chain edge and base row.
Round 69 :
Make central lobe: (Working into chain edge and row base) *dc, tr, dc* into 3 consecutive edge stitches to form a pointed center. (3 cluster) Fasten off tail and rejoin to work side lobes.
Round 70 :
Side lobes — lower pair: Rejoin at two chains adjacent to center. On each side work: ch1, (sc, hdc, dc, hdc, sc) into successive edge stitches to make a rounded lobe. Repeat on both sides symmetrically.
Round 71 :
Increase for outer lobes: Continue along the chain spine one stitch further on each side and work (sc, hdc, dc, tr, dc, hdc, sc) to create the larger outer lobes. Repeat both sides ensuring symmetry.
Round 72 :
Sharpen points: Into the tip of each lobe work 1 sc, 1 picot (ch 3, sl st into first of those ch), sl st back into main lobe to create a crisp outer point; repeat for all lobes (6 smaller lobes plus central lobe). This gives the distinct maple serrated tips.
Info :
Puff/vein technique: To create raised veins, use elongated front post stitches or surface slip-stitch embroidery after the leaf is completed. The sample uses surface raised slip-stitch veins in a slightly darker color for definition.
Round 73 :
Edging: Work sc around the entire leaf edge placing 2 sc into the base row where needed to prevent curling. Ensure even spacing. (Approx 60-72 sc depending on shaping)
Round 74 :
Vein foundation: With matching or slightly darker yarn, attach at leaf base and work a surface slip stitch up the central spine from base to tip. Work side vein branches by bringing the needle through and laying down surface slst branches towards each lobe center.
Round 75 :
Raised veins: Work additional surface slst or chain-stitched cords to create raised ribs. For stronger relief, chain 8 to form a stem and stitch it along the center, fastening at base. This creates the long central vein and small ribbing to each lobe.
Round 76 :
Stem: From the leaf base, ch 12, sl st back along chain to form a slightly raised stem. Fasten off and weave in ends. Trim stem to desired length if too long. Block leaf gently to flatten and open up lobes. (Stem length 12)
Info :
Blocking the leaf: Pin the leaf on a towel, pulling each lobe slightly outward to create the signature maple silhouette. Mist lightly with water and leave to dry. Blocking accentuates the 3D texture and helps appliqué placement.
Leaf 2 — Round 77 :
Repeat Rounds 65-76 for leaf 2 in your chosen second color. Keep the same dimensions and shaping to ensure consistent scale across all leaves.
Leaf 3 — Round 78 :
Repeat Rounds 65-76 for leaf 3 in the third color. Make all leaves following these rounds for uniformity. (Total leaves recommended: 8)
Leaf 4 — Round 79 :
Repeat Rounds 65-76 for leaf 4 and block each leaf to hold shape. Place pins at valley points between lobes to get crisp serration lines.
Leaf 5 — Round 80 :
Repeat Rounds 65-76 for leaf 5. Alternate colors in a pleasing sequence to mimic the scattered autumn look from the sample (rust, mustard, olive, rust, mustard, olive, rust, olive).
Leaf 6 — Round 81 :
Repeat Rounds 65-76 for leaf 6. Ensure stems are oriented consistently so when sewn on they align with the inner green frame as a guiding line.
Leaf 7 — Round 82 :
Repeat Rounds 65-76 for leaf 7. For variety, reduce the stem chain by 2-4 ch on some leaves to add natural variation in appearance.
Leaf 8 — Round 83 :
Repeat Rounds 65-76 for leaf 8. After final leaf is blocked, arrange leaves on the runner to preview placement prior to sewing.
Info :
Make 8 leaves total. You can make more or fewer to taste; the sample uses 8 leaves along a single long edge. Varying the angle and slight rotation of each leaf creates a casual scattered look.
— Alternate Leaf (Textured Puff Method) :
Round 84 :
Optional: For a puff-textured leaf (alternate look), start ch 15. Row 1: sc across (14). Row 2: ch1, turn; sc in each. Row 3: Using a 3.5mm hook, work small puff clusters into edge stitches to create raised 'vein' texture, then finish with sc edging and surface slst veins. This variant gives a chunkier leaf.
Info :
If making puff leaves, adjust blocking and sewing because these will have slightly greater bulk; sew with extra stitches to pull the leaf flush to the panel.
— Leaf Embroidery & Veins :
Round 85 :
With contrasting darker tone (or same color for subtlety) embroider central vein by threading yarn through a tapestry needle and stitching from leaf tip down to base using couching: lay a yarn strand and sew over it with small invisible stitches to hold it in place every 4-6 mm.
Round 86 :
Side veins: From central spine stitch 3-4 pairs of short veins per lobe by couching small lengths of chain or working surface slip stitch branches angled toward the lobe tip. Secure ends well and weave tails on WS.
Info :
Raised vein method: Use a double strand of yarn or chain-stitched cord to create a rope-like vein for a dramatic raised look as seen in photos.
— Assembly & Applique :
Round 87 :
Positioning: Lay the runner RS up and mark positions for leaf placement along the right long edge. Sample spacing (from bottom long edge): Leaf 1 at 3 inches, Leaf 2 at 8 inches, Leaf 3 at 13 inches, Leaf 4 at 18 inches, Leaf 5 at 23 inches, Leaf 6 at 28 inches, Leaf 7 at 33 inches, Leaf 8 at 38 inches. Adjust spacing for your runner length.
Round 88 :
Pin each blocked leaf in place using rust-proof pins. Arrange leaves with slight angles to create a natural scatter as in the sample photo; alternate directions and slightly overlap edges for interest. Do not pin stems over the inner green frame line—aim to connect stems to it or lay stems over it.
Round 89 :
Sewing leaves: Using a matching yarn and yarn needle, whipstitch or ladder stitch around the base and outer edge of each leaf. Use small, evenly spaced stitches hidden on the leaf underside. For stability, stitch through the center vein (under the surface couching) and through the runner fabric along the inner frame line to secure each stem.
Info :
For extra security, use a small dab of fabric glue under the leaf center before sewing. Allow glue to dry completely before trimming tails or blocking again.
Round 90 :
Attach stems: Bring each leaf stem so it aligns with the olive inner frame and sew stem onto the frame using tight, small stitches. If desired, couch a thin chain of olive yarn along the inner frame to echo a vine and stitch stems to that chain.
Round 91 :
Finishing: After sewing each leaf, gently press the leaf again to ensure flatness and to marry the leaf to the runner surface. Trim any visible tails close to the fabric and weave in all ends securely on the WS.
Round 92 :
Final inspection: Check all attachment points and reinforce any loose areas with extra stitches. Ensure no pins remain and that all ends are woven and trimmed. Lightly steam block the entire runner if desired to set shape.
Info :
For a removable leaf option: Instead of sewing leaves permanently, attach with a few invisible snaps or small Velcro dots placed under the leaf center. This allows seasonal interchange or washing.
— Optional Extra Leaves & Variation Notes :
Round 93 :
Make additional smaller leaves using ch 11 spine for decorative accents on the opposite side or corners. Scale the same pattern down proportionally and shorten stem lengths accordingly.
Round 94 :
Add embroidered berry or acorn motifs: Use surface embroidery techniques to attach tiny circular motifs in contrasting colors for a richer autumn composition.
Info :
Mixing textures: Try using a slightly different yarn (e.g., cotton-wool blend) for some leaves to vary the tactile texture and color saturation.
— Care Instructions :
Round 95 :
Care: Hand wash in cool water with mild soap and reshape while damp; flat dry. Avoid harsh machine agitation which can distort the scalloped border and appliques. If necessary, spot clean leaves only.
Round 96 :
Storage: Store flat or rolled to prevent creasing. Keep away from prolonged direct sunlight to avoid color fading of accent leaf yarns.
Info :
Maintenance: If a leaf becomes loose over time, reinforce with a few small stitches on the WS rather than removing the entire applique.
This autumn table runner brings the warmth of handmade charm to your tabletop with textured single crochet rows, a refined scalloped border, and richly colored maple appliques. The layered design feels bespoke yet approachable, perfect for seasonal decorating or as a thoughtful housewarming gift. I hope this pattern inspires cozy afternoons with yarn and tea — enjoy every stitch and the beautiful finished result! 🧶🍂