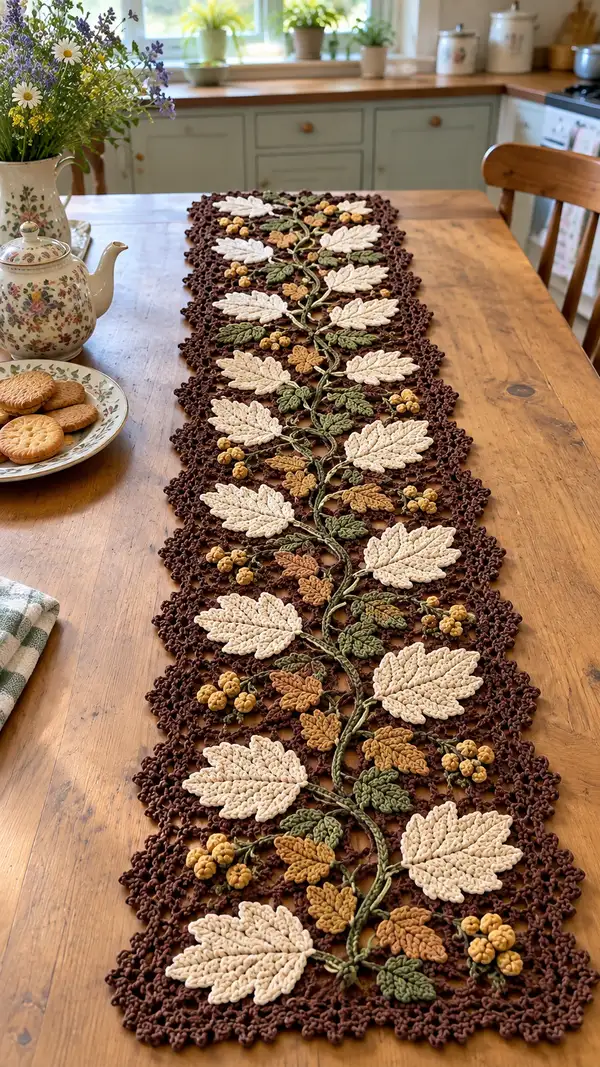
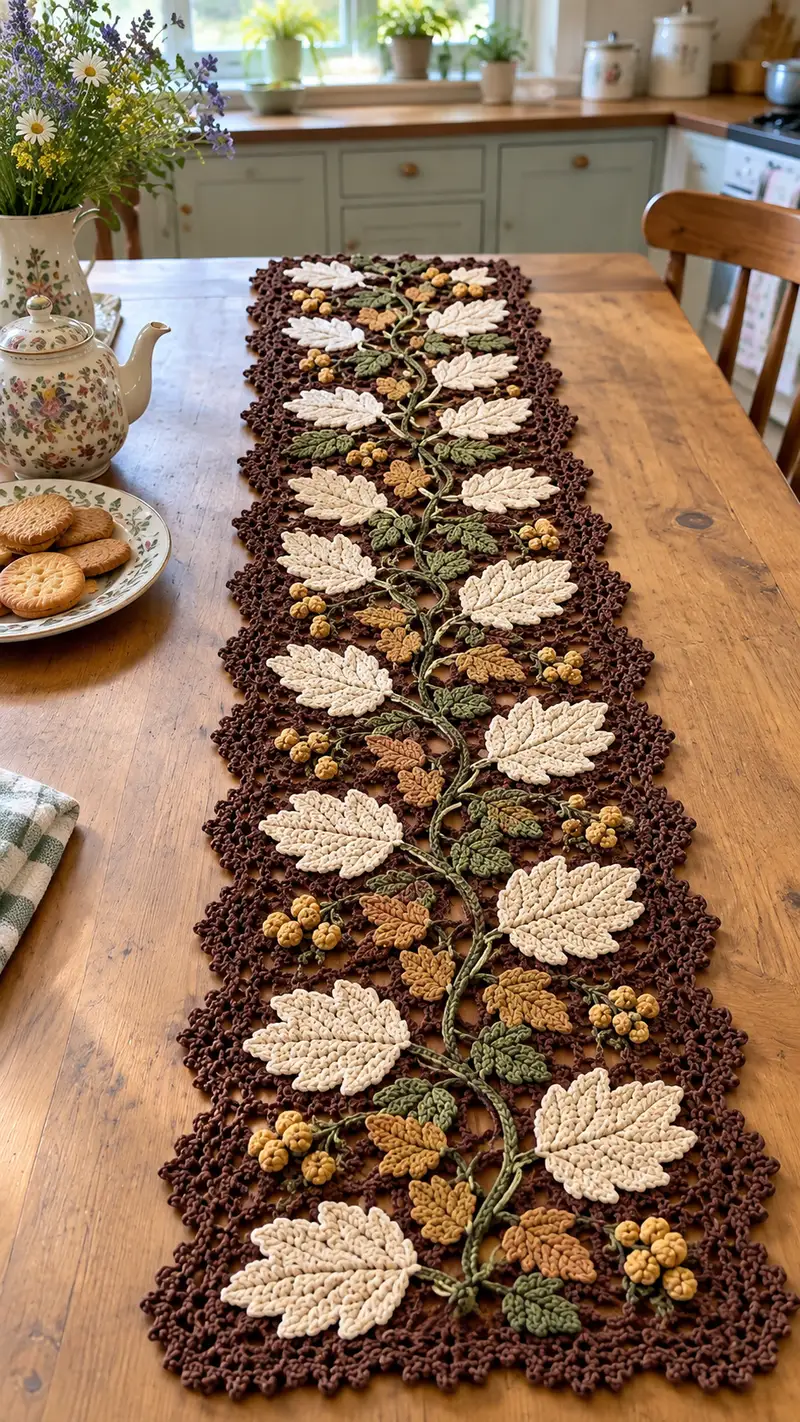
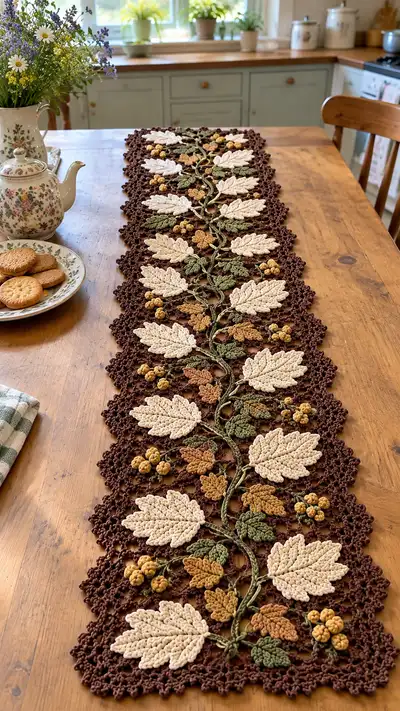
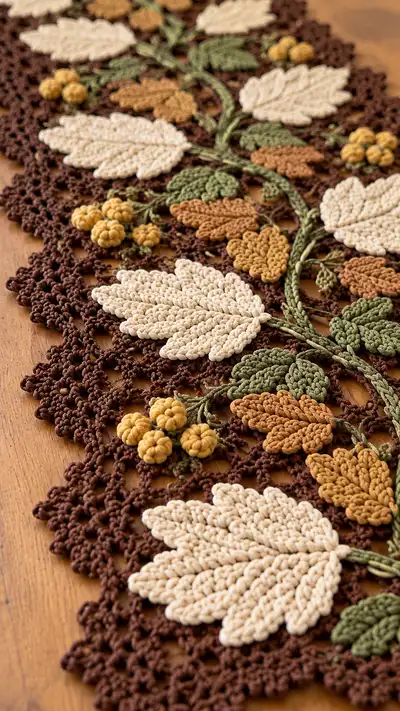
A long, elegant table runner featuring layered crochet leaves, tiny clustered berries, twisting vine cord, and a delicate lacy background. Warm autumn tones of cream, olive, rust and golden yellow sit on a rich chocolate lace ground for a vintage-inspired centerpiece. Detailed modular construction uses repeated leaf motifs and join-as-you-go lacy modules—perfect for gifting or seasonal decor.
Progress Tracker
0% Complete
— Overview :
Info :
This pattern is modular. You will make: large leaves (cream) x10, medium rust leaves x16, small olive leaves x20, berry clusters x20, vine segments to span length, and lacy background modules (join-as-you-go) to form the base. Work pieces flat and applique to the lacy ground or join-as-you-go as directed. Gauge is not critical but consistent hook and tension are essential for even assembly.
Info :
Recommended finished runner approximate measurements: 46-52 inches (117-132 cm) long by 10-12 inches (25-30 cm) wide depending on placement of motifs and blocking. Make more or fewer motif repeats to adjust length.
— Lacy Background Module (Make 18 modules) :
Round 1 :
6 sc in magic ring (6)
Round 3 :
(1 sc, 1 inc) x 6 (18)
Round 4 :
(2 sc, 1 inc) x 6 (24)
Round 5 :
1 sc in each st (24)
Info :
Switch to BLO for a defined ridge on the module base if desired. These early rounds form a small solid center to anchor lace.
Round 6 :
*ch5, sk next 2 sts, sl st in next st* around to create 8 chain loops (8 loops)
Round 7 :
In each ch5 loop: (sl st, ch2, 3 dc, ch2, sl st) to make 8 petal shells (32 dc total loosely)
Round 8 :
*ch3, sc into space between shells, ch3, sl st into shell center* around making picot arches (8 arches)
Info :
Round 6-8 create an open petal ring. Keep tension slightly looser to allow flatness; block these modules before final joining for even lace.
Round 9 :
*ch7, sl st into center of next petal shell* around (8 long loops)
Round 10 :
In each ch7 loop: (sc, ch3, 5 dc, ch3, sc) to form ornate scallops (5 dc x8 = 40 dc)
Round 11 :
*ch2, picot, sc in next sc, ch4, sl st into next scallop top* around adding lacy connectors
Info :
These modules are intentionally airy: they will be joined to one another to form a continuous lace field. Work all modules in the brown main color for cohesiveness.
Round 12 :
Working into chain spaces and scallop tops: *(sc, ch5, sc) in each outer space, sl st into next join space* around to create joining loops (16 joining loops)
Round 13 :
Finish with small edging: *sc in each sc and 3 sc in each ch5 loop* around to firm the outer edge (approx 72 sc)
Info :
Fasten off leaving 6-8 inch tail for join-as-you-go attachment. Block modules lightly to shape scallops before joining.
— Large Leaf (Make 10) :
Info :
These large cream leaves are worked flat from tip to base along a central spine chain. They are slightly cupped by using alternating post stitches and ch-spaces to form veins.
Round 1 :
ch 11, sc in 2nd ch from hook and across to last ch, 3 sc in last ch (starting point counted) then turn working along opposite side of foundation ch: sc across to first ch (total 20 sts)
Round 2 :
ch1, turn, sc in first 2 sts, (hdc, dc, tr, dc, hdc) in next st (creates mid-wing), sc in next 2 sts, sc across opposite side, 3 sc in tip stitch (24 sts)
Round 3 :
ch1, turn, sc in first 3 sts, (hdc, dc, tr, tr, dc, hdc) in next, sc in next 3 sts, sc across opposite side, 3 sc in tip (30 sts)
Round 4 :
ch1, turn, sc in first 4 sts, (hdc, 2 dc, tr, 2 dc, hdc) in next, sc in next 4 sts, sc across opposite side, 3 sc in tip (36 sts)
Info :
Use post stitches (FLO or BLO) on alternate rows to create raised vein texture; work the central vein using front post double crochet when you reach the center rows for definition.
Round 5 :
ch1, turn, sc in first 5 sts, (FLO hdc, dc, tr, dc, FLO hdc) in next, sc in next 5 sts, sc across opposite side, 3 sc in tip (42 sts)
Round 6 :
ch1, turn, sc in first 6 sts, (hdc, 3 dc, tr, 3 dc, hdc) in next, sc in next 6 sts, sc across opposite side, 3 sc in tip (48 sts)
Round 7 :
ch1, turn, sc in first 6 sts, dec (sc2tog) over next 2 sts, sc across to 6 sts before tip, 3 sc in tip, sc back across opposite side decreasing symmetrically (approx 44 sts)
Round 8 :
ch1, turn, sc in first 5 sts, (hdc, 2 dc, tr, 2 dc, hdc) in next, sc in next 5 sts, sc across opposite side, 3 sc in tip (48 sts)
Round 9 :
ch1, turn, work 1 sc in each st FLO to create ridge at leaf center (48)
Info :
At this stage you can add a line of surface slip stitch down the center to form the stem vein; hold leaf flat while doing this. Leave a 6-8 inch tail for sewing at the base.
Round 10 :
ch1, turn, sc in first 4 sts, dec over next 2, sc across to 4 sts before tip, 3 sc in tip, sc back across opposite side decreasing symmetrically (approx 40 sts)
Round 11 :
ch1, turn, sc in first 3 sts, dec over next 2, sc across to 3 sts before tip, 3 sc in tip, sc back across opposite side decreasing symmetrically (approx 34 sts)
Round 12 :
ch1, turn, sc in each st (34)
Round 13 :
sl st around edge to finish and create a subtle edge picot: *sc, ch3, sl st in ch3 base* repeat spacing evenly (34 picots)
Info :
Fasten off leaving a 10-inch tail for sewing. Block gently to shape. Large leaves in photos are slightly cupped; use gentle steam block to shape if desired.
— Medium Rust Leaf (Make 16) :
Round 1 :
ch9, sc in 2nd ch from hook across and 3 sc in last ch then sc back along opposite side (total 16 sts)
Round 2 :
ch1, sc in first 2, hdc, 2 dc, hdc, sc in next 2, sc across, 3 sc in tip (20 sts)
Round 3 :
ch1, sc around creating a slight point at tip with 3 sc cluster; sc back and sl st to finish (20)
Round 4 :
*Work 1 sc in each st and add small picot edges: sc, ch3, sl st in 3rd ch* around (20 picots)
Info :
These medium leaves are flatter and used in groups under the large leaves. Fasten off leaving long tails for sewing.
— Small Olive Leaf (Make 20) :
Round 1 :
ch6, sc in 2nd ch from hook to last ch, 3 sc in last ch then sc back (10 sts)
Round 2 :
ch1, sc in first 2, hdc, 2 dc, hdc, sc in next 2, sc across opposite side (12 sts)
Round 3 :
sl st around to finish, add one front post dc down center for vein (12)
Info :
Smaller leaves are used both attached to vine and clustered near berries. Work these quickly—keeping stitch count consistent helps assembly symmetry.
— Berry Cluster (Make 20 clusters; each cluster = 3-5 berries) :
Round 1 :
make a magic ring, ch1, 6 sc in ring (6)
Round 2 :
*(ch1, 3 dc bobble made by (yarn over, insert, pull up loop, yo pull through 2 twice) worked 3 times into same st, sl st to secure)* in each st to create tiny bobbles; or for compact berry: (dc bobble x3, sl st) around making 6 mini-bobbles
Round 3 :
ch1, sc around bobble bases to encase and firm cluster (approx 18 sc)
Info :
Assemble berries in clusters: sew 3-5 mini-bobbles together using yarn tail for a natural clustered look. Leave a long tail for sewing onto vine or lace ground.
— Vine and Stem Cord (Make sufficient length to span runner ~120 cm) :
Round 1 :
ch 200 (or desired length). Join with sl st to first ch to make round cord if you prefer a loop; or leave open chain for a flat vine (200 ch)
Round 2 :
Working into each ch: sc in each ch all the way to create a firm cord (200 sc)
Round 3 :
Optional: create twist by making 3-strand braid from 3 separate 66 ch cords. For a braided vine, make 3 chains of equal length and braid loosely securing ends with whipping stitches.
Info :
For more dimensional vine, work a chain and then 3 sc around it to create a tubular appearance (i-cord style). Alternatively use surface slip stitch to attach to background after positioning.
Round 4 :
Embellish vine with small picot branches: *ch6, sl st back into vine every 8-10 sc* along length to create branch points (approx 12-15 branch points for runner)
Info :
Leave long tails at both ends of vine for neat attachment into lace ground. Pin vine onto lace after modules are joined to ensure smooth curves and natural twists.
— Small Seed Pod / Cluster Leaf (Make 12) :
Round 1 :
ch7, sc in 2nd ch from hook to end and 3 sc in last ch, sc back along opposite side (14 sts)
Round 2 :
ch1, sc around, add small cluster at base with 3 dc bobble (14)
Info :
These pods sit beneath large leaves and add visual weight. Work them in rust or golden yellow depending on placement.
— Joining Modules to Build Runner Field :
Info :
Arrange 18 lacy modules side by side in two parallel rows (9 modules per row) to produce a long background. The center seam between rows will be where the vine is attached. Work join-as-you-go to create a stable net ready for applique.
Round 1 :
Place first lacy module (A) on flat surface. Pick second module (B). With right sides up on A, align B and sl st through loop on A and matching ch-space on B at 4 equidistant points creating a flexible join (4 joins)
Round 2 :
Continue joining next modules to create first full length row: join modules 1-9 in same manner. Ensure scallop edges align and do not stretch. (Row length = 9 modules joined)
Round 3 :
Create second parallel row the same way with modules 10-18. Block both rows to identical width before final joining to prevent mismatch.
Info :
Work joining sl sts loosely: tight joins will pucker and distort scallops. Use pins to keep modules aligned and check repeats often.
Round 4 :
Join the two long rows together by aligning outer scallops and making sl st joins into corresponding ch5 loops every 3-4 spaces until the two rows are securely connected. The center gap should remain slightly open to accept vine.
Round 5 :
Once rows are joined, work a single round of sc around entire perimeter into outer scallop and adjoining ch-spaces to unify the edge (approximate stitch count varies by blocking; aim for 6-9 sc per module edge scallop)
Info :
When working the perimeter round, place stitch markers at module seams to keep consistent counts and ensure symmetrical edges on both sides of the runner.
— Edge Crochet Motif (Border Round; Work continuous around runner) :
Round 1 :
With brown, join at any seam and ch1, sc evenly around entire runner into edge spaces (work approx 3 sc per small scallop and 7 sc on larger scallops) aiming for even tension (total approx 600-720 sc depending on blocking)
Round 2 :
*ch4, skip 1 sc, sc in next sc* repeat around to create airy picot chain edge (approx 100 loops)
Round 3 :
In each ch4 loop: (sl st, ch3, 3 dc, ch3, sl st) to create decorative shells along edge (100 shells)
Info :
Edge rounds are forgiving but set the final look—block after finishing edge to open shells and make the runner lie flat.
Round 4 :
Finish with delicate picots between shells: *sc, picot (ch3 sl st in 3rd ch), sc* around to add vintage lace points (approx 200 picots)
Info :
Fasten off and weave all tails. Light steam blocking will open the shells and set the runner shape. Keep it damp, pin to desired final measurements, and let dry fully.
— Applique Placement and Attachment :
Info :
Lay the blocked runner flat. Plan a central vine path down the center seam between the two joined rows of modules. Pin the vine first, then position large leaves evenly spaced alternately left and right with bases toward the vine. Place medium leaves and small leaves clustered around larger ones, berries tucked near leaf junctions.
Round 1 :
Pin the vine in position, shaping gentle S-curves. Using mattress stitch or whip stitch, sew the vine to the runner through the foundation of the vine at intervals of approx every 1/2 inch (1.2 cm) to anchor; ensure thread path is hidden under the vine.
Round 2 :
Sew large leaves by placing the base at the vine and using yarn tail to attach with sturdy ladder or whip stitch through the base of leaf and then into the vine. Attach each leaf with 6-10 small secure stitches depending on leaf size.
Info :
When sewing, insert needle through runner mesh into leaf underside to avoid visible stitches on top. Use matching cream thread for cream leaves and rust thread for medium leaves for invisible joins.
Round 3 :
Sew small olive leaves in clusters adjacent to large leaves using 3-4 tiny stitches each. Attach berries near clusters using the berry tails; sew multiple berries together before securing cluster to runner if preferred.
Round 4 :
Embroider additional small veins across the leaves using contrasting slightly darker yarn if you want extra depth: run simple running stitch in matching color along leaf center and branch out with tiny stitches.
Info :
Keep placement symmetrical: large leaves alternate left and right every module repeat for balanced flow. Use pins liberally and step back frequently to assess overall composition before final sewing.
— Final Decorative Touches :
Round 1 :
Add tiny French knot-style bobbles with yarn by forming small wrapped loops and sewing them in groups of three to accent the berry clusters.
Round 2 :
Weave in ends: pass tails through the fabric and into the body of motifs for at least 2 inches, then trim close. Use a second needle to tuck ends into adjacent stitches for security.
Info :
Block the entire assembled runner again if needed to soften join lines and allow the applique to settle into the lace background. Pin leaves flat while drying for permanent lie.
Round 3 :
Optional: add a light fabric-safe spray seal or starch to help the runner keep a slightly crisp shape for display if desired.
Info :
Final runner can be laundered gently by hand in cool water; reshape while damp and dry flat to preserve shape and applique placement.
Finishing this runner is so satisfying—watching all the leaves, berries and lace come together into a cozy autumn centerpiece is a delight! Each applique brings texture and warmth while the chocolate lace ground frames every detail beautifully. Whether on a dining table or sideboard, this runner becomes a conversation piece worthy of seasonal display. Enjoy blocking, pinning and placing—this project is a real labor of love. 🍂🧶