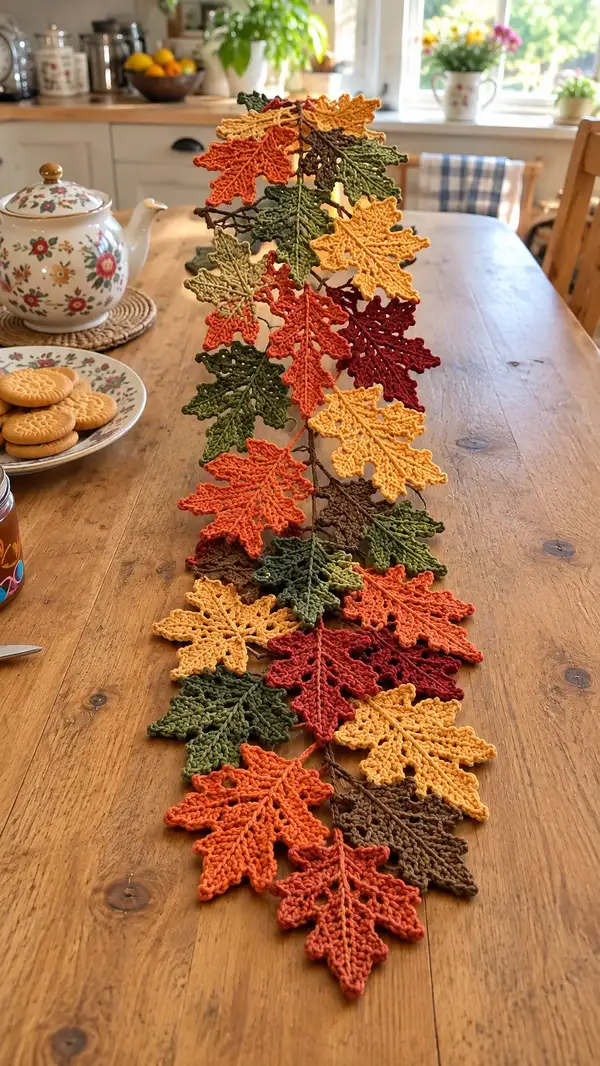
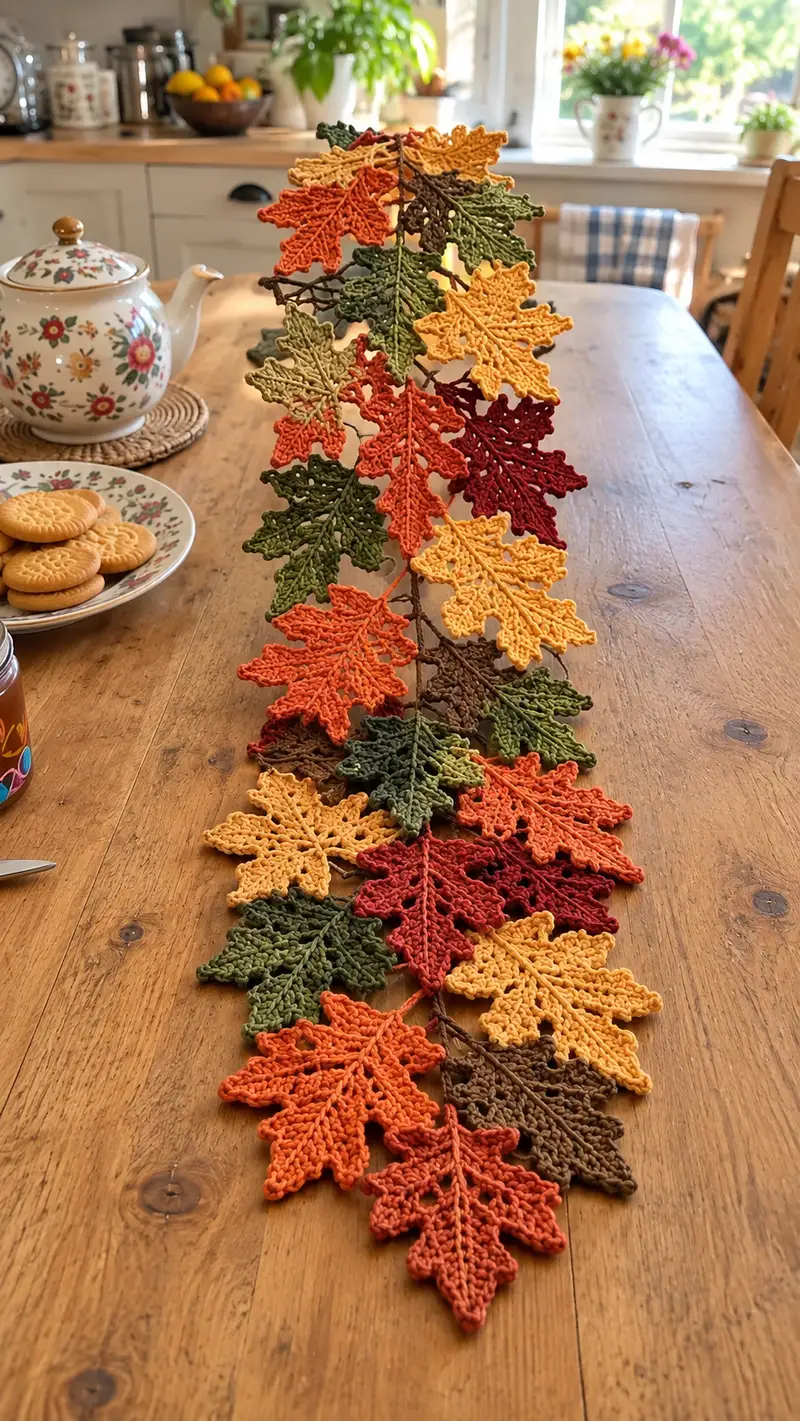
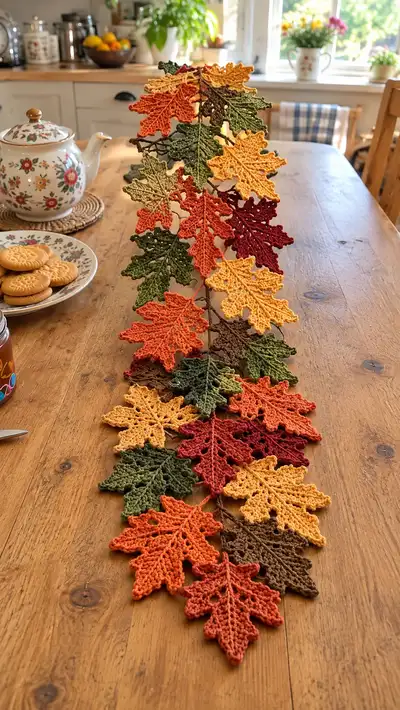
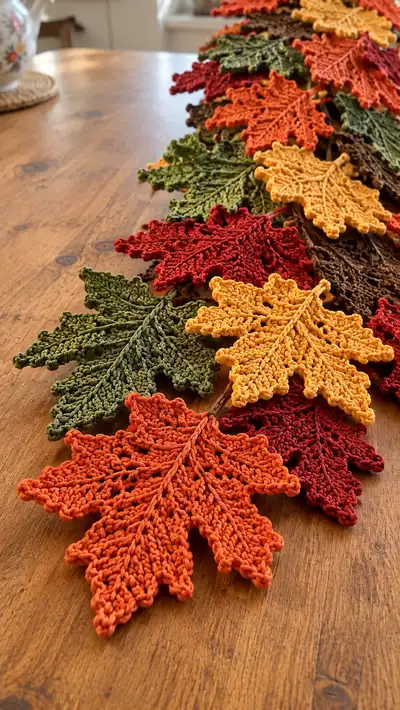
Create a cascading autumn table garland made from crocheted maple-style leaves in warm fall hues. This pattern recreates the layered, lacy leaves seen in the photos with detailed shaping, raised center veining and a rustic stem to join them. The finished garland is perfect as a table runner, mantel decoration, or seasonal centerpiece. Includes instructions for three leaf sizes, a woven stem, edging and full assembly tips.
Progress Tracker
0% Complete
— Notes & Gauge :
Info :
These leaves are worked flat and are best made with a cotton or cotton blend to hold shape. Using the recommended hook and sport/DK weight yarn the large leaf will measure approximately 11-13cm (4.5-5") from tip to base and about 10-12cm (4-4.5") across at the widest lobe. Make a test leaf to check appearance and tension before making multiples.
Info :
Throughout the pattern 'Round' is used to number rows worked back and forth or in the round as described. When working mirror lobes you will work evenly on one side then the other. Use a stitch marker on the center stitch at the base of the leaf for alignment.
— Large Maple-Style Leaf (Make X for garland) :
Round 1 :
6 sc in magic ring (6)
Round 3 :
(1 sc, 1 inc) x 6 (18)
Round 4 :
(2 sc, 1 inc) x 6 (24)
Round 5 :
(3 sc, 1 inc) x 6 (30)
Round 6 :
(4 sc, 1 inc) x 6 (36)
Info :
These first rounds create a slightly rounded starting point that becomes the leaf base. Keep tension even; this central disk helps anchor lobes.
Round 7 :
(5 sc, 1 inc) x 6 (42)
Round 8 :
(6 sc, 1 inc) x 6 (48)
Round 9-11 :
1 sc in each st (48)
Info :
These rounds widen the midsection. Add a removable stitch marker to mark the midline stitch that will act as the central vein start for later raised stitch work.
Round 12 :
(6 sc, 1 inc) x 6 (54)
Round 13 :
(7 sc, 1 inc) x 6 (60)
Round 14-16 :
1 sc in each st (60)
Info :
Now the piece is large enough to begin forming lobes. We'll start directional shaping: each 'lobe' will be formed by working partial rounds into a sequence of increases and decreases, creating pointed extensions from the outer ring. Identify six lobe start points by placing markers every 10 stitches along Round 14.
Round 17 :
(7 sc, 1 dec) x 6 (54)
Round 18 :
(6 sc, 1 dec) x 6 (48)
Round 19 :
(5 sc, 1 dec) x 6 (42)
Info :
Begin stuffing lightly only if you want a slightly raised centre — otherwise leave flat and block to shape. For garland leaves it is typical to leave unstuffed and block firmly to maintain a crisp flat silhouette.
Round 20 :
(4 sc, 1 dec) x 6 (36)
Round 21 :
(3 sc, 1 dec) x 6 (30)
Round 22 :
(2 sc, 1 dec) x 6 (24)
Info :
We have now closed back toward the base; for a leaf shape we will 'open' the work again in directed points. Fasten off leaving a long tail for sewing if you want to create a slightly cupped base; otherwise continue below to build lobes and edges.
Round 23 :
Rejoin on the outer edge (choose a midpoint lobe start). Ch 1, sc around next 12 stitches to form first lobe base (12)
Round 24 :
Turn work; (sc inc, 1 sc) across to create an elongated lobe: (1 sc, inc) x 6 (18)
Round 25 :
1 sc in each st (18)
Round 26 :
(2 sc, 1 inc) x 6 (24) — shape tip
Round 27 :
(2 sc, 1 dec) x 6 (18) — taper back toward center
Info :
Work the subsequent lobes in the same way around the central disk: rejoin on the next marker, mirror the increases and decreases so each lobe matches. Use blocking to stretch points gently into crisp shapes.
Round 28 :
Form second lobe: sc around next 12 sts (12)
Round 29 :
(1 sc, inc) x 6 (18)
Round 30 :
1 sc in each st (18)
Round 31 :
(2 sc, 1 inc) x 6 (24)
Round 32 :
(2 sc, 1 dec) x 6 (18)
Info :
At this stage you should have built the first two lobes. Repeat the same lobe sequence for the remaining four lobes. For speed, keep a stitch marker at the start of each lobe to ensure uniformity.
Round 33 :
Third lobe sequence (rep rounds 23-27) (18)
Round 34 :
Fourth lobe sequence (rep rounds 23-27) (18)
Round 35 :
Fifth lobe sequence (rep rounds 23-27) (18)
Round 36 :
Sixth lobe sequence (rep rounds 23-27) (18)
Info :
After forming the six lobes, the leaf will look scalloped. Now we will add the center raised vein and edge picot detail for a finished look.
Round 37 :
Working across the center from base to tip: rejoin at base center, ch 1, sc in same st, *ch 4, sl st into next st* to create a stitched vein effect for the next 10 stitches; end at tip. (counts vary with spacing)
Round 38 :
Return along opposite side of center: sl st back along chain spaces to make a raised braid. This forms the visible central vein (no final stitch count change)
Round 39 :
Edge picot round: Work 1 sc in each outer edge stitch, working a picot at each lobe tip: *sc 4, picot (ch3, sl st in first ch)* repeat around to create tiny points. Maintain original stitch count roughly (approx 72 with picot loops)
Round 40 :
Finishing round: 1 sc around to tidy picot bases, sl st to join, fasten off and weave in ends. Leave a long tail at the leaf base for sewing to the stem (no change to picot count)
Info :
Block leaf flat to accent lobes: pin to shape and spray lightly with water or starch, stretching lobes and shaping picot points. Allow to dry fully. You may lightly press with a damp cloth if needed, on a low setting and a pressing cloth between iron and leaf.
— Medium Maple-Style Leaf (Make X) :
Round 1 :
6 sc in magic ring (6)
Round 3 :
(1 sc, 1 inc) x 6 (18)
Round 4 :
(2 sc, 1 inc) x 6 (24)
Round 5 :
1 sc in each st (24)
Info :
Medium leaf uses fewer growth rounds so lobes are smaller and quicker to make. Mark the 4 lobe points by placing markers every 6 stitches around round 5 for guided shaping.
Round 6 :
(3 sc, 1 inc) x 6 (30)
Round 7-8 :
1 sc in each st (30)
Round 9 :
(3 sc, 1 dec) x 6 (24)
Round 10 :
(2 sc, 1 dec) x 6 (18)
Info :
Create four directional lobes: rejoin for each lobe in sequence and work a short 8-12 stitch lobe: sc 8, (1 sc, inc) x 4 to form a tip then dec back to the body. Repeat at each marked point.
Round 11 :
Lobe 1: sc 8, (1 sc, inc) x 4 (12)
Round 12 :
1 sc around lobe (12)
Round 13 :
(2 sc, 1 dec) x 4 (8) — taper back
Round 14-17 :
Repeat lobe sequence for lobes 2-4, working mirror shaping and smoothing rounds as needed (counts approximately 8-12 per lobe)
Round 18 :
Raise center vein: rejoin at base center, ch 1, sc, ch 3 repeated up center 6 times, then return with sl sts to create raised effect (no count change)
Round 19 :
Edge tidy and tiny picots at each lobe tip: sc around edge; at each tip do *sc2, picot, sc2* to create tiny points (approx total 40-48)
Round 20 :
Fasten off; leave long tail for joining to stem. Block flat and shape points. (no stitch count change)
Info :
Medium leaves are perfect to alternate between larger leaves for a natural look. Make a sample to check tip sharpness and adjust picot size as desired.
— Small Accent Leaf (Make X) :
Round 1 :
6 sc in magic ring (6)
Round 3 :
(1 sc, 1 inc) x 6 (18)
Round 4 :
1 sc in each st (18)
Round 5 :
(1 sc, 1 dec) x 6 (12)
Round 6 :
Make two small lobes by rejoining: sc 6 across, ch 3, sc back to body and sc 6 other side (approx 12)
Round 7 :
Edge: sc around with tiny picots on tips (approx 18)
Round 8 :
Fasten off; leave long tail for sewing. Block gently to shape the small leaf. (no change)
Info :
Small leaves are used to fill gaps and add texture to the garland. They are quick and perfect for using yarn scraps.
— Stem & Connecting Cord (Make 1 long stem or multiple segments) :
Round 1 :
With brown yarn ch 120 (or desired length of garland stem - each 10 ch ≈ 6cm; adjust length for table size)
Round 2 :
Row 1: sc in 2nd ch from hook and across (119) — this creates a sturdy cord
Round 3 :
Row 2: ch 1, turn, sc across in BLO to create a neat ridge (119)
Info :
Optionally, work two such cords and braid them together for a thicker stem. You can also twist a floral-wire core into the cord for structure before stitching leaves on.
Round 4-8 :
Repeat sc in each st for 5 rows total to make a stout cord (119)
Round 9 :
Optional decorative ridge: FLO row - 1 sc in each st FLO to create a surface suitable for sewing leaves without holes (119)
Round 10 :
Fasten off leaving long tails for joining; if making a braided stem, make 2 or 3 cords and braid, then sew braid ends to secure (no stitch count change)
Info :
If you wish to make a softer, more rope-like stem, chain the desired length and single crochet back along the chain and then fold the cord and whip-stitch to form a tube. For a botanical look, use a slightly fuzzy yarn or wrap a brown yarn around a floral wire.
— Decorative Vein & Raised Centre Technique :
Round 1 :
To create main raised vein on each leaf: rejoin yarn at base center, ch 1, sc in same st
Round 2 :
*Ch 4, sl st into next st* repeat up the center for about 8-12 repeats depending on leaf size; this forms chain spaces that will be outlined.
Round 3 :
Return along chain spaces: sc into the back loops of the previously made chains to create a twisted raised line; this does not change the stitch count of main leaf but creates a visible vein.
Info :
You can substitute a strongly contrasting yarn for the vein if you want a high contrast look, or use same color for subtle raised texture. Work tight sl sts when returning to make the vein stand proud.
— Edging & Picot Finish (All Leaves) :
Round 1 :
With leaf right side facing, join yarn anywhere on outer edge. *Sc in next 3 sts, picot (ch3, sl st in first ch)* repeat around. This will create small defined points at tips; final stitch count varies due to picots but expect approx +20-30 loops overall.
Round 2 :
Sc around to tidy the base of picots, working 1 sc into the base of each picot and 1 sc between (no targeted stitch count required)
Info :
Picot size can be reduced to ch2 if you prefer a smaller scallop. Always block after finishing edges to open out picots evenly.
— Alternative Textured Vein (Optional)
Round 1 :
If you prefer a ribbed raised vein, work a line of post stitches: DC around the chain spaces made earlier or FPdc/BPdc alternately to create ribbing. Choose 6-10 post stitches depending on leaf size.
Info :
Front post double crochet (FPdc) or back post double crochet (BPdc) yield a pronounced ridge; practice on a swatch as they change edge tension slightly.
— Joining Leaves to Stem (Individual Attachment Method) :
Round 1 :
Position leaf on stem, base tail aligned with stem center. Thread long tail through yarn needle and whip-stitch through the stem cord for 6-10 secure passes, then come back through leaf base to anchor (no stitch count change)
Round 2 :
For extra stability, add two or three crossing stitches through the underside of the leaf to prevent rotation. Tie off and weave ends into stem for invisibility.
Info :
Pin leaves in place before stitching to choose pleasing spacing. For a natural look, offset left and right leaves alternately and vary orientations so points face slightly up or down.
— Braided Stem Attachment (Continuous Method) :
Round 1 :
As you work the stem cord, you may join leaves continuously by rejoining yarn at leaf base: when you reach a planned position, insert leaf base tail through a few stem stitches and carry on crocheting the stem, enclosing the base tail within the cord for a 'built-in' look.
Round 2 :
This continuous method is ideal for a neat reverse where leaves appear attached without visible sewing. Keep the leaf base tail long for 4-6 cm so it can be enclosed within stem stitches easily.
Info :
Plan spacing ahead: typically 8-12cm between leaves on medium/large garland, and 4-8cm for clusters. Alternate sizes for natural layering.
— Assembly & Final Styling :
Round 1 :
Lay out your leaves in final order on a flat surface, using the photos as inspiration: alternate colors and sizes so color distribution is even along the garland (no stitch count change)
Round 2 :
Sew or stitch each leaf to the stem using the long tail left at the base. Use invisible ladder stitch or whip stitch; make 6-10 secure passes through the stem cord per leaf (no stitch count change)
Round 3 :
When the stem is finished, weave in all ends and block the entire garland for a final crisp look; allow to dry fully before handling. If using optional stiffener, apply lightly and shape leaves while damp.
Info :
For draping on a table, consider making two stems and twining them for extra volume; for mantel placement a single strand is often sufficient. Secure ends with a small loop of yarn to enable hanging.
Round 4 :
Trim any excess tails and secure loose loops with a dab of fabric glue if desired. Finalise spacing by gently bending the stem or untwining the braid to present leaves with a natural staggered look (no stitch count change)
Info :
Consider adding small wooden beads, mini pinecones or tiny acorns between leaves for extra seasonal detail. Sew or glue them securely to the stem after blocking.
This autumn garland brings cozy, handcrafted charm to any surface — each crocheted leaf layered and blocked to perfection. Create a warm seasonal display that invites compliments and lingering looks. I hope stitching this brings you a calm, creative afternoon and a beautiful decoration to enjoy. 🍁🧶