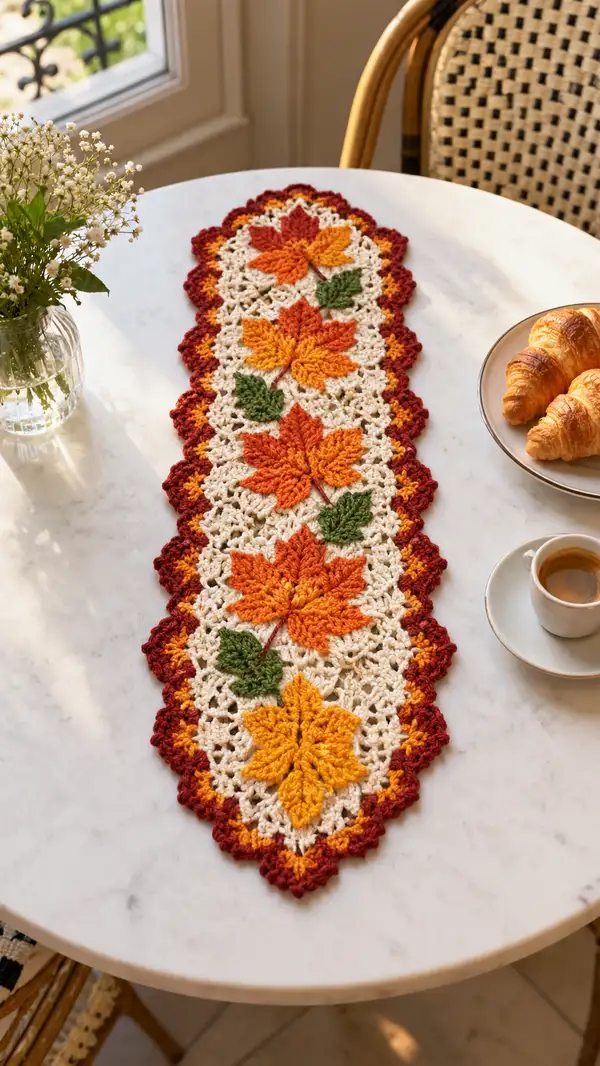
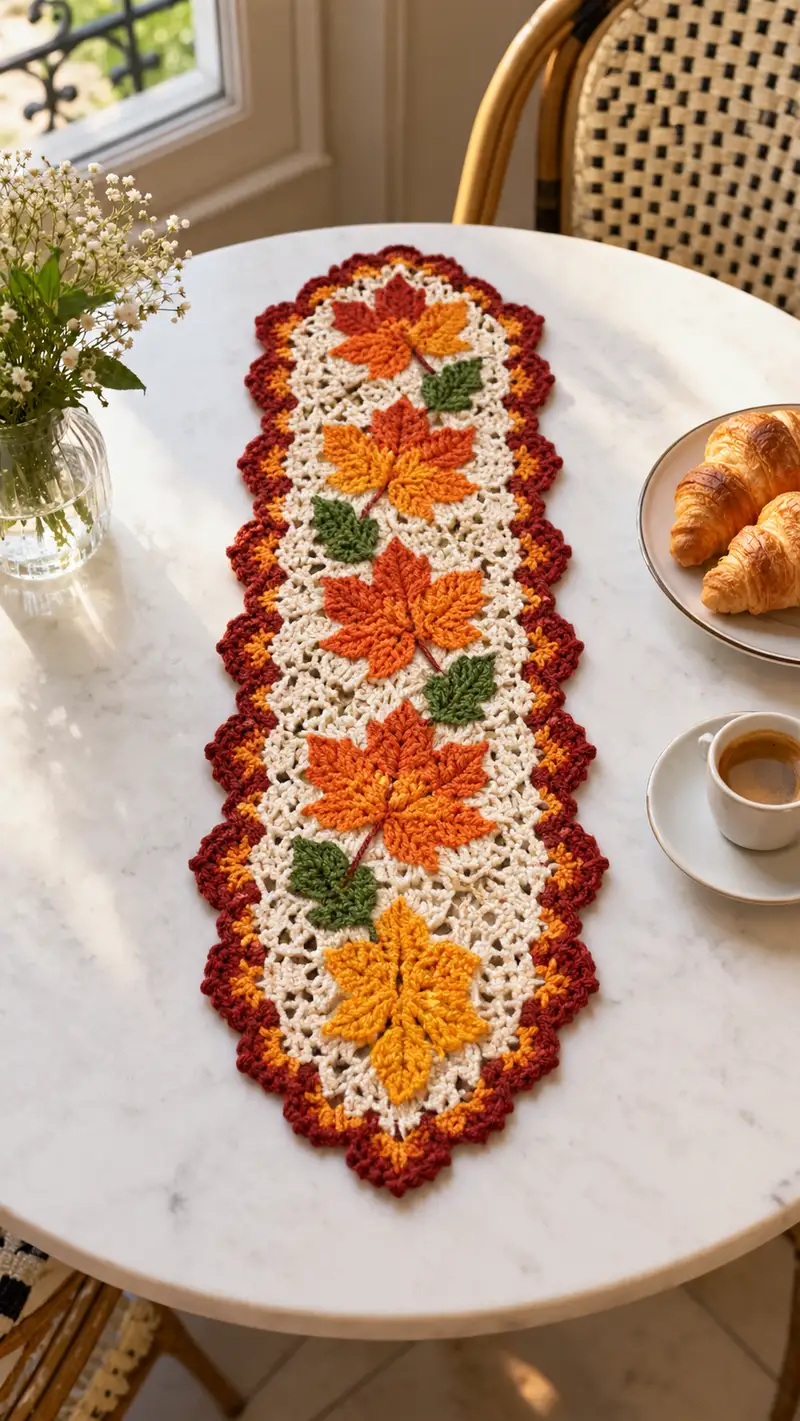
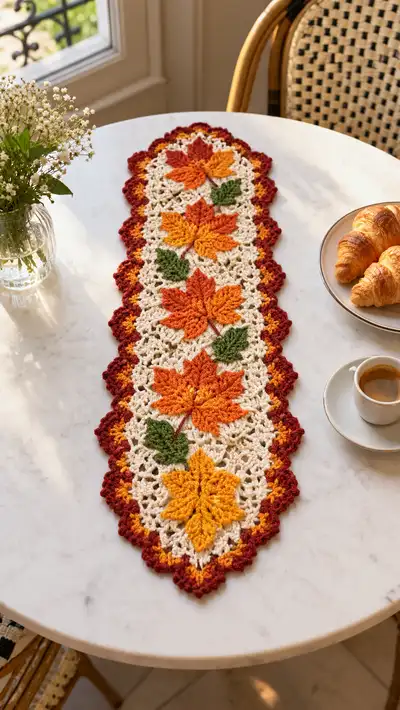
A warm, lacy table runner featuring large textured maple leaves in autumn hues set against a delicate cream lace background and finished with a scalloped rust border. The runner is narrow and elongated — ideal for small round or rectangular tables and coffee tables. Each leaf is crocheted in relief and joined into the center mesh for a rich layered look. Perfect for seasonal décor or as a cozy handmade gift to celebrate fall.
Progress Tracker
0% Complete
— Notes :
Info :
This runner is worked modularly: create large leaf motifs (Make 5), small green leaves (Make 4), alternating lace connector panels (Make 4) and finally join all modules lengthwise, then add the scalloped border. The pattern is written with exact stitch counts. Maintain yarn color changes as noted and block pieces before joining for best results.
— Large Maple Leaf Module (Make 5) :
Round 1 :
With A (burnt orange or pumpkin) make a magic ring, ch1, 6 sc into ring (6)
Round 2 :
Inc in each st around (12)
Round 3 :
(1 sc, inc) x6 (18)
Round 4 :
(2 sc, inc) x6 (24)
Round 5 :
(3 sc, inc) x6 (30)
Info :
These first increases give a small disc that will become the leaf center. Keep tension even to avoid an overly ruffled center.
Round 6 :
1 sc in each st around (30)
Round 7 :
Ch2 (counts as first dc), *skip 1 st, dc shell in next st (3 dc in same st), ch1, skip 1 st, dc in next st; rep around to create 10 shells and finish with sl st to top of ch2 (30 shell structure but 10 shells)
Info :
Round 7 begins sculpting petals. Shells form the base points that will be pulled forward for the leaf lobes later.
Round 8 :
Switch to larger clusters: sl st to center of first shell, ch3, (4 dc cluster in shell center), ch2, sl st into next shell center; rep around making 10 clusters (one cluster per shell) (10 clusters)
Round 9 :
Ch1, *in front loop of cluster: fpdc3tog (work 3 fpdc into top of cluster and join as cluster), ch3, sc into space between clusters; rep around and sl st to first sc (maintain 30 theoretical sts but grouped into 10 cluster points)
Info :
Use your fingers to coax each cluster forward to start the petal/profile of the leaf. This is a textural round — counts are grouped as clusters rather than simple single stitches.
Round 10 :
Ch1, in each cluster work (sc, hdc, 3 dc, hdc, sc) to form a pointed lobe. Between lobes work sc into the bridging space. Repeat for 10 lobes (approx 50 stitches when counting sc/hdc/dc sequentially)
Round 11 :
Ch1, 1 sc in each st across the last round to even the edge and set up shaping (approx 50 sc)
Info :
At this stage the piece will look like a 10-pointed star; we will sculpt the 5 main maple lobes by pairing points in the next rounds. Keep track of lobes using stitch markers to mark centers of the five main lobes (every 2 points = 1 main lobe).
Round 12 :
Work in FLO: *sc in next 4 sts, (dec over next 2 sts) - to soften outer notches, sc in next 4 sts; rep around (reduce slightly) (approx 45 sc)
Round 13 :
Switch to shaping rows per lobe: For each main lobe (marked), work into its span as follows: ch2, dc3tog cluster at base of lobe, ch2, in same span work 3 dc, ch1, sl st to base; move to next lobe. This deepens the lobe points. Maintain 5 main lobe clusters.
Round 14 :
Ch1, sc around entire leaf following existing stitches to tidy (approx 45 sc)
Info :
If you want a sharper maple look, use elongated stitches (hdc and dc) on the lobe tips in Rounds 13-16. Keep symmetry by matching counts at each lobe.
Round 15 :
In each main lobe: work (sc, hdc, 5 dc, hdc, sc) centered on the lobe tip. Between lobes work (2 sc). Repeat for 5 lobes (central counts balanced; approx 55 sts total)
Round 16 :
Ch1, 1 sc in each st around to even edge (approx 55 sc)
Round 17 :
Switch to A darker shade if desired for gradient: *sc in next 3, dec over the next 2; rep around to slightly bring in base (approx 44 sc)
Info :
Round 17 begins to define the leaf valleys between lobes so the leaf reads clearly when attached to the mesh. Add a stitch marker at the base center — this will align to the stem and mesh when joining.
Round 18 :
Sc around (44 sc) and sl st to finish. Fasten off leaving 16-20 in tail for sewing. Block flat with tips pinned to shape lobes for a crisp leaf look.
Round 19 :
Info: After blocking, embroider a central vein using brown yarn. Using a blunt embroidery needle, stitch a single running chain from base to tip of each main lobe; secure ends at the back.
— Small Accent Leaf (Make 4) :
Round 1 :
With green yarn, make mr, ch1, 6 sc in ring (6)
Round 2 :
Inc in each st (12)
Round 3 :
(1 sc, inc) x6 (18)
Round 4 :
Ch1, 1 sc in next 6 sts, ch4, skip 4 sts (creating small tail), sl st into next 6 sts to create a pointed small leaf structure (18 base stitches counted)
Round 5 :
Work 1 sc in each of the 18 base sts, and in ch4 tail: (sc, hdc, 3 dc, hdc, sc) forming small tip (23 total when counting added dc cluster)
Info :
These small leaves are worked to be slightly three-dimensional; block lightly and leave a 12-16 in tail for sewing into the mesh panel.
Round 6 :
Sc around to neaten: 1 sc in each st (approx 23 sc). Fasten off and weave in ends.
— Lace Connector Panel (Make 4) :
Round 1 :
With B (Cream/Ivory), ch 40, join with sl st to form a ring careful not to twist (foundation round measured to suit width of leaf modules). Ch3 (counts as dc), dc in each ch around for a base (40 dc)
Round 2 :
Ch3, *skip 2, (3 dc, ch2, 3 dc) in next st (shell), skip 2, dc in next; rep to end. Join with sl st to top of ch3 (creates alternating shells and dcs) (approx 10 shells)
Info :
This panel forms the lacy lattice between leaves. The starting chain length (40) is suited to hold one large leaf per side when the leaf base centers are aligned to marked points. Adjust chain foundation by multiples of 8 to make the runner longer or shorter.
Round 3 :
Ch1, sc into each dc and ch spaces across to set base for mesh (approx 80 sc considering shells and spaces)
Round 4 :
Ch4 (counts as tr), *in next shell ch2 space work (tr, ch1, tr), ch1, tr in next space; rep across; sl st to top of ch4 (textured fan row creating taller arches)
Round 5 :
Ch1, 1 sc in each st and ch space to set row (maintain counts and even tension) (approx 80 sc)
Round 6 :
Ch3, *in each ch1 space work (3 dc), ch2, sc between fans; rep to end. Join. This produces an open 3-d fan mesh ready for leaf attachment (counts vary by spacing)
Info :
Work 6-8 rounds of alternating fan rows and sc-setting rounds to build a vertical lace band approximately the height of the leaves (we used 6 rounds in this sample). The exact count can be increased for a more elongated mesh.
Round 7 :
Repeat Round 4 (fan arches) to keep a balanced lace pattern (approx same number of fans)
Round 8 :
Ch1, sc across to tidy edge. Fasten off leaving long tail for joining to neighbor modules.
— Joining Large Leaves to Lace Panel (per leaf) :
Info :
Position a blocked large leaf centered over the lace panel so that leaf base center marker aligns with a fan valley (a ch2 space) on the panel. Pin with rust-proof pins through the back of lace so the leaf sits proud of the lace.
Round 1 :
Using a long tail and a tapestry needle, sew leaf base to panel by mattress stitch through the back loops of the sc round on the leaf and through the chain space on thepanel. Use 10-14 evenly spaced stitches across the base to secure (exact numbers depend on leaf width).
Round 2 :
Sew small accent green leaf into the lace space to the lower-left or lower-right of the large leaf, stitching at the small leaf base with 4-6 stitches. Leave a small stem tail for embroidery.
Info :
Arrange leaves so the directional tip of each large leaf alternates up and down along the runner center; this yields the design seen in the photo (leaf tips pointing toward each other along the runner axis).
— Full Center Assembly :
Round 1 :
Make 5 large leaf modules and 4 lace connector panels. Assemble in the sequence: Leaf — Panel — Leaf — Panel — Leaf — Panel — Leaf — Panel — Leaf. Sew panels to leaf bases as described so seams are flat on the wrong side and leaves sit on the right side.
Round 2 :
Check overall length; a 5-leaf assembly with 4 panels should produce approximately 34-40 inches depending on stitch tension. Add or subtract additional panel repeats to customize length.
Info :
Pin everything on a blocking board and steam or wet-block to the desired final dimensions. Blocking opens the lace and sets the leaf shape; allow to dry completely before edging.
— Scalloped Border (3-color) :
Round 1 :
With B (cream) attach yarn to the outermost sc edge around the assembled center (start at one rounded tip), ch1, sc evenly around the whole perimeter, placing 1 sc for every 5-6 mm to get a consistent edging (even count depends on your tension). Join with sl st. (approx 300 sc—this number will vary with runner size; maintain even spacing)
Info :
This base sc round evens and stabilizes the perimeter and provides a foundation for the scalloped shells. Count your stitches once around to be sure you have a multiple of 6 (needed for the scallop repeat).
Round 2 :
Change to C (golden yellow). Ch3 (counts as dc), *skip next 2 sc, work (5 dc) in next sc (shell), skip next 2 sc, dc in next sc; rep around and join with sl st to top of ch3. This establishes the first scallop row (shells spaced by single dcs).
Round 3 :
Ch1, sc in each st and in each dc across to tidy the scallops. Join. (same number of base sts)
Info :
Switching colors between rows makes the scallops pop. Carry the unused color loosely along the wrong side or snip and weave ends if preferred for neater color blocks.
Round 4 :
Change to D (rust). Work into each shell: sl st to shell center, ch3, (7 dc) in shell center to make a puffier outer scallop; sl st to next dc between shells. Rep around for full rust scallop row. Join and fasten off color.
Round 5 :
Ch1, sc around to anchor the outer scallops if desired, or work a decorative picot: *sc, ch3, sl st into top of sc to make a small picot; rep between scallops for extra definition. Fasten off and weave ends.
Info :
Block again gently after scallop application to set edge shape. The three-tone scallop (cream, gold, rust) gives depth and frames the runner like a picture frame.
— Optional Stem Embroidery :
Round 1 :
Using a long strand of brown or maroon, thread a blunt embroidery needle and stitch a thin stem from the leaf base down into the lace mesh using a backstitch. Anchor securely at each end with a few small stitches on the wrong side.
Info :
Work stems before final blocking for easiest placement. Alternate stem directions subtly for a natural look as in the photograph.
— Final Finishing :
Round 1 :
Weave in all remaining tails on the wrong side, burying ends under several stitches for security. Trim close with scissors.
Round 2 :
Give the runner a final full wet-block or steam-block to open the lace, set scallops, and flatten seams. Pin out leaf lobes individually to keep points sharp and even.
Round 3 :
Inspect the piece for loose loops, uneven scallops, or puckering. Re-sew any sections that need reinforcement with small, neat stitches from the wrong side.
Info :
To change the length, add or remove one or more lace connector panels and the corresponding leaf modules; the pattern is modular so expansion is straightforward.
— Gauge & Sizing Info :
Info :
Using worsted weight and 4.0 mm hook, each large leaf module (blocked) measures approximately 6.5-7 inches across tip to tip and about 7.5-8 inches long. A 5-leaf assembly with panels and scallop edge yields a runner approx 12-13 inches wide and 34-40 inches long depending on blocking and tension.
Info :
To scale the runner: thicker yarn and larger hooks increase size proportionally; adjust the foundation chain for each panel by multiples of 8 to keep lace geometry intact.
Finishing this Autumn Leaves Table Runner is the perfect way to welcome cozy mornings and warm evenings to your home. Each textured maple leaf and delicate lace space comes together into a graceful, seasonal accent that you’ll enjoy for years. Block carefully, stitch with care, and watch the runner transform a table into a warm autumn vignette. 🧶🍁✨