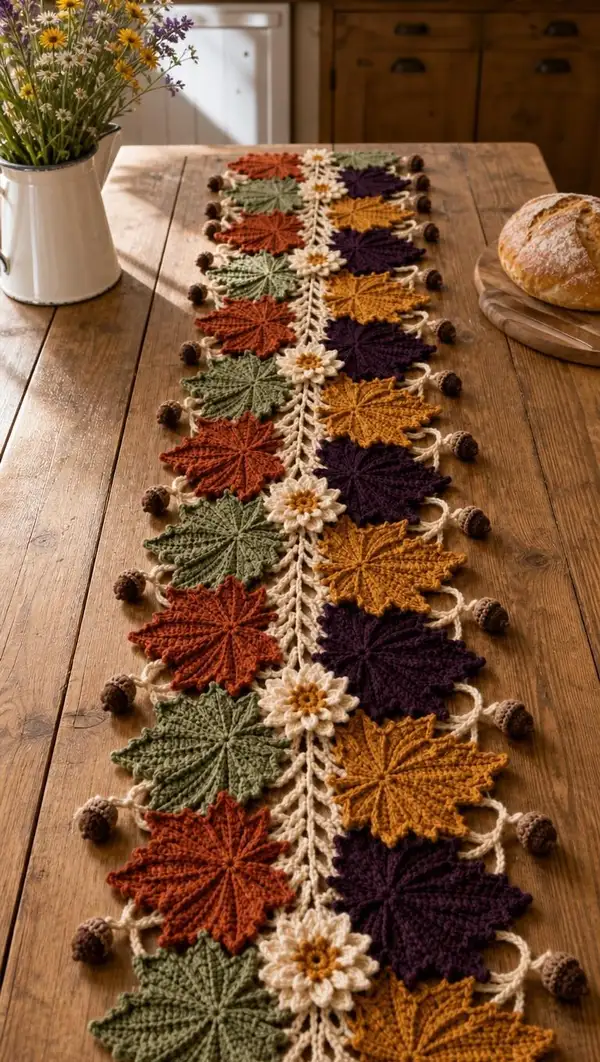
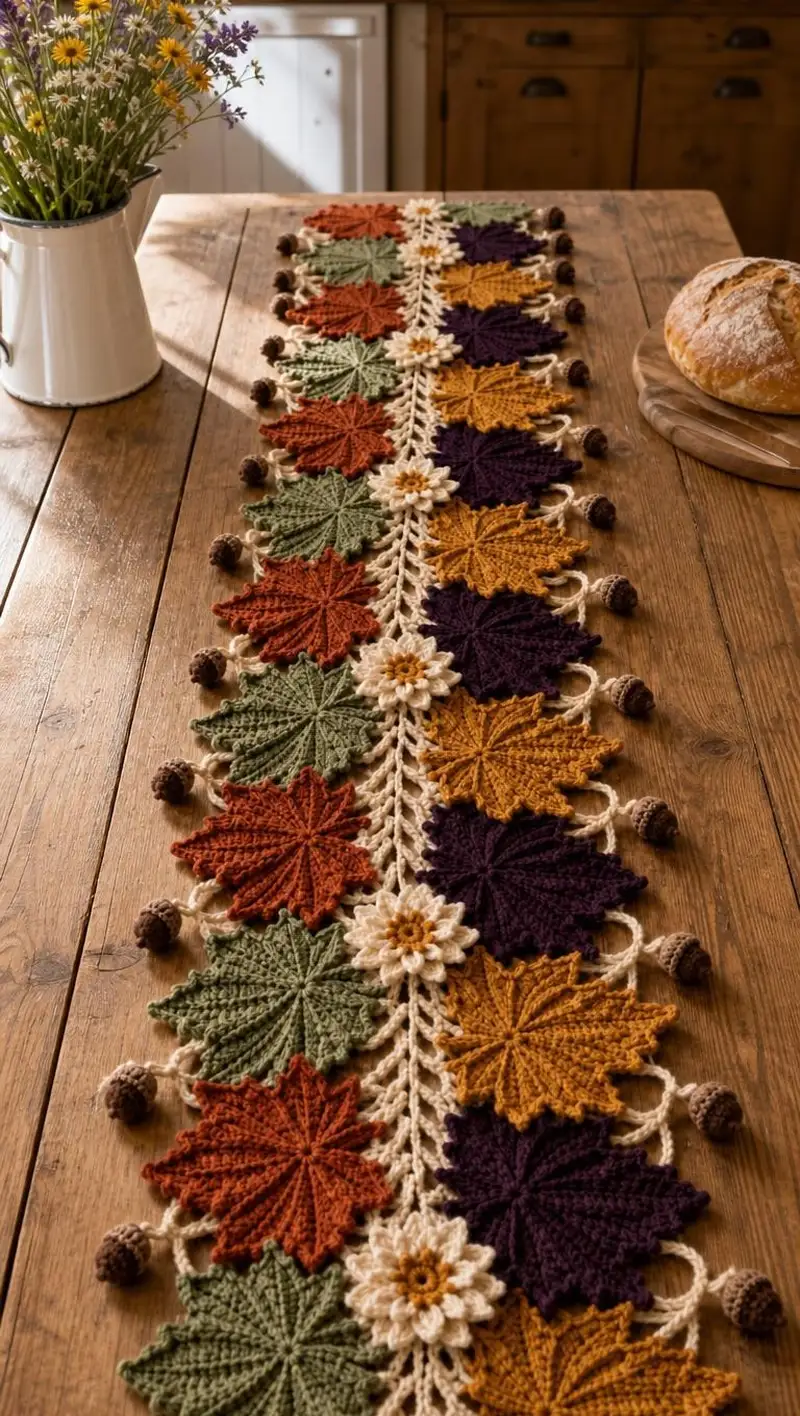
Bring fall to your table with this warm, textured Autumn Leaves Table Runner. The design features stacked leaf motifs in rust, olive, mustard and deep plum, joined down a cream braided spine and accented with cream daisies and tiny crocheted acorns. The runner's rich textures — raised ridged leaf veins, layered petals and bobble acorns — create depth and cozy seasonal charm. Perfect as a centerpiece for harvest decor or a thoughtful handmade gift.
Progress Tracker
0% Complete
— Overview :
Info :
This pattern is modular: you will make multiple Leaf Motifs (shown in colors rust, olive, mustard, plum), Cream Daisy motifs and small Crocheted Acorns, then join them down a central braided spine. A single leaf motif measures approximately 6.5" across when blocked using worsted yarn and a 4.0mm hook; adjust hook/yarn to modify size. The runner shown uses 14 leaf motifs (7 per side) with daisies placed every fourth join and small acorns alternating along the outer edge.
Info :
Throughout the leaf and petal construction we use front-post stitches to create raised veins. Work tightly enough that stuffing for acorns will not show through. Use stitch markers to divide the motif into 12 equal sections for accurate placement of veins and petal tips.
— Leaf Motif (Make 14 - colors as desired) :
Round 1 :
6 sc in magic ring (6)
Round 3 :
(1 sc, inc) x 6 (18)
Round 4 :
(2 sc, inc) x 6 (24)
Round 5 :
(3 sc, inc) x 6 (30)
Info :
At the end of Round 5 place 12 evenly spaced stitch markers: you will create 12 leaf 'ribs'. The markers help align front post ribs later.
Round 6 :
(4 sc, inc) x 6 (36)
Round 7 :
(5 sc, inc) x 6 (42)
Round 8 :
(6 sc, inc) x 6 (48)
Round 9-10 :
1 sc in each st (48)
Info :
Rounds 9-10 create a stable base to map your 12 ribs. If you want a slightly smaller leaf, omit Round 10 and continue from Round 11.
Round 11 :
(1 sc in next 3 sts, fpdc around the post of the next st) x 12 (48)
Info :
Work each fpdc so that the post stitch creates a raised rib that runs outward toward the petal tips. The sequence groups stitches in 4s: 3 flat and 1 post stitch forming 12 ribs total.
Round 12 :
1 sc in each st (48)
Round 13 :
(sc in next 2 sts, fpdc around next 2 posts together) x12 (48)
Info :
These fpdc 'doubles' widen the rib and push texture outward. Keep your front-post stitches tall and consistent for a defined vein effect.
Round 14 :
1 sc in each st (48)
Round 15 :
(sc, inc) x 24 (72)
Info :
Round 15 increases the motif's circumference to create deep, pointed petal shapes. Place a marker at the start of this round to help keep track of groups.
Round 16 :
1 sc in each st (72)
Round 17 :
(2 sc, inc) x 24 (96)
Info :
Increasing again forms the base that will be shaped into 12 distinct petal tips. You now have 96 stitches; these will be worked into grouped sections for petals.
Round 18 :
1 sc in each st (96)
Round 19 :
(sc in next 6 sts, ch3, sk 3 sts, sl st in next st) x 12 (96)
Info :
This round creates small loop connectors around the outer edge; each repeat builds the foundation for pointed petal shaping in the following rounds. The ch3 loops will be used to anchor post stitches and picots for the petal tips.
Round 20 :
Work into each ch3 loop: (sl st, ch1, 3 dc, ch1, sl st) into each ch3 loop around (12 petals formed). Maintain overall stitch count at 96 by working the post stitches into the spaces formed by sl sts; counts inside the round remain balanced (96 equivalent working points).
Round 21 :
Working across petals: *fpdc around the center post of the petal (the post from Round 11/13), 3 dc across the next 3 sts of the petal, tr2tog over the top of the petal tip; sl st to the base to secure* x12 (96)
Info :
Round 21 sculpts each petal into a deep blade; the use of fpdc along the petal center produces a raised vein that is visible from the front side. Keep stitch lengths even to match adjoining petals.
Round 22 :
1 sc in each st (96)
Round 23 :
(sc in next 4 sts, dec) x 16 (80)
Info :
Begin gentle decreases around the outer edge to tidy the shape and emphasize the 12 points; the decreases do not eliminate the petal texture but tighten the border.
Round 24 :
1 sc in each st (80)
Round 25 :
(sc in next 3 sts, dec) x 16 (64)
Round 26 :
1 sc in each st (64)
Round 27 :
(sc in next 2 sts, dec) x 16 (48)
Info :
At Round 27 you return to 48 stitches which mirror the base rounds, producing a stable body with sharply defined petal points. Fasten off and weave in ends, leaving a long tail for blocking if desired.
Round 28 :
Optional edging: With contrast or same color, join and do (sc, picot, sc) into the tip of each of the 12 points to give more definition (48 visible edge points). Fasten off and block.
— Cream Daisy Motif (Make 4-6 for runner) :
Round 3 :
(1 sc, inc) x 6 (18)
Info :
Use cream for petals; use a small contrasting center color (gold/mustard) for the tiny center disk—create this now or later.
Round 4 :
1 sc in each st (18)
Round 5 :
(ch2, 3 dc in next st, ch2, sl st in same st) into every other stitch around to form 9 petal bases (9 petals)
Round 6 :
Into each popped petal base: (sl st, ch1, sc, hdc, 3 dc, hdc, sc, ch1, sl st) around to make layered rounded petals (9 full petals)
Round 7 :
Join mustard/gold center yarn: 6 sc in mr to create center puff, sl st to secure. Sew center puff to middle of daisy base. Fasten off both colors and weave in tails.
Info :
Blocking the daisy lightly will allow its petals to open and sit attractively in the runner spine. Use a small whipstitch to secure the center puff to the petal base if needed.
— Crocheted Acorn (Make many, one per leaf tip) :
Round 3 :
(1 sc, inc) x 6 (18)
Round 4 :
1 sc in each st (18)
Round 5 :
Change to darker brown (acorn cap): (sc in next 2 sts, inc) x 6 (24)
Info :
Switch to darker shade for the cap; leave a 6" tail for sewing and shaping. Stuff the nut lightly at this stage to maintain a rounded shape.
Round 6 :
1 sc in each st (24)
Round 7 :
(sc in next 3 sts, dec) x 6 (18)
Round 8 :
1 sc in each st (18)
Round 9 :
(sc in next 1 st, dec) x 6 (12)
Info :
Finish stuffing firmly but not aggressively. Leave a long tail to sew the acorn into place. For the textured cap, you may add a small bobble edging: pick up stitches around Round 5 and make 6 small bobbles using (2 dc, ch1, 2 dc) into spaced stitches to simulate a textured cup.
Round 11 :
Fasten off leaving tail for sewing. Block lightly to give a smooth, rounded acorn shape.
— Center Braided Spine / Joining Strip :
Info :
The central cream spine is built as a long openwork strip of chains and elongated slip-stitch braids to resemble a woven vine. This strip both joins left and right leaf motifs and secures the daisies. Work the length required for your runner—measure the number of leaf repeats and multiply by the repeat length described below. For the photographed runner we worked a spine length to join 14 leaf motifs plus daisies and connectors.
Foundation :
Ch long enough to accommodate the number of leaf joins; for a 14-leaf runner chain 420 (this count is approximate and based on the spacing used in the sample—make a small sample to determine your personal spacing: 30 ch per full leaf repeat is a useful starting point).
Row 1 :
Starting in 3rd ch from hook: 1 sc, *ch6, sk 6 ch, sc in next ch* rep across to end (this creates loops for leaf connectors). Adjust loop spacing so there is one loop per leaf tip location. End with sc in last ch.
Info :
Make the chain long and place it on your table aligning the planned leaf positions with the loops. Use stitch markers to mark every 30 chains for later joining points. The ch6 loops become anchoring loops for outer leaf tips and acorn connectors.
Row 2 :
Turn, ch1, 1 sc into each sc across, working 6 sc into each ch6 loop to create a raised braid effect (the count across will vary according to your foundation length; for the sample spine the width is approximately 1.25" after this row).
Row 3 :
Ch3, *sk next 2 sc, dc in next sc, ch3, sk next 2 sc, sl st into next sc* rep across to create alternating open arches along the spine. Fasten off and weave ends.
Info :
The spine is intentionally airy so you can sew the leaves to it by aligning their inner points to the small sc posts along the spine. If you prefer a more solid spine, work additional dc rows to widen and strengthen it before joining motifs.
— Joining Leaves to Spine and to Each Other :
Info :
Arrange your motifs in the desired color order in two parallel columns along the length of the spine (left and right leaf columns). The inner point of each leaf aligns with a sc on the spine; the outer tip will align with the ch6 loops used to hang acorns. Pin each motif so edges slightly overlap the spine and neighboring motif points interlock. This interlocking creates the alternating pattern seen in the photo.
Join Step 1 :
With yarn tail left from finishing the leaf, use whipstitch or mattress stitch to sew the inner edge of each leaf to the spine sc posts: pick up 6 evenly spaced stitches along the leaf's inner arc and sew to the sc post on the spine. Repeat for each leaf along both sides.
Info :
Keep your tension even so petals sit flat and the runner lies flat. If you prefer invisible joins, use a ladder stitch with a matching thread and then tighten carefully to draw motifs flush to the spine.
Join Step 2 :
Where two leaves meet tip-to-tip between the spine and the outer edge, sew 2-3 small catch stitches through both motif edges so they interlock and create a continuous scalloped outer edge. This reduces shifting and gives the runner a cohesive look.
Info :
Add the cream daisies at every fourth join: center each daisy where the inner arcs of adjacent leaves meet the spine and sew through the base of the daisy to the spine with small stitches. Make sure daisies are evenly spaced along the runner length.
— Outer Acorn Connectors and Loops :
Info :
Small loop connectors hang acorns from the outermost ch6 loops made in the spine or from outer edge loops created while assembling leaves. For each designated outer loop: join acorn using a short ch7 tail and secure with a sl st back through the loop; attach acorn using the long tail through the loop and sew securely so acorn dangles freely but stays attached when the runner is moved.
Acorn Attachment :
Thread long tail of acorn through the ch6 loop, then use yarn needle to work a small circle of whipstitches around the ch6 loop and acorn tail to secure. Tie off and hide tail into the acorn body.
Info :
Space acorns alternating left-right along the runner for visual rhythm. If you prefer no dangling elements, sew acorns flush to the outer edge so they sit on the table surface like tiny nuts.
— Outer Edging and Finishing Rounds :
Round 1 :
With cream yarn, starting at one end, join at the inner spine seam and sc evenly around the entire runner edge (through leaf outer points and between petals) working 2 sc into deeper valleys and 1 sc into peak stitches to smooth the silhouette. Keep counts consistent along each leaf so edges match.
Round 2 :
Into each sc around: (sc, ch2, sc) to form small loops and decorative picot-like arches around the outer edge. This will create the scalloped finishing effect seen in the photograph.
Info :
Place small bobble stitches at the base of each outer petal if you want extra three-dimensional texture. Use (dc3tog bobble) anchored to a single stitch and secure with a sl st.
Round 3 :
Weave in all loose ends along the backside of the runner. Block the entire runner to flatten joins and set petal shapes; use pins to open petals slightly and allow the cream spine to sit proud and central.
— Optional Reinforcements and Blocking :
Info :
If your runner will be used heavily, consider sewing a lightweight cotton backing to the underside of the runner to protect yarn and make cleaning easier. Attach a few small fabric snaps to keep the runner from shifting on a slick table surface.
Blocking :
Spritz motifs lightly with water and pin to shape on blocking mats. Allow to dry overnight. For sharper petal points, pin each petal tip taut but not overstretched.
Final Tip :
Store the runner flat when not in use to preserve shape. For washing, hand wash gently in cool water and lay flat to dry; avoid machine agitation which can distort the raised post stitches.
Completing this Autumn Leaves Table Runner is a wonderfully tactile way to celebrate the season — every raised vein, layered daisy and tiny acorn adds character and warmth. The modular construction lets you work in small bursts while seeing a beautiful, cohesive result come together. I hope this runner brings cozy vibes and compliments to your table! 🍂🧶