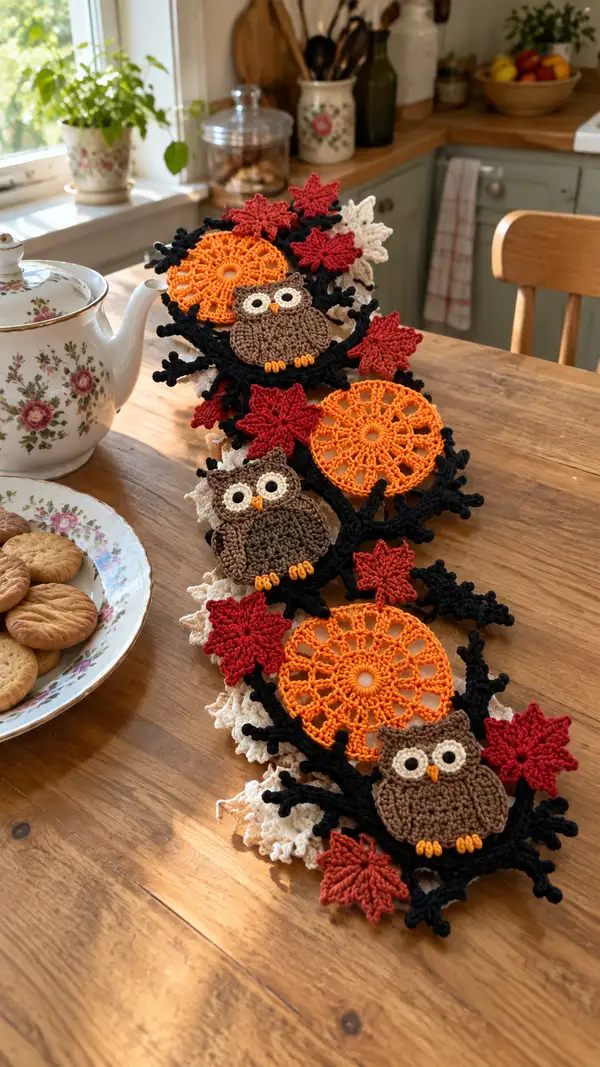
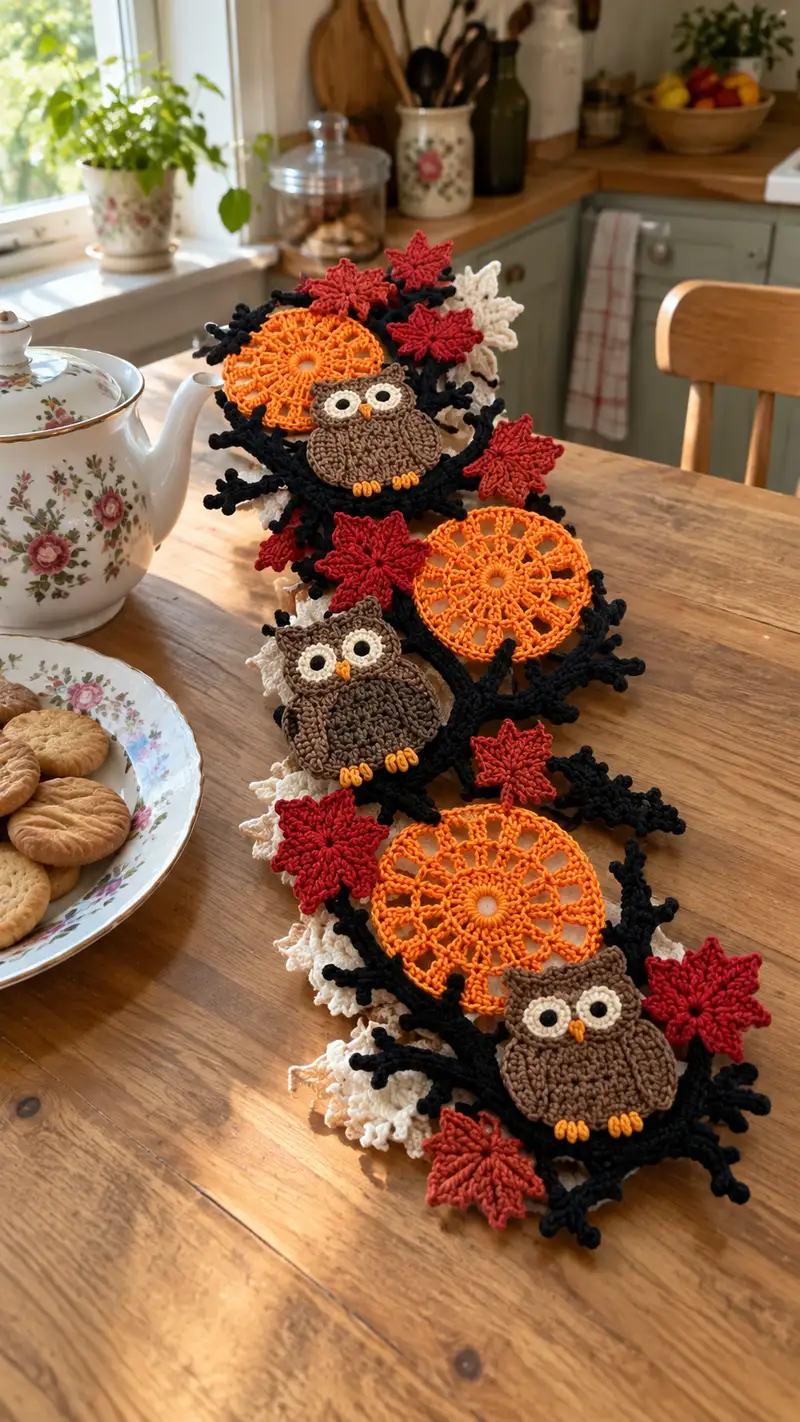
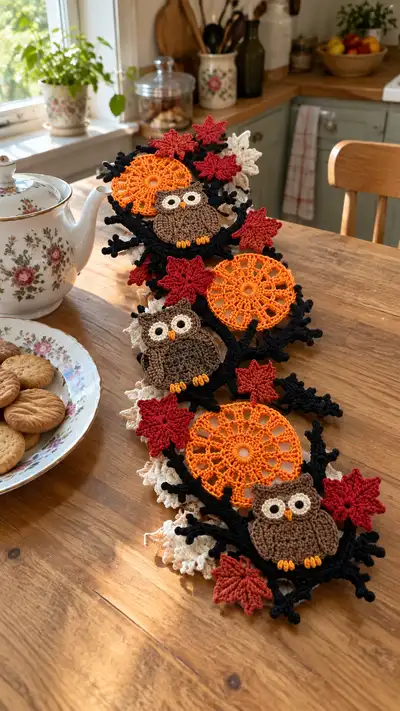
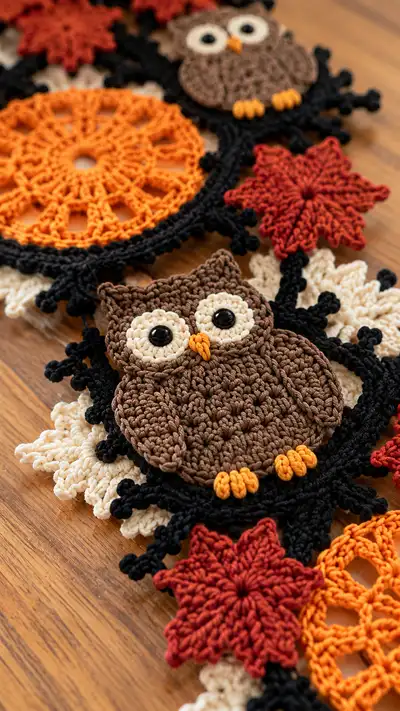
Bring autumn to your table with this richly textured runner featuring crocheted owls, pumpkin mandalas, maple leaves and curly black branches. Warm browns, rusty reds, pumpkin orange and cream motifs interlock to create a layered, dimensional centerpiece. Designed for intermediate crocheters comfortable with motif work, color changes and creative joining techniques. Perfect for fall brunches, seasonal decorating or a cozy handmade gift.
Progress Tracker
0% Complete
— Owl Head :
Round 1 :
6 sc in magic ring (6)
Round 3 :
(1 sc, inc) x 6 (18)
Round 4 :
(2 sc, inc) x 6 (24)
Round 5 :
(3 sc, inc) x 6 (30)
Round 6 :
(4 sc, inc) x 6 (36)
Round 7 :
(5 sc, inc) x 6 (42)
Round 8 :
(6 sc, inc) x 6 (48)
Round 9-12 :
1 sc in each st (48)
Info :
Work the owl head flat and dense to create a slight 3D front-to-back relief. Use brown worsted cotton, and consider a 3.0mm hook if you prefer a slightly tighter fabric for the owl pieces. Place stitch marker at the start of each round.
Round 13 :
1 sc in each st BLO (48) — create a subtle ridge around the face edge
Round 14-16 :
1 sc in each st (48)
Info :
At the end of round 16 determine eye placement: position eyes centered horizontally about 10–12 stitches apart depending on desired expression. If using beads, attach eye bases now or mark placement for later sewing of small beads or embroidered pupils.
Round 17 :
(6 sc, dec) x 6 (42)
Round 18 :
(5 sc, dec) x 6 (36)
Round 19 :
(4 sc, dec) x 6 (30)
Info :
Begin shallow stuffing between rounds 18 and 20 to give the face a little body; use a small amount of stuffing to keep the head relatively flat since this owl motif is intended to be appliqued onto the runner rather than fully stuffed.
Round 20 :
(3 sc, dec) x 6 (24)
Round 21 :
(2 sc, dec) x 6 (18)
Round 22 :
(1 sc, dec) x 6 (12)
Info :
Fasten off leaving a long tail for sewing the head down to the body panel later. Weave a few stitches through the last rounds to flatten and secure the back of the head piece. If you plan to stack multiple layers for a raised face, make a second thin disc (rounds 1-12) to layer between head and body.
— Owl Body (flat, worked in rounds) :
Round 1 :
6 sc in magic ring (6)
Round 3 :
(1 sc, inc) x 6 (18)
Round 4 :
(2 sc, inc) x 6 (24)
Round 5 :
(3 sc, inc) x 6 (30)
Round 6 :
(4 sc, inc) x 6 (36)
Round 7 :
(5 sc, inc) x 6 (42)
Round 8 :
(6 sc, inc) x 6 (48)
Round 9 :
1 sc in each st (48)
Round 10 :
1 sc in each st BLO (48)
Info :
Working round 10 in BLO creates a slight ridge that becomes the chest edge, helping define where the wings attach. Keep tension consistent—this main body will be one of the largest flat pieces in the runner's motifs.
Round 11-13 :
1 sc in each st (48)
Round 14 :
(6 sc, dec) x 6 (42)
Round 15 :
(5 sc, dec) x 6 (36)
Round 16 :
1 sc in each st (36)
Round 17 :
Switch to a slightly textured stitch for interest: *sc, hdc, sc* around (36)
Info :
This textured round simulates the owl's chest feathers. Use a combination of sc and hdc to create a subtle bumpy texture. If you want deeper texture, insert a front post hdc in place of the middle hdc every third stitch.
Round 18-20 :
1 sc in each st (36)
Round 21 :
(2 sc, dec) x 6 (24)
Round 22 :
(1 sc, dec) x 6 (18)
Info :
Fasten off leaving a long tail to sew the body to the runner branches. Press or block flat to shape the bottom curve. If you prefer a fuller owl, work rows rather than rounds for a slightly elongated wingless body.
— Owl Eyes (Make 2) :
Round 1 :
6 sc in magic ring (6) (ivory)
Round 3 :
(1 sc, inc) x 6 (18)
Round 4 :
1 sc in each st (18)
Round 5 :
BLO: 1 sc in each st (18) — this creates a subtle rim to seat a pupil bead
Info :
Sew or glue small black beads (5–6mm) into the center or embroider pupils with black yarn. For safety eyes, use smaller flat-backed beads and secure with fabric glue since the runner will be handled on a table.
Round 6 :
Fasten off leaving a tail to sew to the head. Attach pupils centered and secure well.
— Owl Beak :
Round 1 :
Ch 4, sl st in 2nd ch from hook, sc in next, hdc in last (3 stitches) (use pumpkin orange)
Round 2 :
Turn, sc across 3 sts, sl st to finish; fasten off leaving tail for sewing (3)
Info :
Sew the beak between the eyes centered on the face. A small dab of glue under the beak before sewing helps hold its position while you tack it down.
— Owl Feet / Talons (Make 2 sets) :
Round 1 :
Ch 6, sl st back across chain to form small curled talon loop; repeat to make three small loops per foot in pumpkin orange
Round 2 :
Sew three small looped talons at the lower edge of the body between rounds 16–18 for consistent placement; fasten off
Info :
Make talons by wrapping yarn around a small crochet hook 3 times and fastening with a sl st to create a stubby curled shape; sew securely to the branch where the owl perches for a natural look.
— Pumpkin Mandala (Make 3) :
Round 1 :
6 sc in magic ring (6) (pumpkin orange)
Round 3 :
(1 sc, inc) x 6 (18)
Round 4 :
(2 sc, inc) x 6 (24)
Round 5 :
Change to openwork: *ch 5, skip 2 sts, sl st in next* around (8 ch-5 loops)
Info :
This mandala uses ch-lace spokes to create the pumpkin round window look. Keep tension steady so the round stays flat; if it cups, pull slightly while blocking.
Round 6 :
In each ch-5 loop: (sc, ch 3, 5 dc, ch 3, sc) — creates a petal-shaped spoke (8 petals)
Round 7 :
Sl st into center of first petal, *ch 3, (dc, ch1, dc) into the top of petal, ch 3, sl st into next petal* around to create connecting arches
Round 8 :
Work a round of sc in each available st around to reinforce the edge (approx 48 sc)
Round 9 :
Round of BLO: 1 sc in each st BLO (48)
Round 10 :
Space decorative picots: *sc in next 3 sts, (ch 3, sl st in top of last sc) repeat* around creating a tiny scallop edging
Round 11-12 :
1 sc in each st to further stabilize (48)
Info :
Block flat and maintain a round shape. If you want a more pronounced pumpkin 'ribbing', add surface slip stitch lines from center to edge in a slightly darker orange after blocking.
Round 13 :
Optional small center rosette: with same color, ch 4, join with sl st to make ring, work 12 hdc into ring and sl st to center; sew to center of mandala
Round 14 :
Fasten off leaving tail for sewing to branches; make three identical mandalas for the runner
— Maple Leaf (Make 6–8) :
Round 1 :
Ch 5, join with sl st to form small ring (rust red)
Round 2 :
Work 5 sc into ring (5)
Round 3 :
*Ch 5, picot, sl st in next sc* around to create 5 points
Round 4 :
Work outward shaping each point: in each ch-5 space make (sc, hdc, 3 dc, hdc, sc) to create a fuller maple point
Round 5 :
Between points, work (sl st, ch 2, sl st) to form notches between lobes; fasten off and weave tail
Info :
Use a wool or cotton blend with a slight drape. Block leaves gently with pins to flatten lobes. Vary sizes slightly by making some leaves with ch 6 base loops for extra fullness.
— Cream Filler Ruffle Motif (Make 6) :
Round 1 :
6 sc in magic ring (6) cream color
Round 3 :
(1 sc, inc) x 6 (18)
Round 4 :
Ch 3, 2 dc in same st, *ch 3, skip 1, 3 dc in next* around to create a ruffled scallop edge (6 shells)
Round 5 :
In each ch-3 space work (sc, hdc, 3 dc, hdc, sc) creating a lacy petal; fasten off and block flat
Info :
These cream motifs sit beneath the owl and mandala motifs to create background contrast. Make them slightly larger than the owl body to peek out around edges.
— Branch Network (worked in black, create multiple long branch strips to join motifs) :
Round 1 :
Ch 45, sc in 2nd ch from hook and across (44 sc) — this creates a main branch strip baseline
Round 2 :
Ch 1, turn, 1 sc in each st (44)
Round 3 :
Along the top edge, work occasional branchlets: *sc in next 5, ch 6, sl st back into branch body 2 sts behind to anchor a little twig* repeat across to create random twiglets (approx 6–8 twiglets)
Info :
Make your branch strips slightly irregular—vary twiglet length between 4–8 ch to mimic natural branches. Work two or three long strips to run the length of your runner and smaller interconnects to join motifs later.
Round 4 :
Flip branch strip and sc along the underside to give thickness (44)
Round 5 :
Randomly add bobble knots for knobbly branch texture: *in designated st work (dc, ch2, dc, ch2, dc) then sl st back to body* repeat 6–10 times
Round 6-10 :
Continue sc rounds to finalize shape; fasten off leaving long tails to sew to motifs
Info :
Create 3 long branch strips approx 40–50 cm each depending on runner length. Use one central strip and two offset strips; you can also create short connector strips to fill gaps.
Round 11 :
For branching junctions: join two strips by slip stitching across 6–8 sts in a Y juncture then reinforce with sc around the joint
Round 12 :
Edge the branch with 1 sc around to tidy and create a solid black outline (approx 44–60 sc depending on twiglets)
Info :
Branch pieces can be lightly starched if you want a firmer runner. Keep them supple if you prefer drape. Plan the placement of large motifs (owl, pumpkin) where branches create small platforms for sewing.
— Joining Motifs & Assembly Rounds :
Round 1 :
Lay out branch strips on table and position cream filler motifs under where owls will sit to create a layered look
Round 2 :
Pin pumpkin mandalas to the branch circles, aligning petals so mandala edge meets the branch top. Using black yarn and tapestry needle, whip stitch through outer edge every 6–8 sts to secure (approx 8–10 stitches per mandala)
Info :
For a seamless look use mattress stitch or invisible whip stitch, making small stitches through both layers so the join is secure but low-profile. Keep joins spaced so the runner lays flat.
Round 3 :
Place each owl body centered on a cream filler motif so the cream lacy pokes out around the back; sew through both layers using matching brown yarn, making small even stitches around 12–16 stitches total per owl body
Round 4 :
Sew eyes to heads and then sew heads onto body tops between rounds 10–14 of the body piece so the head slightly overlaps the chest ridge; use small even stitches to hide the seam
Round 5 :
Sew talons to the black branch where the owl meets the branch; attach beak between eyes with a few secure stitches and add a tiny dab of glue if using beads for security
Info :
Position maple leaves and stitch at 3–5 points along each leaf to the branch and to adjacent motifs to create natural drape. Use small stitches in matching color to make joins invisible from a short distance.
Round 6 :
Where two branch strips cross or meet, sew them together with black yarn using a small whip stitch around the crossing points (6–8 stitches at junction) to secure stable intersections
Round 7 :
After all motifs are sewn, weave in all ends at the back and trim tails. Use blocking pins to pin the entire runner flat and steam gently to set the shape (do not press directly on yarn)
Info :
Try to keep all sewing stitches minimal and hidden on the back to preserve front aesthetics. Reinforce any high-stress joins with an extra row of stitches if you expect heavy handling.
— Optional Embellishments and Surface Work :
Round 1 :
Add surface slip stitch lines from the center of the pumpkin mandala to the edge in a darker orange to suggest pumpkin ribs. Work 8 evenly spaced lines.
Round 2 :
Embroider small feather lines on the owl chest with a contrasting shade of brown using running stitch to add visual depth (approx 8–12 small vertical stitches)
Info :
Surface embroidery should be applied after all motifs are joined to avoid snagging during assembly. Keep stitches short and secure with knots on the underside.
— Finishing Touches :
Round 1 :
Check for any loose stitches; reinforce joints with extra invisible stitch work if needed
Round 2 :
Block the entire runner flat, pinning edges to shape and allowing to dry completely
Info :
If you plan to launder the runner occasionally, use 100% cotton yarn and block, then hand wash gently and reshape while damp. Avoid tumble drying to preserve shape and detail.
This autumn runner brings cozy seasonal charm to any table, combining whimsical owls and pumpkin lace with dramatic branchwork for a handcrafted focal point. Each motif is a small joy to crochet, and joining them into a single cohesive runner feels like painting in yarn. The rich color palette and layered textures create a gorgeous, warm display perfect for fall gatherings. I hope you enjoy stitching each motif as much as I enjoyed designing this layout—happy crocheting! 🍂🧶