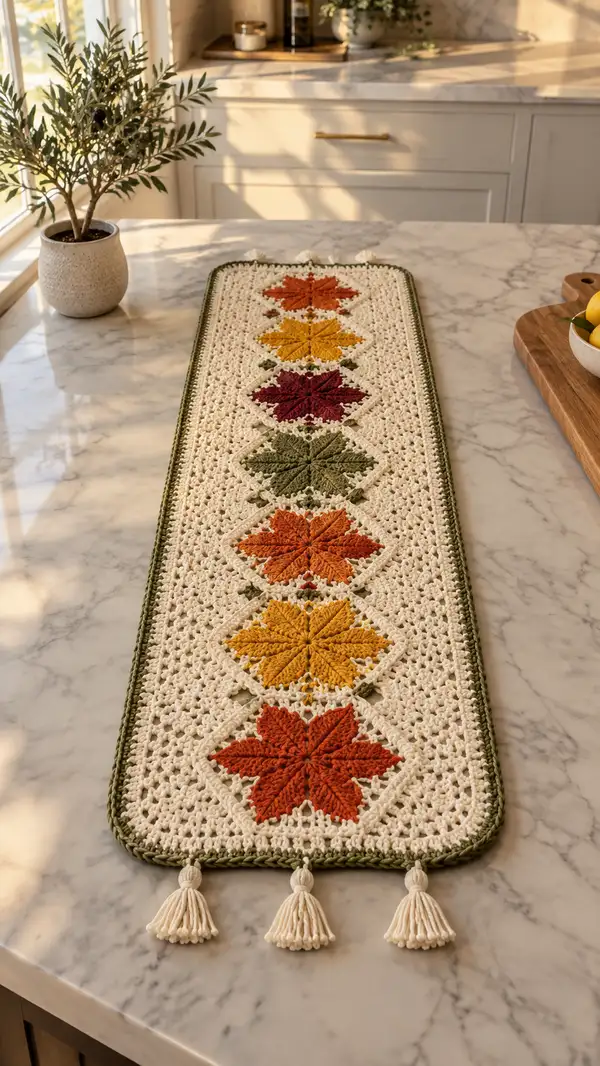
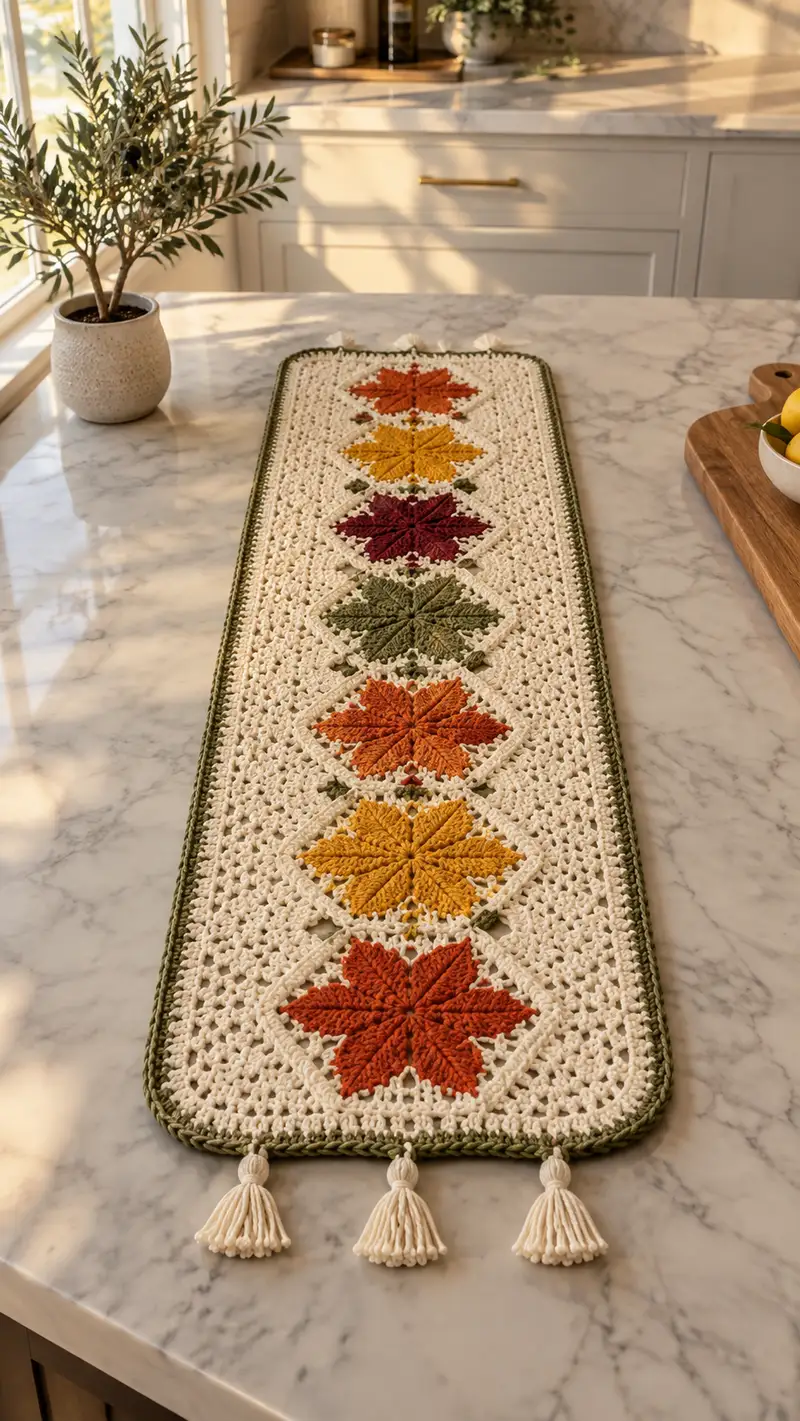
A warm, farmhouse-inspired table runner featuring a row of textured autumn leaf motifs set into a delicate lacy background with an earthy green border and cream tassels. The runner showcases five to six boldly colored leaf squares in rust, mustard, burgundy and olive, joined by an open mesh stitch and finished with neat rounded corners and tassels for a polished seasonal accent.
Progress Tracker
0% Complete
— Gauge & Notes :
Info :
Gauge is flexible for a decorative runner. One completed leaf motif block (including surrounding diamond) should measure approximately 8" wide by 8" tall blocked. If your motif size differs, adjust the number of motifs to fit your table. Work tightly enough so the textured leaf petals are defined, but not so tight that the lacy mesh is cramped.
Info :
Terms: US crochet terms used. Work in continuous rounds where specified for motifs; use stitch markers to mark round starts. Block motifs before joining for consistent shape. Break yarn between color changes to avoid long floats; weave ends into motif backs.
— Leaf Motif (make 6, one in each seasonal color) :
Round 1 :
With leaf color, make a magic ring. Ch1, work 8 sc into magic ring, tighten (8)
Round 2 :
Inc in each stitch around (16)
Round 3 :
(1 sc, inc) x8 (24)
Info :
These first rounds build a small base circle to anchor the petal clusters. Keep tension even; the center should lie flat and not ruffle.
Round 4 :
(2 sc, inc) x8 (32)
Round 5 :
Ch2 (counts as first dc), *sk next st, 7 dc cluster in next st (work 7 dc into same base st), sk next st, sl st into next st; rep from * around to form 8 petal bases. Finish last sl st into top of ch2. (8 petals total)
Info :
Petal clusters use multiple dc into a single stitch to create a full raised petal. Place a stitch marker in the top of each petal base as you make them to help keep symmetry.
Round 6 :
Working around the first petal: *ch1, turn, in front loop of petal base work 10 dc in a fan to shape the petal (insert hook under the vertical front loop of the base cluster), sl st into base between petals; rep from * for each petal (8 fans). Finish with sl st to join. (8 fans)
Round 7 :
Rotate motif so fans are outward. Working behind each fan, ch1, FPdc around the base of each fan (work 3 FPdc around the base cluster area), ch2 between each group to create separation. Repeat for all 8 petals. (24 FPdc groups; ch2 sps between)
Info :
Front post double crochet around the base cluster gives a raised ridge outlining each petal. Keep posts consistent; insert hook from front to back to front around the base of the cluster.
Round 8 :
Ch3 (counts as dc), *work 3 dc down the side of petal into the loops of fan to lengthen petal, dc into ch2 space between petals; rep from * around. End with sl st to top of ch3. This evens petal lengths. (approx 8 x 4 dc groups + 8 dc between)
Round 9 :
Ch1, sc evenly around petal edges to tidy the shape: Work 2 sc in the top of each petal fan peak, 1 sc along sides spaced evenly, and 1 sc in each dc between petals. Aim for an even circular shape connecting petals (approx 64 sc, depending on placement).
Info :
Count stitches; if your sc total differs by a few stitches, add or reduce side sc to preserve smooth curve. Keep motifs similar by counting and marking repeats.
Round 10 :
Switch to background color (Cream) in final sl st of Round 9: Join cream with sl st. Ch3, dc in same st, *ch2, sk 2 sc, (2 dc, ch2, 2 dc) in next sc (creating small diamond points between petals), sk 2 sc, rep from * around. Aim to create 8 small diamond connectors forming a star around the leaf. Sl st to top of ch3 to finish.
Info :
Change to cream here to frame the leaf in a diamond-shaped surround. Carrying the background yarn briefly inside the motif is okay but weave in ends later. Make sure color joins are neat on the back of the motif.
Round 11 :
Ch1, sc into same st, *ch3, sk the ch2 sp, sc into next dc cluster top, ch3, sc in next ch2 space, rep to form 8 elongated points around cluster. End with sl st to join. (8 ch3 loops + 8 sc)
Round 12 :
Ch3 (counts dc), *in ch3 loop work (2 dc, ch2, 2 dc) to create a fuller diamond point, sl st into next sc; rep around to make a ring of diamond points; sl st to top of ch3. (8 diamond points)
Info :
These diamond points will later be squared into a full diamond by adding corner expansions. Keep stitch tension consistent so the diamond edges are even.
Round 13 :
Ch1, sc around the entire ring of diamond points: Work sc along sides of diamond and 3 sc in each valley where two diamonds meet to begin squaring up the motif. This brings the shape closer to an octagon ready for corner shaping. (Approx 80 sc)
Round 14 :
Ch2, *work 1 hdc in next 5 sc, (2 hdc, ch1, 2 hdc) in the next sc to create a corner puff, rep around to make 8 small corner expansions; sl st to join. (This begins forming a diamond-of-diamonds shape around the leaf)
Info :
At this point, check motif measurement. Block lightly if there's curling and check that final motif measures approx 8" square. Adjust tension if necessary before making remaining motifs.
Round 15 :
Ch1, sc evenly to fill sides between corner expansions, placing 1 sc per hdc across smaller stretches and 3 sc in corner ch1 loops. Aim for a neat square outline (approx 96 sc). Fasten off and weave in ends. Block motif square to 8" x 8" using pins and steam or wet blocking as preferred.
Info :
Make 6 motifs total, in your chosen leaf colors. Ensure all motifs are blocked to the same size. Label motifs A-F to help place colors in desired order when joining.
— Diamond Connector & Background Mesh (per motif, extends motif into runner) :
Round 1 :
With cream color joined at midpoint of any side of blocked motif, ch3 (counts as dc), dc across side evenly to reach corner, placing 1 dc per visible stitch/space. Do this on each of the four sides to begin an even band around motif. Aim for symmetric edges. (Edge counts will match previous sc counts; approx 28-30 dc per side)
Round 2 :
Ch2, *sk next dc, (3 dc, ch2, 3 dc) in next st to create a corner diamond point, sk next dc, dc in next dc; rep around. Sl st to join. This sets up open mesh points at corners. (Creates 4 diamond points)
Info :
These mesh corner points will line up with adjacent motifs when you join them into a long runner. Place stitch markers at each corner point to aid matching later.
Round 3 :
Ch1, sc around the entire motif perimeter including corner diamonds: Work 3 sc in each ch2 corner space, and 1 sc along side dc groups. This evens the edge for joining. Fasten off and weave ends. Block again lightly if needed for neatness.
Info :
Repeat this diamond connector step for all motifs. The finished motif with diamond connector should be a neat square of approximately 9" across, with defined corner ch2 loops at each corner for joining.
— Background Mesh Panels (make panels to fill between motif columns) :
Round 1 :
With cream, chain a foundation long chain equal to the distance between motifs plus 2 chains for turning. For a runner with 6 motifs aligned lengthwise, your mesh panel length should match the motif height (approx 9") and width should be the width of the motif. For practice, ch 36 as a sample panel. Row 1: sc in 2nd ch from hook and in each ch across. (35 sc)
Round 2 :
Ch3, turn, dc in each st across. (35 dc)
Round 3 :
Ch1, turn, sc in first st, *ch3, sk 2 dc, sc in next dc; rep across to create open mesh. End with sc. (This creates a lacy filet-like mesh).
Round 4-12 :
Repeat Round 3 until panel reaches desired height to match motif diamond connector height (approx 9"). Fasten off. Make enough panels to run the whole runner width between motif columns (for a single-column runner, you will create two long side mesh strips to flank the motif column)
Info :
To make the runner exactly like the photo, you will create two long side mesh panels that run the full length of the runner, with motifs inserted centrally in a column. Measure and block these panels so their length matches the total combined height of all joined motifs.
— Joining Motifs into a Single Runner Column :
Info :
Arrange motifs in color order along a long flat surface using pins to hold in place. Align each motif so that diamond corner points line up. Use tapestry needle and cream yarn to join via single crochet or slip-stitch join, depending on desired seam visibility. The method below uses a neat join with single crochet along matched corner ch2 loops and side scs.
Round 1 :
Place two motifs wrong sides together with corners matched. From behind, join cream in corner ch2 loop with sl st and ch1. Work 3 sc evenly through corner ch2 loop of both motifs to secure corner. Move along side; sc through corresponding sc stitches of both motifs, putting 1 sc in each matched stitch, adjust spacing so motifs lie flat. Fasten off at mid-side. (Seam will be invisible on right side if worked from wrong sides together.)
Round 2 :
Join the next motif in the same fashion, continuing until all motifs are joined into a neat column. After joining each, block lightly to even out joins. For a runner of 6 motifs, you will have 5 joins in total.
Info :
For a sturdier join, you can use whip stitch through corresponding stitches after sewing with sc. If you prefer a crochet seam that shows a decorative ridge, join right sides together and sc through both motifs from the right side.
— Integrating Motifs with Side Mesh Panels :
Round 1 :
Lay the joined motif column on top of the two long mesh panels prepared earlier so that motifs are centered between mesh side panels. Using cream yarn and tapestry needle, whip stitch mesh panels to motif sides through the perimeter sc edging added in Diamond Connector Round 3. Sew evenly from motif corner to corner on both sides, leaving small gaps if you prefer visible diamond points.
Info :
If your mesh panels are separate pieces, sew them continuously along each side; try to maintain even tension so the runner lies flat. Alternatively, you can crochet the mesh panels on directly by using sc around motifs and continuing with the mesh stitch, but this requires careful counting to match rows.
— Center Small Olive Accent (make small squares between motifs) :
Round 1 :
With olive green, ch4 and sl st into first ch to make a small loop. Ch1, 6 sc into loop, tighten (6)
Round 2 :
Inc in each st around (12)
Round 3 :
(1 sc, inc) x6 (18). Fasten off and leave long tail to sew into joints between motifs where small olive squares sit in photo (these sit at the corners of diamond frames between motifs)
Info :
Sew these small olive accents into the runner at points where diagonal diamonds meet—use them to stabilize joins and to echo the green border color.
— Runner Full Length Assembly and Straightening :
Info :
Once motifs are joined into a long column and mesh panels attached on both sides, take time to square the ends. Trim or adjust mesh panel lengths so both ends of the runner align with the motif edges. Block the entire assembled panel on a flat surface for at least 24 hours for best evenness.
Round 1 :
With cream yarn, work one round of sc evenly around entire assembled runner to even the perimeter and prepare for border. Place 3 sc in each corner ch2 space to create a rounded corner. Fasten off and switch to border color (Olive).
Info :
This sc round binds all seams and creates a base for the decorative outer border. If you see gaps at joins, use a few extra sc to close them on this round.
— Outer Border (Olive Color) :
Round 1 :
Join olive in any sc on the edge. Ch2 (counts as hdc), hdc in same st, *sk 1 sc, 3 hdc in next sc (creates a tiny ridge), sk 1 sc, hdc in next sc; rep around. At corners, work (3 hdc, ch1, 3 hdc) into the corner sc grouping to maintain rounded corners. Sl st to top of ch2 to join. (This creates a wide textured border.)
Round 2 :
Ch1, sc in each hdc around, working 5 sc in each corner ch1 loop to accent rounded corners. Sl st to join. (Even count; adjust if needed to keep edges flat.)
Info :
If the border skews, wet-block the runner again and adjust tension. You may need to add or reduce a few stitches along long sides to keep the border flat; this is normal for long assembled pieces.
Round 3 :
Ch3, *in next st work (1 fpdc, 1 bpdc) into same st to create a braided ridge effect across the border; ch1, sk next st; rep across. End with sl st to top of ch3. Fasten off and weave in ends.
Info :
This braided ridge is decorative and gives the runner a finished, hand-crafted trim that complements the leaf texture. If you prefer a simpler border, work two rounds of sc in olive instead.
— Final Edge Rounds & Rounded Corners :
Round 1 :
With olive, rejoin and work a round of crab stitch (reverse single crochet) around the entire edge for a neat rope-like finish. Work 5 crab stitches in corner ch1 loops to round corners fully. Sl st and fasten off neatly. Weave ends into border with tapestry needle.
Info :
Crab stitch provides a firm edge that resists curling. If crab stitch feels tight, use the 4.5mm hook for this round to relax the edge slightly.
— Tassels (Make 6 and attach at each short end, evenly spaced) :
Round 1 :
Using cream, make tassels approx 2.5" long (loop yarn around a 2.5" piece of cardboard 18 times for fullness). Slide off, tie a tight wrap at top with 6" of yarn, then wrap a second small cord around 1/2" from top to create the tassel head. Secure ends and trim tassel bottom even.
Round 2 :
Attach tassels: Thread long tail into tapestry needle and insert through runner corner just inside the border at each short end and at even intervals across the short edge (three tassels per short end in the photo). Tie securely inside and weave ends into the back of the runner. Trim any stray ends.
Info :
Spacing for three tassels per short end: for a runner approx 48" long with six motifs, place tassels approx 1.5" from each corner and one in the center of the short end. Adjust spacing by eye for symmetry.
— Finishing Touches :
Round 1 :
Weave in all ends securely on the wrong side of the runner. Use small whip stitch passes to secure loose joins if needed. Re-block the entire runner flat and allow to dry fully before trimming tassels to precise length.
Info :
Press lightly with steam if desired, but do not press directly; mist with water and re-block for best results. If the runner will be laundered, test a small swatch for colorfastness first.
— Optional Variation: Continuous Crochet Join Method :
Info :
If you prefer to avoid sewing, you can join motifs and add mesh panels using a continuous crochet method: after finishing the round that creates perimeter sc on a motif, instead of fastening off, ch the number required to begin the mesh and continue with mesh panels directly onto the motif edge. This requires careful counting and a long working row but yields fewer ends to weave in.
Info :
When using continuous join, work slowly and check alignment frequently. Use blocking pins to hold adjacent motifs in place as you crochet the connecting mesh rows.
This Autumn Leaves Table Runner makes a cozy seasonal statement or an elegant year-round accent. The textured leaf motifs provide tactile charm while the airy cream mesh keeps the look light and modern. Each carefully blocked motif and carefully stitched border come together in a runner you'll be proud to display. 🧶🍂 Enjoy the therapeutic rhythm of repeating motifs, and the joy of finishing with tassels and a neat border. Happy stitching—and don't forget to share a photo of your finished runner! ✨