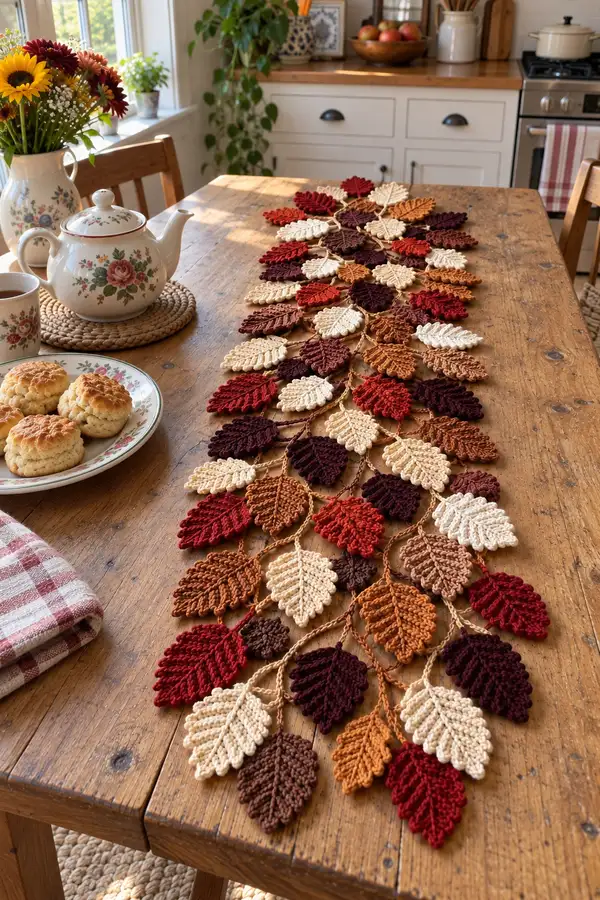
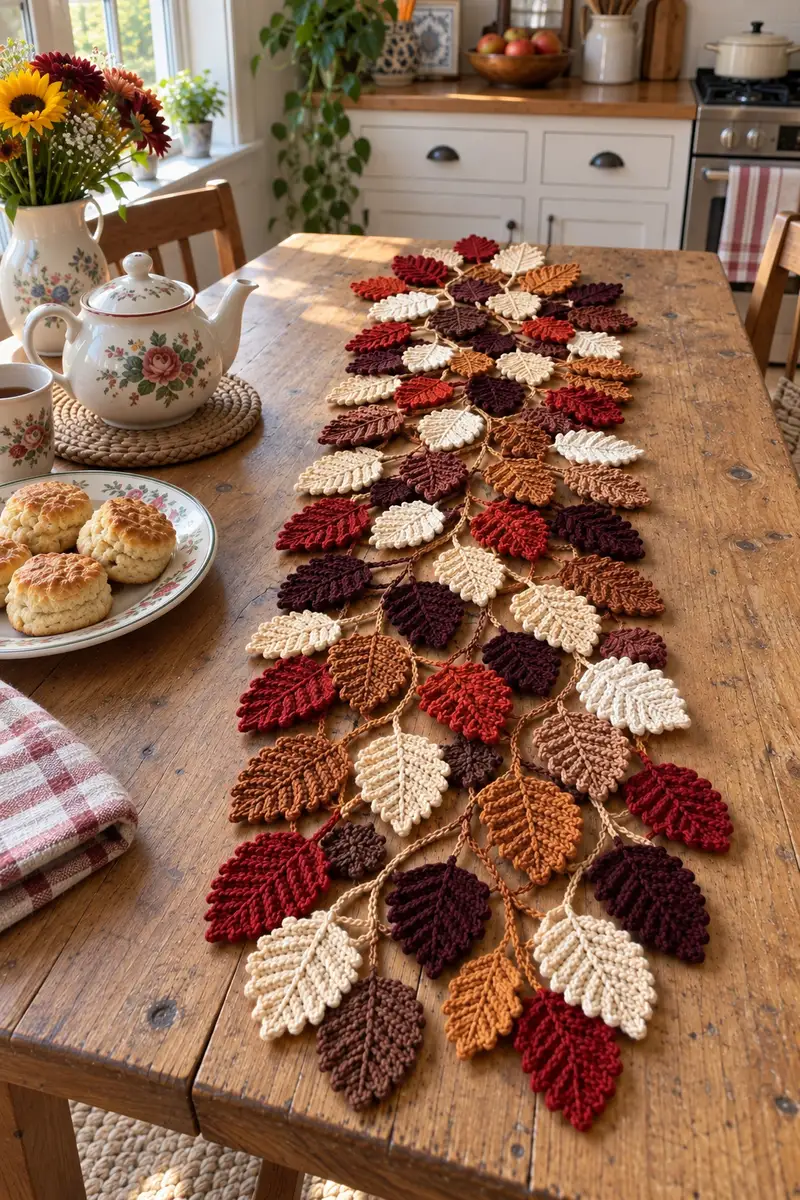
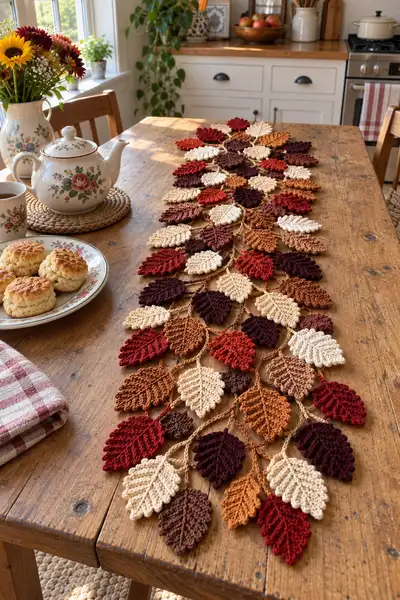
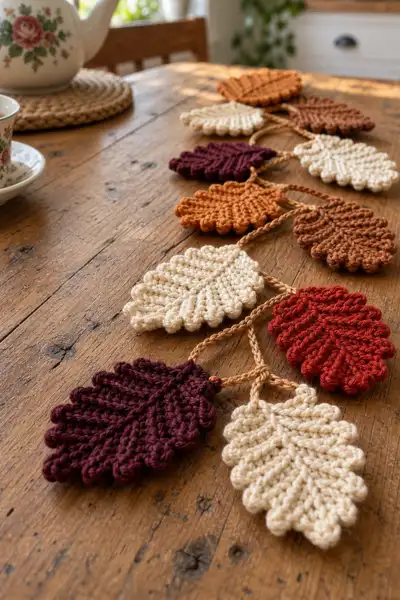
Create a cozy fall table runner made from dozens of crocheted leaves in warm autumn tones. This pattern breaks the project into three leaf sizes, braided vines, and clear joining instructions to make a long, natural-looking runner that drapes beautifully down a dining table. The finished piece highlights textured ribs on each leaf and a lightweight, flexible vine construction for easy styling. Perfect for seasonal decorating and gifting.
Progress Tracker
0% Complete
— Introduction :
Info :
This table runner is built from three leaf sizes (Large, Medium, Small) plus a braided vine connector. Make leaves flat and textured by combining rounds of regular stitches with BLO ribs. Leaves are worked in the round from a small center and shaped with systematic increases then decreases. Assemble by linking leaves with chains and slip stitches, then join vines into the runner length. Block all leaves before final assembly for best drape.
— Large Leaf :
Round 1 :
6 sc in magic ring (6)
Round 3 :
(1 sc, 1 inc) x 6 (18)
Round 4 :
(2 sc, 1 inc) x 6 (24)
Round 5 :
(3 sc, 1 inc) x 6 (30)
Round 6 :
(4 sc, 1 inc) x 6 (36)
Round 7 :
(5 sc, 1 inc) x 6 (42)
Round 8 :
(6 sc, 1 inc) x 6 (48)
Info :
At this point the leaf is at maximum width. Use a stitch marker to mark the centre stitch of the top edge so you can reference it when creating the central vein later.
Round 9-12 :
1 sc in each st (48)
Round 13 :
1 sc in next 6 sts, 1 sc in next st FLO, 1 sc in next 6 sts, 1 sc in next st FLO, rep across to end (48)
Round 14 :
1 sc in each st BLO across (48)
Info :
Rounds 13-14 create the first subtle rib. Work the BLO round more tightly for contrast. Use same color or change to a slightly darker tone for heavier veins.
Round 15 :
1 sc in each st (48)
Round 16 :
(6 sc, 1 dec) x 6 (42)
Round 17 :
(5 sc, 1 dec) x 6 (36)
Info :
Begin to shape the leaf tip. Stuffing is not required; these are flat motifs. Keep tension consistent and avoid pulling tight when decreasing to maintain a smooth point.
Round 18 :
(4 sc, 1 dec) x 6 (30)
Round 19 :
(3 sc, 1 dec) x 6 (24)
Round 20 :
(2 sc, 1 dec) x 6 (18)
Round 21 :
(1 sc, 1 dec) x 6 (12)
Round 23 :
Fasten off, leaving a long tail for sewing. Do not close the last 6 sts; instead pull through to make a small pointed tip. (0 visible opening)
Info :
After finishing, use the tail to sew a small whipstitch to secure the tip if necessary. Press gently under steam or pin flat when blocking to preserve shape.
Round 24 :
Optional raised central vein: Join yarn at center top edge, ch 1, work 18 sc evenly down the center, sl st to tip to secure. Fasten off. (18)
Info :
For a pronounced central vein, work a row of single crochet down the center then add 1 sc popples on either side using picots or 3 sc clusters. These accentuate the leaf’s natural ribs.
— Medium Leaf :
Round 1 :
6 sc in magic ring (6)
Round 3 :
(1 sc, 1 inc) x 6 (18)
Round 4 :
(2 sc, 1 inc) x 6 (24)
Round 5 :
(3 sc, 1 inc) x 6 (30)
Round 6 :
(4 sc, 1 inc) x 6 (36)
Info :
Medium leaves reach a maximum of 36 sts. Mark the top-center stitch for later vein and layout reference.
Round 7-9 :
1 sc in each st (36)
Round 10 :
1 sc BLO in each st to form first rib (36)
Round 11 :
1 sc in each st (36)
Info :
To make a more textured rib pattern, alternate FLO and BLO rounds every other round; this creates raised lines on the leaf surface.
Round 12 :
(4 sc, 1 dec) x 6 (30)
Round 13 :
(3 sc, 1 dec) x 6 (24)
Round 14 :
(2 sc, 1 dec) x 6 (18)
Round 15 :
(1 sc, 1 dec) x 6 (12)
Round 17 :
Fasten off and pull tail through to form point. Weave in ends.
Info :
Optional: After finishing, use contrasting yarn to surface-slip-stitch along ribs to emphasize texture. Use the long tail to secure the leaf to the vine later.
— Small Leaf :
Round 1 :
6 sc in magic ring (6)
Round 3 :
(1 sc, 1 inc) x 6 (18)
Round 4 :
(2 sc, 1 inc) x 6 (24)
Round 5 :
1 sc in each st (24)
Round 6 :
1 sc in each st BLO (24)
Round 7 :
(2 sc, 1 dec) x 6 (18)
Round 8 :
(1 sc, 1 dec) x 6 (12)
Round 10 :
Fasten off leaving tail to form point. Weave in tightly.
Info :
Small leaves are quick to make and excellent as filler. Use them between medium and large leaves to create a natural clustered look.
— Rib and Vein Detail (All Leaf Sizes) :
Round 1 :
Join yarn at top-centre of leaf (where you placed marker), ch 1, sc into same st (1)
Round 2 :
Ch 1, sc in next 8 sts down centre line (work even), for large leaf 18 sc (varies by size)
Round 3 :
Work back up using FLO 1 sc in each st, or for stronger ribs: sc2tog every 3rd st to make a raised line (adjust per leaf width)
Info :
You can create multiple ribs by repeating this process offset by 4-6 stitches. Surface slip stitch is an excellent option to create delicate raised ribs without adding bulk.
— Vine Connector (Make Multiple) :
Round 1 :
Ch 60. This foundation chain will form a flexible connector vine roughly 40-50cm when relaxed — adjust length to fit desired runner layout.
Round 2 :
Working into back bumps of chain, sc in each ch across (60)
Round 3 :
Ch 1, turn, 1 sc in each st BLO across (60)
Round 4 :
Ch 2 (counts as hdc), hdc across in each st (60)
Round 5 :
Ch 1, sl st evenly along top edge to create a smooth rope-like appearance. (60)
Info :
Make several vine connectors: long ones for the centre spine and shorter ones to link leaves into staggered rows. For a braided effect, make three equal-length strips and braid them together, fastening with a 10-ch tie.
Round 6 :
Optional braid: Make three strips (each ch 40-60 depending on desired runner fullness). Braid strips loosely and whipstitch ends together. Fasten off.
Round 7-12 :
Make extra vine tendrils by chaining 10-20 and fastening to vine body with sl st to form hanging stems for leaves.
Info :
Use a slightly lighter-weight hook (3.5mm) for vine strips if you want a tighter, more corded look. Leave long tails at the vine ends for neat finishing and for attaching to multiple runners or tableware.
— Attaching Leaves to Vine (Technique) :
Round 1 :
Position leaf under vine where you want it to sit. Using a matching yarn tail, whipstitch through the top-centre 6-8 sts of the leaf to the vine strip. Sew through both layers for a secure join.
Round 2 :
For a looser hang, sew only through the top 3 sts of leaf, then tie a small slip knot around vine to mimic a natural stem.
Round 3 :
For additional stability on heavy or large leaves, add a second stitch about 4-6 stitches down the vine and secure with back-and-forth whipstitches, ensuring no yarn tail remains exposed.
Info :
Always pin your leaves in the exact arrangement before sewing. Space leaves irregularly for natural look: clusters of 2-4 leaves alternating with singles. Use small leaves as fillers around medium/large leaves.
— Joining Multiple Leaves Into Clusters :
Round 1 :
To make a 3-leaf cluster, position a medium leaf centrally and two small leaves to each side above or below. Using long tails, sew the small leaves to the medium leaf at 3-4 secure points each, forming a compact cluster. (Use 6-8 stitches per leaf)
Round 2 :
Attach cluster to vine with a 10-ch stem: at the vine, ch 10, sl st into top centre of cluster and fasten; weave in chain tail to hide.
Info :
Clusters add depth and volume to the runner. Make about 12-18 clusters and intersperse single leaves for a balanced look. Vary color combinations for a gradient effect along the runner.
— Layout & Assembly (Step-by-Step) :
Round 1 :
Decide on runner length and lay out vine strips on a large table or blocking board. Place large leaves down the centre line spaced 8-12 cm apart depending on leaf size and table width.
Round 2 :
Place medium leaves staggered on either side of the centre line, alternating left/right and rotating leaves slightly to mimic natural fall. Fill gaps with small leaves and clusters.
Round 3 :
Pin every leaf in place through the vine and into the blocking mat. Check symmetry and adjust spacing to avoid crowding edges.
Round 4 :
Sew leaves to vine as described in Attaching Leaves to Vine. Use small, even whipstitches and hide tails under the vine by weaving them into the vine strip stitches.
Info :
Work in small sections: sew 3-4 leaves, then step back and view from a distance. This helps you maintain balanced color distribution and organic spacing.
Round 5 :
When all leaves are attached, join vine strips end-to-end if needed using a neat whipstitch or by crocheting a joining sl st seam with matching yarn so the runner reads as one continuous piece.
Round 6 :
Optional: add 5-8 short tendrils (ch 8-12) hanging off the runner at random points to create movement and layered depth.
Info :
If you prefer a less dense runner, remove every other medium leaf and reduce clusters; conversely, add more small leaves to make a fuller runner.
— Edging & Finishing :
Round 1 :
With vine color, work 1 sc evenly along each exposed vine edge to neaten joins (work through both vine layers when braided). Keep stitch count even across runner length.
Round 2 :
Picot edge: *ch 3, sl st in 3rd ch from hook (picot), skip 2 sts, sc in next 3 sts* rep along outermost edges of leaves only where desired to create a scalloped border.
Round 3 :
Fasten off and weave in all ends along underside of runner, hiding tails within vine structure.
Info :
Edge stitches will add a finished look and help hold leaves flat. Test picot spacing on a sample leaf first to ensure desired effect—it can look delicate or strongly scalloped depending on tension.
— Blocking & Stiffening :
Round 1 :
Pin each leaf to a blocking mat in its exact stitched shape. Gently steam or spritz lightly with water and shape ribs with fingers. Leave pinned until fully dry.
Round 2 :
Optional: apply a light fabric stiffener to leaf underside for longer-lasting flatness. Test on a spare swatch first to avoid shine or discoloration.
Info :
Blocking is essential to achieve the crisp, natural contours seen in the photos. Without blocking, leaves will curl and not lie uniformly along the runner.
— Notes on Color Placement & Repeats :
Round 1 :
Plan a color gradient before you start by laying out yarn samples. A balanced look alternates light and dark leaves and clusters red/rust tones every 3-4 leaves.
Round 2 :
Create 5-7 repeat sets of: Large leaf (deep red), Medium leaf (burnt orange), Small leaf (cream), Medium leaf (brown), Large leaf (burgundy). Repeat down runner for consistent rhythm.
Info :
Color placement can make the runner appear longer or wider. Darker colors recede, while lighter colors draw the eye; use this to create a visual flow down the table.
— Variation: Single-Color Runner :
Round 1 :
Work entire runner in one color to emphasize texture and shape rather than color. Use cream or warm tan for a neutral elegant look.
Info :
Single-color runners are excellent for formal tables or where you want the leaf shapes to be the main focal point. Consider adding metallic thread accents for a festive touch.
— Troubleshooting & Tips :
Round 1 :
If a leaf is too floppy, block and then add a light spray starch. If too stiff, re-wet slightly and relax pins to soften the curve.
Round 2 :
For uniformity, make all leaves of one size in one sitting; your tension will be more consistent and assembly faster.
Round 3 :
When sewing, use three small stitches rather than one large one to reduce noticeable seam bumps on the vine.
Info :
Keep a dedicated small bowl for finished leaves to avoid stretching while you continue making parts. This simple habit speeds assembly and preserves shape.
Completing this autumn leaves table runner brings the warmth of fall into your home stitch by stitch. Each textured leaf contributes to a layered, handcrafted centerpiece that you’ll love to arrange and rearrange. The pattern is satisfying to repeat and the final blocking gives a professional finish. 🍁🧶 Take your time, enjoy the colours, and share your finished runner with friends for seasonal cheer!