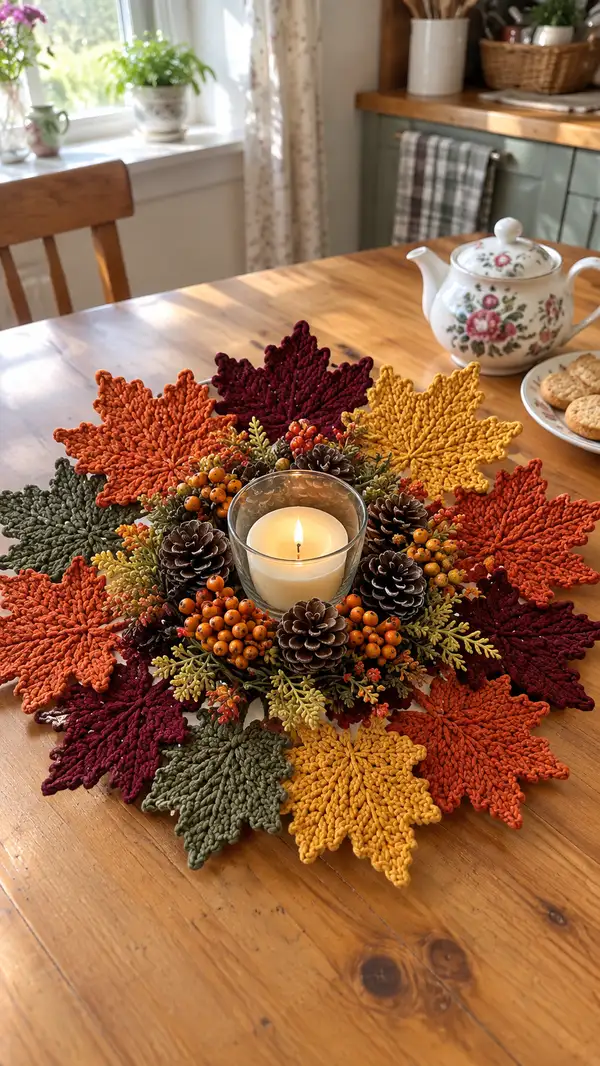
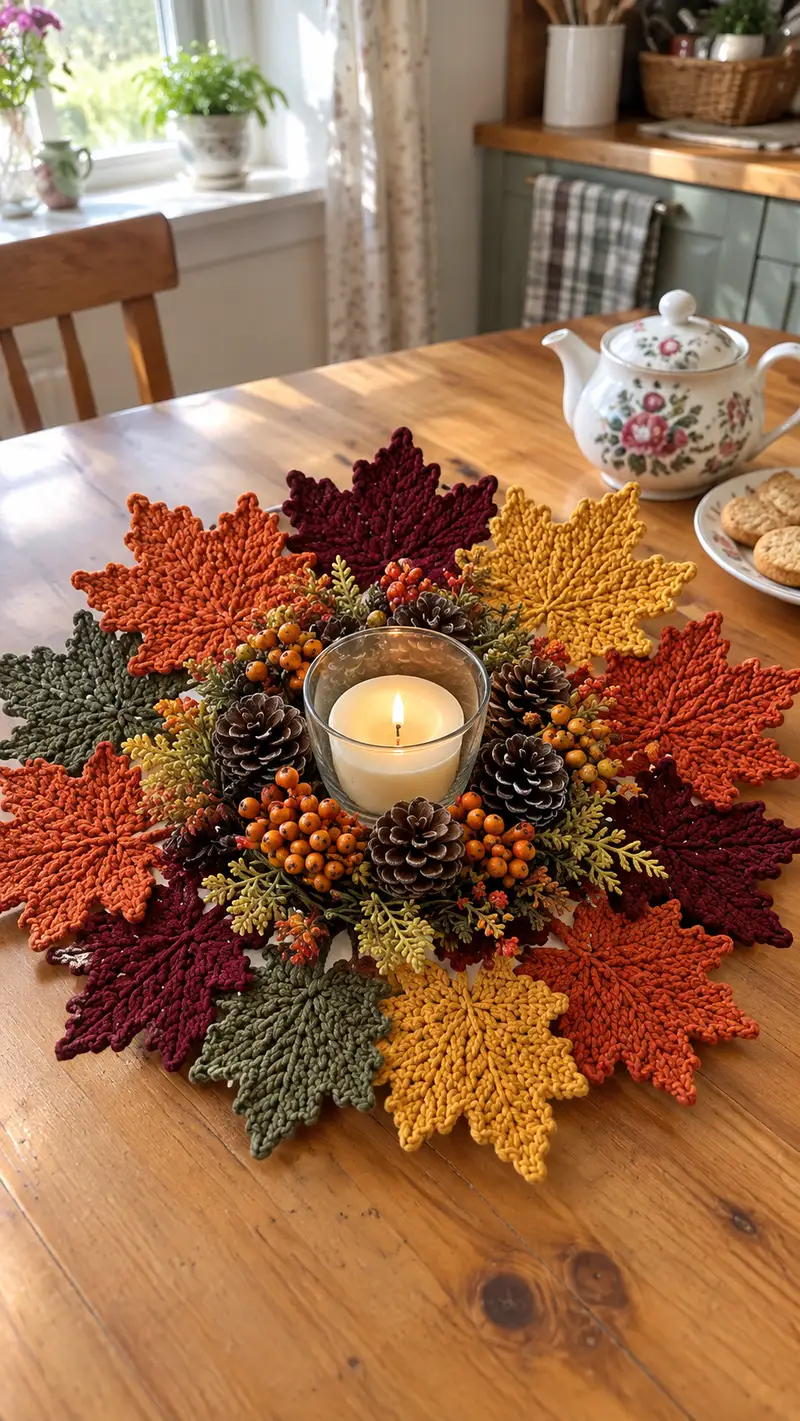
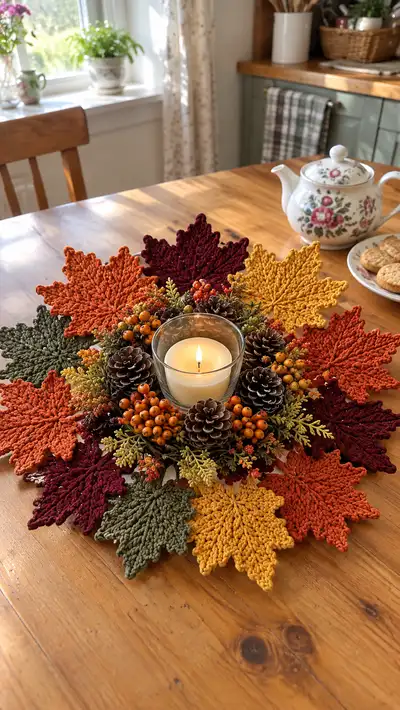
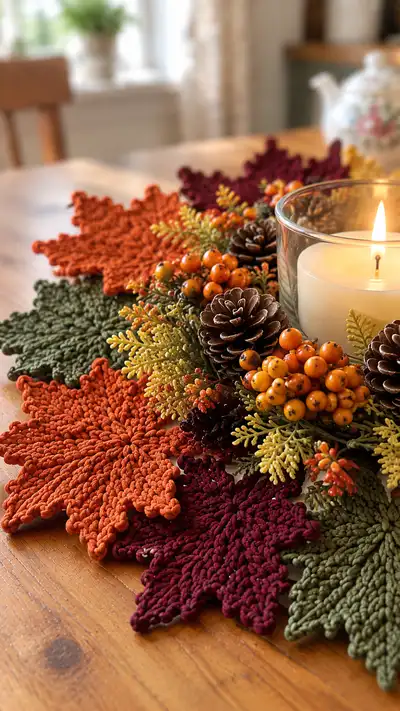
Create a warm, fall table centerpiece made from crochet maple leaf motifs in rich autumn hues. This pattern teaches you how to make large textured maple leaves, smaller accent leaves, berry clusters and a simple center medallion to arrange into a wreath or runner. The finished set photographs beautifully with a candle, pine cones and faux berries for a cozy seasonal display.
Progress Tracker
0% Complete
— Notes & Gauge :
Info :
This pattern is worked in flat motifs and small 3D accents. Gauge is not strict for decorative pieces, but one complete large leaf with 3.5mm hook will measure approximately 7.5-9 inches from tip to tip depending on yarn and tension. Work tightly enough to get crisp stitch definition for the leaf veins.
Info :
Throughout this pattern we use repeat structures based on eight points to create an 8-lobed maple leaf silhouette. Most round stitch counts are given as totals for clarity and are checked for mathematical consistency. Use stitch markers at each round start.
— Large Maple Leaf (Make 6) :
Round 1 :
MR, 8 sc in MR, pull tight (8)
Round 3 :
(1 sc, 1 inc) x 8 (24)
Round 4 :
(2 sc, 1 inc) x 8 (32)
Round 5 :
(3 sc, 1 inc) x 8 (40)
Round 6 :
(4 sc, 1 inc) x 8 (48)
Round 7 :
(5 sc, 1 inc) x 8 (56)
Round 8 :
(6 sc, 1 inc) x 8 (64)
Round 9-12 :
1 sc in each st (64)
Info :
Place a stitch marker at the beginning of each round and move it up as you complete rounds 9-12. These even rounds build a broad foundation for the leaf's veins. Keep tension even so the leaf lies flat.
Round 13 :
1 sc in each st BLO (64)
Info :
Working in the BLO creates a subtle ridge that will become the first raised vein line. Use your fingers to gently flatten the motif as you work to keep edges tidy.
Round 14 :
1 sc in each st (64)
Round 15 :
(5 sc, fpdc around next st) x 8 (64)
Info :
The fpdc (front post double crochet) wraps around the post of a stitch in the previous round to raise a vein-like ridge. Each fpdc counts as one stitch; stitch count remains 64.
Round 16 :
1 sc in each st (64)
Round 17 :
(2 sc, hdc, dc, tr, dc, hdc, 2 sc) x 8 (72)
Info :
Round 17 creates the first true lobes or points by working taller stitches toward the center of each lobe. This round increases total stitches by 8 (one additional stitch per repeat) to reach 72 total.
Round 18 :
1 sc in each st (72)
Round 19 :
(3 sc, hdc, dc, tr, dc, hdc, 3 sc) x 8 (80)
Info :
Round 19 increases again to widen the points. Work the taller stitches into the top of the previous round's tr to build height. Total now 80 stitches.
Round 20 :
1 sc in each st (80)
Round 21 :
(4 sc, hdc, dc, 2 tr, dc, hdc, 4 sc) x 8 (88)
Info :
Round 21 extends the lobes and prepares for the serrated edges. Count carefully when working tall stitches so that each repeat uses the corresponding top-of-stitch from the previous round.
Round 22 :
1 sc in each st (88)
Round 23 :
(5 sc, dc cluster: [dc, ch1, dc] into center st, 5 sc) x 8 (96)
Info :
A dc cluster separated by a ch1 makes a small indentation toward each point tip. Work clusters into the tall center stitches of each lobe to form the silhouette of a maple leaf point.
Round 24 :
1 sc in each st (96)
Round 25 :
(3 sc, picot, 3 sc, dc over tip, 3 sc, picot, 3 sc) around each lobe repeat roughly as diagrammed = 96
Info :
Work small picots at the outermost edges to create the serrated look. Adjust picot size to ch2 or ch3 depending on how pronounced you want points. Picots do not change stitch counts because they are worked into existing sts or chains within the repeat.
Round 26 :
1 sc in each st BLO (96)
Round 27 :
1 sc in each st (96)
Round 28 :
(BLO ridge round) (bpdc around the post of every 3rd stitch) to form stronger ridges across veins (96)
Info :
These post stitch rounds emphasize the central ribs and help each lobe keep a slightly cupped structure while the leaf remains flat overall.
Round 29 :
1 sc in each st (96)
Round 30 :
(1 sc, dec across small groups to sculpt the base row) x 24 placements = 72
Info :
Round 30 begins subtle base shaping so leaves join flat around a center. Remove stitch marker after this round if you need to switch to working a decorative stem; otherwise keep marker for edging.
Round 31 :
1 sc in each st (72)
Round 32 :
(1 sc, hdc, sc) across to firm the base (72)
Round 33 :
(3 sc, sl st in next ch-space) x 18 to define points and scallops (72)
Round 34 :
Edge finish: work (sc, picot, sc) into each outer tip point around to make points crisp (72)
Round 35 :
Fasten off and weave in ends. Block leaf flat: pin to desired shape, gentle steam/blocking spray if using cotton yarn. Repeat to make 6 large leaves in chosen colors.
Info :
If you prefer a firmer leaf, lightly starch or spray with textile stiffener when blocking. Arrange pins to curve each lobe slightly upward for realistic look.
— Small Maple Leaf (Make 6) :
Round 1 :
MR, 8 sc in MR, pull tight (8)
Round 3 :
(1 sc, 1 inc) x 8 (24)
Round 4 :
(2 sc, 1 inc) x 8 (32)
Round 5 :
1 sc in each st (32)
Round 6 :
(1 sc, hdc, dc, 1 sc) x 8 (32)
Round 7 :
1 sc in each st (32)
Round 8 :
(2 sc, dc cluster, 2 sc) x 8 (32)
Round 9 :
Edge round: (sc, picot) into every 2nd stitch around to make small serrations (32)
Round 10 :
1 sc in each st (32)
Round 11 :
Finish base by working (sc, dec) across last 8 stitches to shape join area (28)
Round 12 :
Fasten off and weave in ends. Block the small leaf slightly to match scale of large leaves.
Info :
Small leaves are worked more compactly to add visual layering in the final assembly. Make six in assorted colors and block them together with the large leaves so they sit uniformly.
— Center Medallion (Optional) :
Round 1 :
MR, 6 sc in MR (6)
Round 3 :
(1 sc, inc) x 6 (18)
Round 4 :
(2 sc, inc) x 6 (24)
Round 5 :
(3 sc, inc) x 6 (30)
Round 6 :
1 sc in each st (30)
Round 7 :
(sc, hdc, dc, hdc, sc) repeat around (30)
Round 8 :
1 sc in each st (30)
Round 9 :
(sc, picot, sc) around to create a lacy edge (30)
Round 10 :
Fasten off, weave in ends. This disc fits under a small glass candle holder and provides a stable base for arranging leaves and faux botanicals.
Info :
If you want a sturdier medallion, work two discs and join them with a round of sc, or add a small circle of felt glued/stiched to the back for stability.
— Berry Cluster (Make 6 clusters) :
Round 1 :
ch 2, 6 sc in 2nd ch from hook (6) - form small bead
Round 3 :
1 sc in each st (12)
Round 4 :
Fasten off leaving long tail for sewing. Make 6-8 small beads per cluster and stitch them together into a tight bunch to mimic berries.
Info :
Use small amounts of yarn in vivid orange or yellow to imitate the bright berries seen in the photo. Glue or stitch beads onto short floral wire or directly to the center medallion as desired.
— Small Acorn / Pinecone Accent (Optional, Make 6) :
Round 1 :
MR, 6 sc in MR (6)
Round 2 :
(1 sc, inc) x 3 (9)
Round 3 :
1 sc in each st (9)
Round 4 :
(2 sc, inc) x 3 (12)
Round 5 :
1 sc in each st (12)
Round 6 :
(3 sc, dec) x 3 (9)
Round 7 :
1 sc in each st (9)
Round 8 :
(1 sc, dec) x 3 (6)
Round 9 :
Fasten off, leave long tail, lightly stuff and sew closed. Attach top cap by stitching a small circle of brown yarn around the top of each acorn to mimic the cap.
Info :
Pinecone accents in the photos are real; crocheted acorn accents give the same effect if you prefer all-fabric decor. Use darker brown for the cap and lightly tack them into the assembled arrangement.
— Joining & Edge Round (Join Leaves into a Ring or Runner) :
Round 1 :
Arrange leaves in desired layout: alternate large and small leaves around center or create overlapping rings. Pin pieces in place so tips overlap slightly for a natural look.
Round 2 :
With matching yarn and yarn needle, use invisible ladder stitch or whip stitch to sew adjacent leaf bases together: sew through the last 2-3 rounds of each leaf base for a secure join.
Round 3 :
Option: Crochet a join-by-slip-stitch round. Place leaves side-by-side and, using a 3.5mm hook and same-color yarn, sl st through the edge stitches of both leaves to join; work across each pair for a seamless look.
Round 4 :
Edge finish: once leaves are joined, work a shallow round of sc around the entire assembled edge to tidy any gaps. Use BLO for this round to create a visible rim if desired.
Round 5 :
Fasten off and weave in all visible ends. Use small hidden stitches to tighten any loose joins so the centerpiece lies flat and even.
Info :
When joining leaves, check the assembled piece on the table with the medallion and candle in place to ensure the center hole size and symmetry are correct. Adjust spacing before final sewing.
— Assembly with Centerpiece Decorations :
Step 1 :
Place the center medallion where you want the candle or floral cluster. Arrange large leaves around the medallion, alternating small leaves between them as in the photo for a layered effect.
Step 2 :
Stitch berry clusters and acorns into the center area on top of the medallion or glue small faux pinecones and faux greenery in place. Ensure any glued elements are dry before placing candles nearby.
Step 3 :
Optional: Attach small magnets or a felt-bottom disk to the underside of the medallion to keep a glass candle holder centered and prevent slipping.
Info :
For safety, never place an open flame directly on yarn. Use a glass hurricane or a battery-operated candle if you place the piece where heat could contact yarn. The crocheted medallion should sit under a glass holder or faux candle for safe display.
Finishing :
Once all pieces are joined and embellished, press gently using a steam iron at low setting through a thin cloth if using cotton yarn. Reblock any lobes that need reshaping. Trim loose threads and secure any ornaments with extra stitches or a dab of fabric glue.
Info :
Store flat between sheets of tissue or lightly stuffed to keep lobes from creasing. Wash spot-only with a damp cloth; do not submerge assembled centerpiece if it contains glued/fake botanicals.
This autumn centerpiece pattern combines textured crochet leaves with easy floral accents to create a cozy, seasonal focal point for your table. With deep jewel and harvest tones, it’s perfect for Thanksgiving, fall gatherings, or to bring a warm seasonal touch to everyday life. Make a few leaves at a time and assemble them into a runner or a round centerpiece — the modular design is flexible and forgiving. 🧶🍂 Light a candle, add pinecones, and enjoy a handmade autumn display that feels like home. Happy stitching! 🍁