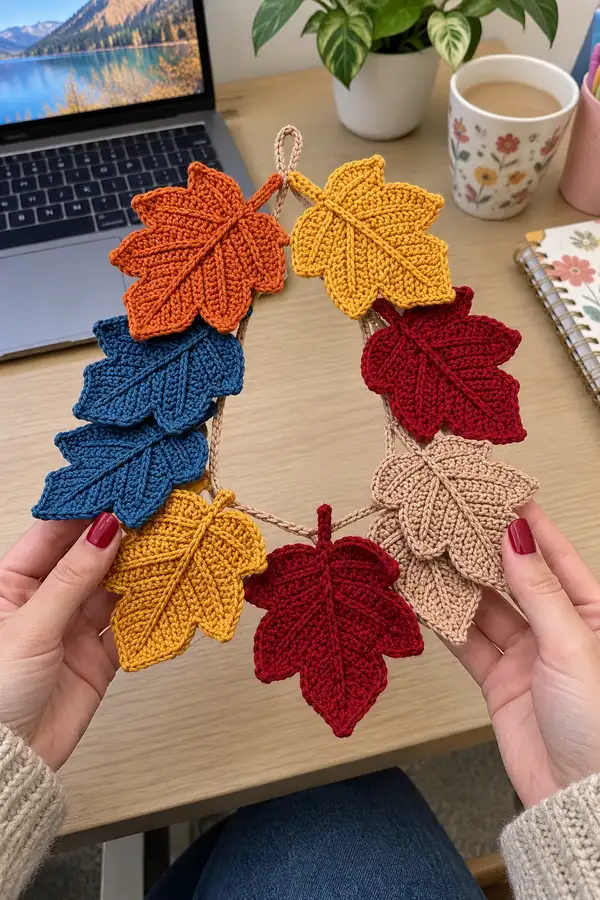
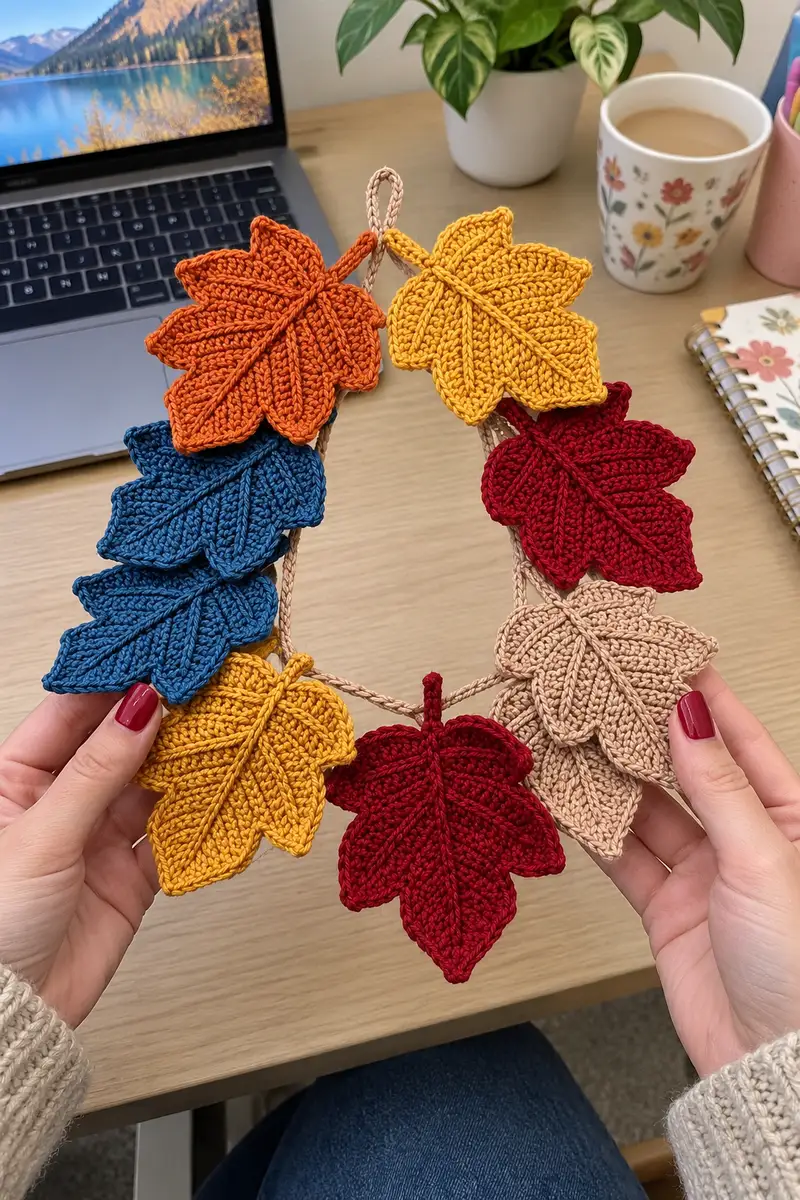
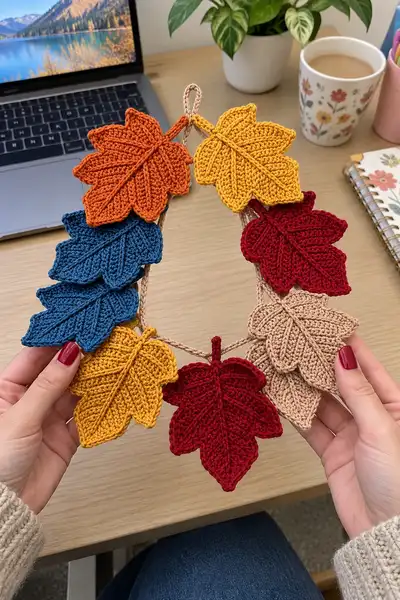
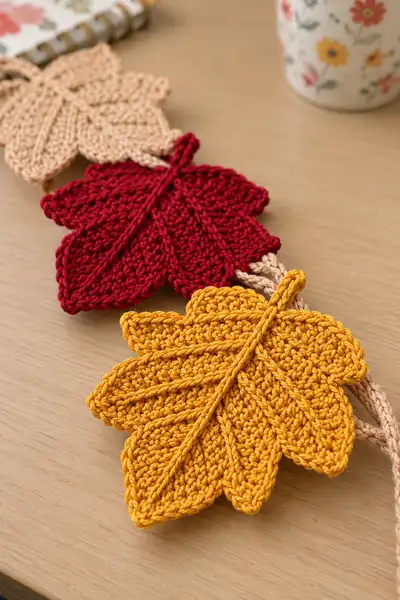
Bring cozy autumn vibes to your home with this handcrafted maple leaf garland. Each polished leaf is crocheted flat with defined veins and scalloped lobes, then strung on a braided cord. The pattern creates deep reds, mustard yellows, warm oranges, denim blue and neutral beige leaves just like the inspiration photo—perfect for doorways, mantels, or seasonal tablescapes.
Progress Tracker
0% Complete
— Overview :
Info :
This pattern describes a flat stylized maple leaf motif worked from a small foundation chain and worked around to form five lobes. One complete leaf is 34 rounds/rows of detailed shaping and finishing. Make eight leaves for the garland as pictured: 1 deep red, 1 mustard, 1 burnt orange, 2 denim blue, 1 beige, 1 blush pink, 1 additional deep red or color of choice. The pattern below shows one complete leaf worked in rounds/rows that form both sides of the leaf. After the leaf motif you will find a separate Stem & Cord section to braid and assemble the garland.
— Leaf (Make 8) :
Setup :
Use 3.5mm hook and cotton DK yarn. For a single leaf work with about 18-22g yarn. Start with a foundation chain of 13.
Round 1 :
Ch 13, 1 sc in 2nd ch from hook and in each ch across until last ch, 3 sc in last ch (the tip), now continue on the opposite side of the foundation chain working 1 sc in each ch back toward the beginning (total 27 sc) (27)
Round 2 :
Ch 1, turn. Work 2 sc in first 2 sts, 1 sc in next 3, hdc in next 3, dc in next 3 (these steps form the first lobe bulk), 3 dc in tip sts (center), mirror down opposite side: dc in next 3, hdc in next 3, 1 sc in next 3, 2 sc in last 2 sts (total increases distributed evenly) (33)
Info :
Round counts in flat leaf rows mark the number of stitches across the entire leaf row from base to base. The central tripled stitches at the tip create a point, and the grouping of sc/hdc/dc shapes the lobes.
Round 3 :
Ch 1, 1 sc in first 3, (inc, 1 sc) x2, 1 hdc in next 4, (1 dc, inc) x3 across center tip (this creates a larger center point), mirror: 1 hdc in next 4, (1 sc, inc) x2, 1 sc in last 3 (39)
Round 4 :
Ch 1. Work 1 sc in first 4 sts, (inc, 2 sc) x2, 1 hdc in next 5, (2 dc, inc, 2 dc) across the tip 3 sts, mirror on return: 1 hdc in next 5, (2 sc, inc) x2, 1 sc in last 4 (45)
Round 5 :
Ch 1. 1 sc in first 5, (inc, 3 sc) x2, 1 hdc in next 6, build tip shape with (3 dc, inc, 3 dc) across 3 tip sts, mirror back: 1 hdc in next 6, (3 sc, inc) x2, 1 sc in last 5 (51)
Info :
If you want a slightly smaller leaf, stop increasing after Round 5 and proceed to shaping rounds; for the medium-large leaf pictured continue to Round 10 of shaping. Keep stitch markers at the base points so you can count lobe divisions easily.
Round 6 :
Ch 1. 1 sc in first 6, (inc, 4 sc) x2, 1 hdc in next 7, (4 dc, inc, 4 dc) across tip, mirror back: 1 hdc in next 7, (4 sc, inc) x2, 1 sc in last 6 (57)
Round 7 :
Ch 1. 1 sc in first 7, (inc, 5 sc) x2, 1 hdc in next 8, (5 dc, inc, 5 dc) across tip, mirror back: 1 hdc in next 8, (5 sc, inc) x2, 1 sc in last 7 (63)
Round 8 :
Ch 1. 1 sc in first 8, 1 sc in each of next 10, BLO 1 hdc in next 9 to create a shallow ridge, 1 sc in next 10, 1 sc in last 8 (63)
Round 9 :
Ch 1. This round builds scalloped lobes: *(skip next st, 5 sc in next st - picot-like cluster), sl st into next st* across around the tip and down each side so you produce 5 raised scallop points (63 with clusters counted as 5-st clusters)
Info :
Round 9 creates scalloped edges that form the outer petal/lobe points. Work clusters loosely so the points curve outward. If you prefer sharper points, work 3 sc clusters instead of 5 sc clusters.
Round 10 :
Ch 1. Work a round of 1 sc in each st around, placing 2 sc in the center tip cluster to stabilize and spacing increases evenly across toward the base (approx 70 sts - exact number depends on cluster compression) (70)
Round 11 :
Ch 1. 1 sc in each st for 2 rounds to flatten and stabilize (70)
Round 12 :
Ch 1. Begin forming decorative vein channels with surface slip stitches: Insert hook from front to back at center base, sl st up through the center of the leaf toward the tip to create the central rib. Make 1 surface sl st every 2-3 sts to the tip (no change in stitch count)
Info :
Surface slip-stitch ribs are worked across the right-side of the leaf. Keep tension even; if your surface sl st pulls too much, use a slightly larger hook for the surface ribs to let them sit on top without puckering.
Round 13 :
Ch 1. Working on RS, mark the center vein with a line of sl sts. Then identify two diagonal vein placements on each side – these will be spaced to fall over the scallops. Do 3 short surface sl-st ribs on each side branching from the center rib (no change in base stitch count)
Round 14 :
Ch 1. 1 sc in each st around in BLO to create a subtle ridge at the edge (70)
Round 15 :
Ch 1. 1 sc in each st around for 2 rounds to firm up the border (70)
Round 16 :
Ch 1. Work reverse single crochet (crab stitch) around edge for a neat finished perimeter. Use 3.0mm hook if you prefer a tighter, neater border (70)
Info :
Reverse single crochet is worked left-to-right. It gives a rope-like edge that highlights the lobes. If unfamiliar, practice on a scrap first: insert hook in next st, yarn over, pull loop, yarn over and pull through both loops (working backwards).
Round 17 :
Ch 1. Fasten off leaving a 20-25cm tail for sewing to the cord and for the stem. Using the tail, weave a twisted stem by chaining 20, fold chain, and single crochet across the chain to create a rope stem; anchor stem to the base center with invisible stitches (no change in flat leaf stitch count)
Round 18 :
Info :
To make the stem more substantial, you can chain 30 and work slip stitches back along the chain to form a tighter rope. Alternatively, braid three short chains together for a chunky stem. Securely weave in yarn ends through the base of the leaf to hide them.
Round 19 :
Ch 1. If you want the leaf to be double-layered for extra weight and opacity, make a second identical leaf and slip stitch the two leaves together around the reverse single crochet border, matching scallops carefully (70)
Round 20 :
Info :
Double-layering is optional on the heavier cotton yarn. If you double-layer, leave a small opening, stuff lightly with a pinch of polyfill to add body, then finish closing. The pictured leaves are single-layered and rely on blocking to make the ridges crisp.
Round 21 :
Ch 1. Blocking instructions: dampen leaf lightly, pin onto blocking mat shaping lobes with fingers so scallops splay evenly. Let dry completely for crisp shape (no stitch count change)
Round 22 :
Info :
To add more texture, you can work an additional surface sl-st rib on either side of the central vein, starting two thirds of the way from base to tip. This creates the pronounced veined look visible in the photos.
Round 23 :
Ch 1. Optional: Add small embroidered stem lines using chain stitch and yarn needle across each lobe for extra realism (no stitch count change)
Round 24 :
Info :
Weave in ends: Use a yarn needle to thread the working tails through 4-6 stitches at the leaf base and then trim close. This secures the leaf when it is attached to the cord later.
Round 25 :
Info :
Make 8 leaves in total as pictured. Use the same leaf instructions for each leaf changing only color. Re-block each leaf after finishing for consistency in size and lobes. Slight differences among leaves make the garland feel organic.
Round 26 :
Variation - Small Leaf : If you would like a 10% smaller leaf, after Round 5 stop increasing and begin rounds 8-17 shaping and finishing as above. This smaller leaf uses less yarn and makes a pleasing staggered look along the garland (approx 55 sts on shaping rounds)
Info :
Create at least 3 small leaves and 5 full-size leaves for a balanced garland like the photo. Arrange colors so the palette reads evenly along the cord.
— Stem & Cord :
Round 27 :
Make the braided cord that holds the leaves. Using neutral beige yarn, make three strands each approx 180 cm (final braid will be shorter depending on assembly). Each strand: ch 200, 1 sc in 2nd ch and across (approx 199 sc) to create a stable rope strip. Repeat for all three strands.
Round 28 :
Info :
Alternatively you can make three twisted chains faster: chain 200, fold in half and single crochet through both loops along the chain to make a thicker strand. Use the same tension on each strand before braiding.
Round 29 :
Lay the three finished strands parallel, secure top ends with a clip, and braid them together evenly until you reach the desired garland length (approx 50-70cm finished depending on number of leaves and spacing). Tie both ends securely with a few knots and hide with a short slip-stitched cap of yarn (no stitch counts apply).
Round 30 :
Info :
To make a loop for hanging, leave 10cm unbraided at both ends, tie into a loop and wrap with a small scrap of yarn using whip stitches to create a neat hanging tab. Secure with a dab of fabric glue if desired.
Round 31 :
Attach leaves to the braided cord by pinning them spaced evenly: for eight leaves, aim for approx 6-8 cm spacing depending on cord length. Place the leaf stems so they face alternating directions for a balanced, organic drape.
Round 32 :
Info :
Use the long tail left on each leaf to stitch the base of the stem to the braid with a yarn needle. Sew around the base with ladder or whip stitch, then wrap excess tail around the stem and onto the braid for a tidy finish.
Round 33 :
For extra security, run an invisible stitch through the back of the leaf and through the braid at two or three points, knotting inside the braid. This prevents twisting and keeps the leaf flat against the cord when hung.
Round 34 :
Info :
Final assembly tip: After all leaves are attached, hold the garland by the center and adjust spacing. If some leaves lie flat against each other, reposition by slightly loosening the attachment thread and shifting. Weave in and trim all ends and give a light steam-block once assembled to finalize shape.
— Edge & Decorative Details :
Round 35 :
Optional: Add a contrasting decorative topstitch: using a thin contrasting yarn, make an edge whip stitch around each scallop, or work a single chain of small loops between each scallop to create a beaded effect (no change in base leaf counts)
Round 36 :
Info :
If you prefer a matte, vintage appearance, rub a little beeswax over the braid ends and heat lightly to set. This is optional and helps protect cotton from fraying.
Round 37 :
Optional Hanging Loops for Each Leaf: If you prefer each leaf to hang from its own tiny loop, use leftover neutral yarn to make 6-8 ch loops (6 ch each), fold in half, and sew to the leaf stem base before attaching to the braid.
Round 38 :
Info :
To achieve the layered look in the photos, thread two leaves onto the braid at some points so they overlap slightly – place one leaf front and one behind and sew each separately to keep layers from flipping.
Round 39 :
Cleaning and Care: Hand wash gently in cool water, reshape and lay flat to dry. Cotton may shrink slightly; re-block after washing if necessary.
Round 40 :
Info :
Enjoy customizing: change the number of leaves, mix sizes, or add mini acorns or pumpkins created with small rounds to the braid for a fuller autumn garland.
This autumn maple leaf garland brings instant cozy charm to any space. Each leaf is carefully shaped, ribbed, and edged to create a beautiful fall display you’ll love showing off. Make a few garlands in different palettes to decorate mantels, windows, or front doors—this project is both relaxing and rewarding. 🍁🧶✨