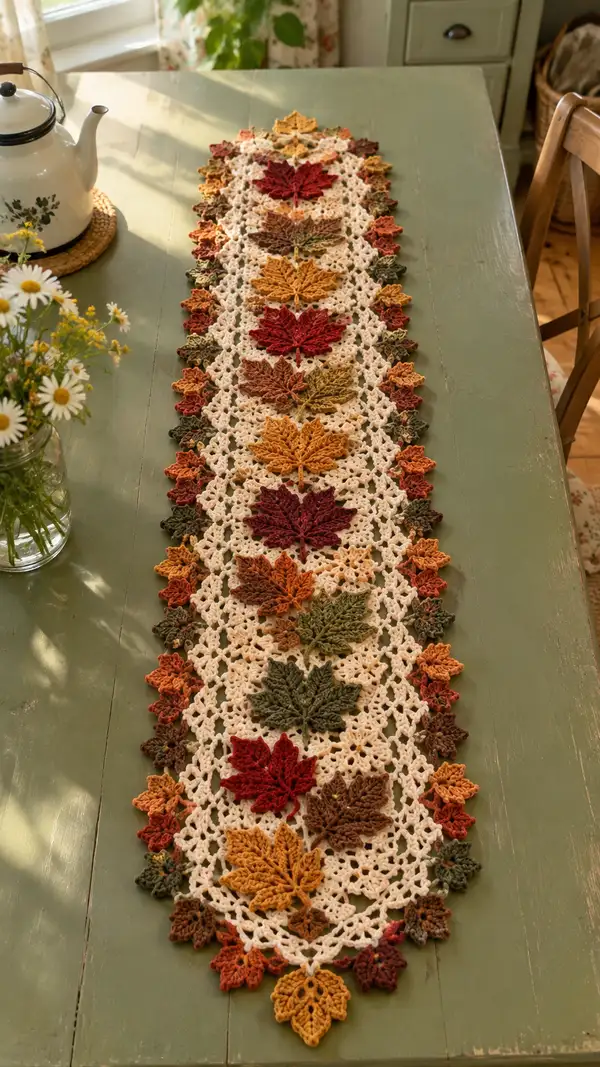
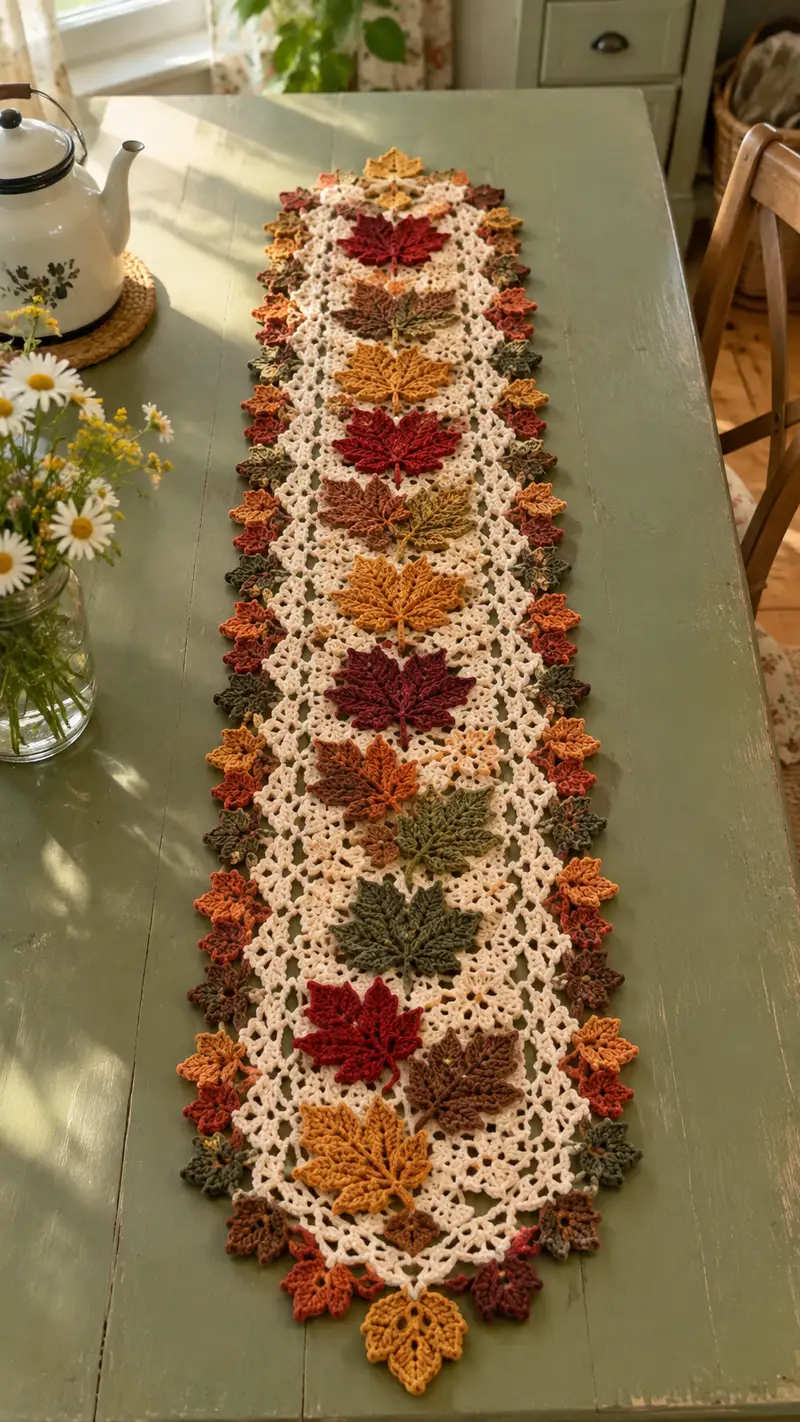
A warm, elegant table runner featuring layered maple leaves in cream, burgundy, gold and olive tones on a delicate lacy background. This pattern uses join-as-you-go motifs and dimensional crocheted leaves to create a cozy fall centerpiece. Detailed instructions guide you through making large focal leaves, smaller accent leaves, lace connector motifs, and a scalloped picot edging for a finished heirloom look.
Progress Tracker
0% Complete
— Notes & Overview :
Info :
This pattern describes three main elements: the Large Maple Leaf motif (focal), the Small Accent Leaf motif (edge clusters), and the Lace Connector Motif (openwork panels). Motifs are made separately and joined-as-you-go into a long runner with alternating leaves set into the lace. The pattern gives full round-by-round instructions for each motif. Block all motifs flat before joining for best results.
Info :
Gauge: One large maple leaf measures approximately 8.5" (22 cm) wide at the widest point and 7.5" (19 cm) tall when worked with worsted weight yarn and 3.5 mm hook. Lace connector motif measures approximately 4" (10 cm) wide. Adjust hook to match gauge if needed.
— Large Maple Leaf (Focal Leaf) :
Info :
Make 8-10 large leaves for a standard table runner length (pattern photo shows 7 large leaves). Work each leaf flat starting at the stem and working outward symmetrically. Use burgundy, mustard, olive or brown for these leaves as desired. Each indicated 'Round' below refers to a shaping row across the leaf; counts given are total stitch equivalents for that row across both sides combined when applicable.
Round 1 :
Ch 10, sc in 2nd ch from hook, sc in next 3 ch, hdc in next 2 ch, dc in next 2 ch, tr in last ch (7 stitches across foundation) — now continue on opposite side of foundation chain: dc, hdc, sc, sc, sl st to first sc to form a small looped stem (15 sts total including turning points)
Round 2 :
Ch 1, turn, sc in first 2 sts (stem), sc in next 3, hdc in next 2, (dc, ch2, dc) in top of last tr to begin central lobe, work mirror back across: hdc, sc x3, sc x2 (total visual lobe beginning - counts vary by shaping)
Round 3 :
Ch 2 (counts as hdc), hdc in next 2, dc in next 2, tr in next 3 (forming point), ch3, dtr in same top to form a raised central point, then mirror down other side with tr x3, dc x2, hdc x3, sl st to base (leaf width broadened)
Round 4 :
Ch 1, sc in first 3 sts along stem side, (hdc in next 3), (dc, ch2, dc) in each central ch3 space and in central point top, working extra dc clusters into the lobes to widen: total stitch equivalents ~30 across (visual shaping)
Round 5 :
Ch 2, hdc across stem region (3), dc across lower part of lobes (6), tr cluster forming serrated edge: (tr, dc, hdc, sc) repeating on each serration to start point shaping (approx 36 stitch equivalents)
Info :
This is the first Info after a few shaping rows: Use slightly firmer tension for the serrated edges so leaf points hold shape. If you prefer more open lace, use regular tension; for crisp points, go tighter or drop hook size to 3.25mm.
Round 6 :
Work deep lobe stitches: (2 dc, tr, picot, tr, 2 dc) in each lobe peak to shape five primary lobes across the leaf. Stitch equivalents along edge will total roughly 40-44 depending on picot size.
Round 7 :
Ch 1, sc down into each stitch across to tidy the base, spacing small ch-1 loops between serrations in the edge to prepare for detailed veinwork (approx 44 sc equivalents)
Round 8 :
Establish veins: Work a surface line of sl sts starting from stem base extending to each lobe tip: insert hook from front to back along center line and work sl st along center for about 6-8 inches equivalent across motif (no count applies, this is shaping technique)
Info :
Surface slip stitch veins: After finishing back loop of Round 7, ch1 and work sl st on the front surface along center rows to create raised vein lines. Maintain even tension and secure ends with small knots or weave-ins on reverse side.
Round 9 :
Increase points: At each lobe tip work (sc, hdc, dc, tr, picot, tr, dc, hdc, sc) to heighten points — creates pronounced shape; total counts vary but expect 52-56 stitch equivalents along full edge
Round 10 :
Ch 1, sc across base stitches to compress the base slightly: 1 sc in each previous st across the base region (approx 20 sc base), leaving wide lobes free
Round 11 :
Decorative filet rows in each lobe: ch3, skip 1, dc across central lobe spaces creating small mesh windows inside lobes — this trims bulk and adds lacy texture (counts vary per lobe)
Round 12 :
Work shell edging inside each lobe: (5 dc) in central ch-space of each lobe then sc between lobes; this anchors the lobes and prepares for final leaf ribs (approx 60 stitch equivalents)
Info :
If you want a denser leaf, replace dc shells with (hdc x5). For a more open leaf, use (dc x5). Keep consistent choice across all large leaves for cohesive look.
Round 13 :
Create main ribbing: Using front-post dc (FPdc) and back-post dc (BPdc) alternated across central axis to create raised ribs; work 3 FPdc clusters toward each lobe valley and 2 BPdc clusters across ridges (no simple numeric total; aim for symmetrical ribs)
Round 14 :
Refine edges: sc in each st around edge with small picots on each peak: (sc, ch3, sl st in 3rd ch) in each lobe tip — total picots roughly 10-12 along whole edge
Round 15 :
Work small decorative leaves on tip points: in each picot space work (sl st, ch4, sl st) to form tiny looped accents; this helps later joining to lace panel
Info :
Block leaf flat and pin the points out neatly. Use spray starch lightly to hold shape if you prefer crisp points. Blocking here will set your leaf to accurate dimensions for joining.
Round 16 :
Trim and finish stem: turn to back and sc 3 rounds around stem base to strengthen attachment point for sewing into lace panels; fasten off leaving 8" tail for sewing.
Round 17 :
Optional: Using a contrasting color, work a decorative outline around one side of the leaf by slip-stitching in each picot and shell to add visual definition (no count change, fasten off).
Round 18 :
Reinforce central veins with duplicate stitch or surface chain: with yarn needle and matching yarn, embroider central veins from stem to each point. Secure and weave ends on reverse.
Info :
The large leaf sequence uses shaping techniques across many micro-rows rather than strict repetitive stitch counts per round; each finished leaf should have five pronounced lobes and measure close to gauge. When in doubt, compare to a blocked sample leaf as you progress.
Round 19 :
Optional surface texture: Work a round of crab stitch (reverse sc) around the entire leaf edge for a finished look; this may reduce span by 5-8% — block after to regain shape.
Round 20 :
Final finishing: Weave in all ends, trim tails, and steam-block leaf flat. Label each with color name to plan placement on runner.
— Small Accent Leaf (Edge Clusters) :
Info :
Make many small leaves to form the scalloped edge. Each small leaf is designed to sit between larger leaves along the runner edge and nestles into lace mesh. Small leaves are quicker and worked in flat rounds.
Round 1 :
Ch 6, sc in 2nd ch from hook, sc x3, hdc in last ch, turn and sc in opposite side of ch (approx 8 sts total), sl st to complete small loop
Round 2 :
Ch 2, hdc in first 2 sts, dc in next 2, tr in top, picot, tr, dc x2, hdc x2, sl st to base (creates a five-lobed mini leaf, approximately 12 stitch equivalents)
Round 3 :
Ch 1, sc around to even edge including small ch-1 loops between lobes; fasten off leaving 6" tail for joining
Info :
Vary color of small leaves randomly to create a natural fall color palette. Alternate orientation of leaves when joining to create fullness.
Round 4 :
Optional: Add a tiny central vein with surface sl sts from base to tip using contrasting yarn.
— Lace Connector Motif (Openwork Panel) :
Info :
Make modular lace motifs that will join to each other in rows to form the runner background. Each motif is worked in rounds and finishes as a small diamond/medallion approximately 4" wide. Join-as-you-go technique is used on final round to connect motifs to create a long central strip.
Round 1 :
Magic ring, ch3 (counts as dc), work 11 dc into ring, pull ring closed, sl st to top ch3 (12 dc) — this forms central ring
Round 2 :
Ch4 (counts as tr), tr in same st, ch2, [2 tr in next st, ch2] around to create four corner tr pairs; sl st to join (4 tr-pairs, 4 ch2 corners)
Round 3 :
Sl st into ch2 space, ch3, (2 dc, ch2, 3 dc) in same ch2 (creates shell corner), ch1, skip across to next ch2, (3 dc, ch2, 3 dc) in each corner, ch1 between corners; sl st to join (creates square-ish medallion)
Round 4 :
Ch1, sc into next st, *ch5, sc into space between shells (forms mesh arches)* repeat around for 4 arches per motif, sl st to join (counts: 4 sc anchor points, 4 ch-5 arches)
Round 5 :
Working into each ch-5 arch: (sc, hdc, 3 dc, hdc, sc) to form fan; sc between fans — motif becomes more open. Final stitch count per round: approx 36 stitch equivalents
Info :
Make a sample motif and block flat. Measure motif width and adjust number of motifs you need for desired runner length. Mark corners with stitch markers to help with join locations.
Round 6 :
Ch3, dc into center of each fan across, ch3 between each dc to form joinable loops around motif edge — prepare for join-as-you-go on next round
Round 7 :
Join-as-you-go round: Work sc into loop spaces; when meeting a previously completed motif edge, sl st to join motifs together and continue around. Work consistent joining points at each corner and side to keep motif square (approx 40 join points per motif when fully joined)
Round 8 :
Finish edge: sc around all free edges, adding small picot (ch3 sl st in 3rd ch) at each corner to produce tiny points for small leaf attachment; fasten off leaving long tail for final edging if needed
Info :
When joining motifs, use the long tail method or sl st join to create neat seams. If you prefer a visible seam, use whip stitch with matching yarn. Keep motif orientation consistent so picot points face outward for small leaf placement.
— Assembly & Join-As-You-Go Layout :
Round 1 :
Plan layout: For a standard 14" x 60" runner, assemble 12 central lace motifs in a single long strip (join motifs end-to-end). Align large leaves to sit centered over every 2nd motif or as photo reference (spacing approx every 8-10 inches). Small leaves will be placed along both long edges at joining picot points.
Round 2 :
Join central motifs lengthwise: With right sides facing, perform join-as-you-go on Round 7 of connecting motifs (see Lace Connector Motif Round 7). Secure firmly with sl sts and check alignment frequently (no strict numeric count; maintain corner to corner matching).
Info :
When joining, place stitch markers at exact locations where each large leaf's stem will sit so you can sew the stem through the lace panel at the correct location. I recommend pinning a blocked leaf over the motifs before sewing to confirm placement visually.
Round 3 :
Attach large leaves: Position a large leaf centered over two motifs (center span). Using the long tail left on the leaf, sew through the lace mesh anchors: pick up several stitches in the sc anchor points of the lace to secure the stem and base of the lobes. Sew in a horizontal ladder stitch across the stem base and then anchor 6-8 evenly spaced stitches around the leaf base to secure lobes. Repeat for each large leaf (fasten off and weave tails).
Round 4 :
Attach small leaves to edge picots: Using long tails from small leaves, sew each small leaf to picot points along both long sides of the lace strip. Place leaves alternating orientation and colors to create a natural fall edge. Anchor with 3-4 small stitches per small leaf tail.
Info :
Use blocking pins during assembly — pin each leaf into position and step back to check symmetry. Sewing technique: use a yarn needle and mattress stitch or ladder stitch along the stem to prevent flipping; then secure outside lobes with single stitches to anchor into picot loops or sc spaces in lace.
Round 5 :
Secure junctions: Where large leaves overlap two motifs, add an extra anchoring stitch at each motif seam to prevent gaps; insert needle through both motif seams and leaf base so the leaf helps flatten the seam.
Round 6 :
Optional reinforcement: On reverse, run a line of whip-stitch along length of runner through motif backs to ensure the join-as-you-go sl st seams are reinforced, particularly if runner will be used frequently.
Info :
If your runner will support weight from dishes, reinforce bottom seams with a narrow fabric backing strip sewn on with matching thread to distribute stress. This step is optional and reduces breathability slightly but is practical for heavy use.
— Scalloped Picot Edging & Final Border :
Round 1 :
With cream yarn and 3.5mm hook, join at any long-side corner sc. Round of sc: sc evenly along long edge across all motifs (approx 220 sc along entire length depending on motif count). Place 1 sc in each sc or join point.
Round 2 :
Picot scallops: *ch4, sl st in 3rd ch (picot), sl st to next sc, ch4, turn and work (sc, hdc, 3 dc, hdc, sc) into central ch-space to create shell; sl st to next sc* — repeat across entire edge to form scallops (approx 40 scallops along both sides combined)
Info :
When making scallops, adjust spacing by working one or two extra sc between shells if your motif spacing requires it. Check scallops lie flat; if they spiral, block again and adjust tension on next repeat.
Round 3 :
Attach accent tiny leaves in scallop tips: Use remaining small leaf tails to stitch small leaves into the center of each scallop. Place one or two leaves per scallop for dense edging as shown in photo. Secure with 3-5 small stitches each.
Round 4 :
Optional decorative border: Work one round of reverse single crochet (crab stitch) around entire runner to give a braided look; this tightens the edges and frames the runner (fasten off and weave ends).
Info :
Final blocking: Once all pieces are joined and edging is complete, wet-block the entire runner pinned to a flat surface to even out joins and scallops. Allow to dry fully before using. Light starch can be applied to hold shape for display.
— Finishing Touches & Care :
Round 1 :
Weave in all tails on reverse side, trimming close to fabric. Secure long tails with a few extra back-and-forth stitches to prevent slipping.
Round 2 :
Steam lightly to remove any kinks and settle seams. Avoid harsh pressing which can flatten the 3D leaves; use steam from a distance or press through a damp cloth.
Info :
Care: Hand wash gently in cool water with mild detergent and re-block flat to dry. Avoid machine washing to preserve delicate join points and three-dimensional leaves.
This Autumn Maple Leaf table runner pattern brings the warm glow of fall into your home with delicate lace and dimensional leaves. Each motif is a little piece of seasonal charm — cluster them, mix colors, and make a runner that's truly yours. The join-as-you-go construction and detailed finishing give a professional look, while the palette of cream, burgundy, mustard and olive feels timeless. I hope you enjoy the meditative pleasure of making each leaf and seeing them come together on your table! 🍁🧶