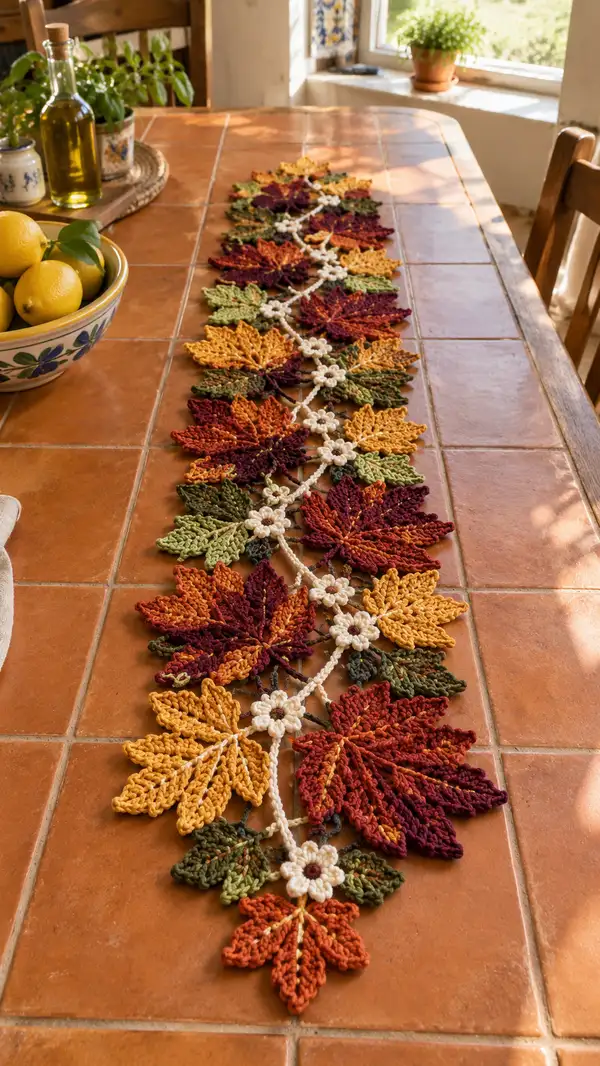
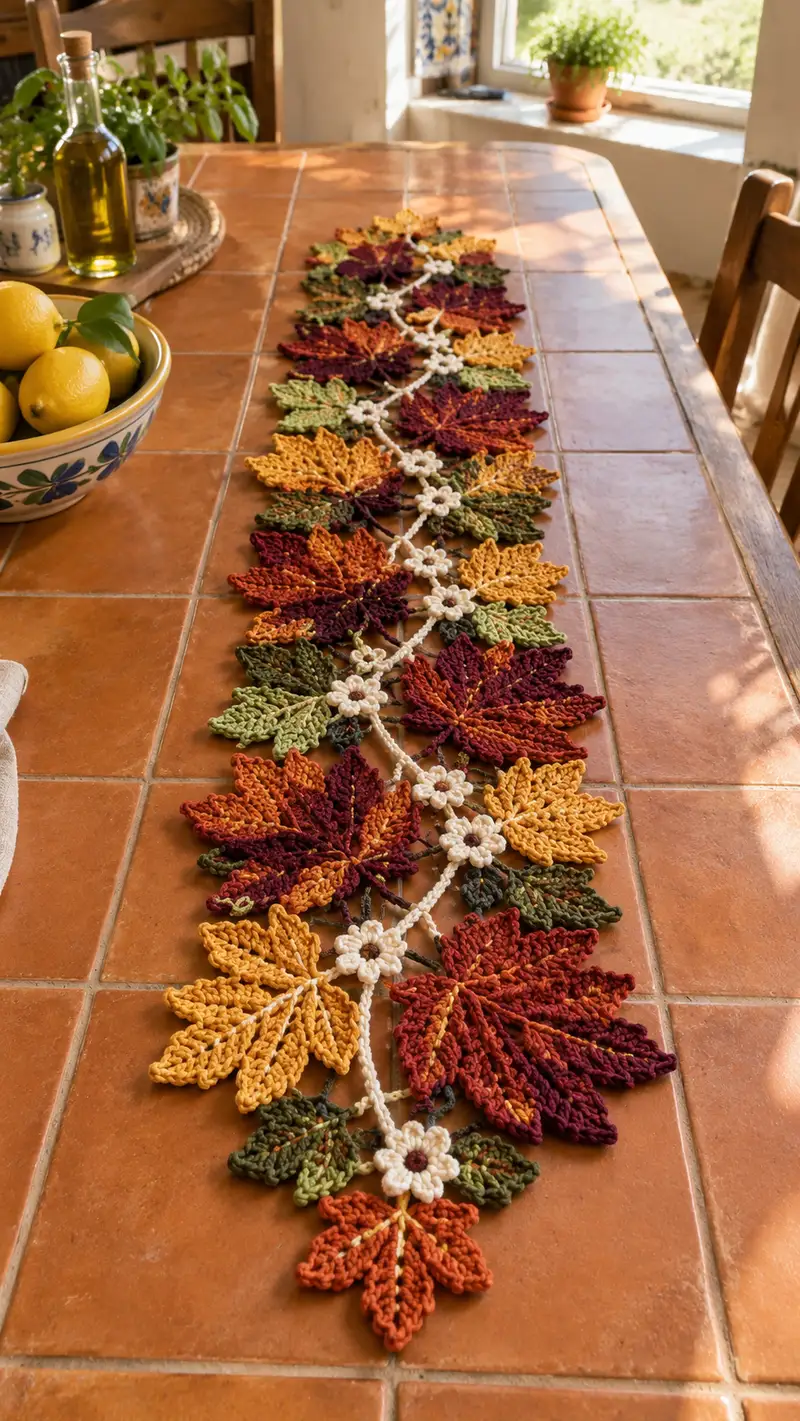
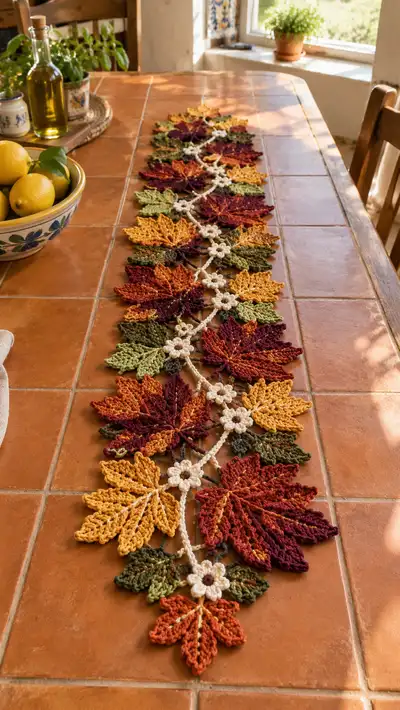
Bring autumn indoors with this intricate Mustard Burgundy Maple Leaf Table Runner. A long, elegant runner made from layered crochet maple leaves, small textured green leaves and ivory blossom connectors that create a delicate vine down the center. Warm mustard, rich burgundy, burnt orange and olive tones combine for a cozy harvest look—perfect for seasonal dinners or a warm everyday accent.
Progress Tracker
0% Complete
— Overview :
Info :
This pattern builds the table runner from three main motifs: the Large Maple Leaf motif (worked flat), the Small Accent Leaf motif, and the Petite Ivory Flower motif. Leaves are crocheted individually then joined along a central chain-vine. The pattern includes instructions for finishing, blocking and joining. Gauge is not critical; keep consistent tension throughout.
Info :
Suggested final runner length shown in photo ≈ 48-54 inches depending on spacing and number of leaf repeats. You can add or remove leaf motifs to customize length. For the photographed runner, plan for roughly 12-14 large leaves plus 12-14 small leaf clusters and 12-14 flowers in alternating positions.
— Large Maple Leaf (Make multiples in desired colors) :
Round 1 :
mr, 7 sc into magic ring, pull tight and join with sl st to first sc (7)
Round 2 :
2 sc in each st around (14)
Round 3 :
(1 sc, inc) x 7 (21)
Round 4 :
(2 sc, inc) x 7 (28)
Round 5 :
(3 sc, inc) x 7 (35)
Info :
This small round disk forms the anchor ring for the seven lobes of the maple leaf. The 7 base points correspond to the lobes: center top, two upper lateral, two mid lateral and two lower lobes. Keep the base flat and even; if it domes, block it flat before continuing.
Round 6 :
1 sc in each st around (35)
Round 7 :
*Ch 8, sl st into next base stitch (this creates a long loop for a lobe base); repeat from * around to create 7 loops, join with sl st to first sl st (7 loops)
Info :
Each ch-8 loop will become a lobe worked back along the chain. Make sure chains are all the same length for symmetrical lobes. Use a marker to note the first loop if desired.
Round 8 - Lobe 1 (Work into first chain loop - do not join to base until lobe is completed) :
Attach yarn at base of first loop, ch1, sc in base, ch2, (hdc, dc, 2 tr, dc, hdc) across chain to create a central point, ch2, sc back into base stitch; fasten off lobe. (Lobe measures: 9 shaping sts plus base)
Round 9 - Lobe 2 :
Attach yarn to second loop and repeat Round 8 shaping for each loop in sequence. Work identical shaping into each of the 7 loops. (Repeat 7 times)
Info :
When working lobes, maintain identical stitch counts on each side of the lobe to create mirrored points. Work gently to avoid puckering at the join. Keep yarn tails managed or weave them later on the underside.
Round 10 :
After all 7 lobes are worked, rejoin at base with one round of sc around the central ring: join yarn at any base stitch, 1 sc in each base st and behind each lobe join (35)
Round 11 :
(1 sc, inc) x 11, 1 sc (47)
Info :
This round expands the anchor band a touch to give a little extra surface for the veins to attach. The count here intentionally increases to 47 so we have more space between lobes to work raised veins in later rounds.
Round 12 :
1 sc in each st (47)
Round 13 :
Begin main vein placement. Mark seven approximately evenly spaced stitches across the ring (roughly every 6-7 sts). Using surface slip stitch technique or working in FLO, create the central vein lines: insert hook from front to back in marked stitch, pull up loop and work 8 sc back towards lobe center, then return to the ring. (Create 7 veins - each vein worked in situ, counts do not change on ring)
Info :
Surface slip stitch veins: with yarn held at front of work, insert hook into first marked ring stitch, pull up loop, ch1, sl st forward along the path of the vein towards the tip of the lobe, anchor at the tip with sl st, then fasten yarn and continue to next marked stitch. This creates a raised ridge without altering stitch counts.
Round 14 :
Work a decorative edge to define each lobe: *At the base of each lobe, attach yarn, ch3, (sc, picot, sc) across lobe edges following the outermost edge turning at the tip to form scalloped ridges; fasten off and repeat at each lobe.* (7 scalloped edges)
Info :
Picot = ch3, sl st into 3rd ch from hook gives leaf notch detail. Keep picots small so they do not catch on surfaces. If you prefer a smoother edge, substitute (sc, hdc, sc) instead of picots.
Round 15 :
Using contrasting thread or same color, embroider fine veins radiating from the base centre towards lobes: with yarn needle tack 3-5 straight lines per lobe. Secure ends at the back. (Decorative only, no stitch count)
Info :
If you prefer crocheted raised veins, use a chain of 6-10 sts worked from the ring to the lobe tip and anchor with a sl st forming a visible braid. Keep the veins consistent in length across all lobes.
Round 16 :
Fasten off and weave in all ends on the underside. Block each leaf flat by pinning to shape and lightly misting or wet-blocking. Allow to dry fully before joining. (Finish)
Info :
Blocking is essential to make lobes lay flat and match neighboring leaves during assembly. Use mild steam or damp towel pressing if using cotton-blend yarn.
— Small Accent Leaf (Make multiples in olive/green shades) :
Round 1 :
mr, 5 sc in ring, pull tight and join (5)
Round 2 :
inc in each st around (10)
Round 3 :
(1 sc, inc) x 5 (15)
Round 4 :
1 sc in each st around (15)
Round 5 :
Ch8, sl st to opposite side of base to form a leaf loop across center. Attach yarn at base of loop, ch1, sc, hdc, dc, hdc, sc across chain, anchor with sl st to base. Fasten off loop. (Small leaf formed)
Info :
Small leaves are worked as a single lobe and are roughly half the scale of the large maple leaf lobes. These are used to fill gaps between large leaves and to add green contrast.
Round 6 :
Optional: Work a picot edge of (sc, picot) around outer edge for texture. Fasten off and weave in ends. (Finish)
Info :
Make clusters of 2-3 small leaves to mimic small leaf bunches seen between large leaves in the photo. Block small leaves lightly for uniform size.
— Petite Ivory Flower (Make multiples to join vine junctions) :
Round 1 :
mr, 6 sc into magic ring, pull tight but do not join (6)
Round 2 :
*Ch3, sl st in next st* around to make 6 small loops, join with sl st (6 loops)
Round 3 :
Work petals: in each loop work (sc, hdc, 2 dc, hdc, sc), fasten off after last petal. (6 petals)
Round 4 :
With brown contrasting yarn, embroider a tiny French knot or small circular sl st cluster at center to create a seed center; weave ends to back. (Decorative)
Info :
These small flowers anchor the vine and provide a bright contrast between warm leaves. Make many—one flower per leaf junction in the photographed runner.
— Vine Connector Chain (Make many lengths for joining) :
Round 1 :
Using cream/ivory yarn, ch 18 for each vine segment for spacing between adjacent large leaf motifs. This length is approximate; adjust to taste. (Chain 18)
Round 2 :
Turn, 1 sc in 2nd ch from hook and in each ch across (17)
Round 3 :
Work a decorative rope: *ch3, sl st in next st* across to give a beaded rope look; fasten off. (Decor detail)
Info :
Instead of a solid chain, you may use a crocheted narrow tube (i-cord style) or a chain of picots to mimic the photographed textured vine. Keep vine lengths consistent between leaves for even spacing.
Round 4 :
Optional: For a raised rope, make a twisted chain by chaining the required length, then twisting and slip-stitching along one side to create a rope tube. Fasten off and set aside.
Info :
Make several vine segments ahead of time and block them gently to maintain shape for easier joining. The photographed runner uses a slightly bulky cream yarn for the vine for contrast.
— Decorative Veins and Contrast Stitching :
Round 1 :
Attach a contrasting mustard or darker tone at the underside center of each large leaf base, work a surface chain of sl sts from base to tip to create a raised central vein. Repeat for secondary veins branching out to lobes. (Surface stitch only)
Info :
Use a yarn color one or two shades darker than the leaf color for vein embroidery to create depth and the impression of stitched veins in the photo. Keep lines symmetrical across the leaf.
— Joining Leaves into the Runner (Assembly Prepping) :
Round 1 :
Layout your leaves in desired sequence on a flat surface, alternating colors (mustard, burgundy, orange, burgundy, mustard, etc.). Place small green leaf clusters between most large leaves. Position petite ivory flowers at the intersection of vine and leaf base.
Info :
Take a photo of your layout before joining; this helps keep the sequence and orientation consistent. Pay attention to leaf orientation—the leaf tips should alternate left-right to create a natural staggered arrangement.
Round 2 :
Begin at one end of layout: Attach vine segment to underside of the first large leaf base using whip stitch and invisible ladder stitch through the center base stitches (approximately 4-6 secure passes). Fasten off but leave tail for weaving into next join.
Round 3 :
Center a petite ivory flower over the vine join and sew through the flower's underside into both the vine and the leaf base using small stitches to secure, taking care not to pull too tight. Repeat between each large leaf join.
Info :
When sewing the vine to leaves, keep the vine slightly raised over the surface (do not flatten the leaves). This gives the runner the dimensional look in the photo. Use hidden stitches at the back of the motifs for a clean finish.
Round 4 :
Between each pair of large leaves, position 2–3 small accent leaves roughly angled outward and sew in place through their base only, so they appear to sprout from behind the large leaf. Anchor with a small stitch into the vine and the underside of the neighboring leaf base.
Round 5 :
Continue joining leaves, small leaf clusters and flowers until runner reaches desired length. End with a small decorative leaf cluster and a single flower as a finishing flourish. Fasten off all threads and weave in ends to the underside.
Info :
Maintain consistent spacing between leaves—photographed spacing is approximately 2 inches between largest adjacent lobes. Use measuring tape while laying out to keep even intervals.
— Final Finishing and Blocking :
Round 1 :
Pin entire runner to blocking surface keeping shape and spacing even. Gently mist with water and allow to dry completely to set final shape. (Finish)
Info :
Once dry, lightly steam the runner if needed to flatten any stubborn curls—do not press fabric directly; use a pressing cloth or steam from above to avoid crushing the motif texture.
Round 2 :
Weave in any remaining tails on the underside and trim close. Optionally, tack a few hidden stitches along the vine to keep it centered on the table when in use.
Info :
For regular table use, consider adding a non-slip felt strip underneath the runner center to keep it from shifting. If the runner will be laundered, test how your yarn behaves with water and wash gently by hand only if suitable.
— Variations and Customization :
Round 1 :
Change leaf colors for different seasons: bright green and pink for spring, winter whites and silvers for holiday, or monochrome for neutral decor. To change size, switch yarn weight and adjust hook size (thicker yarn = larger leaves).
Info :
To lengthen the runner, add more leaf-and-vine repeats or insert extra small leaf clusters between large leaves for a more airy look. For a denser runner, add additional small leaves per junction or use smaller spacing between large motifs.
Round 2 :
Optional edging: After all joins are complete, work a decorative border down both long sides by slip-stitching through the outermost picot edges with a single strand of contrasting yarn in blo across the underside for a tidy finish.
Info :
This pattern intentionally keeps join stitches minimal and invisible from the top; use small, tight stitches during assembly to preserve the clean look of the motif tops.
This mustard burgundy maple leaf runner is a celebration of cozy autumnal texture and color—each leaf and little flower is a small handmade treasure that joins to create a striking table accent. I hope every stitch in this runner brings you a little warmth and satisfaction. Display it for seasonal dinners or keep it out year-round for a natural, crafted touch. 🧶🍂✨