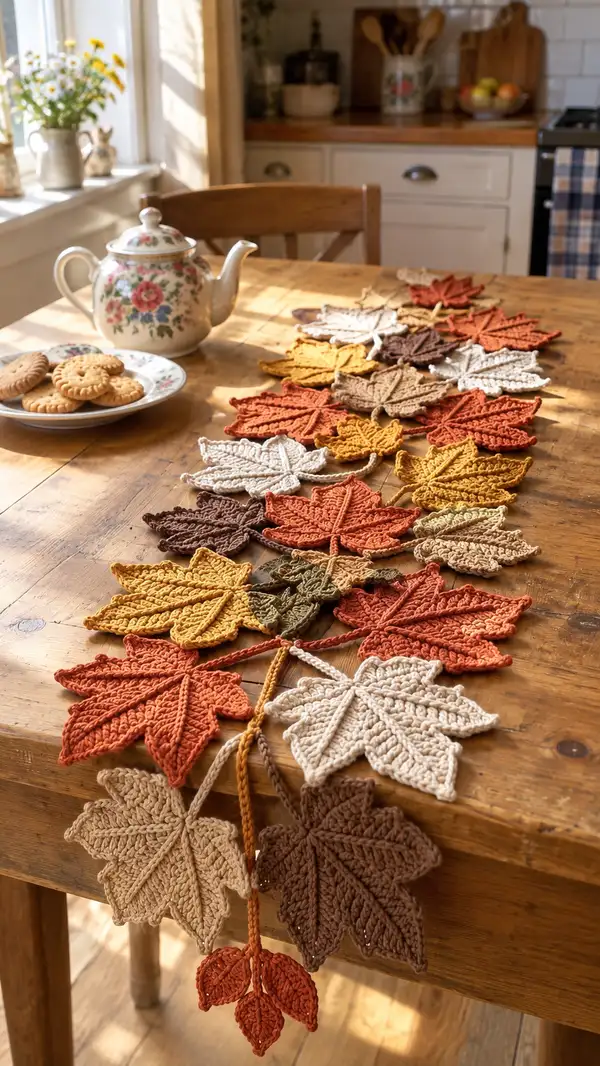
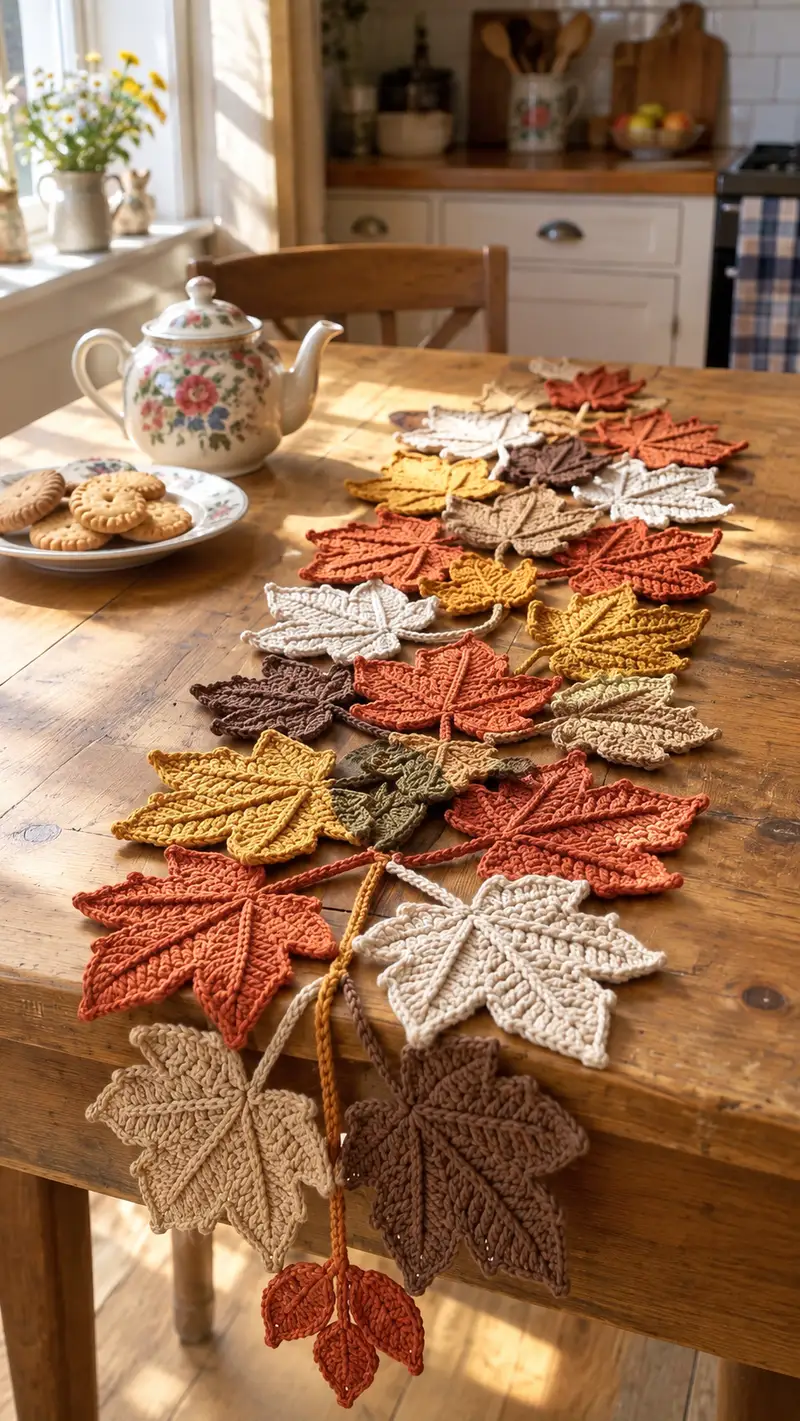
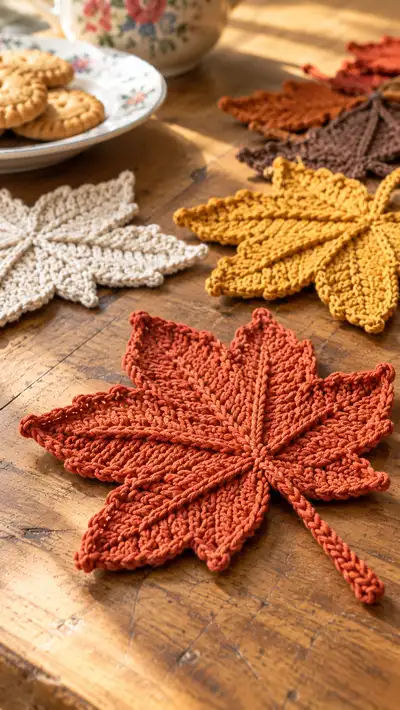
A warm, vintage-inspired garland of crocheted maple leaves in a palette of burnt orange, mustard, olive, cream, and chestnut brown. This pattern walks you through making three leaf sizes plus small leaflets and a braided stem to link them together — perfect as a table runner, mantle swag, or door hanger. Textured veins and a raised ridge technique give each leaf realistic detail and depth. Intermediate-level instructions with lots of tips make this a lovely seasonal make.
Progress Tracker
0% Complete
— Materials & Gauge :
Info :
Gauge is not critical for this decorative project, but using worsted weight yarn with a 4.0mm hook should yield leaves approximately 13-16cm (5-6.5") across for the large leaf. Smaller leaves will scale accordingly. Adjust hook size for crisper or looser texture.
— Techniques to know :
Info :
You will use standard crochet stitches plus front-post double crochet (fpdc) to create raised veins. Many leaves are worked in rounds to create a star-shaped center, then each 'lobe' is worked in rows outward. Use stitch markers to mark lobe starting points; blocking is recommended to shape points.
— Large Maple Leaf (Make 6-8 for a full runner) :
Round 1 :
6 sc in magic ring (6)
Round 3 :
(1 sc, inc) x 6 (18)
Round 4 :
(2 sc, inc) x 6 (24)
Round 5 :
(3 sc, inc) x 6 (30)
Round 6 :
(4 sc, inc) x 6 (36)
Round 7 :
(5 sc, inc) x 6 (42)
Round 8 :
(6 sc, inc) x 6 (48)
Round 9-12 :
1 sc in each st around (48)
Info :
Place stitch markers at every 6th stitch to mark 8 lobe starting points (48/8 = 6). These markers mark the center base for each of the 8 lobes (points) of the maple leaf.
Round 13 :
1 sc in each st around (48). Use fpdc in the first st of each marked section to begin the raised vein: [fpdc around st below, 5 sc] repeat 8 times (48)
Round 14 :
1 sc in each st around (48). Continue fpdc along the center stitch of each 6-stitch section to build a vertical ridge; insert fpdc around the corresponding stitch of the previous round so the ridge stacks (48)
Info :
Working fpdc does not change stitch count but builds a raised central vein. Keep consistent placement by always working the fpdc into the same stitch number of each section (use markers if needed).
Round 15 :
1 sc in each st around (48) with fpdc on center stitch of each marked section (48)
Round 16 :
1 sc in each st around BLO (48)
Info :
Switching to BLO (back loops only) for one or two rounds helps the central ridge stand out and forms a subtle ridge base for each lobe without changing stitch counts.
Round 17 :
1 sc in each st around (48)
Info :
We will now create individual lobes worked outward from the center. Each lobe is worked in rows outward, anchored back to the round base by slip stitches. You will work 8 lobes in sequence. After completing each lobe, join back to the base and move to the next marker.
Round 18 (Lobe 1 - Row 1) :
From marker 1, ch7 (counts as turning chain + 6), working along the foundation of 6 base stitches: sl st into next base st, 1 sc into next base st, 1 hdc into next base st, turn (this creates a short foundation bridge). You will now work 7 rows to shape the lobe tip. (base remains 48)
Round 19 (Lobe 1 - Row 2) :
Work into ch7 bridge: 1 sc in first ch, 1 hdc in next 2 ch, 3 dc in center 3 ch, then decrease back: 1 hdc, 1 sc (7 sts in lobe tip). Sl st to base at the next base stitch to secure and continue in round to next marked section (48)
Round 20 (Lobe 1 - Row 3) :
Ch1 on tip, turn: 1 sc across lobe tip row (7 sc), sl st to base. Maintain base stitch counts as you anchor (48)
Round 21 (Lobe 1 - Row 4) :
Ch1, fold tip slightly and work 1 sc, 1 hdc, 1 dc in center top stitch to form a pointed tip, then 1 hdc, 1 sc back (5 sts for final tip shaping). Sl st to base and tighten any loose chains. Return to base round (48)
Info :
For each lobe you will use the same sequence: Ch7 foundation, build the tip over 4 rows then secure back to the base with a slip stitch. Keep each tip consistent by counting stitch groups carefully.
Round 22-49 :
Repeat Rounds 18-21 for Lobes 2 through 8, working from each marked base stitch around the circle. After finishing Lobe 8, you will have 8 outward-pointing lobes attached to the round base.
Info :
Take a break every two lobes to compare sizes. Pin lobes flat on blocking mat to match shapes before moving on to ridge detailing.
Round 50 :
Work 1 sc in each base stitch around to neat the join line where lobes were secured (48)
Round 51 :
Using contrasting color (optional), work 1 sc in each st BLO around to create a subtle scalloped edge (48)
Round 52 (Vein definition) :
Work fpdc down the center of each lobe: insert hook around the base stitch that forms the center of each lobe and work 6 fpdc in a straight line down the middle of each lobe toward the base, fasten with sl st to secure. Repeat for each lobe (raised veins do not change main stitch count).
Info :
Vein rows are worked along the surface; they do not alter the shaped lobe stitches but add raised texture. Use a slightly smaller hook if you want the ribs to be very pronounced and tight.
Round 53 (Stem join) :
At the base of the circle, find the two base stitches between lobe 4 and lobe 5; ch20 to form a stem cord and sl st back at the first base stitch to secure (stem will be braided later). Fasten off, weave ends. This creates an attached stem that sits behind the leaf.
Info :
For a more robust stem, make the cord longer and braid multiple cords together (see 'Braided Stem' section). Make 6-8 large leaves for a full runner depending on spacing.
— Medium Maple Leaf (Make 8-10) :
Round 1 :
6 sc in magic ring (6)
Round 3 :
(1 sc, inc) x 6 (18)
Round 4 :
(2 sc, inc) x 6 (24)
Round 5 :
(3 sc, inc) x 6 (30)
Round 6-8 :
1 sc in each st around (30)
Info :
Mark 6 sections for lobes (30/6 = 5). Medium leaves are slightly simpler: they have 6 lobes instead of 8, and each lobe uses a ch6 foundation for a faster shape.
Round 9 (Lobe foundation) :
From marker, ch6, sl st into next base stitch, 1 sc into next base stitch, turn to work lobe rows (base remains 30)
Round 10 :
Work into ch6: 1 sc, 1 hdc, 1 dc, 1 hdc, 1 sc (5 sts). Sl st to base. Repeat for each of the 6 lobes (30)
Round 11 :
Ch1, turn on each lobe tip, sc across the 5 sts to tighten tip and create a small point. Sl st to base after each lobe (30)
Round 12 :
Work 1 sc in each base st around to smooth joins (30)
Round 13 :
Using fpdc, work a line of 4 fpdc centered on each lobe to form a raised vein (fpdc do not change base stitch count) (30)
Round 14 :
Ch14 at base to form a small stem cord, sl st to secure to base. Fasten off (30)
Info :
Medium leaves are great for filling between large leaves and adding color contrast. Keep lobe sizes even by counting each lobe's stitches and blocking after finishing.
— Small Maple Leaf / Leaflet (Make 10-14) :
Round 1 :
6 sc in magic ring (6)
Round 3 :
(1 sc, inc) x 6 (18)
Round 4-5 :
1 sc in each st around (18)
Round 6 (Lobes) :
Mark 3 even sections (18/3 = 6). From marker, ch5, work a small tip over 3 rows: (ch5: sc, hdc, dc, hdc, sc), sl st back to base. Repeat for 3 lobes (18)
Round 7 :
1 sc in each st around smoothing joins (18)
Round 8 :
Work an fpdc centered on each small lobe for a little vein line (fpdc do not change stitch count) (18)
Round 9 :
Ch10 at base to make a short stem, sl st to secure and fasten off (18)
Info :
Small leaves and leaflets are ideal to cluster at the end of the braided stem for a realistic droplet look. Make several in varied colors for visual interest.
— Tiny Three-Leaf Sprig (Make 6-10) :
Round 1 :
Ch6, join with sl st to form small ring, ch1 (6)
Round 2 :
Into ring work 6 sc (6)
Round 3 :
Make three tiny petals off three adjacent stitches: from st1 ch5, work sc, hdc, sc, sl st back; skip one st and repeat twice more so you have three tiny leaflets attached. Maintain central base stitches (6)
Round 4 :
Sl st to base, ch8 for a short connecting stem, fasten off. These make lovely clusters for the end of the garland (6)
Info :
These sprigs add a finished, organic look — attach in groups of 2-3 to tail ends or tuck between larger leaves.
— Braided Stem & Cord (Make 1 long cord or several short cords) :
Round 1 :
Ch120 (approx 1m long) or ch40 for short segments. Fasten off leaving long tails for joining.
Round 2 :
Make three cords: ch120 twice more (three cords total). Combine three cords and braid tightly; knot ends and weave tails through the knot to tidy (cord length depends on desired runner length)
Info :
Alternatively make an I-cord style cord by working a narrow tube with sc in a foundation chain tube and gathering. Braiding is quicker and gives a rustic look.
Round 3 :
When braiding, leave 15-20cm of tail at regular intervals to attach leaves; you will thread and sew leaf stems through these anchors.
— Decorative Edge & Joining (Finishing each leaf and attaching to cord) :
Round 1 :
For each leaf, weave in the tail from the stem cord through the base area and tie a small slip knot on the back side, then secure with a few whip stitches so the leaf sits flat on the cord.
Round 2 :
Space leaves along cord: typical spacing is 8-12cm between larger leaves, 4-6cm between mixed small ones. Pin layout before attaching to make a pleasing composition.
Round 3 :
Secure each leaf by stitching through the base of the cord and the leaf stem with strong yarn and a yarn needle. Make 6-8 small whip stitches and knot on the backside. Weave ends thoroughly.
Info :
If you prefer a removable arrangement, attach leaves using small loops of contrasting yarn that can be slipped over the cord, allowing configuration changes.
— Optional Edge Scallop for Each Leaf :
Round 1 :
With contrasting color, join at any outer tip stitch, ch1, *sc in next 2 sts, ch2, sl st in same st (creates picot)* repeat around each lobe tip to create a delicate scalloped edge. The contrast highlights edges without altering shape.
Info :
Edge picots are optional but add a hand-stitched, vintage look. Use same or slightly lighter yarn to keep scale subtle.
— Blocking & Shaping :
Info :
Pin each leaf to a blocking mat, gently steam or spray with water and shape the lobes to crisp points. Allow to dry thoroughly. Blocking opens stitches slightly and helps veins and lobes keep their shape on the runner.
— Assembly Overview (Complete runner) :
Round 1 :
Lay out your braided cord on a table and pin in place. Plan a focal point by placing larger leaves centrally; cluster medium and small leaves toward the ends for graduating color flow.
Round 2 :
Sew each leaf to the cord using corresponding stem loops, spacing as planned. Add small sprigs in clusters of 2-3 for a natural look. Secure knots and weave ends thoroughly to hide tails.
Info :
For longevity, sew through the cord center rather than only wrapping around to ensure leaves stay put when runner is handled or moved.
— Alternative: Make Placemats :
Info :
Instead of a long braided runner, make 4-6 large leaves and use them individually as autumn placemats. Stiffen lightly with fabric stiffener for extra durability and washability.
Final Info :
Weave all ends, give a final light steam block, and hang your garland or lay on a table. Enjoy the seasonal warmth!
Completing this garland is such a comforting, rewarding project — each leaf works up quickly yet adds layered, tactile interest to your home. The textured veins bring a little piece of autumn indoors and the braided cord ties everything together in a cozy rustic way. Whether draped across a farmhouse table or used as a mantel swag, this handmade runner will be a seasonal favorite. 🧶🍂✨