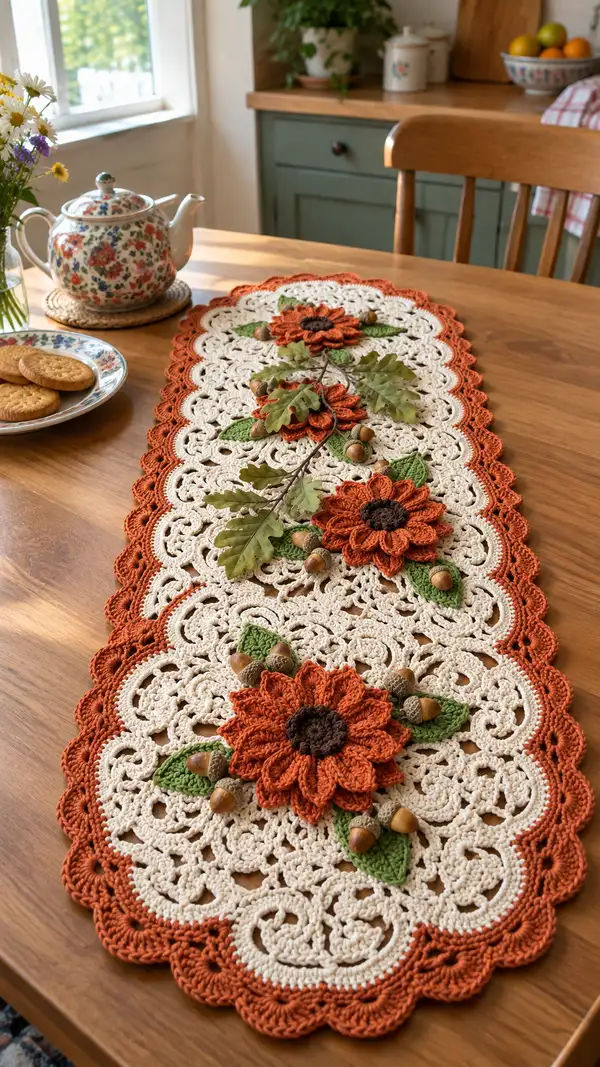
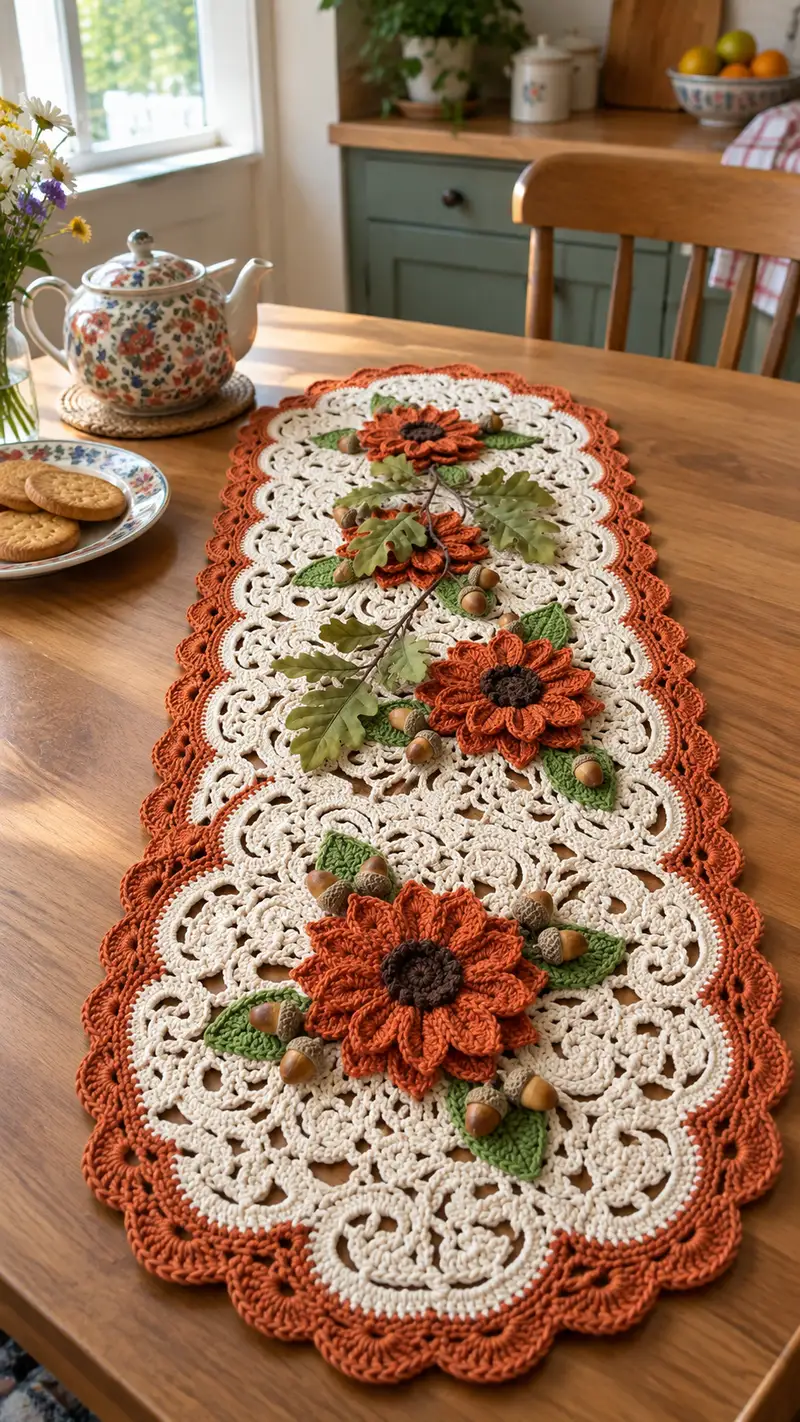
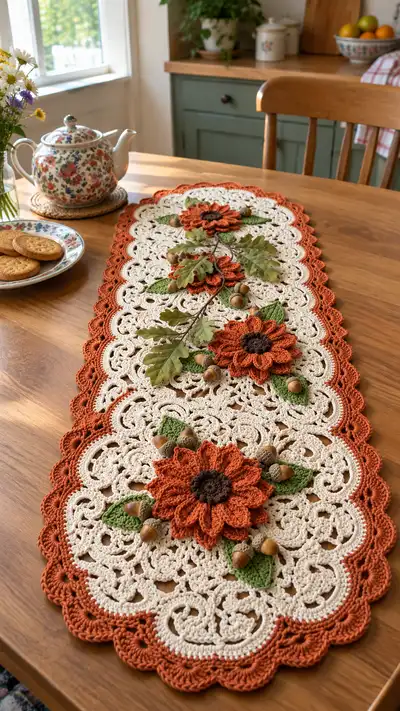
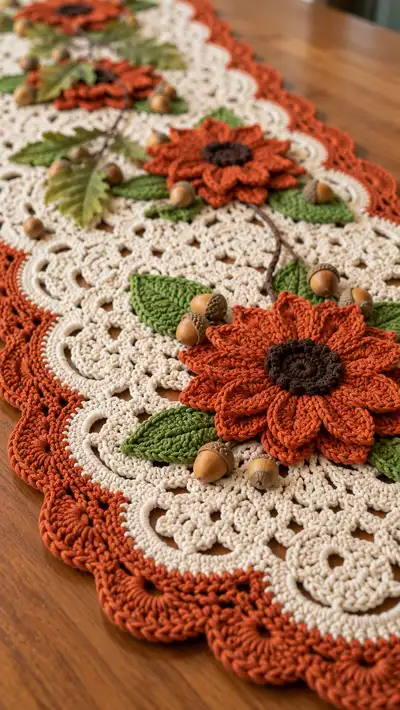
A long, elegant crocheted table runner in warm autumn tones: creamy lace medallions framed with a rust scalloped edge and topped with layered sunflower appliques, green leaves and acorn accents. The runner is richly textured with openwork motifs and dimensional petals for a cozy seasonal centerpiece. Detailed, step-by-step instructions guide you through each medallion, joining, border and applique so you can recreate this heirloom piece for your home.
Progress Tracker
0% Complete
— Pattern Overview :
Info :
This runner is constructed from repeated circular lace medallions joined into an elongated row of six medallions (or expand for a longer runner). Each medallion is worked in the cream color. After all medallions are completed and blocked, join them with a slip-stitch joining round that creates an oval runner. Add an inner round to tidy the joins, then work a scalloped rust border around the whole piece. Make three layered sunflower appliques with brown centers, rust petals and green leaves and sew them along the centerline as pictured. Add acorn accents or small wooden beads as desired.
— Lace Medallion (Make 6) :
Round 1 :
6 sc in magic ring (6)
Round 3 :
(1 sc, inc) x 6 (18)
Round 4 :
(2 sc, inc) x 6 (24)
Round 5 :
(3 sc, inc) x 6 (30)
Info :
Use a stitch marker at the start of each round and move it up as you work. Keep tension consistent; this medallion forms the basis for the runner so all medallions should be the same size after blocking.
Round 6 :
(4 sc, inc) x 6 (36)
Round 7 :
(5 sc, inc) x 6 (42)
Round 8 :
(6 sc, inc) x 6 (48)
Round 9 :
1 sc in each st (48)
Round 10 :
*ch3, skip 1 st, sc in next st* repeat around (48 ch-3 loops formed)
Info :
This round of ch-3 loops creates the beginning of the lace arches. Count loops to ensure you have the same number in each medallion; if your tension is tight, use a slightly larger hook for rounds forming openwork (or loosen your holding).
Round 11 :
In each ch-3 loop: [sc, ch3, sc] (48 shells) (144 stitches in loops counted as shell units)
Round 12 :
*sc in next 2 sc, ch5, sl st in ch-3 of previous shell, ch5, sc in next 2 sc* repeat around to create interlocking arches (48)
Round 13 :
Work into ch-5 spaces: (sc, ch3, 3 dc, ch3, sc) in each ch-5 to form larger petals/arches (48 petal motifs)
Info :
Use pressing/blocking pins to shape these arches after finishing the medallion; wet-block each medallion to a consistent diameter (measure across from edge to edge) so joins will be even.
Round 14 :
1 sc in each st across the top of the arches to create a tidy edge (count remains 48)
Round 15 :
*(sc, ch2, sk 2, sc) into each arch top to create decorative open loops* repeat around (48 decorative loops)
Round 16 :
Work (dc, ch1, dc) into each decorative loop across to add lace texture (48 mini arches)
Round 17 :
1 sc in each stitch (48)
Round 18 :
*(sc, ch4, sc) in every 4th stitch along to start the scallop foundation* repeat around (12 larger ch-4 loops)
Round 19 :
Into each ch-4 loop: [sc, 3 dc, sc] which will form 12 larger scallop petals (12 scallops)
Info :
These larger scallops are where medallions will join; keep tension even so joining stitch counts align. Mark one scallop as the alignment point (top) for consistent joins between medallions.
Round 20 :
1 sc in each st around the scallops to secure (48)
Round 21 :
*(sc, ch2, sc) around the point of each scallop to accent each petal* repeat around (12 accent points)
Round 22 :
1 sc in each stitch to tidy the round (48)
Round 23 :
*Work a picot at the tip of every 3rd scallop: sc in next st, ch3, sl st in 3rd ch from hook* repeat around to add tiny decorative points (12 picots)
Round 24 :
1 sc in each stitch to stabilize the picot round (48)
Round 25 :
Optional decorative round: In cream, work (fpdc around the base of each scallop, then dc in next 3 sts) to create a textured band (48)
Info :
Fasten off leaving a long tail for joining if you prefer to join medallions by whip stitch. I recommend leaving about 25-30cm to make joining easier without knotting or re-threading multiple times.
— Joining Medallions into Runner :
Info :
Layout your six medallions in the order they will be joined: medallion centers aligned along a straight centerline with scallops meeting scallops. Pin them on a blocking mat in correct spacing, then either slip-stitch join in the cream color to create a secure seam or sew using whip stitch for less visible joins.
Round 1 :
With right sides up and using cream yarn, join in a scallop point on medallion A. Sl st through both layers into corresponding stitch on medallion B to join those two scallops (work across shared scallop edges). Continue joining adjacent scallop points until two medallions are joined (number of sl st depends on scallop stitches; maintain even tension)
Round 2 :
Join medallion B to medallion C the same way; continue until all medallions are joined in a single line (join 6 medallions into a strip). When joining, ensure consistent spacing so the final strip is flat, not ruffling.
Round 3 :
Once all medallions are joined, work an even round of sc around the entire connected shape, working into the join seams to even out edges 1 sc per stitch around (estimate 320 sc around full runner after joining — stitch count will depend on your exact medallion size)
Info :
If your medallions have small gaps at joins, fill them by working sc or hdc into open spaces to create a neat canvas for the border. Take extra care to match the same number of stitches on each side so the scalloped border aligns later.
Round 4 :
Work a tidy foundation round in cream: 1 sc in each stitch around, placing 2 sc in the seam sections where joins meet to keep edges level. (adjust so runner lies flat)
Round 5 :
Switch to rust yarn. In rust, work 1 round of hdc in BLO across the foundation round to create a ridge for the scalloped border (st count same as foundation, estimated 320 hdc)
Info :
Switch to rust now so you can carry color up into the scalloped border. When changing color, finish the previous round with a sl st in last stitch and join new color with sl st in desired starting point.
— Elongated Filler Rounds to Shape Runner Edges :
Round 1 :
In rust, *sc in next 5 sts, (2 sc, ch3, 2 sc) in next st* repeat along the long edges; this places small loop stations that will be turned into scallops (work evenly until you reach the end). Count and adjust so there is a symmetric number of loop stations on both long sides (estimate 24 per side)
Round 2 :
1 sc across to anchor loops; maintain symmetry across both edges (st count varies by your layout)
Info :
These filler rounds ensure the runner forms a long, oval silhouette rather than remaining a strict row of circles. Take time to match counts on both sides; pin edges while working to keep the shape true.
Round 3 :
Work into each (2 sc, ch3, 2 sc) loop: [sc, 5 dc, sc] to form scallop shells along both long sides. This creates a continuous scalloped ridge before the final border (work same shell count both sides)
Round 4 :
1 sc in each st around the entire runner to tidy the shell edges (st count will grow slightly; keep even tension)
Info :
At this point the runner should resemble a long oval with scallop base ready for the final decorative border. If the runner looks wavy, adjust by adding or reducing a few sc in seam areas, then block again gently to stabilize shape.
— Scalloped Border (Rust) :
Round 1 :
With rust yarn and a 4.0mm hook, sc in each st around to build border foundation (matching previous round’s stitch count; estimated 340 sc)
Round 2 :
*(sc in next 2 sts, ch5, sk 3)* repeat around to create ch-5 loops for scallops (count loops and mark every 3rd loop for large scallop placement)
Round 3 :
Into each ch-5 loop: [sc, 7 dc, sc] — this forms pronounced scallops around the entire edge (number equals ch-5 loops)
Info :
If your runner is very long, work in sections and pin each scallop flat before continuing to ensure even shell height. Use blocking pins to keep curve consistent.
Round 4 :
1 sc in each st across the top of scallops to anchor them (st count equal to shells*9 approx)
Round 5 :
*In every second scallop work: (sc, ch3, 3 tr, ch3, sc) to deepen scallop texture; in alternate scallops work (sc, ch1, 5 dc, ch1, sc)* repeat around to create alternating deep and shallow scallops
Round 6 :
Slip stitch into each stitch around to tidy and flatten the border. Fasten off and weave in ends neatly on the wrong side.
Info :
This rust scalloped border provides the warm frame shown in the photo. If you prefer a subtler edge, reduce the number of dc in each scallop (for example 5 dc instead of 7 dc) to decrease the scale.
— Sunflower Applique (Make 3) :
Round 1 :
With dark brown and 2.75mm hook: 6 sc in mr (6)
Round 3 :
(1 sc, inc) x 6 (18)
Round 4 :
Slip stitch to join and fasten off brown. This creates a tight disc for the sunflower center. Weave tail to the back and secure.
Info :
If you want a raised center, work an additional round in brown of 18 sc then another round of BLO hdc to create a small ridge that petals can overlap.
Round 5 :
Join rust yarn to the back of the center. Round of sc around the brown disc to anchor (18 sc)
Round 6 :
Petal foundation round: *ch3, skip 1, sc in next* repeat around (9 chain-spaces for petals) (9)
Round 7 :
Work petals in each ch3: [sl st into ch, ch6, (dc, tr, dtr) into chain cluster, ch6, sl st back into base] to form tall pointed petals (9 petals). Ensure each petal base is anchored to the brown center area.
Round 8 :
Fasten off and reposition petals evenly. Join rust again on the inside base between petals to start second petal layer.
Round 9 :
Second petal layer (front of first layer): *ch2, sc into base between existing petals, ch2, in the ch2 space work (hdc, 2 dc, hdc) to create a fuller petal* repeat to produce 9 offset petals (9)
Info :
Stagger the second layer of petals so they sit between the first layer, creating a full sunflower look. Use pins to hold positioning while sewing layers together.
Round 10 :
Fasten off and weave ends. If petals need more body, use a 4.0mm hook in the petal rounds or add a third layer using the petal foundation method for extra fullness (optional).
Round 11 :
Optional edge tidy: Join brown again around the center and work small slip-stitch bumps (sc, picot) to mimic sunflower seed texture if desired (18 tiny bumps)
Info :
Sew tucked-in petals to the center by using the long tails from the brown center and stitching through the petal bases on the underside so the top remains neat. Press lightly after finishing to shape petals.
— Leaf Applique (Make 8) :
Round 1 :
With leaf green and 3.5mm hook: ch 12, sc in 2nd ch from hook, hdc in next, dc in next 3, hdc 2, sc 1, sl st to next to create a tapered leaf tip, then work down the other side mirrored to the starting point and sl st to base. Count total sts along leaf as you go (approx 22 stitches including base)
Round 2 :
Edge round: sc around the entire leaf working evenly with (sc, ch1, sc) at the wider center to form subtle serrations (same stitch count)
Round 3 :
Vein detail: With a tapestry needle and a strand of darker green, embroider a central vein with backstitch from base to tip and add 3 small lateral veins on each side. Secure and weave in tails.
Info :
Make leaves with a slight curve by pinning them in shape on a blocking board and spraying lightly with water or starch; this helps them sit naturally over the lace when sewn on.
— Acorn Embellishment (Make 9-12) :
Round 1 :
Using tan yarn and 2.75mm hook: 6 sc in mr (6)
Round 3 :
1 sc in each st around (12)
Round 4 :
*(sc, dec)* repeat around until you have 8 sts remaining for a slight tapered base (8)
Round 5 :
Fasten off leaving tail to sew through bottom of an actual small acorn cap or to simulate a cap by stitching brown yarn across the top and securing a wooden bead. If you prefer crocheted caps, use dark brown and work 1 round of brown sc around the top edge and stitch small ridges (optional).
Info :
Glue acorn caps only if necessary and on the underside of the runner where glue won't be visible; hand-sewn attachment is tidier and more secure for washability.
— Final Assembly & Placement :
Info :
Arrange your runner flat. Pin three sunflower appliques centered along the runner centerline spaced evenly across the medallion repeats (for six medallions: place one on medallions 1-2, one on medallions 3-4, one on medallions 5-6). Alternate leaves around flowers to mimic photo placement and tuck acorns into clusters around petals. Try placements before sewing.
Round 1 :
Sew sunflower centers to the runner first, using a yarn needle and long tail from the center. Anchor through the lace medallion foundation rounds (pass needle through several layers to secure). Sew round seam with small, even stitches so the underside remains tidy.
Round 2 :
Sew each petal layer down only at the petal base; allow petal tips to remain slightly free to create dimension. Use a few strategic stitches to the lace underneath so petals won't flop over time.
Round 3 :
Sew leaves into position, tucking their base underneath petals and stitching through the lace and petal base for secure attachment. Weave ends to the back and trim.
Round 4 :
Sew acorns into small clusters of two or three around the petals using the acorn tails and the tapestry needle; anchor through the lace to prevent rotation. If using natural acorns, stitch through the cap (not the nut) from underneath to keep the natural look intact.
Info :
For longevity, avoid hot machine washing if you attach natural elements; spot clean the runner or remove embellishments before laundering. If you want machine washability, use all-crocheted acorns and sew them very securely.
Round 5 :
Final blocking: block the fully assembled runner again to flatten seams and set shape. Use plenty of pins to hold scallops, petal tips and leaves in place. Allow to dry completely before using.
Info :
Weave in all remaining ends on the wrong side, trimming tails close but not flush for security. Use a drop of fabric glue inside the knots if you expect rough handling, but test on scrap yarn first.
This autumn sunflower table runner brings seasonal warmth to any table with its delicate lace medallions and dimensional floral appliques. Working through the medallion repeats and layered petals is deeply satisfying, and the final result is an heirloom-quality centerpiece you’ll be proud to display. Add personal touches like different colors or extra leaves to make it uniquely yours. 🧶🍂