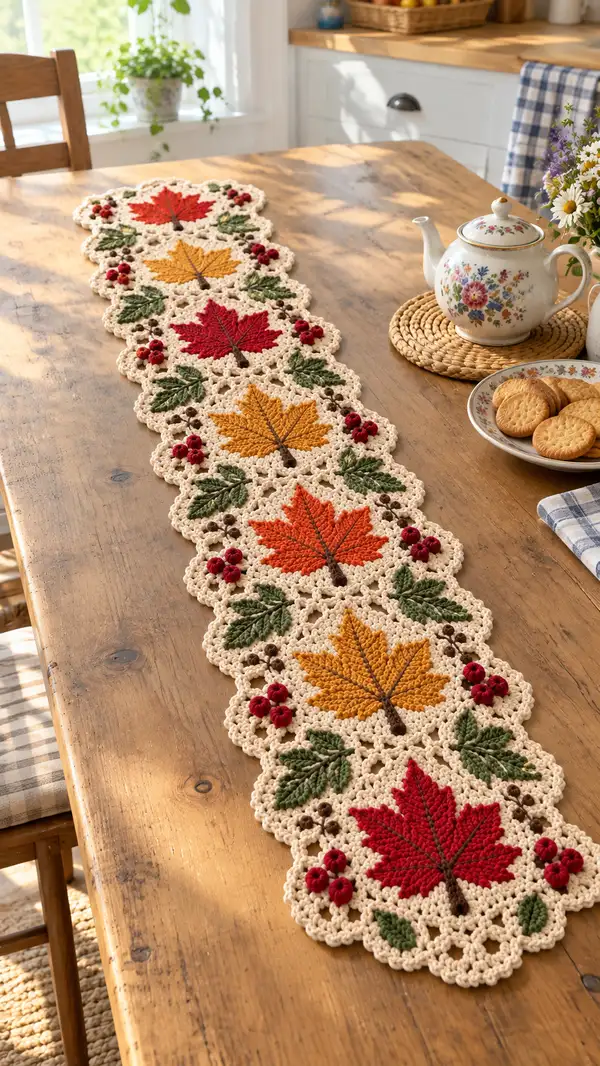
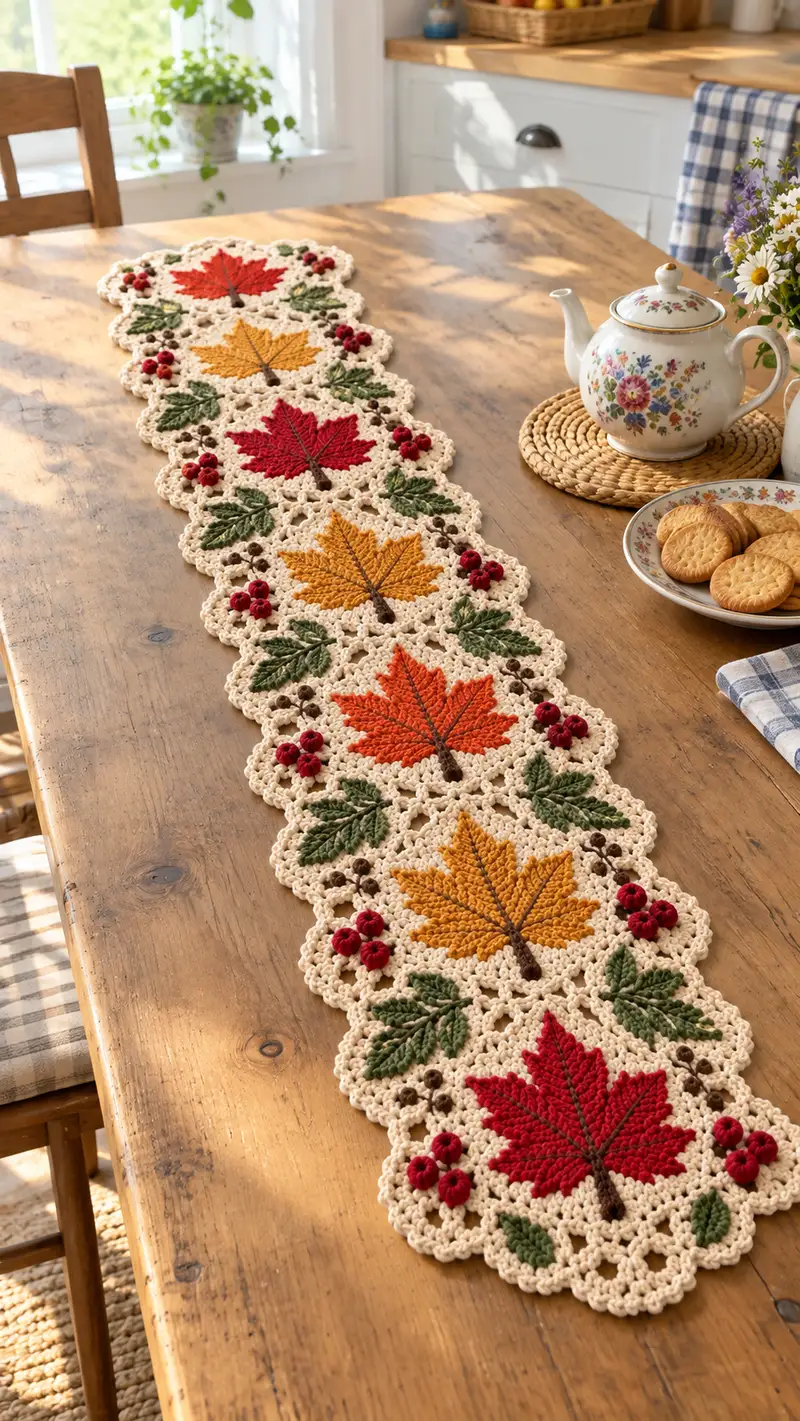
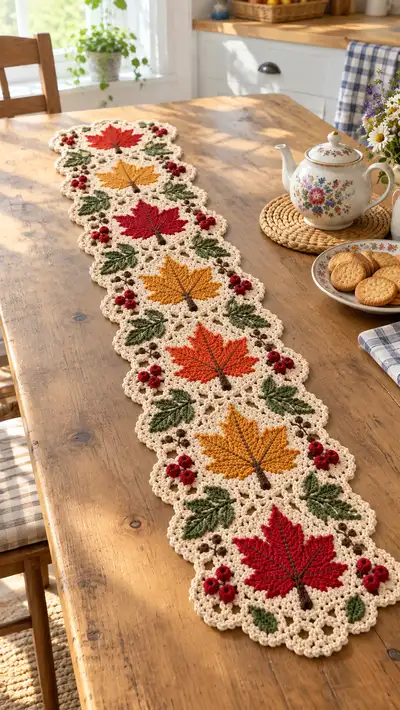
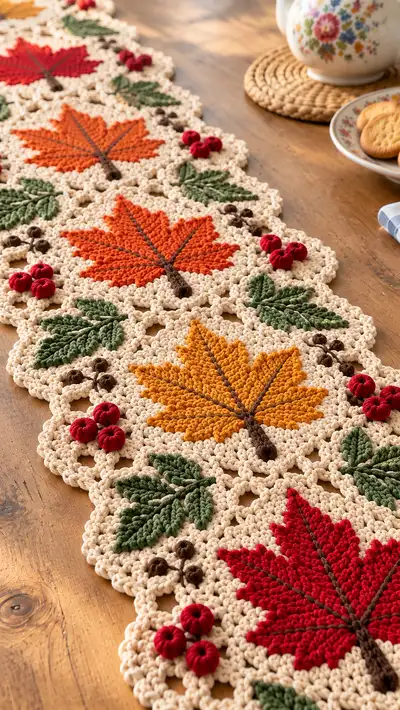
This cozy table runner features a string of scalloped medallions, each showcasing a raised, textured maple leaf in warm autumn shades with leafy accents and tiny berry clusters. Worked in a neutral background with bold fall colors, it brings a handmade, vintage farmhouse look to any table. The runner is assembled from repeating motifs joined and edged with a delicate lacy scallop to create a continuous, elegant piece.
Progress Tracker
0% Complete
— Overview :
Info :
This runner is made from repeating circular-hex medallions (called motifs) each worked in a neutral background with a large leaf applique9 attached or worked as an overlay. Each motif also features two textured accent leaves and clusters of three small berries and tiny brown acorns. Motifs are joined edge-to-edge either by a join-as-you-go method or by sewing. The pattern below describes how to make a single motif in full detail, how to make leaf applique9s and accents, and then how to join and finish the runner.
Info :
Gauge is not critical for a table runner but recommended to maintain uniform motif size. Using worsted yarn and a 4.0mm hook, each finished medallion measures approximately 6.5-7 inches across from point to point. Block each motif lightly to reach consistent size before assembly.
— Motif Base (Make X motifs depending on runner length) :
Round 1 :
With background color (cream), form a magic ring. 6 sc in magic ring (6)
Round 2 :
Inc in each st around (12)
Round 3 :
(1 sc, inc) x 6 (18)
Round 4 :
(2 sc, inc) x 6 (24)
Round 5 :
(3 sc, inc) x 6 (30)
Info :
At this stage the circle is forming. Keep tension consistent; this center will later support the applique9 leaf. Use a stitch marker at the beginning of each round.
Round 6 :
(4 sc, inc) x 6 (36)
Round 7 :
(5 sc, inc) x 6 (42)
Round 8 :
(6 sc, inc) x 6 (48)
Round 9 :
1 sc in each st around (48)
Round 10 :
1 sc in each st around (48)
Info :
We will begin shaping the medallion into a gentle 6-point scalloped hexagon with grouped clusters at six points so the finished motif will nest neatly. For the next six rounds we will create subtle corner increases to form the points.
Round 11 :
(7 sc, 3 sc in next st) x 6 (54)
Round 12 :
1 sc in each st around (54)
Round 13 :
(8 sc, 3 sc in next st) x 6 (60)
Round 14 :
1 sc in each st around (60)
Info :
Each 3-sc cluster marks a point of the medallion; later rounds will create a lacy ring that supports overlay stitches and edge joins. Keep rounds even and check counts at the end of every round.
Round 15 :
(9 sc, 3 sc in next st) x 6 (66)
Round 16 :
1 sc in each st around (66)
Round 17 :
(10 sc, 3 sc in next st) x 6 (72)
Round 18 :
1 sc in each st around (72)
Info :
We now have a generous surface for the large maple leaf applique9 or overlay work. If you prefer to work the leaf as an overlay rather than applique, you will stitch overlay details directly on the rounds 12-18 surface. If making applique9, fasten off and set motif aside for now.
Round 19 :
Ch 1, *sc in next 3, ch 2, sk 2* around to form small ringed spaces between groups; finish with sc to join (approx 72 sts with 6 ch-2 sps)
Round 20 :
Into each ch-2 sp: (sc, ch1, sc) to create small picot-like loops; sc in remaining sts. (Counts will remain approx 72 with 6 loop clusters)
Round 21 :
Switch to a finer, lighter tension if desired: 1 sc around to firm up surface (72)
Info :
Fasten off background color if you prefer to sew applique leaves. If you plan overlay leaf work, continue with color changes below. Lightly wet-block or steam each motif to 6.5-7" diameter across points before joining.
— Leaf Applique (Make one large maple leaf per motif) :
Info :
Each maple leaf is worked flat as an applique9 from a center stem and shaped in symmetrical rows. Work in rows rather than rounds. Use worsted yarn in your chosen leaf color (red, orange or golden). Use a 3.5mm hook for crisply textured rows; switch to 4.0mm if you want looser fabric. The leaf consists of a central rib and angled lobes worked in increasing then decreasing rows.
Round 1 :
With leaf color, ch 6. Row 1 (RS): sc in 2nd ch from hook and across (5 sc). Turn. (5)
Round 2 :
Ch1, sc in first st, inc in next, sc in center, inc, sc in last (7)
Round 3 :
Ch1, sc to last 2 sts, (inc, sc) across to create slight widening: (9)
Round 4 :
Ch1, sc across (9)
Info :
We will begin shaping the lobes: at the right and left edges we will create increases to form the outer points of the maple leaf, and in the center we will shape a tall central lobe by working extra rows up the center column later. Keep stitches centered so the leaf remains symmetrical.
Round 5 :
Ch1, sc in first 2 sts, inc, sc in next 3, inc, sc in last 2 (11)
Round 6 :
Ch1, sc across (11)
Round 7 :
Ch1, sc in first 2, inc, sc in next 5, inc, sc in last 2 (13)
Round 8 :
Ch1, sc across (13)
Round 9 :
Ch1, sc in first 3, inc, sc in next 5, inc, sc in last 3 (15)
Round 10 :
Ch1, sc across (15)
Info :
Now that the leaf base is wide enough, we will shape distinct lobes by working short shaping rows branching off the central column. The following design uses short-turn techniques to make seven lobes typical of a maple leaf. Work carefully and keep the center rib aligned.
Round 11 (Center Lobe Build) :
Ch1, sc across until center 3 sts, ch2, turn. (Work center lobe as short rows next)
Round 12 :
Short row: sc across center 3 sts, ch2, turn. Repeat 6 short rows adding 1 sc to each side of the center on every other short row until center lobe reaches desired height (approx 7 short rows total). After completing center lobe, resume full-row pattern flattening out to full width (15).
Round 13 :
Ch1, sc across entire row (15)
Round 14 :
Begin shaping side lobes: sc in first 4 sts, dec over next 2, sc in next 5, dec, sc in last 4 (13)
Round 15 :
Ch1, sc across (13)
Round 16 :
sc in first 3, dec, sc in next 5, dec, sc in last 3 (11)
Round 17 :
Ch1, sc across (11)
Round 18 :
sc in first 2, dec, sc in next 5, dec, sc in last 2 (9)
Round 19 :
Ch1, sc across (9)
Round 20 :
Dec across until close, leaving a small tail for sewing the tip closed if necessary (5). Fasten off, leaving long tail for basting to motif.
Info :
Shape the finished applique9 by trimming slightly and tugging to create clear lobes. Block the applique9 flat, then baste or mattress stitch it to the center of the prepared motif base, aligning the center stem over the medallion center.
— Leaf Texture & Vein Embroidery :
Info :
The leaf in the photo shows a raised central vein and secondary veins along each lobe. These are achieved with surface slip stitch embroidery or a thin chain stitch in contrasting brown. Use a long tail of chocolate brown and a yarn needle or use surface crochet with a 3.5mm hook.
Round 1 :
With brown yarn, secure at the base of the applique9 center. Surface slip stitch up the center of the leaf from base to tip to create the central stem and vein. Work 1 surface sl st per row of the leaf; maintain even tension.
Round 2 :
From the central vein, create 3-4 diagonal veins on each side: surface sl st from center towards the tip of each lobe at a slight diagonal, spacing evenly. Each secondary vein should start near the center and extend half the width of the lobe.
Round 3 :
To get raised texture, work a couple of FPdc (front post double crochet) across the central vein on the RS using a 3.5mm hook and the same brown yarn. Work 1 FPdc in each of 8-10 stitches along the center to create a ridge. Fasten off and weave ends to the WS.
Info :
If using surface crochet, keep RHS facing and use small neat stitches; if embroidering, use a long-eye yarn needle and couching for extra stability. Test the appearance on a spare swatch if unfamiliar with surface techniques.
— Accent Green Leaves (Make 2 per motif) :
Round 1 :
With leaf green and 3.5mm hook, ch 8. Row 1: sc in 2nd ch from hook and across (7)
Round 2 :
Ch1, inc in first st, sc across until last st, inc in last (9)
Round 3 :
Ch1, sc across (9)
Round 4 :
Ch1, sc2tog at start to round the base, sc across until last 2 sts, sc2tog at end (7)
Round 5 :
Ch1, sc across (7)
Round 6 :
Ch1, shape tip by dec until small (5) then fasten off leaving tail for sewing
Round 7 :
Info : For raised texture, use BPdc and FPdc on RS: before sewing, make 2 rows of FPdc down center of each accent leaf (work into rows using FPdc on RS). This creates a ribbed leaf appearance consistent with the photo.
Info :
Sew accent leaves to motif adjacent to the main leaf at a diagonal position using mattress stitch. Place two leaves per motif, one on either side of the lower half, mimicking the photo placement. Place them approximately at the junction between rounds 14 and 15 of the motif for consistent placement.
— Berry Clusters & Tiny Acorns (Clusters per motif) :
Berry (Make 6 small berries per motif) Round 1 :
With berry red and 3.5mm hook, ch 2, 6 sc in 2nd ch from hook (6). Do not join. (6)
Round 2 :
Work around in spiral: (inc) x 6 (12)
Round 3 :
(Sc, dec) x 4 (8)
Round 4 :
Sc around 8. Fasten off leaving long tail; stuff lightly with fiberfill and close hole using yarn needle. Knot tail to secure and leave for sewing.
Info :
Stagger berry clusters on motif: groups of three berries form a triangular cluster. Sew berries in place with tails, arranging them in small clusters attached to the motif background. Add a tiny bit of glue inside each berry if necessary for stability.
Tiny Acorn (Make 3 per motif) Round 1 :
With chocolate brown ch 2, 6 sc in 2nd ch from hook (6). (6)
Round 2 :
Sc around (6). Fasten off leaving long tail. Sew three together or group as small arranged acorns between leaves as seen in the design.
Info :
Sew berry clusters and acorns to motif with brown stems embroidered: for each small acorn cluster, use 2-3 chain stitches in brown to form stems then anchor berries. Position berries around rounds 16-18 near accent leaves for a natural look.
— Applying Applique9 and Embellishments to Base Motif :
Round 1 :
Info : Place leaf applique9 over motif center so that the bottom of the stem sits over the center 6 sc cluster created around round 12-16. Baste in place with a contrasting thread to check position before final sewing.
Round 2 :
Sew applique9 using mattress stitch around the outer edge of the leaf: pick up every 2-3 sts on motif and corresponding edge stitches on the leaf. Keep stitches small and invisible on the RS. Be careful not to pull too tight causing puckers. Fasten off and weave in ends to WS.
Round 3 :
Sew two accent green leaves to lower-left and lower-right positions, anchoring at the base with extra slip stitches for stability. Add 3 berry puffs sewn into a small cluster to the upper-side area beside one leaf and 3 tiny acorns grouped near the other leaf.
Info :
Tack each decorative element lightly first, step back and view alignment, then sew securely. Use matching thread to avoid visible back stitches on the RS. The arrangement should mirror the photos: two green leaves and one red berry cluster per motif side.
— Joining Motifs (Join-as-you-go or sew) :
Info :
You can join motifs as you go on the last round, or complete and block all motifs then sew them together. The photos show motifs joined edge-to-edge creating a continuous runner; use join-as-you-go for neat, slotted joins that reproduce the look best. The following join method assumes joining at the final edging round.
Round 1 :
Work one motif fully and prepare the next motif through Round 20 (the foundation lacy ring). On the final motif round (the scallop round), when you reach a point where motifs meet, instead of working the full scallop, slip stitch into the corresponding scallop loop of the adjacent completed motif, ch1, then resume scallop. This creates a flat, joined seam. Continue around joining at 2-3 points per adjacent motif to create a stable seam.
Round 2 :
If sewing: place two motifs RS together aligning scallop points. Use mattress stitch or whip stitch along scalloped points using matching background yarn, catching corresponding picot and chain loop anchors. Secure seams with multiple passes through each join point for durability.
Round 3 :
When joining successive motifs, alternate join points so seams sit inboard from the scalloped outer edge and create the lacy open spaces visible in the photos. Pin thoroughly before final sewing for even spacing.
Info :
Join motifs to create the desired runner length. The photographed runner uses 8 motifs in a linear sequence; adjust the number of motifs to fit your table. Keep consistent orientation: leaves should all face alternating directions if that is the chosen layout.
— Final Scalloped Border (Works across joined motifs) :
Info :
After joining motifs, work a continuous edging round across the entire runner perimeter to unify the piece. Use the background cream. This edging provides the scalloped raised rim as seen in the images.
Round 1 :
Join background yarn at any outer scallop point on the perimeter. *Ch3, sk 1, sc into next base stitch, ch2, sl st into the outer picot of the next motif point; rep across to form a ring of small arches that mirror the motif points.* Adjust repeats as necessary to maintain even spacing across joined seams.
Round 2 :
In each ch-3 arch: (sc, hdc, 3 dc, hdc, sc) to form rounded scallops. Work 1 sc into the base stitch anchored between arches. This will produce pronounced scallops across the entire runner edge. Fasten off and weave ends.
Round 3 :
Info : For extra stability, work a final round of slip stitches along the RS edge of each scallop, placing 3 sl sts centered on each large dc cluster to reduce flaring. This gives the polished, slightly raised edge visible in the photos.
— Blocking & Finishing Touches :
Info :
Lightly block the entire runner to flatten and align scallops. Pin to exact shape and either steam gently from the RS or wet-spray and allow to dry. Avoid direct heat on acrylic yarns; for natural fibers a gentle steam or damp blocking works well.
Round 1 :
Weave in all loose ends on the WS using a yarn needle. For sewn joins, pass the needle through seams twice for stability, knot and bury ends. Clip any stray stitches or long tails.
Info :
Optionally add a few tiny hand-sewn beads in the berry centers for sparkle, but test first on a motif corner to ensure beads do not scratch the table surface. Place felt pads under the runner points if using on delicate wood surfaces to prevent scuffing.
Final Notes :
Repeat motif production until you reach the desired runner length. Each complete motif including decoration takes approximately 45-75 minutes depending on your experience with applique and surface embroidery. Keep motifs organized by color and block each to consistent size before joining for a professional result.
Completing this Autumn Maple Leaf Table Runner was such a joy — each motif adds a bit of seasonal warmth and handmade charm to my table. The raised leaves and berry clusters bring delightful texture, while the scalloped edges give a refined finish. I love seeing the runner catch natural light and bring cozy autumn vibes into the room. 🍁🧶