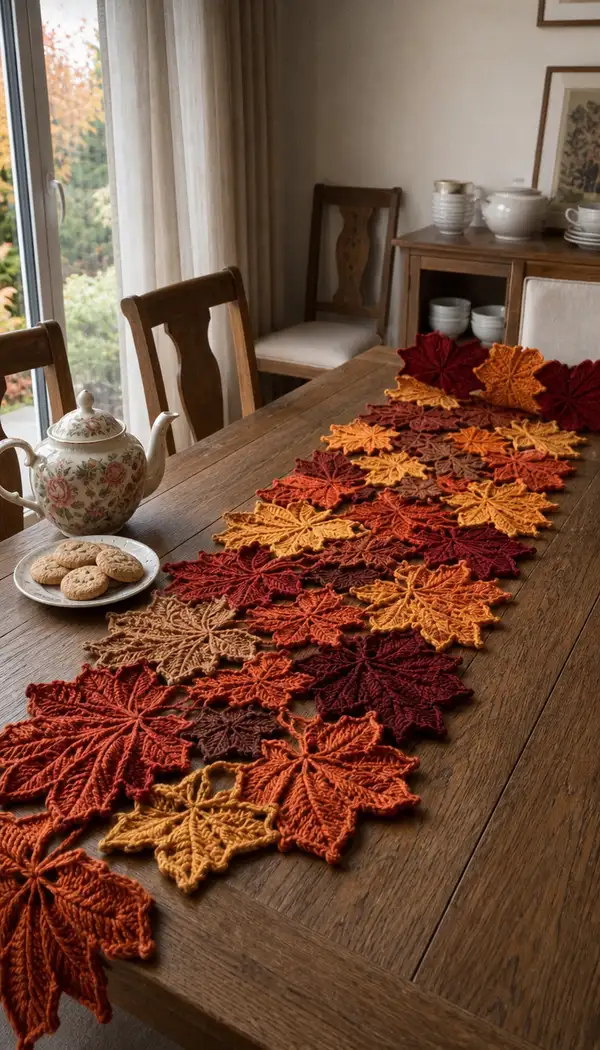
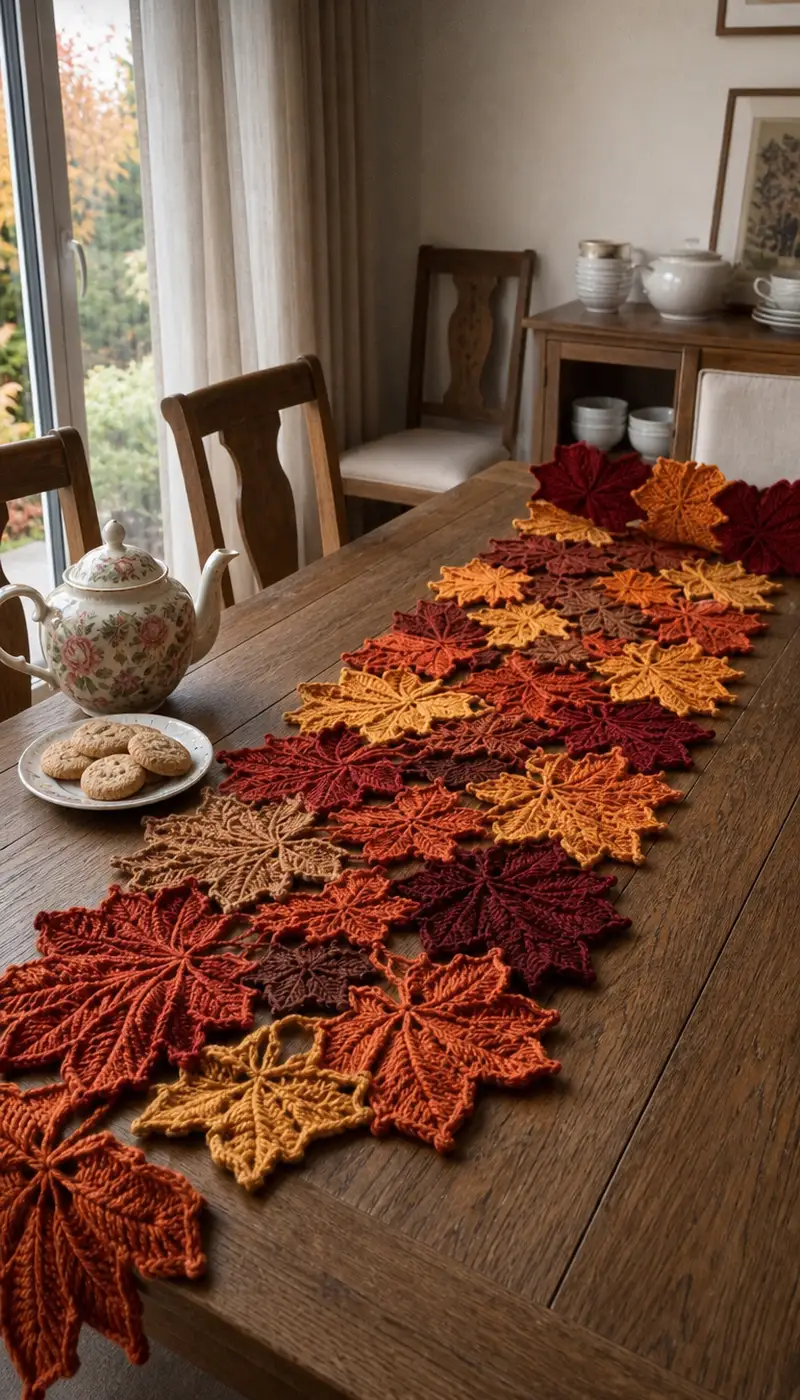
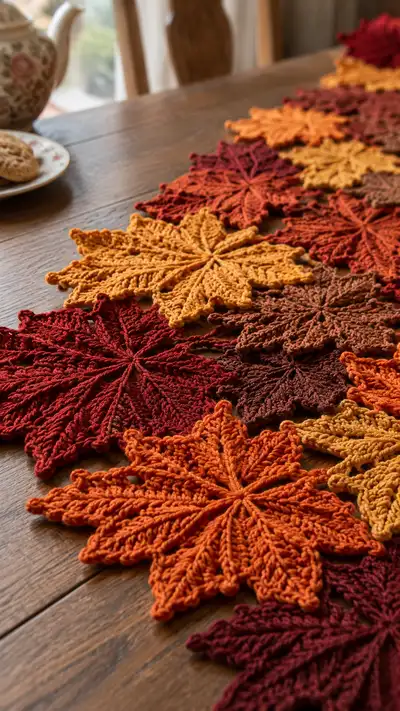
Create a warm, autumnal table runner made from interlocking crochet maple-leaf motifs in rich fall tones. This pattern uses modular leaf motifs in three sizes, joined and edged to form a long runner like the one pictured. The finished runner showcases textured veins, raised petal ridges and picot tips for a beautifully dimensional, handcrafted centerpiece.
Progress Tracker
0% Complete
— Overview :
Info :
This pattern builds a table runner from three sizes of maple-leaf motifs: Large, Medium and Small. Work each motif flat in rounds, weave in ends, block flat and join motifs into rows as described in the Joining & Edging section. The instructions below give complete round-by-round detail for each motif size and for the finishing edge and joining rows. All counts are shown per round; adjust hook size slightly if your gauge varies.
— Large Leaf Motif (makes the big pointed leaves seen in photo) :
Info :
Large motifs are worked to create an 8-point maple leaf. Use 4.0mm hook and worsted yarn. Gauge: each large leaf will measure approximately 15-17cm (6-6.5in) from tip to tip after blocking. Work tightly for good definition; blocking will open the petal points and highlight the ribs.
Round 1 :
Make a magic ring, 8 sc into ring (8)
Round 2 :
Inc in each st around (16)
Round 3 :
(1 sc, inc) x 8 (24)
Round 4 :
(2 sc, inc) x 8 (32)
Round 5 :
(3 sc, inc) x 8 (40)
Round 6 :
(4 sc, inc) x 8 (48)
Round 7 :
(5 sc, inc) x 8 (56)
Round 8 :
(6 sc, inc) x 8 (64)
Info :
Counting check: you now have 64 stitches forming a round disc. These stitches will be the anchors for the eight leaf points. Place 8 stitch markers evenly spaced (every 8th st) to mark petal centers if helpful. The next round creates chain loops that become petal foundations; keep tension relaxed in the chains so petals sit nicely.
Round 9 :
*Ch7, skip 7 sts, sl st in next st* x 8 (creates 8 ch7 loops around the disc; base stitch count remains 64)
Round 10 :
Working into first ch7 loop: sl st into loop, ch3 (counts as dc), 2 dc, tr, tr, 2 dc, dc, sl st into same loop to close petal; repeat in each ch7 loop (per petal: 1 ch3 as dc + 2 dc + 2 tr + 2 dc + 1 dc = 8 tall stitches) x8 petals (64 tall stitches total)
Info :
Each petal is worked separately into its ch7 foundation. Work the tall stitches evenly and try to keep each petal identical. If your ch7 feels too loose or too tight, adjust by one ch before starting the next motif. The sl st at the end of each petal anchors it back to the base disc.
Round 11 :
Working around the outside of the petals: 1 sc in each tall stitch and 1 sc in each sl st joining point around (estimated total 72 sc) — count your stitches as you go; you should have roughly 8-10 sc per petal edge depending on how you formed the petal (total will vary slightly but aim for consistent edge counts per petal)
Round 12 :
(Sc around evenly to tidy petal edges, adding 1 sc for each ch-2 and chain spaces along the side) — maintain same stitch count as Round 11 (approx 72)
Info :
Now we begin to shape the point and add a picot tip. Work slowly on the tip rows to ensure symmetry. If you want a softer tip, replace picot with a single sl st at the tip; for the crisp tip seen in the photos, use a small picot (ch3, sl st into top of last stitch).
Round 13 :
At the tip of each petal: sc in next 3 sts, ch3, sl st into top of last st (picot), sc in next 3 sts; repeat for each petal (adds 1 picot per petal) (approx 80 sts total)
Round 14 :
1 sc in each st around to secure picots and even the edge (approx 80)
Round 15 :
Begin vein-work: *At the base of petal, work fpdc around the post of the central tall stitch of petal to create a raised rib: (fpdc) into designated post, ch1, sc in next 2 sts along petal base* x 8 (this round will use a mix of fpdc and sc across petals; total count remains approx 80)
Info :
Front post stitches create the visible veins that run up each leaf. Identify the same central tall stitch in every petal and work the fpdc consistently into that post for all petals. Use stitch markers to mark these posts if helpful. Work gently so posts are neat and not twisted.
Round 16 :
1 sc around in every stitch to tidy and lock the fpdc ribs into place (approx 80)
Round 17 :
Edge detailing: *sc in next 2 sts, hdc in next, dc in next, picot at tip if desired, dc in next, hdc in next, sc in next 2 sts* around each petal (this sc pattern sculpts the serrated edges; per petal adds 8 stitches; total approx 64-80 depending on your shaping)
Round 18 :
Final tidy round: sc in each st around. Fasten off, weave in ends. Block motif flat, pinning points outwards and steam or spray-block lightly to open petal definition.
Info :
Large motif complete. Repeat as many times as needed in desired colors. Alternate shades for a natural scattered look. Block and dry fully before joining to keep perfect points.
— Medium Leaf Motif (slightly smaller, supports staggered layout) :
Info :
Medium motifs are scaled down versions. Use the same yarn and hook for cohesive texture or 3.5mm for slightly crisper edges. Measure: approx 12-14cm (4.5-5.5in) tip to tip after blocking.
Round 1 :
Make a magic ring, 8 sc into ring (8)
Round 3 :
(1 sc, inc) x8 (24)
Round 4 :
(2 sc, inc) x8 (32)
Round 5 :
1 sc in each st around (32)
Info :
Because this motif is smaller, we form ch5 loops to create shorter petals with the same 8-point layout. Place markers every 4 sts if you need stitch reference points for the petal anchors.
Round 6 :
*Ch5, skip 3 sts, sl st in next st* x 8 (creates 8 ch5 loops)
Round 7 :
Into each ch5 loop: sl st, ch3 (dc), dc, tr, dc, dc, sl st to close (per petal: 1 ch3 as dc + 1 dc +1 tr +2 dc = 5 tall stitches) x8 (40 tall stitches)
Round 8 :
1 sc around each tall stitch and join points to make petal edges (approx 40 sc)
Round 9 :
Tip shaping: sc in next 2 sts, ch3, sl st into last, sc next 2 sts for each petal (adds small picot tip) (approx 56 sts)
Info :
Add 1 round of fpdc at the base central post for a subtle vein: locate central tall stitch and fpdc around its post on each petal, then sc around to tidy. Block this motif slightly less aggressively than the large so it nests between larger leaves.
Round 10 :
Work fpdc into central post of each petal then sc in each st around to tidy (approx 56)
Round 11 :
Edge round: sc in each st, adding a small picot at each petal tip if desired (final tidy) (approx 56)
Round 12 :
Fasten off and weave in ends. Block moderately and set aside for joining.
Info :
Make a mix of medium motifs in complementary shades to fill gaps and create the layered effect shown in the photos. These bridge the large and small leaves when joining.
— Small Leaf Motif (fills and accents) :
Info :
Small motifs give the runner its dense, scattered look. These are quick to make. Approx 8-10cm (3-4in) after blocking. Use 4.0mm or 3.5mm hook depending on desired crispness.
Round 1 :
Make a magic ring, 8 sc in ring (8)
Round 3 :
(1 sc, inc) x8 (24)
Round 4 :
1 sc in each st around (24)
Round 5 :
*Ch4, skip 2, sl st in next* x 8 (creates 8 ch4 loops)
Round 6 :
Into ch4 loop: sl st, ch3 (dc), dc, tr, dc, sl st (per petal approx 5 tall stitches) x8 (40 tall stitches)
Round 7 :
sc around petals to tidy, add small picot tip on each petal if desired (approx 40)
Round 8 :
1 sc in each st to finish edge, fasten off and weave ends (approx 40)
Info :
Small motifs are quick and ideal for filling gaps between larger leaves. They also look charming overlapped slightly under the larger points.
— Vein and Texture Variations (optional rounds you can add to any motif) :
Info :
To emphasize veins or add folded ridge texture, add these rounds after the main petal rounds but before the final edge round. These rounds are optional and add 1-4 rounds of surface post work for dramatic definition.
Optional Round A :
Fpdc up the center of each petal starting at round base: (fpdc around the post of each chosen dc/tr) x 8. Then sc around whole motif to lock posts in place. (st count approximates previous round)
Optional Round B :
Use bpdc on the back side to create a raised ridge on the front: work bpdc around the posts directly behind the fpdc veins. Follow with 1 sc round to tidy.
Info :
These surface stitches are visible on both sides — work neatly and block after finishing to set the ridges. If you plan to use the runner on both sides, keep surface work minimal so either side looks attractive.
— Joining & Layout :
Info :
Study the photos for layout inspiration: the runner shown is an organically staggered column of leaves using all three sizes. Alternate colors in a non-repeating manner to mimic natural fallen leaves. Lay out motifs overlapping slightly at edges before joining to decide final placement.
Joining Step 1 :
Arrange motifs on a flat blocking surface. Overlap leaves so that petal tips of one motif rest slightly over the edge of neighbor motifs. Use pins to hold pieces in place. Typical run: staggered central column with overlapping leaves forming a continuous runner.
Joining Step 2 :
Join using slip-stitch join or invisible whip stitch: for slip-stitch join, hold two motifs wrong sides together and work through both loops with sl st along the connecting seam (recommended for a flatter join). For whip stitch, use a yarn needle and matching yarn to sew through the back loops only for an invisible seam.
Joining Round 1 :
When slip-stitch joining, insert hook through both motifs' outer edge loops and sl st across the intersection area to secure. Work 3-5 sl st across overlapping petal seams for each connection point (number varies by overlap length).
Joining Info :
If using whip stitch, make small, even stitches through both motif edges. Use a double strand of yarn for extra strength on pieces that will see handling. For a decorative visible join, use a contrasting color and use a blanket stitch around the joined edges.
Joining Round 2 :
Continue joining motifs row by row until runner reaches desired length. Mix large, medium and small motifs intentionally — place small motifs in gaps to make the edges look natural and avoid straight lines.
Info :
Take frequent layout breaks to step back and ensure your runner remains balanced and not lopsided. The organic look comes from deliberate irregularity — avoid overly symmetric repetition.
— Edging & Final Border (adds the scalloped, finished look) :
Info :
The final border is worked after all motifs are joined to create a consistent edge along the runner. You can either edge through both layers of joined motifs (if motifs overlap) or pick up stitches along the runner perimeter for a continuous border.
Border Round 1 :
With contrasting or matching yarn, pick up evenly spaced sc around the entire runner perimeter, working through the outer loop only where possible. Maintain even spacing — approximately 1 sc per 1 cm of edge for a neat finish.
Border Round 2 :
*Sc in next 3 sts, hdc in next, dc in next, picot (ch3, sl st), dc in next, hdc in next, sc in next 3 sts* around curves and tips to echo the leaf serrations (count will vary based on runner size)
Border Round 3 :
One more round of sc to tidy the border and secure picots and scallops. Fasten off and weave in ends securely across several stitches on the wrong side.
Info :
If you prefer a flat border, substitute a row of hdc instead of the decorative picot round. For a more rustic look, work a chain loop fringe between leaf points, secured with single crochet anchors every 2-3cm.
— Blocking & Finishing :
Info :
Block each motif to size before joining. Pin points outward and use a steam iron a few inches above the fabric or spray lightly and let dry. Once joined, press the assembled runner gently from the wrong side, using a cloth barrier if required by your yarn fiber.
Info :
Weave in ends on the wrong side and trim flush. If the runner will be washed, try a gentle hand wash and reshape while damp; avoid tumble drying. Consider a thin fabric backing for extra durability if the runner will be used daily.
Tip :
To make a longer runner, add more motifs in the staggered pattern; to make a table mat, compose a compact group of 5-7 motifs and finish as above.
This maple-leaf table runner brings the warmth of autumn to your home with layered texture and rich, cozy colors. Each leaf motif is a small handcrafted treasure — when combined they create a striking runner that feels like a scatter of leaves down your table. The pattern is satisfying to make and easy to customize in color and size. 🍂🧶 Enjoy the meditative process of making each leaf and the beautiful centerpiece you'll have at the end. Happy crocheting!