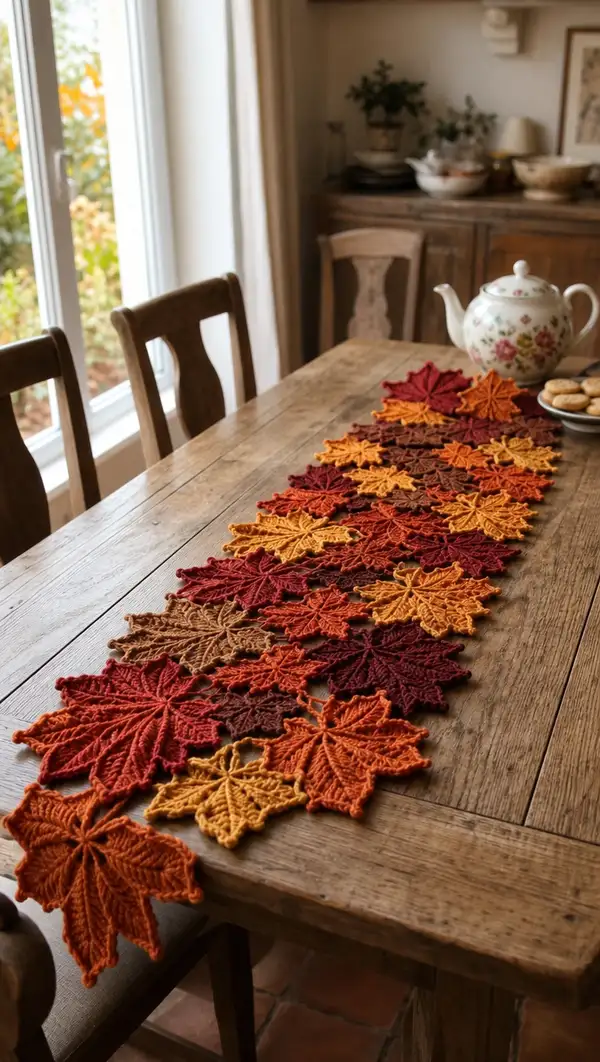
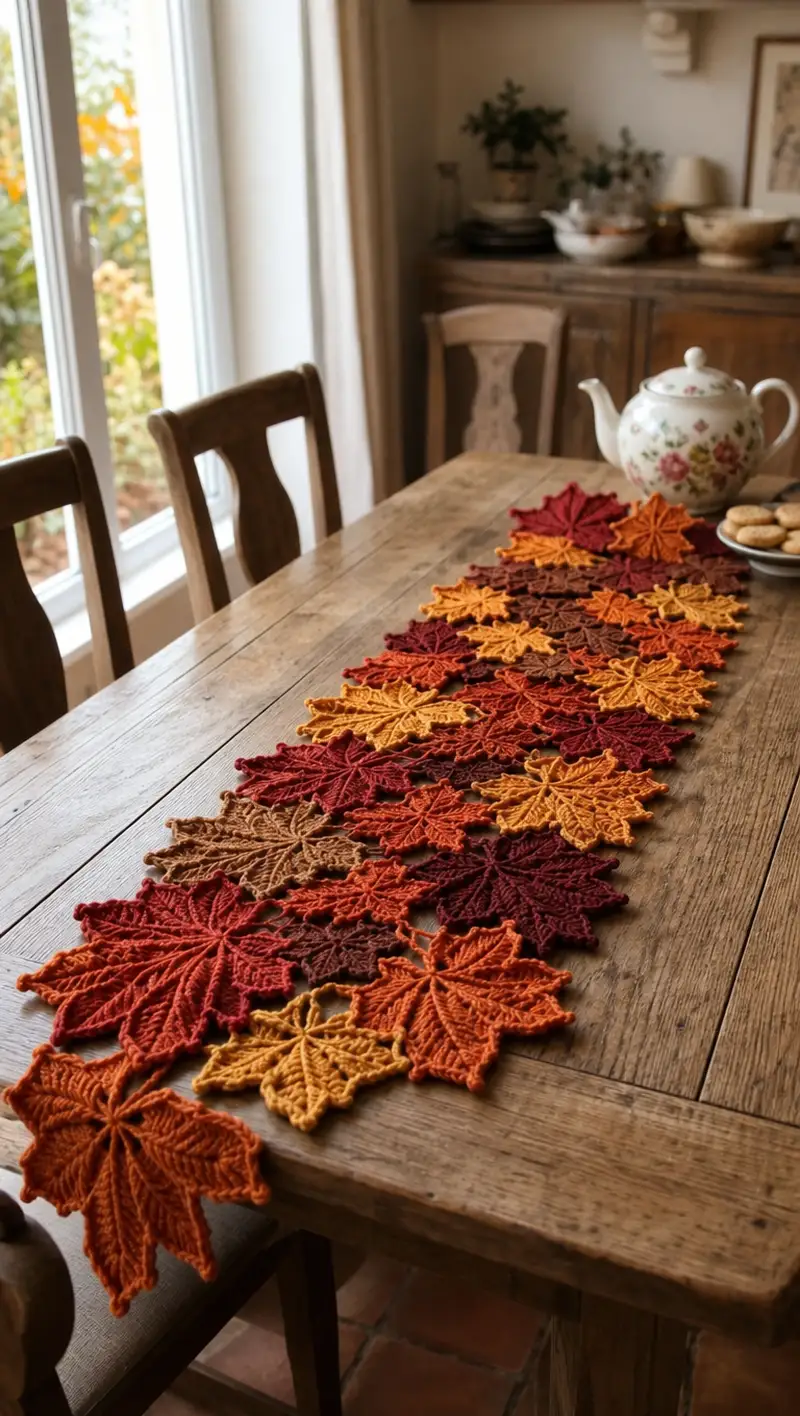
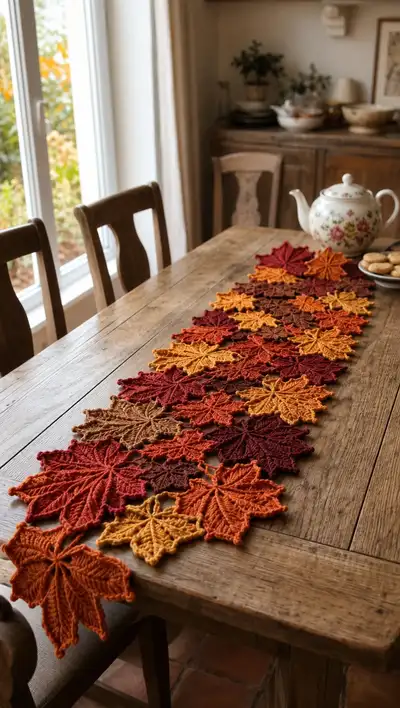
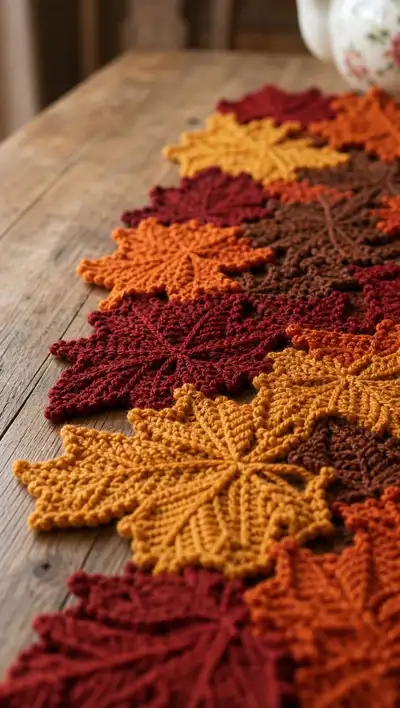
Create a warm, seasonal table runner made of joined crochet maple leaves in rich autumn tones. This pattern uses textured post stitches and picot edges to give each leaf a realistic ridged vein and crisp lobed outline. Easy to arrange into a long runner or smaller mats — perfect for fall decor and gift-making.
Progress Tracker
0% Complete
— Leaf Motif :
Round 1 :
6 sc in magic ring (6)
Round 3 :
(1 sc, 1 inc) x 6 (18)
Round 4 :
(2 sc, 1 inc) x 6 (24)
Round 5 :
(3 sc, 1 inc) x 6 (30)
Round 6 :
(4 sc, 1 inc) x 6 (36)
Round 7 :
(5 sc, 1 inc) x 6 (42)
Info :
Rounds 1-7 create a dense circular center from which the leaf lobes radiate. Count carefully; round 7 has 42 sts which divides evenly into 7 lobes (6 sts per lobe)
Round 8 :
1 sc in each st (42)
Round 9 :
Change to FLO and 1 sc in each st FLO (42). This creates a subtle ridge separating the center from the lobes
Info :
Mark the stitch that will become the beginning of the first lobe; you will work 7 identical lobes around. Use a removable marker so you can re-position for alignment
Round 10 :
*ch 6, sl st in next st* x 7 (42 — chains create 7 loop spaces for lobes)
Info :
The ch-6 loops you made will become the base for each lobe; do not count chain stitches as base stitches. The stitch count shown continues to represent the 42 foundation stitches around the center
Round 11 :
Working in each ch-6 loop: sc, hdc, 3 dc, tr, 3 dc, hdc, sc (11 sts in each loop) — total 11 x 7 = 77 sts around when worked into loops (77)
Info :
This round builds the lobe bulk. Work evenly and keep tension steady to maintain symmetrical lobes. If you want slightly larger lobes, increase the ch length on round 10 and add extra dc in this round accordingly
Round 12 :
1 sc in each st around (77)
Round 13 :
Ch 1, *sc in next 2 sts, hdc in next, dc in next 3 sts, fpdc around the central dc of the 3-dc cluster (make a raised vein), dc in next 3 sts, hdc in next, sc in next 2 sts* x 7 (77)
Info :
Round 13 creates the first decorative raised vein for each lobe. The fpdc should be placed over the central double crochet of the lobe to create a line from base toward the point
Round 14 :
1 sc in each st (77)
Round 15 :
In each lobe work: (ch 3, skip 1 st, sc in next 2 sts, hdc in next, dc in next 5 sts, picot, dc in next 5 sts, hdc, sc in next 2 sts) x 7 — this builds the pointed outer shape and picot detail; count will vary depending on picot construction but expect about 9–13 sts per lobe; approx (11–13) x 7 = 77–91 sts (keep consistent stitch counts by following the sequence exactly)
Info :
Make a small picot at the center of each lobe's outer edge: (ch 3, sl st in first ch) — this gives the crisp serrated edge seen in the photos. If you prefer a smoother edge skip the picot
Round 16 :
1 sc in each st (adjust to actual count) — maintain the round as even to set the shape (approx 77–91)
Round 17 :
Working into the back of the lobe points, create texture: *fpdc around the dc that forms the center ridge of a lobe, tr in next st, fpdc around same central spot to create a raised reversed stitch* x 7 — This round uses post stitches and does not change the number of foundation stitches (count remains same as round 16)
Info :
Post stitches create the raised veins. Take care to complete each fpdc evenly; practice on a spare motif if needed. Use the same stitch as your 'central double' in round 11 as the post base
Round 18 :
1 sc in each st (same count as previous rounds)
Round 19 :
Edge round: *(sc, ch 2, sc) in the tip of each small serration (including picots), then 1 sc down the side of the lobe between serrations* — Work evenly around all lobes to form a defined edge. Final count will be stable but depends on whether picots are used; expect roughly 84–96 sts
Info :
This edge round pulls the lobes into a crisp outline; if you want a thicker edge use hdc instead of sc. Block after this round for best shape retention
Round 20 :
Optional ornamental round — work 1 sc in each st BLO to create a tiny raised border (same stitch count as round 19)
Round 21 :
Final finishing round: picot trim around the entire motif at regular intervals: *sc in 3 sts, (ch 3, sl st in first ch), sc in 3 sts* repeating around. Fasten off and weave in ends. Motif diameter will be approximately 6.5–8 inches depending on yarn and hook
Info :
Make as many leaf motifs as you like. For a runner similar to the photo, you will make between 20–30 leaves in mixed colors and stagger them in slightly overlapping rows. Block all motifs flat and pin the lobes open before joining
— Color & Quantity Plan :
Info :
Suggested leaf counts for a runner approx 36-44 inches long: Deep burgundy 8 leaves, Burnt orange 7 leaves, Golden mustard 6 leaves, Chestnut brown 4 leaves. Adjust as desired for length. Alternate darker and lighter leaves to create contrast and depth
Info :
Change color at the beginning of round 11 (when you begin the lobes) to give the impression of a colored leaf edge; carry yarn only short distances or fasten off and weave in ends between motifs for clean joins
— Blocking & Preparation :
Info :
Soak each finished leaf in lukewarm water, gently squeeze out excess, pin flat on blocking mat stretching each point to crisp edges. Allow to dry completely. Alternatively lightly steam-block with an iron (use steam and a cloth) for faster results. Pin picots and points so they are uniform for neat joining
Info :
If you prefer stiffer leaves for centerpieces, lightly mist with diluted fabric starch before drying. Test on a single scrap leaf first
— Join-As-You-Go (JAYG) Method — Basic Join :
Info :
Lay out two blocked leaves with edges overlapping so picot/serration points align. The JAYG is done in the last round of the second leaf — instead of finishing a full edge round you will join to the first leaf at chosen points with sl sts or sc. This method creates a seamless, flat join that mimics the photographed layout
Round J1 :
With the second leaf on your hook at the last edge round: when you reach a point that overlaps the first leaf, insert hook into the corresponding stitch of the blocked first leaf and sl st to join, then continue along the round of the second leaf. Repeat at each overlap point. Fasten off when round complete
Info :
Use small, even slip stitches for a neat join; if you prefer more visual connection use sc instead. Pin leaves first to be sure of exact alignment before the JAYG
Round J2 :
For a stronger join, after slip stitching across overlapping points, work a second pass of sc through the same stitches across the join from the RS, creating a shallow seam; this will add stability without bulk
Info :
When joining three leaves in a triangular overlap (one leaf overlaps two below), join the top leaf first to both lower leaves before proceeding to the next top leaf; pin carefully to avoid twisting
— Join Sequence for Runner Layout :
Info :
Suggested staggered layout (left-to-right reading): Row A: 5 leaves staggered; Row B: 4 leaves positioned to fill gaps and overlap row A leaves; Row C: 5 leaves repeating row A; Row D: 4 leaves repeating row B; adjust to desired length. This creates the overlapping natural look in the photos
Info :
Begin by joining leaves left-to-right in each row using JAYG. Once a row is complete, pin it next to the preceding row and join across the seams using the same JAYG technique. Work slowly — symmetry is achieved by consistent pinning and counting picot points
Join Step 1 :
Pin Row A's five leaves in final layout. Start with the left-most leaf and attach the second leaf by JAYG at three overlap points (two side lobes and one near the tip). Repeat across the row
Join Step 2 :
After Row A is joined, align Row B underneath so that Row B's leaves tuck into gaps of Row A. Join Row B leaves to Row A at 2–3 points per leaf using sl st in corresponding picot or edge stitches
Info :
For a cleaner back finish, perform all joins from the right side making sure sl sts sit mostly on the underside, then weave tails to the back and block lightly again
— Alternative Joining: Sew & Mattress Stitch :
Info :
If you prefer sewing rather than JAYG, use a tapestry needle and yarn tail from one leaf to mattress stitch along overlapping edge stitches. This creates a nearly invisible join and allows repositioning after blocking
Join Sew 1 :
Place two leaves RS together at their overlap. Using long tail and tapestry needle, whipstitch or mattress stitch through the outermost edge loop of each leaf for each join point. Pull evenly to prevent puckering
Info :
Sewing is slower but stronger; choose this if your runner will receive frequent handling or if you want a reversible back that looks tidy
— Edge Border for Finished Runner :
Info :
Once all leaves are joined and runner laid flat, you can add an optional narrow border to unify the edges. Use a complementary neutral or a single color from the leaf set to tie everything together
Border Round 1 :
With RS facing, pick up yarn at one corner and work 1 sc evenly into outer-most edge loops around the entire perimeter to create a consistent base. Work 1 sc in each picot and 1 sc in each side stitch; join with sl st (count will vary depending on runner size)
Info :
If the perimeter has deep indentations between lobes, add 2 sc in the wider gaps to avoid puckering. Keep stitch spacing visually even
Border Round 2 :
1 sc in each st around; join. This evens the edge and prepares for final decorative round
Border Round 3 :
*(ch 3, sl st in first ch) picot every 3–4 sc around for a tiny scalloped finish*, adjust spacing so picots fall at lobes and between lobes evenly. Fasten off and weave ends
Info :
For a more decorative border, replace picots with small shells: *5 dc in same st, skip 2 sts, sl st next st* — do this only if runner edge is fairly straight to avoid bulk
— Finishing Touches :
Info :
Weave in all ends securely on the WS, using duplicate stitch patterns for any ends trailing into an area visible on the RS. Trim ends close after weaving through several stitches
Info :
Lightly block again with pins to ensure the runner lies flat and the lobes maintain their shape; if using starch, apply before final drying for a crisp display
Info :
Optional: Add a few tiny embroidered veins with matching yarn on selected leaves for extra depth — use a tapestry needle and small running stitches following the raised post veins
— Variations & Scaling :
Info :
Smaller runner: use fewer leaves in each row (e.g., 3+2+3 rows) for a narrow runner. Larger table: add extra rows or make leaves in larger hook/yarn for oversized leaves. You can also alternate two shapes (7-lobed as here and a simpler 5-lobed version) to add interest
Info :
To make placemats, use a single large leaf worked with an extra round of lobes for greater diameter, then border as desired
This autumn maple leaf table runner brings handcrafted warmth to any table. Each leaf is textured with raised veins and trimmed with picot edges to create a realistic, cozy fall aesthetic. Designed to be modular, you can easily scale the design for any table or make matching placemats. 🍂🧶 I hope these detailed instructions help you create a beautiful seasonal centerpiece you'll enjoy year after year. Happy stitching and don't forget to share photos of your finished runner! 🍁