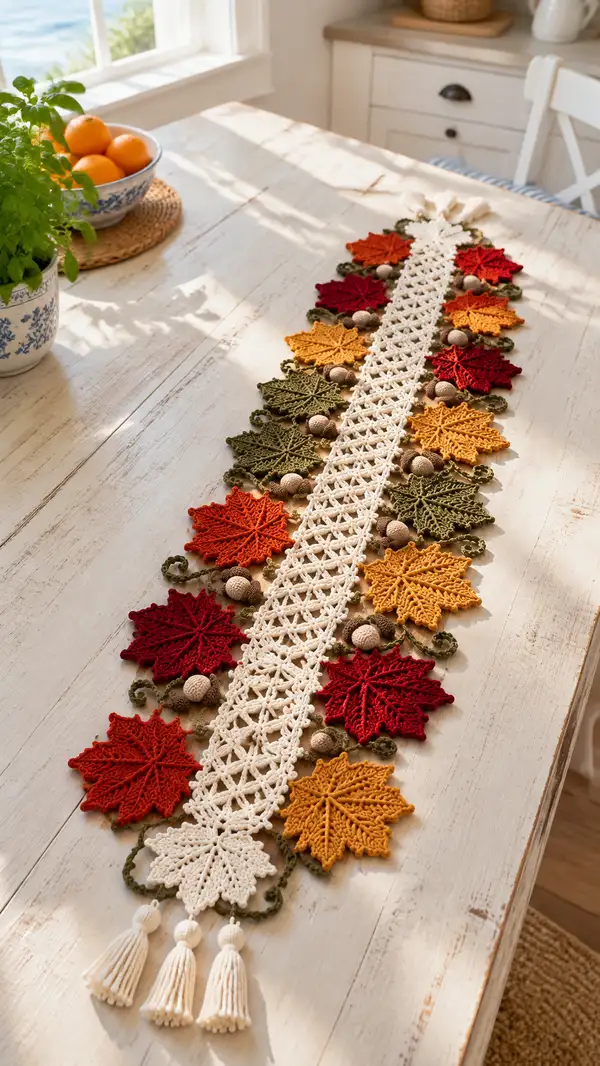
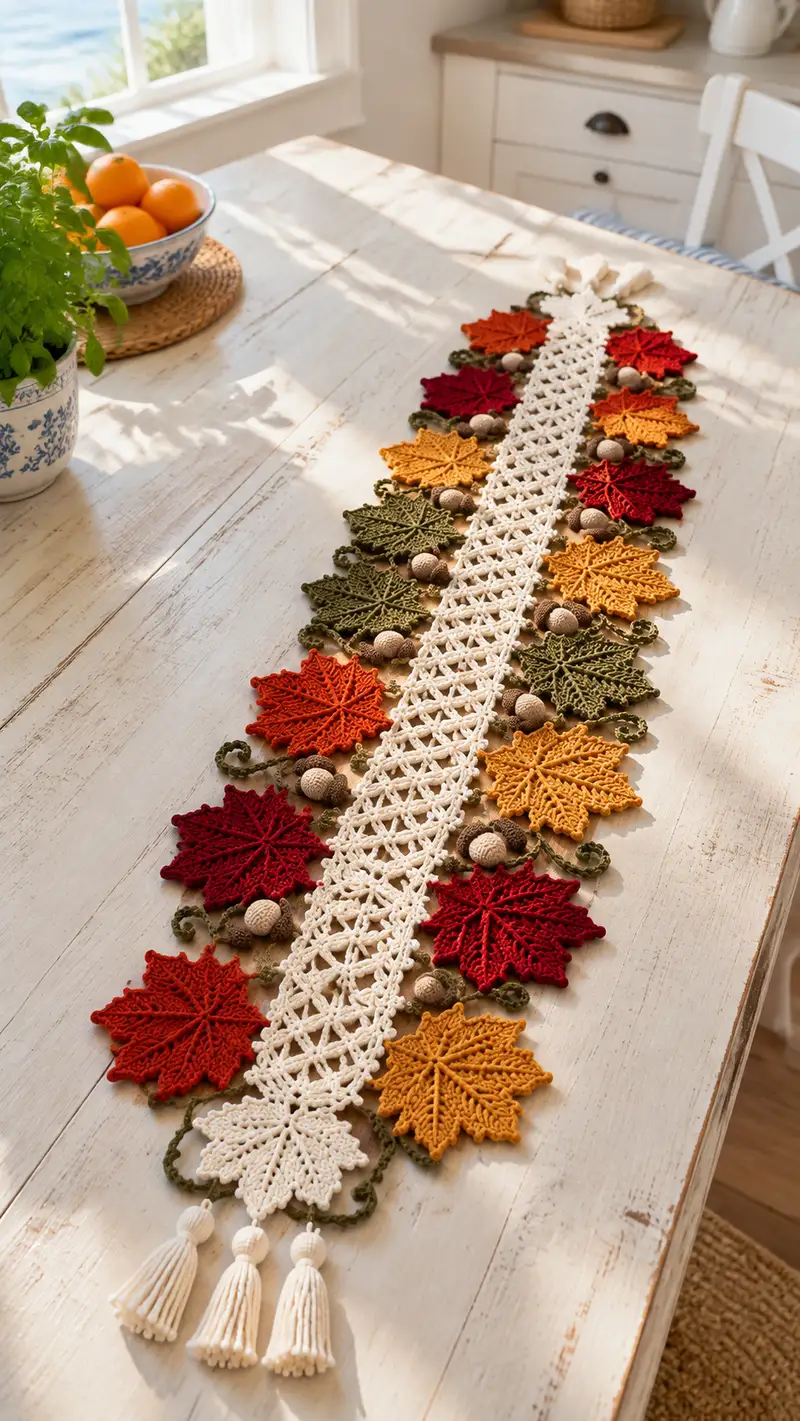
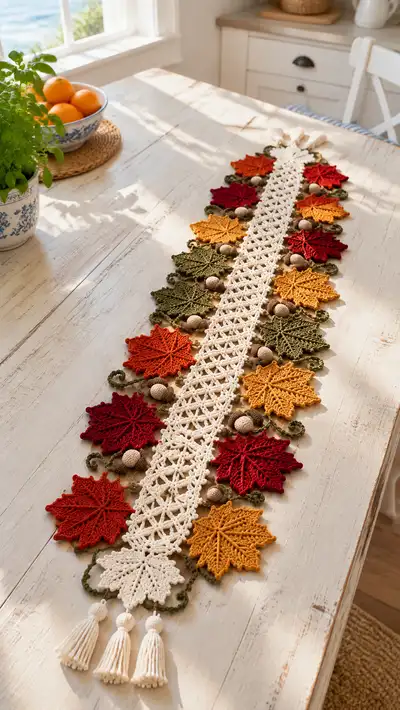
Create a cozy, autumn-inspired table runner featuring a delicate lattice center panel flanked by crochet maple leaves in warm fall tones. This runner combines lacework, leafy motifs, tiny acorn accents, olive-green vines, and three tassels at each end for a seasonal centerpiece. The finished piece is decorative yet sturdy — perfect for dining tables, sideboards, or seasonal displays.
Progress Tracker
0% Complete
— Central Lattice Panel :
Round 1 :
Ch 19, join with sl st to first ch to form a ring (19 ch foundation)
Round 2 :
Ch 3 (counts as dc), dc in same ch, *ch 1, sk next ch, 2 dc in next ch; rep from * across to last ch, join with sl st to top of ch-3 (36 dc with 17 ch-1 spaces)
Round 3 :
Ch 1, sc in same st, *ch 5, sl st in center of next 2-dc cluster (into ch-1 space), ch 5, sc in top of next 2-dc cluster; rep from * across, join with sl st (creates scalloped openwork)
Info :
These three rounds form the repeating lace unit. The central panel is worked lengthwise by repeating Rounds 2-5 to desired length. Keep tension even; this panel will be joined to leaf motifs later so block flat before assembly.
Round 4 :
Ch 3, dc into same st, *ch 1, 2 dc into next sc (over top of cluster), ch 1, skip to next ch-5 space, sc in center of ch-5; rep across, ending with 2 dc in last sc, join with sl st (maintain 36 dc clusters and open spaces)
Round 5 :
Ch 1, sc in same st, *ch 5, sl st in center dc cluster, ch 5, sc in next sc; rep across, join (panel now has stable lattice lines)
Info :
Repeat Rounds 4-5 until the central panel reaches the length that will seat the number of leaves you plan to attach. For sample runner length pictured, repeat the two-row lace unit 22 times to reach approximately 80cm (adjust by adding or subtracting repeats).
Round 6-49 :
Repeat Rounds 4-5 alternating (46 rows total including initial rows) until panel length is achieved (maintain the same stitch pattern). Keep beginning and ending rows symmetrical so leaf joins fall in matching positions.
Info :
When your panel reaches target length, fasten off leaving a long tail for joining. Block the lattice panel flat, pinning open each ch-5 space and letting dry to keep openings crisp for lace effect.
Round 50 :
Optional edging: join cream yarn with sl st at one long edge, ch 1, sc evenly around the entire perimeter of the lattice panel (work 3 sc in each corner), join and fasten off (this gives a neat edge for joining leaves)
Info :
If you prefer a narrower panel, reduce the initial foundation chains. If you lengthen the runner, make additional lace repeat pairs. Mark the positions where leaves will be joined: count ch-5 spaces along both long edges and note every third or fourth space depending on desired leaf spacing (we use every 3rd ch-5 space for the pictured spacing).
— Maple Leaf Motif (Make 14; 7 per side) :
Round 1 :
Using leaf color, make a magic ring, ch 3 (counts as first dc), 11 dc into ring, pull tight and join with sl st to top of ch-3 (12 dc)
Round 2 :
Ch 1, sc in same st, *ch 2, sk next dc, sc in next dc; rep around to make 6 ch-2 picot spaces, join with sl st (6 ch-2 spaces, 6 sc)
Round 3 :
Sl st into first ch-2 space, ch 3 (counts as dc), 2 dc in same ch-2 sp, ch 2, 3 dc in same ch-2 sp (creates first lobe), *sl st to next ch-2 sp, ch 3, 3 dc in ch-2 sp, ch 2, 3 dc in same sp; rep around for 6 lobes, join (each lobe is 6 dc separated by ch-2)
Info :
These lobes form the basic leaf shape. Work next rounds to elongate and define the leaf points and center vein. Keep stitches centered over lobes for symmetrical points.
Round 4 :
Ch 1, sc in first dc, *ch 2, [sc in next dc, hdc in next dc, dc in next dc, tr in next dc, dc in next dc, hdc in next dc, sc in next dc] across lobe, ch 2, sl st to base of next lobe; rep around, join (each lobe filled with 7 stitches creating a pointed shape)
Round 5 :
Ch 1, sc in same st, *work 7 sc across the lobe spine (FLO on odd rounds to create texture): sc in each st across, ch 1, sl st to tip of next lobe; rep around, join (structure begins to define lobes and ridges)
Round 6 :
Ch 1, sc in base of first lobe, *ch 4, skip to center of next lobe, sc in center of lobe (forms connecting arches between lobes); rep around, join
Info :
Round 6 arches create the negative space and the leaf perimeter. From here we begin shaping the central vein and adding pointed tips by working increases and decreases along each lobe tip.
Round 7 :
Sl st to tip of lobe, ch 1, sc, hdc, dc, tr, dc, hdc, sc working over tip to form a slender point; sl st back to join point to base of lobe, ch 1, sl st to next lobe base; rep around (each lobe now has a defined point)
Round 8 :
Ch 1, sc across bases and sl st into connecting arches, *ch 3, sc in tip of lobe to create raised stitch line for vein, ch 3, sl st back into arch; rep around, join
Round 9 :
Using FLO on this round: Ch 1, sc FLO in every st around to create a raised ridge that becomes the main vein; join (stitch count maintained: approx 72 sts depending on earlier shaping)
Info :
At this stage the leaf has a central ridge; use a tapestry needle to embroider additional veins later with contrasting yarn if desired. Block flat while still slightly damp to set points.
Round 10 :
Ch 1, sc around working 2 sc in the base scallops (6 bases) to widen the leaf slightly for a realistic silhouette, join (approx +6 sts added)
Round 11 :
Ch 1, *[sc in next 4 sts, dec over next 2 sts] x repeat across each lobe base to taper inward slightly toward the tip of each lobe, join (mathematically reduce approx 12 sts total)
Round 12 :
Ch 1, sl st into center-bottom stitch, ch 20 to create leaf stem loop, sc into same stitch to anchor stem, fasten off leaving tail for sewing (form narrow stem approx 20 ch long)
Info :
Make 14 leaves in the color arrangement you prefer. Block each leaf individually to set the lobes and points. If you want more pronounced veins, embroider 3-4 veins radiating from the center ridge using a contrasting darker shade with a simple backstitch.
— Leaf Vein Embroidery (Optional) :
Round 1 :
Thread yarn needle with a slightly darker shade, bring needle up at base center of leaf, stitch straight lines (backstitch) from center to each lobe tip — make 6 main veins; secure ends at leaf back
Info :
Use 2-3 strands of yarn for prominent veins or single strand for delicate detail. Secure knots on wrong side and weave in ends under blocked leaf fabric.
— Acorn Sphere (Make 14) :
Round 1 :
Using light brown, make magic ring, 6 sc in ring (6)
Round 2 :
Inc in each st around (12)
Round 3 :
(1 sc, inc) x 6 (18)
Round 4 :
(2 sc, inc) x 6 (24)
Info :
Begin stuffing lightly after Round 4. Acorn spheres should be small and firm but not rock-hard — use small amounts of fiberfill.
Round 5 :
(3 sc, inc) x 6 (30)
Round 6 :
1 sc in each st around (30)
Round 7 :
(3 sc, dec) x 6 (24)
Round 8 :
(2 sc, dec) x 6 (18)
Round 9 :
(1 sc, dec) x 6 (12)
Round 10 :
6 dec (6) - close, fasten off leaving tail for sewing and shaping; weave tail through final sts and pull closed, hide tail inside sphere
Info :
Make 14 spheres. Optionally insert a small wooden bead into the top before final stuffing for weight and shape. Use darker brown for the cap to add contrast; cap is attached separately below.
— Acorn Cap (Make 14) :
Round 1 :
With dark brown, ch 7, join to form ring, ch 1, 10 sc into ring (10)
Round 2 :
2 sc in each st around (20)
Round 3 :
Sc in each st around (20)
Round 4 :
BLO sc in each st around (20) to create a textured rim
Round 5 :
Ch 1, sc around again pulling firmly to cup over the top of the acorn sphere; fasten off leaving long tail for sewing cap to sphere
Info :
Sew cap onto acorn sphere with whip stitch, covering top third of sphere. Secure and weave ends into sphere to hide. Make 14 caps and attach to spheres.
— Olive Vine and Connecting Loops :
Round 1 :
Using olive green, ch 70 (or length to fit between two leaf stems on panel edge), sl st back along chain to create a twisted rope effect: beginning in 2nd ch from hook, *sl st in next ch, ch 1, sl st in same ch; rep to end, fasten off leaving tail for sewing
Round 2 :
For decorative curled tendrils: ch 12, in 2nd ch from hook work 2 sc, 2 hdc, 4 dc, 2 hdc, 2 sc; fasten off and leave long tail for attaching to vine
Info :
Make enough vine segments and tendrils to weave between leaves on both sides. The vine segments are stitched along the panel edge to give a natural flow. Curling tendrils are sewn between leaves and around acorns.
— Tassels (Make 6; 3 per end) :
Round 1 :
Using cream, wrap yarn around a 6cm wide card 40 times. Cut one side to create the fringe. Tie a small bundle near the top with a length of yarn to form the tassel neck. Trim ends even and add a small wrapped bead cover by wrapping yarn around the neck for a neat finish. Make 6 tassels.
Info :
Use starch spray lightly if you want structured tassels. Attach tassels in groups of three per end: two outer tassels attached at the two outside leaf stems and one in the center attached to the panel end.
— Assembly & Joining Motifs :
Info :
Block all motifs flat before assembly. Lay the central lattice on a flat surface with RS up. Arrange leaf motifs along long edges with stem loops orientated toward the panel so stems will be sewn behind the panel edge. Even spacing: use every 3rd ch-5 space on the lattice edge for 7 leaves per side over the sample panel length.
Round 1 :
Position first leaf on right edge aligning its stem loop to the marked ch-5 space. Using matching yarn and tapestry needle or a contrasting whip stitch, sew the stem loop to the lattice panel by stitching through the back of the leaf stem loop and through the edge ch-space and adjacent dc clusters. Use small, even stitches to hide joins (approx 6-8 stitches per leaf to anchor)
Round 2 :
Continue placing leaves along the edge, alternating colors as you go: red, olive, mustard, burgundy, orange sequence as pictured. Pin each leaf while sewing to maintain even spacing and mirror placement on opposite edge for symmetry.
Info :
Sew leaves only by stem loops initially. After all leaves are anchored, go back and add a mattress stitch along the leaf base edge at 3-4 points per leaf to prevent flapping. Do not sew across the pointed tips; only anchor the base and sides so lobes remain free and dimensional.
Round 3 :
Sew acorn spheres into clusters of 2-3 between leaves: place acorn in position, tack through acorn top into lattice ch-spaces and vine loops, then secure vine tendrils around acorn bases. Use long stitch to secure each acorn with at least 6 stitches through the body and into lattice to prevent slippage.
Round 4 :
Attach olive vine segments along the entire long edges by basting the vine along the panel edge and securing at every leaf stem and every acorn cluster. Curl tendrils are sewn to the vine and tucked under leaf edges for a natural look.
Info :
For extra strength, stitch through both lattice and leaf base (but only through the back of the leaf to avoid visible stitches). Use hidden ladder stitch when you need invisible joins along the front of the lattice.
Round 5 :
Sew tassels to ends: place central tassel at center of end leaf, sew through tassel neck securely into panel and leaf bases; place two side tassels evenly each side, attach and hide ends within leaf bases. Wrap necks with matching yarn and weave ends close to secure.
Round 6 :
Go over all joins and weave in any remaining tails. Trim stray ends, and give the entire runner a final blocking to ensure uniformity and flatness.
Info :
Once assembled, steam block the completed runner for 1-2 minutes at a safe distance to relax any stiffness, reshape lobes by hand if needed, and leave to cool/re-dry under pins for best shape retention.
— Finishing Touches & Optional Variations :
Round 1 :
For a richer texture, embroider additional vein detail on leaf fronts with thin yarn or embroidery floss using long straight stitches from base to tip. Add tiny French knots at the leaf base to mimic seeds or dew drops.
Round 2 :
To change scale: use DK weight yarn and 3.25mm hook to reduce size by ~15%-20% or bulky weight and 4.5mm hook to enlarge motifs similarly. Adjust number of leaves to maintain pleasing proportions on your table.
Info :
If making for outdoor use, use 100% acrylic yarn and skip stuffing wooden beads in acorns; secure with fabric glue and double-stitch for weather resistance.
This autumn table runner is a joyful project that celebrates texture and color. Each leaf and acorn you crochet adds a little piece of the season to your home, and assembling them into the final runner is deeply satisfying. The finished centerpiece is both elegant and charming — perfect for holiday tables or everyday cozy decor. 🍁🧶 Add your personal color choices and enjoy the warmth this handmade piece brings to your space.