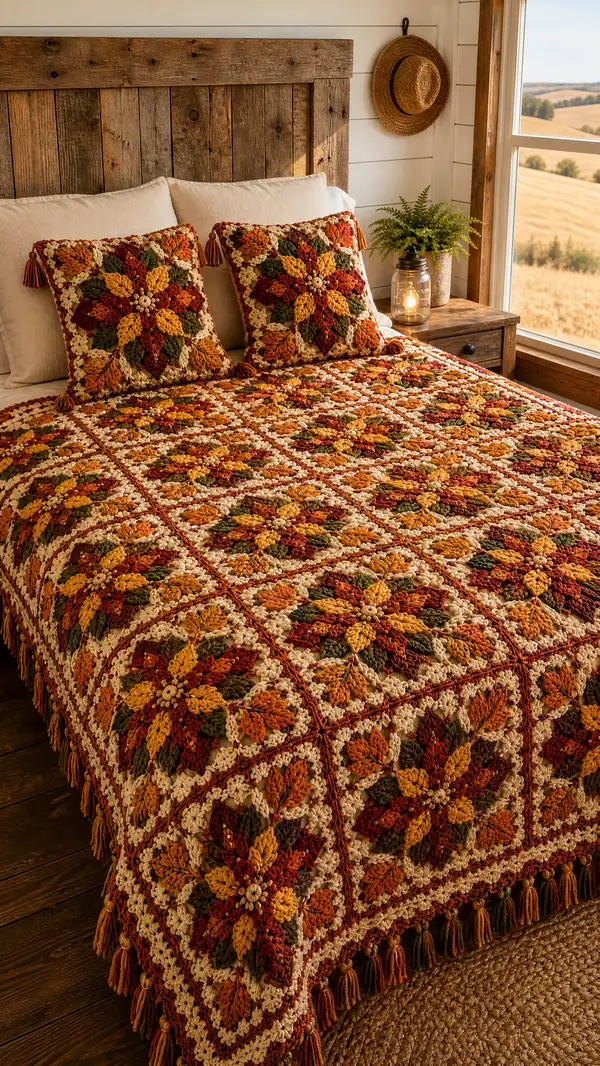
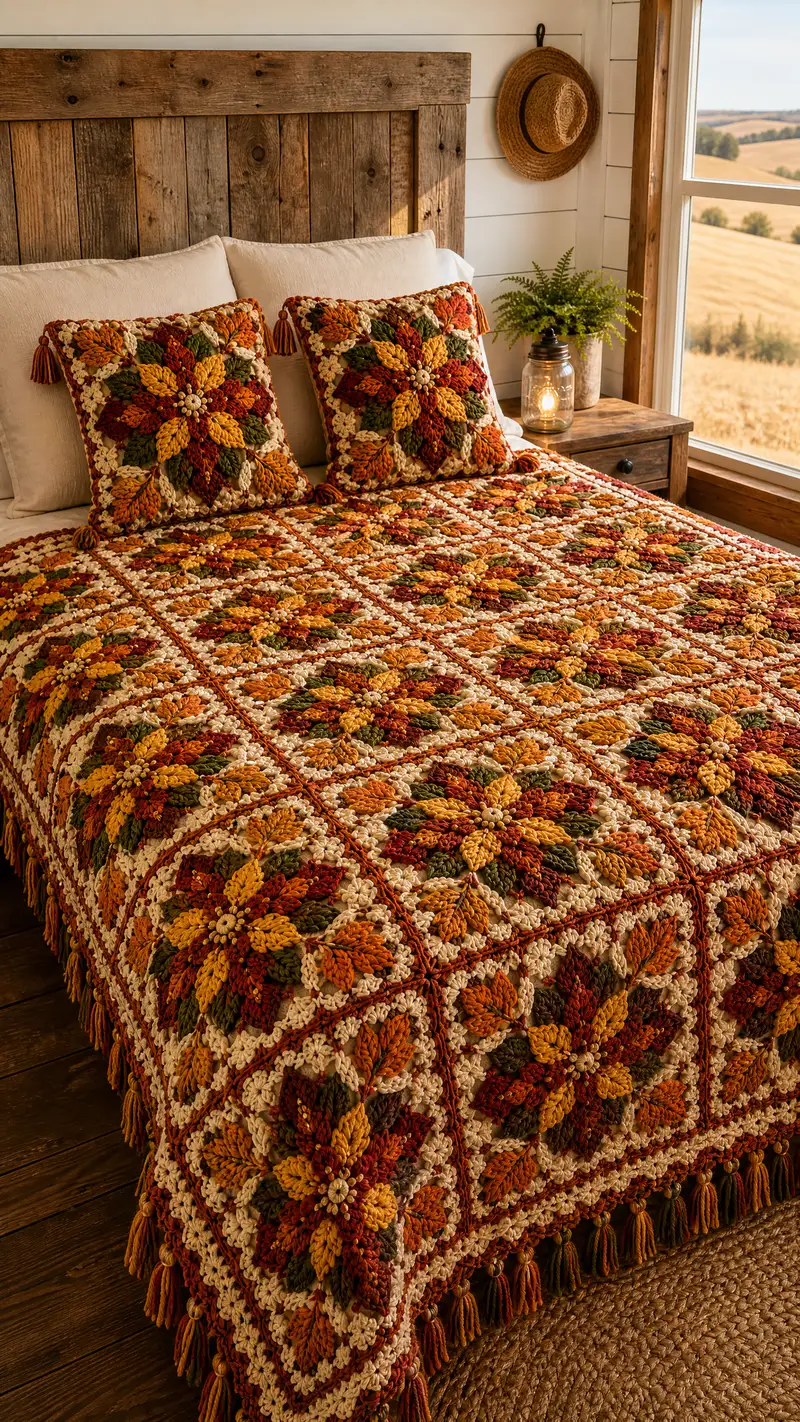
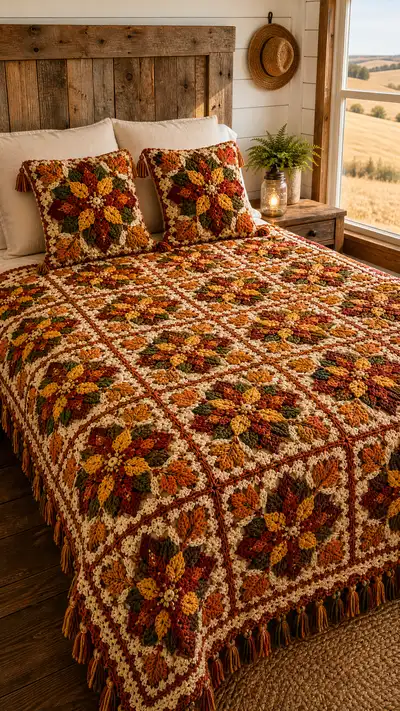
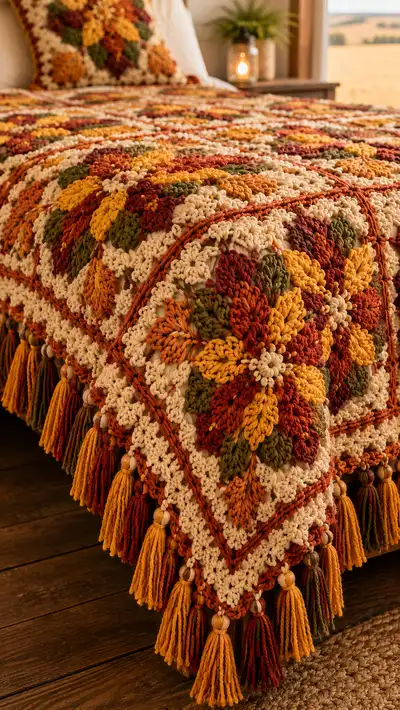
A warm, rustic bedspread made from textured petal granny squares in rich autumn hues. Each square features layered puff petals, a neutral openwork border, and a beaded tassel edge for rustic farmhouse charm. The finished set shown includes a full bedspread and matching pillow shams with coordinating tassels.
Progress Tracker
0% Complete
— Materials & Gauge :
Info :
Gauge: One finished petal granny square = approximately 10.5" square after blocking when worked with worsted weight yarn and 5.5mm hook. Gauge is measured across center petal span. Adjust hook size to match gauge.
Info :
Puff stitch used = 5-loop puff: Yarn over, insert hook, pull up loop, repeat 5 times in same stitch (11 loops on hook), yarn over and pull through all loops, ch1 to close puff. Counts as 1 stitch unless otherwise noted.
— Center & Petal Formation :
Round 1 :
With Color A (cream) work 6 sc in magic ring (6)
Round 2 :
Inc in each st around (6 inc) (12)
Round 3 :
(1 sc, inc) x 6 (18)
Round 4 :
(2 sc, inc) x 6 (24)
Info :
Change to Petal Color 1 (rust) now. Fasten off cream or carry inside if you prefer to keep loop tidy; many find fastening off easier for multiple color changes.
Round 5 :
Establish petal anchors: *(1 sc in next st, puff in next st, 1 sc in next st) ; rep from * around (consumes 24 sts) (24). Each puff forms the base of a petal; because there are 24 sts we will make 8 major petals by grouping puffs in sets of 3 in later rounds.
Round 6 :
Build petal clusters: *(ch2, 3 dc around the top of the puff just worked, ch2, sl st to the sc after puff), sc in next sc; rep from * around. This round creates decorative arches above each puff. Stitch count remains visually 24 main anchors though 24 sl st and insertions occur.
Info :
Work gently when inserting into puff tops; use stitch marker after Round 6 to note the first petal anchor for later alignment.
Round 7 :
Change to Petal Color 2 (mustard). Around each puff make: *(ch1, 5-loop puff in top of puff to elongate petal, ch1, sl st in base between puffs) ; rep from * around (24 elongated puffs). Count remains 24 puff stitches.
Round 8 :
Shape petals: *Sc in base between puffs, (sc, hdc, dc) across center of each elongated puff (work these into the top loop area created by previous puff), sc in next base; rep from * around. This builds out the petal shape. Approx stitch count now 24 sc anchors plus 8 small dc groups; treat as 40 visual elements but base anchor count is 24.
Info :
If your puff petals are too loose, tighten yarn tension for puff loops and close puffs with a slightly smaller hook for these rounds.
Round 9 :
Working around the petal edges, change to Petal Color 3 (burnt orange): *(ch2, 4 dc in petal top evenly spaced, ch2, sl st in next base sc), sc between petals; rep from * around to form the full round of petal caps. This round establishes a circular petal crown and prepares for square shaping.
Round 10 :
Make petal joins: Sl st to a ch2 space, ch1, (sc, ch3, sc) in each ch2 space around to make 8 small picot-like petals spaces (one at the tip area of each petal), sl st to join. You will have 8 ch3 corner-like loops positioned evenly.
Info :
At end of Round 10 the motif reads as an 8-point flower. Mark the 8 corner loops with removable stitch markers; these will become the four square corner positions (we will pair them up to create square corners in later rounds).
— Petal Layering & Texture Rounds (Rounds 11-24) :
Round 11 :
Change to accent Olive color. In each ch3 loop: (sc, ch4, sc) to elongate the corner loops, sl st to join. Maintain a visual count of 8 ch4 loops (8).
Round 12 :
Work dense cluster between petals: In each space between petal bases work (sc, hdc, 3 dc, hdc, sc) to fill in and create raised valleys between petals. Space placement: there are 8 petal valleys to fill; repeat 8 times. This adds textured wedges and does not change the corner anchor count.
Info :
Keep petals facing outward by gently pinching and blocking later; these rounds create the sculpted surface that will show strongly after blocking.
Round 13 :
Change to cream (background) for frame start. Work around entire round: *(sc in each dc and sc across previous rounds) until you reach the first ch4 loop, then (sc, ch5, sc) in each ch4 loop to make tall corner loops; rep around. After working across all petals and loops you should have 8 ch5 loops positioned evenly (visual anchors for square corners).
Round 14 :
Square shaping start: In cream, work evenly around: 1 sc in each stitch and 3 sc in each ch5 loop to begin turning the round toward a more square outline. If you started with 24 anchors, after inserting 3 sc in each of 8 ch5 loops you add 16 extra sc so approximate count becomes 24 base + 16 new = 40 (40).
Info :
Check layout on flat surface; the motif should begin to look polygonal with four slightly longer edges separated by corner clusters. We will now expand into a square with controlled increases at four cardinal points.
Round 15 :
Continue in cream: *Work 1 sc in each st across edge until you reach a ch5-derived corner; in that corner work (sc, ch3, sc, ch3, sc) to create a roomy corner that will allow the square to form. Repeat for 4 corners only (space evenly). After working four such corners the stitch count increases by 8 stitches per corner (each corner adding two ch spaces and extra sc); approximate new count = 40 + (4 x 8) = 72 (72).
Round 16 :
Establish even square sides: 1 sc in each st around (72). This round evens out the counts; place markers at the exact center of each side (will be used as join reference later).
Info :
From Round 16 onward you will be working in rounds that gradually enlarge the square. Mark the 4 corner groups to identify them during increases; this improves symmetry across the bedspread.
Round 17 :
Increase at side centers: *Work 1 sc in each st until 2 sts before corner; (inc, sc) in next 2 sts to slightly widen each side; rep for all 4 sides (4 inc total of 1 st each side because we did inc twice per side). New count approximate = 72 + 8 = 80 (80).
Round 18 :
1 sc in each st around (80)
Round 19 :
Repeat a side increase: *Work (sc in each st across side until reach corner marker) then (inc, sc, inc) across the mid-side area to shape a flatter side; rep 4 times. Each side increases by 2 stitches total = +8 overall. New count = 88 (88).
Round 20 :
1 sc in each st around (88)
Info :
By Round 20 the motif is a defined square with textured floral center. Continue expansion if making larger square, or stop here if you want a smaller square. The sample blanket squares are worked to approximately 10.5" after Round 22 and blocked.
Round 21 :
Optional puff accent round: Change to rust. *Work (sc, puff, sc) evenly across the sides in the spaces between clusters; rep around. This adds an intermediate raised ring around the petals. Treat each puff as 1 stitch. Approx count remains 88.
Round 22 :
Return to cream. 1 sc in each st around (88). Fasten off if completing square now. Block square to 10.5" if aiming for sample size.
Info :
Make a large number of squares to hit your bedspread dimensions. The sample uses 6 x 7 squares for a full bedspread (42 squares). Measure after blocking and adjust square count to match bed size: twin, full, queen, king will require different counts.
— Alternate Petal Variation (Optional Small Squares) :
Round 23 :
For a more compact petal look: after Round 6 work a single close round in the same color: (sc in each st and sc2tog every 6th stitch) to reduce and tighten petals; this will reduce final square size by approx 0.5". Repeat Rounds 11-16 accordingly to shape square.
Info :
Keep track of altered counts if you choose compact petals; re-measure motif and adjust how many squares you need before joining.
— Joining Squares (Join-As-You-Go Method) :
Info :
We recommend joining squares using the Join-As-You-Go (JAYG) single crochet join for a clean raised seam that echoes the sample. Join in cream, with the right sides facing out.
Round 24 :
Place first square as reference. On second square, align edges; beginning at one corner sc, insert hook through front loop only of both edge stitches and sl st to join, ch1 then sc in each pair of loops across until corner; for corners work (sc, ch3, sc) through both squares to maintain corner space. Continue joining squares row by row. For each join pair you'll work sc into paired sts which keeps counts consistent.
Info :
When joining, ensure motifs align so petals line up across seams. Place pins every 2-3" to keep orientation while you join. Use a contrasting removable marker to note beginning/ending of each join row.
Round 25 :
JAYG across a row: For each inter-square edge, work sc through both loops of square A and B slipped together, evenly spacing stitches; if counts don't match exactly, add a sc increase every 10-12 sts to equalize. Keep corners roomy with (sc, ch3, sc) through both squares.
Round 26 :
After joining a row of squares, turn to join the next row by starting at a corner and repeating the JAYG procedure. Work in continuous rows until all squares are joined into the layout you planned (6 x 7 for sample). When joining vertical seams notice the seam forms a raised ridge; this is intentional and echoed later by the border ridge.
Info :
If you prefer a flat join, slip stitch join or mattress stitch can be used, but final look will be different. JAYG produces a framed look that complements the rustic sample.
— Structural Border Rounds (Post-Assembly) :
Round 27 :
With bedspread assembled and joins complete, work 1 rnd in cream around the entire perimeter: 2 sc in each corner space (created by previous corner loops) and 1 sc in each edge stitch (this evens the border and hides raw join edges). Count will vary by overall bedspread size; for sample approximate perimeter sc = 6 squares across x 7 squares down = calculate perimeters accordingly; work evenly to maintain flat edges.
Round 28 :
Switch to rust. Work 1 sc in each st around (evening round). Corners: 3 sc in each corner stitch to keep turn square. This establishes a colored frame between cream and tassel border.
Info :
Place stitch markers every 12" along border to help count even spacing for final decorative rounds and tassel placement.
Round 29 :
Texture ridge round in cream: Work 1 sc in each st BLO around to create a raised ridge effect (this forms the cream textured ridge seen near sample edges). Corners: 3 sc in corner stitch BLO to maintain square corners.
Round 30 :
Return to rust: Work 1 sc in each st around (evening). Prepare placement marks for V-stitch shell below; this will act as a holding row for shell rounds.
Round 31 :
Shell foundation in cream: *(ch3, sk 2, 5 dc in next st, ch3, sl st in next st) across each side; where necessary adjust to keep shells evenly spaced. Count is visual shells across side; this builds the openwork background present in the sample.
Info :
Spacing shells evenly at corners may require adjusting the number of shells by +/- 1 across long sides; prioritize symmetry top-to-bottom and left-to-right.
Round 32 :
Top shell round: Work a shell (5 dc) into each shell ch-space from previous round; in corners work a specially spaced cluster: (5 dc, ch3, 5 dc) to keep corner fullness. This gives the lacy cream frame around the motifs you see in the picture.
Round 33 :
Finish shell stabilization: 1 sc in each st around in rust to anchor the shell rounds and create the thin rust border line seen in the sample. Corners 3 sc. This provides a clean edge before final tassel attachment.
Info :
At this stage measure the perimeter to determine tassel spacing; sample tassels are spaced about 3.25" apart along the edge and placed at every shell valley center. Mark tassel positions now using pins or removable markers.
— Decorative Raised Ridge (Optional) :
Round 34 :
To recreate the raised diagonal ridge visible in each sample square (thin rust ridge between motifs), before joining squares you can add a raised ridge round along the seam lines: Work front post hdc or fpdc along the existing join row to raise a narrow ridge. Work this same fpdc ridge around the entire bedspread perimeter in rust for continuity.
Info :
Front post stitches are worked into the body of the join seam (under and around the join sc) to produce a raised ridge. Be careful to insert the hook behind the post of the stitch to get consistent ridges.
— Tassels & Beaded Fringe :
Info :
Make tassels before final finishing. Sample tassels are multi-strand, 3-color blended, with two wooden beads per tassel and tied to the shell valley with a loop knot. Prepare tassels so that finished length is approx 6.5" (including bead).
Round 35 :
Make tassel bundle: Cut 40 strands at 13" long from chosen colors (for a full dense tassel). Fold strands in half, loop at fold and tie a small piece of yarn tightly about 1" from the fold to form the tassel head. Thread two wooden beads onto the looped top (one lighter, one darker) before locking the head knot if using beads through yarn loop.
Round 36 :
Attach tassels at marked positions: Slip the loop end under the final border and pull the tails through the loop, then thread beads over the tails and push down to the head. Secure with a strong knot and apply a drop of fabric glue inside the bead hole if desired. Trim tassel ends evenly and comb for fullness.
Info :
Alternate tassel option: Use a single-color tassel for more subtle look, or vary placement spacing to match your aesthetic. Ensure tassels are evenly spaced around perimeter to avoid weight imbalance when the bedspread hangs over a bed.
— Pillow Shams (Matching Squares) :
Round 37 :
Make two large squares for pillow fronts following Rounds 1-22 but finish square after Round 22 at desired size. For front-facing detail, work two additional border rounds in cream and rust as per Rounds 27-33 to mirror bedspread edge. Sew or zipper pillow back to dimensions matching finished square (approx 10.5" square for a smaller decorative sham; sample uses 14" finished sham built from same motif enlarged by 2 extra outer expansion rounds).
Round 38 :
Pillow sham tassels: Attach a tassel to each corner and mid-side to mimic bedspread's tassel rhythm. For each corner tie a slightly shorter tassel to keep pillow corners neat.
Info :
Consider lining the pillow back fabric to protect yarn and keep shape when using regularly. A zipper insertion is neatest for removable covers.
— Finishing & Care Rounds :
Round 39 :
Weave in ends: Use a yarn needle to weave all tails into the backs of squares across several stitches and knot inside to secure. Trim close to the fabric. Ensure tassel knots are tightly secured with multiple weaves.
Round 40 :
Block assembled bedspread: Dampen lightly and pin square edges straight on a blocking surface or use a dry steamer and blocking pins. Allow to dry completely. Blocking helps petals relax and squares lie flat.
Info :
Spot wash or gentle hand wash recommended for worsted cotton/wool blends. Lay flat to dry. Re-block after washing if needed to maintain edge crispness.
— Complete Step-by-Step Round Index (Expansion & Decorative Rounds) :
Round 41 :
Decorative slip-stitch ridge in rust around bedspread exterior to echo inter-square ridges; 1 sl st in each st around. Corners 3 sl st. This is decorative and does not change counts significantly.
Round 42 :
Sc in each st cream around to create a small lip before shell setup. Corners 3 sc. This evens out any irregularities after sl st ridge.
Round 43 :
Large shell round: *Sk 1 st, (5 dc, ch2, 5 dc) in next st to create bold shells along border; sk 1 st, sl st in next; rep around. Corners: work (5 dc, ch4, 5 dc) to keep corner size. This yields a bold scalloped edge that will be further stabilized in next rounds.
Round 44 :
Stabilize shells: 1 sc in each dc and 3 sc in each shell ch2 or ch4 space to anchor shell and maintain flat perimeter. Corners 5 sc in corner ch space. This creates a foundation for tassel knots to attach to.
Info :
When attaching tassels, push beads down firmly and knot twice; weave in the tails into the border for added durability—especially if bedspread will be used daily.
Round 45 :
If you prefer a heavier border, repeat Round 43 then again Round 44 but alternate colors (rust then cream) to create layered scallops visible in the sample where cream scallops are framed by rust lines.
Round 46 :
Final anchor round: 1 sc in each st BLO around using cream. This produces a neat, slightly raised outer edge where tassel loops will thread. Corners 3 sc in corner st BLO. Fasten off and weave ends securely.
Info :
At the end of the rounds above your bedspread should have a clear, decorative perimeter with evenly spaced shell valleys for tassel placement. Trim and finish tassels last to match length uniformly across the spread.
— Optional Extra Embellishments :
Round 47 :
Add little bead cluster centers to each motif: sew 6-8 seed beads in a small circle in the very center of each flower to mimic the beaded center visible in the sample close-up. Use a strong thread and weave through several stitches to secure beads.
Round 48 :
For extra texture add front post double crochet ribs in rust along the seam rows between squares: *fpdc around each join sc to make thin ridges that echo the sample's raised joins. Work evenly to ensure ridge consistency.
Info :
Beads add weight. If you add bead centers to every motif, ensure tassels are balanced and bedspread is supported on the bed to avoid pulling at the corners.
— Final Checklist Before Use :
Round 49 :
Check all tassel knots for security and weave any loose ends into the backing rows. Confirm beads are snug and not sliding up the tassel. Give the spread a final gentle steam to relax any hook scars.
Round 50 :
Enjoy and style: Drape over bed, fold back top border for layered look, or use as a throw. The texture, colors, and tassels create a rich autumn focal point.
This Autumn Petal Granny Square Bedspread brings together texture, color and tactile charm into one spectacular statement piece. Each repeating petal motif is addictive to stitch, and the finishing tassels add handcrafted character that really makes the bed pop. Whether you keep it for cozy nights in or gift it to someone special, this bedspread is a labor of love that rewards patience with timeless beauty. 🧶🍂 Make a cup of tea, put on a playlist, and enjoy every square. ✨