🧢 Beautiful ✨ Detailed πŸ’ Adorable

Autumn Plaid Scallop Table Runner Pattern

Autumn Plaid Scallop Table Runner Pattern
4.7β˜… Rating
5-7 Hours Time Needed
3.5K Made This
βœ‚οΈ

Intermediate Level

Ideal for those with basic crochet experience, featuring slightly more advanced stitches and techniques to expand your skills.

⏱️

Weekend Treat

Takes 5-7 hours, making it an enjoyable project to finish over a couple of days.

🏑

Cozy Accent

A warm touch for your space that transforms ordinary corners into inviting nooks filled with handmade charm.

🧢 Jump to Pattern ↓

About This Autumn Plaid Scallop Table Runner Pattern

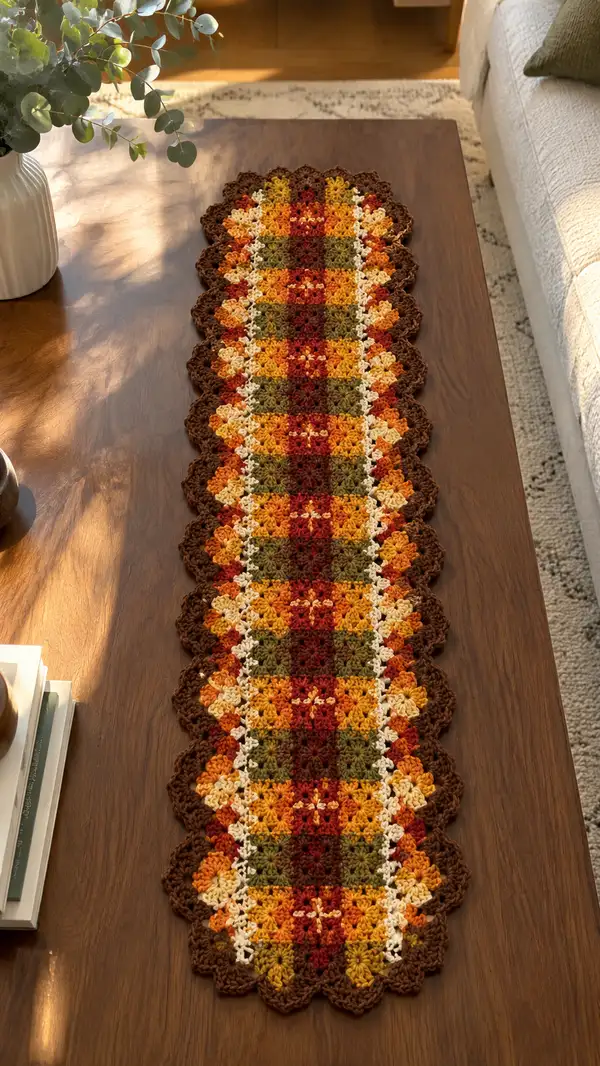
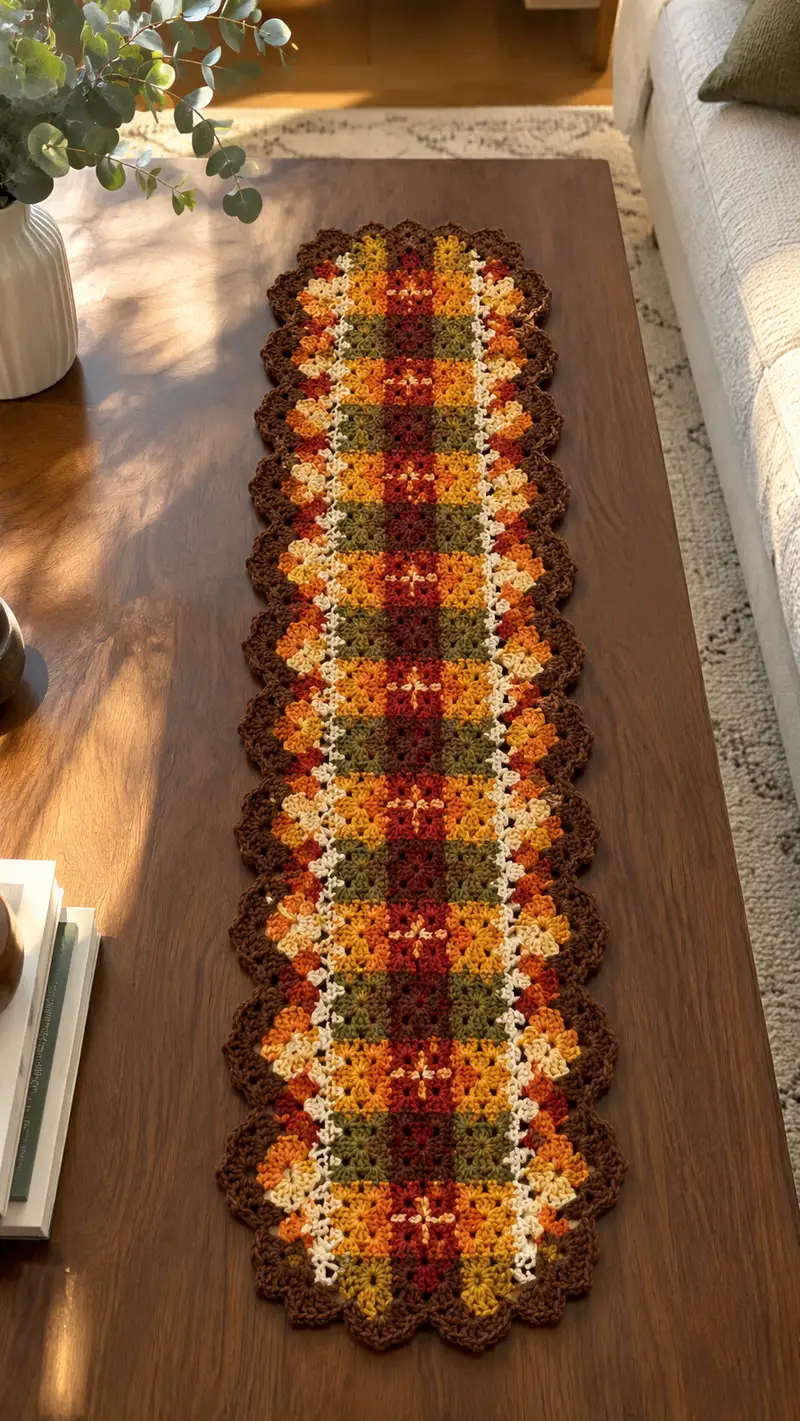
This table runner is constructed from repeat granny-cluster motifs worked in a vertical strip, joined seamlessly as you go, then finished with a deep scalloped border. Color changes create a cozy plaid effect with visible blocks of rust, mustard, olive, cream and chocolate brown. The scalloped chocolate edging rounds the runner beautifully for a finished, tailored look.

Autumn Plaid Scallop Table Runner Pattern crochet pattern - detailed view of completed project

The pattern is modular: you can lengthen or shorten by adjusting motif repeats. It uses worsted weight yarn and a medium hook for a sturdily draping runner that still lies flat on tables. The stitch motifs are forgiving and ideal for practicing color changes and joining-as-you-go.

Why You'll Love This Autumn Plaid Scallop Table Runner Pattern

I love this runner because it blends classic granny-cluster texture with a refined scalloped border that elevates everyday decor. I especially enjoy how the warm fall palette reads like woven plaid when the motifs repeat, and how the deep brown edge frames the whole piece for a polished finish. It's cozy, satisfying to make, and makes a table look instantly styled.

Autumn Plaid Scallop Table Runner Pattern step 1 - construction progress Autumn Plaid Scallop Table Runner Pattern step 2 - assembly progress Autumn Plaid Scallop Table Runner Pattern step 3 - details and accessories Autumn Plaid Scallop Table Runner Pattern step 4 - final assembly and finishing

Switch Things Up

I absolutely love how versatile this pattern is β€” I often change just one color in the sequence to make a winter or spring version. Swapping the Mustard for a soft gray and the Rust for a dusty rose creates a completely different mood.

I also enjoy adjusting the runner length: add more motif repeats for a dining table or make a shorter version for a coffee table. Using a slightly smaller hook tightens the fabric for a more formal look, while a larger hook softens the drape. Finally, you can add a narrow sc or hdc border in a contrasting yarn before the scallops to make a bolder edge.

If you prefer, translate the motif into a single-color runner simply by working all rounds in one hue; the texture will still read beautifully. Don't be afraid to experiment β€” this construction is very forgiving and friendly to custom tweaks.

Common Mistakes & How to Fix Them

βœ— Skipping the stitch marker at the beginning of each round can cause misaligned shell placement; always mark the first stitch of each round. βœ— Changing colors without securing tails can create uneven tension; weave in or carry the yarn neatly at color changes. βœ— Working too loosely on cluster rounds produces floppy motifs that won't lie flat; use a consistent, moderately firm tension. βœ— Joining motifs too tightly will pucker the strip; when joining-as-you-go leave joins slightly flexible and block gently. βœ— Not blocking after finishing makes scallops look uneven; wet-block or steam-block the runner for a flat professional finish. βœ— Using a hook that's too large or too small for your yarn will distort gauge; test a small swatch and adjust hook size for desired drape. βœ— Waiting to stuff or stabilize edges later can make seaming awkward; secure edge stitches and weave tails as you go. βœ— Counting mistakes in repeat rows create an off-centered plaid; keep a row counter or notes for each color-repeat sequence.

Autumn Plaid Scallop Table Runner Pattern

A warm, elegant table runner featuring layered granny-style clusters and scalloped edges in autumn tones. This long runner has a plaid-like center strip of repeat granny motifs in rust, mustard, olive, cream and deep red, framed with a deep chocolate scallop. It's perfect for a coffee table or dining table centerpiece and adds handcrafted seasonal charm to any room.

Intermediate 5-7 Hours

Materials Needed for Autumn Plaid Scallop Table Runner Pattern

β€” Main Fabric

  • 01
    Worsted weight yarn (#4), approximately 180-220g in Chocolate Brown (deep border color)
  • 02
    Worsted weight yarn (#4), approximately 120g in Rust/Deep Orange
  • 03
    Worsted weight yarn (#4), approximately 100g in Mustard/Golden Yellow
  • 04
    Worsted weight yarn (#4), approximately 100g in Olive/Forest Green
  • 05
    Worsted weight yarn (#4), approximately 80g in Cream/Ivory
  • 06
    Worsted weight yarn (#4), approximately 60-80g in Deep Red/Burgundy for accents

β€” Tools Required

  • 01
    4.0mm (G) crochet hook (recommended) for main work
  • 02
    3.5mm (E) crochet hook if you prefer a firmer fabric (optional)
  • 03
    Tapestry (yarn) needle for weaving ends and sewing joins
  • 04
    Blocking pins and a blocking mat or towel for finishing
  • 05
    Scissors
  • 06
    Stitch markers (3-6) to mark repeat points and beginning of rounds
  • 07
    Measuring tape or ruler
  • 08
    Optional: small clips or pins to hold join-as-you-go seams during assembly
  • 09
    Optional: color-coded sticky notes or row counter

Progress Tracker

0% Complete

β€” Overview :

Info :

This table runner is built from a vertical strip of repeating granny-cluster motifs worked in rounds and joined-as-you-go, then framed with a deep scalloped border in Chocolate Brown. The pattern lists rounds for a single motif unit and then enumerates a long sequence of motif repeats to create the runner length. Follow the color sequence exactly to recreate the plaid-like center. The sample runner measures approximately 36" long and 10" wide; you can lengthen by adding motif repeats.

Gauge :

One motif block (after Round 8) = approximately 3" square when using 4.0mm hook and worsted yarn. Adjust hook for desired drape.

Finished Size :

Sample runner: approximately 36" long x 10" wide (91 x 25 cm). Final dimensions will vary by yarn, hook and blocking.

β€” Motif (Granny-Cluster Block) :

Round 1 :

Make magic ring. Ch3 (counts as first dc), 2 dc into ring, ch2, 3 dc into ring, ch2, 3 dc into ring, ch2, 3 dc into ring. Pull ring closed. (12 dc, 4 ch-2 corners)

Round 2 :

Sl st to the first ch-2 corner space. Ch3 (counts as dc), (2 dc, ch2, 3 dc) into same corner, *ch1, (3 dc, ch2, 3 dc) into next corner; rep from * twice more, sl st to top of ch3 to join. (48 dc clustered into 4 corner clusters, 4 ch1 spaces between corners)

Info :

Change color at the end of Round 2 if following color sequence. Carry unused yarn or weave in tails later. This round forms the first square expansion; ensure corners are ch2 to maintain square corners.

Round 3 :

Sl st into the next ch1 space. Ch3 (counts as dc), 2 dc into same ch1 space, ch1, 3 dc into same space (creates a shell in side space), *in next ch2 corner work (3 dc, ch2, 3 dc), in next ch1 space work (3 dc, ch1, 3 dc); rep from * around, sl st to join top of ch3. (Shells on all sides, corners preserved)

Round 4 :

Sl st to the first side shell. Ch3, 2 dc in same shell sp, ch1, 3 dc in same shell sp (shell made), *in corner ch2 sp work (3 dc, ch2, 3 dc), in each side ch1 sp make (3 dc, ch1, 3 dc); rep around, sl st to join. (Square expands; keep shells evenly placed)

Info :

From now on shells are 3-dc groups separated by single chain spaces on sides and ch2 at corners. Maintain the same shell placement each round to create a flat motif.

Round 5 :

Repeat Round 4 working shells into each side ch1 space and full corner clusters into ch2 corners. Sl st to join. (Motif size increases; approximate stitch count = 4 corner clusters + 4 shells per side x 4 sides)

Round 6 :

Repeat Round 4 again to create a larger motif. Sl st to join. (Motif now approx 3" square; stitch count increases consistently with added side shells)

Info :

Change color here for the next motif color band (if following plaid sequence). If you plan to join motifs side-to-side, plan color edges so that corresponding colors meet neatly when joined-as-you-go.

Round 7 :

Repeat Round 4. This establishes the motif final working size before finishing edge joins. Sl st to join. (Keep an eye on tension; motifs should be flat without cupping.)

Round 8 :

Optional finishing round: Ch1, sc evenly around working into tops of shells and into corners (work 3 sc into corner ch2 to keep corner stable). Sl st to join and fasten off leaving tail for joining. (This creates a neat edge for joining; counts vary)

Info :

We recommend using Round 8 as your join edge: sc border gives clean stitches to join with slip-stitch or join-as-you-go technique. If you prefer a softer edge, omit Round 8 and join directly into shells.

β€” Color Sequence for Sample Runner :

Info :

The sample runner uses a repeating 6-color stripe order per motif: Chocolate Brown border (worked later), then Center motif bands in sequence for each motif unit: 1) Deep Red/Burgundy, 2) Mustard/Golden Yellow, 3) Olive/Green, 4) Rust/Orange, 5) Cream/Ivory center accents, 6) Repeat Deep Red. Follow the motif color changes as listed in the long rounds section.

β€” Building the Runner (Joining-as-you-go vertical strip) :

Info :

Work the first motif completely (Rounds 1-8). For the second motif, work up to Round 7 then join into the right-hand side by slip-stitching into corresponding side shell spaces of the first motif. Continue motifs, joining each new motif to the previous one along one side so you form a continuous vertical strip. Use the Round 8 sc edge for easier joining when preferred.

Round 9 :

First motif pair joined. After joining second motif, fasten off and weave tails. Check that motifs align so the plaid blocks form columns matching the sample photo.

Info :

When joining-as-you-go, work slip-stitches through the corresponding sc edge stitches (from Round 8) or into the top of shells if Round 8 was omitted. Count side shell spaces carefully so joins are consistent.

β€” Long Repeat Sequence (sample runner length) :

Info :

The pattern below lists motif units in repeated rounds for clarity. Each motif corresponds to 8 internal motif rounds plus an optional sc finish (Round 8). For the runner sample we repeat this motif sequence 12 times to reach the pictured length. The rounds below show color and join notes for each motif; these are enumerated as 'Motif 1 - Round X' to create the long sequence equivalent of many rounds across the entire runner. Follow the same internal motif Rounds 1-8 for each motif, substituting color as listed and joining to previous motif after completing internal rounds.

Assembly Instructions

  • Join motifs as you go by slip-stitching into corresponding sc edge stitches (Round 8). Align side shells so the plaid centers line up straight; pin motif 2 to motif 1 before joining to ensure perfect alignment.
  • After making the full vertical strip of motifs, lay the strip flat and block lightly to square motifs and set seam lines; pin gently and allow to dry.
  • Work the Chocolate Brown scalloped border around the entire outer edge of the strip. Begin by joining brown yarn at a corner and work consistent shell scallops; adjust spacing so scallops fall centered on outermost shells.
  • If adding a second narrow border for weight and drape, work one round of sc or hdc in Brown before starting scallops to provide a stable base for scallops.
  • Weave in all tails using a tapestry needle; for visible joins weave tails through the joining round on the wrong side to hide ends. Trim close once secure.
  • Final blocking: pin scallops so they are evenly rounded and symmetrical along both long sides and ends. Spray with water and leave pinned to dry for a crisp flat finish.

Important Notes

  • πŸ’‘Use stitch markers consistently at the beginning of each round to avoid counting errors and maintain proper shaping.
  • πŸ’‘Stuffing is not required for flat home decor items, but blocking is essential for getting a professional finished look.
  • πŸ’‘When changing colors, carry the unused yarn on the wrong side over small distances or weave in tails if color sections are long.
  • πŸ’‘For join-as-you-go, ensure the hook size is consistent throughout; switching hook sizes mid-join can change tension and cause wobble.
  • πŸ’‘Block motifs gently; overly aggressive stretching will warp the shell shapes and scallops.
  • πŸ’‘Pin pieces before final sewing to ensure proper placement and symmetry.
  • πŸ’‘Work tightly enough so the scalloped border keeps its shape and does not stretch when laundered.
  • πŸ’‘Label your motifs as you make them if following a complex color order to avoid accidentally swapping color bands.

This autumnal runner brings handmade warmth to any surfaceβ€”each cluster and scallop is a small act of comfort. The repeat plaid motifs make it easy to grow the runner longer or create matching coasters and placemats. I hope you enjoy every stitch of this cozy project! πŸ§ΆπŸ‚βœ¨

You ask,

we answer.

FAQs

What is the finished size of this runner?

Based on the specified yarn and hook, the sample runner measures approximately 36" long x 10" wide. Adding or removing motif repeats will change the length proportionally.

Can I use different yarn weights for this pattern?

Yes. If you use a lighter or heavier yarn, adjust your hook size accordingly and work a swatch to check the motif size. Remember that thicker yarn will increase finished size and drape.

Do I have to join-as-you-go or can I sew motifs together later?

Either method works. Joining-as-you-go creates a seamless look and fewer ends to weave; sewing later allows for more control with blocking individual motifs first.

How many motifs do I need for a longer dining table runner?

Each motif is approximately 3" square. For a 60" runner, allow about 20 motif repeats; adjust based on your gauge and desired overhang.

How should I block the runner?

Pin the runner onto a blocking mat, gently stretch to desired dimensions, and spray with water or use a damp cloth. Let dry completely to set the stitches and scallops.

Can I make coasters or placemats from this design?

Absolutely. One motif (after finishing round) makes a lovely 3" coaster; use multiple motifs joined to make placemats in matching colors.

What is the best way to weave in color change tails?

Weave tails into the wrong side along the last round of the color using a tapestry needle, following the path of stitches to hide ends securely.

How do I keep edges from ruffling?

Work an even sc round before scallops to stabilize the edge. Block the finished runner to relax any slight ruffling.