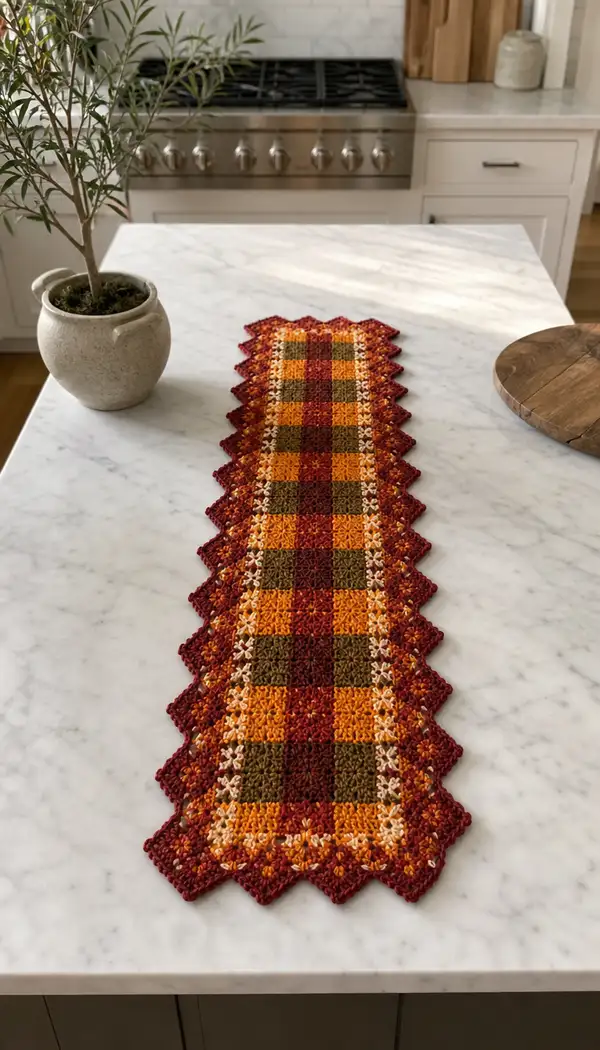
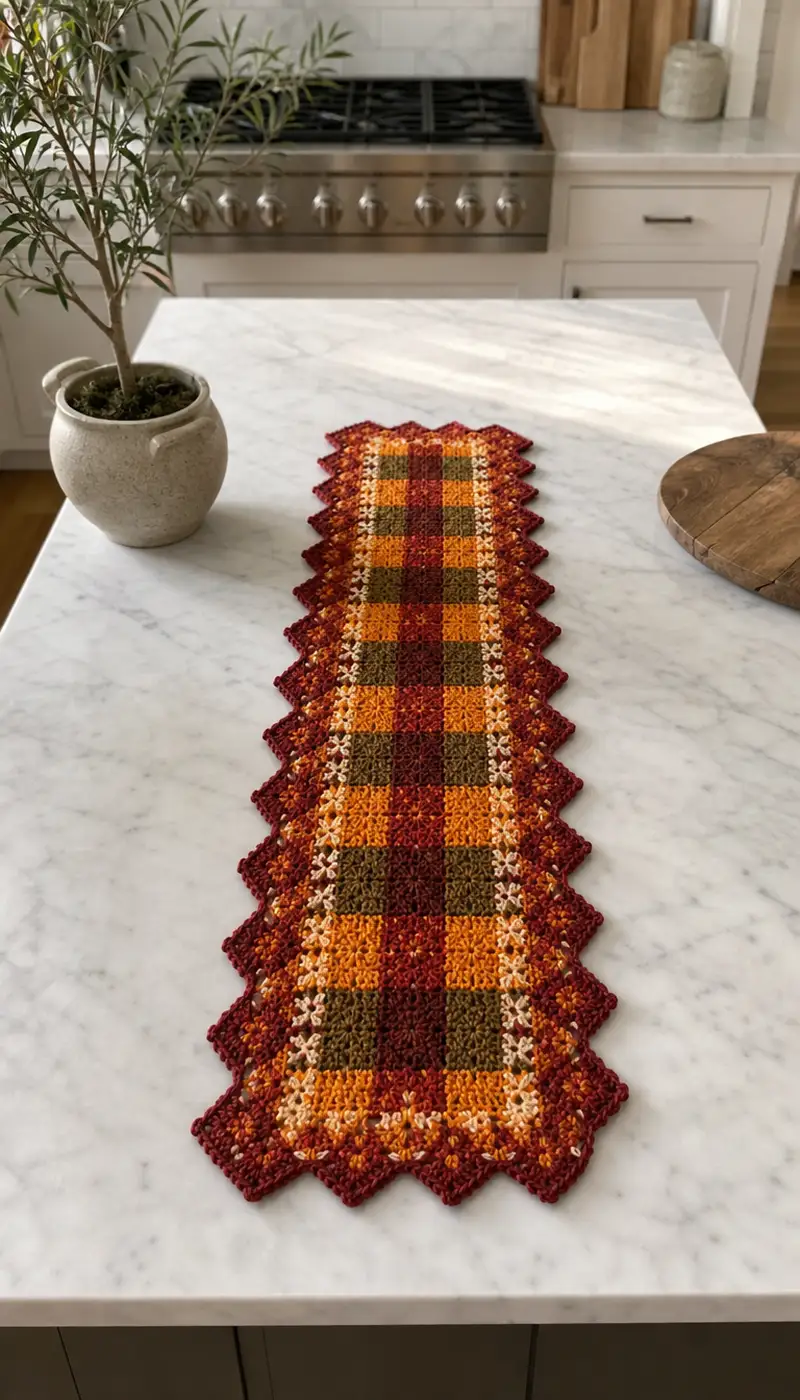
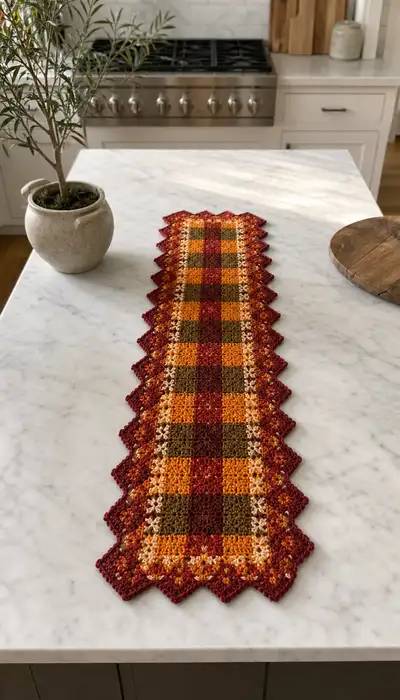
A long, cozy table runner featuring warm autumn plaid in rich burgundy, burnt orange, mustard and cream. The pattern combines textured cluster stitches and V-stitch chains to create a checked motif with a decorative zigzag scalloped border. Worked flat in repeating color blocks, this runner is perfect for seasonal tablescapes, centerpieces, or gifting. Detailed color-change and edging instructions make it easy to customize length and palette.
Progress Tracker
0% Complete
— Notes & Gauge :
Info :
This runner is worked flat in rows with frequent color changes to create a plaid check effect. Gauge is not critical for a table runner but for reference: 14 motifs (clusters) across = approx 10 cm when using 4.0mm hook and worsted weight yarn. Match tension to get even squares; adjust hook size if needed.
Info :
Cluster stitch used throughout: Work cluster (cl) as follows - yarn over, insert hook, yarn over, pull up loop, yarn over, pull through 2 loops (leave last loop(s) as indicated) to create multi-part cluster; for clarity: a 3-dc cluster = (yarn over, insert, pull up loop) three times, then yarn over and pull through all loops to close cluster. Abbreviated as cl3 if 3-dc cluster.
— Foundation & Setup :
Round 1 :
Using burnt orange (Color A), ch 77 (foundation chain). This will be the width for a standard runner approx 12-14 inches wide. Adjust multiples of 6+1 to widen or narrow runner.
Info :
Foundation chain: If you prefer less stretch, create chain with larger hook then switch to working hook; check final width before starting pattern repeats. Mark last chain as row start with stitch marker for first row.
Round 2 :
Row 1: Leave first ch as turning chain, sc in 2nd ch from hook, sc across to last ch, sc in last ch. (76 sc)
Info :
If you prefer a neat edge, work first sc row tightly; this row establishes width. Count stitches carefully: foundation of 77 chains gives 76 sc across when starting in 2nd chain.
— Establishing the Plaid Panel (Central Pattern Repeat) :
Round 3 :
Row 2 (set-up row): Ch 3 (counts as dc), turn. *Skip next st, cl3 in next st, sk next st, dc in next st* repeat across ending with dc in last st. (This builds a staggered cluster grid. Maintain 38 cluster positions across.)
Info :
Clusters are grouped so that subsequent rows will sit between them to form a textured grid. Keep counts: if you started with 76 sc, you will work approximately 38 cluster/dc placements across the row depending on final repeat; use markers at quarter points to check spacing.
Round 4 :
Row 3: Ch 3, turn. Work dc into the top of each cl3 from previous row and dc into each dc; between clusters work v-st (dc, ch1, dc) into the ch1 spaces to open the pattern. (Approx 76 dc placements and v-sts across working pattern)
Info :
At the edges you may need to substitute a single dc or hdc to keep even counts; maintain the overall stitch height and end each row with a dc to align edges neatly.
Round 5 :
Row 4: Change to mustard/olive brown (Color B). Ch 1, turn. Sc in first stitch, *ch2, sk next dc, cl3 in next st, ch2, sc in next dc* across, ending with sc in last st. This introduces vertical color banding when repeated in alternating colors. (Approx 76 stitches including ch spaces)
Info :
Change colors at the end of the previous row before the last sl st to create a tidy join; carry the unused color loosely along the wrong side to catch every 4-6 sts if you want fewer ends to weave in later.
Round 6 :
Row 5: With Color B, ch3, turn. Work dc across into cl3 and sc spaces, working v-sts in ch2 spaces to keep panel open. Maintain established pattern so clusters sit staggered in a checkerboard lattice. Count clusters: you should see a regular alternation - check every 12 stitches to ensure alignment.
Info :
The plaid look is created by alternating blocks of two or three rows in the same color then switching to another color for the next block. Keep block heights even (2-3 rows per block) for a balanced check.
— Color Block Sequence (10-row Plaid Repeat) :
Round 7 :
Row 6: Change to burnt orange (Color A). Ch1, turn. Sc across the row placing sc in top of each dc and in cluster spaces as needed (76 sc/placement points). This stabilizes the panel and prepares for the next textured rows.
Round 8 :
Row 7: Change to deep burgundy (Color C). Ch3, turn. Work pattern of dc, cl3 and v-st following the established grid: dc over dc, v-st in ch spaces, cl3 in cluster centers. The color change here will make a vertical stripe when repeated along length.
Round 9 :
Row 8: With Color C, ch1, turn. Sc across with even tension; pick up both tops of clusters and dc to maintain flatness. (76 sc)
Round 10 :
Row 9: Change to cream (Color D). Ch3, turn. Work one row of dc and v-sts to create crisp contrast stripe; this thin contrast line is what gives the checked/plaid definition between richer block colors.
Info :
These 10 rows (Rows 1-10 of the central repeat) form the base plaid module: Orange block rows followed by Brown rows, Burgundy, then a thin Cream dividing stripe. For a standard runner length you will repeat this 10-row sequence many times.
Round 11 :
Row 10: With Color D, ch1, turn. Sc across to consolidate contrast stripe. (76 sc)
Round 12 :
Row 11: Change to burnt orange (Color A). Ch3, turn. Repeat Row 2 pattern: cluster placement so the clusters align in a grid with the previous block. Continue to maintain the same counts and pattern repeat. (Clusters approx every other stitch, creating 38 cluster positions)
Round 13 :
Row 12: With Color A, ch1, turn. Sc across to stabilize. (76 sc)
Round 14 :
Row 13: Change to mustard/olive B. Ch3, turn. Repeat the cluster/v-st alternation to continue the plaid sequence.
Round 15 :
Row 14: With Color B, ch1, turn, sc across. (76 sc)
Round 16 :
Row 15: Change to deep burgundy (Color C). Ch3, turn. Work textured row aligning clusters and v-sts. (Maintain 76 stitch placement points)
Info :
At the end of Row 15 you have completed one full 10-row to 15-row color module depending on how you choose to stack your colors. For lengthening: Repeat Rows 7-16 in established order until desired runner length is reached.
— Length Extension (Repeat Instructions) :
Round 17-56 :
Repeat Rows 7-16 (the 10-row color block set) four times (40 rows) to extend the runner length. Maintain exact color order: A (burnt orange) x2 rows, B (mustard) x2 rows, C (burgundy) x2 rows, D (cream) x2 rows then A again; adjust for final symmetry so borders align with center blocks. End these repeats with a full cream contrast stripe to center the runner.
Info :
Check your length every 10 rows. The sample runner in the photo is 12 modules long (approx 120 rows total), but you can stop earlier. Keep ends tidy by weaving color tails in as you go or by leaving slightly longer tails for final finishing.
Round 57-76 :
Continue repeating the 10-row color block as desired until you reach your preferred runner length. The sample measures 38-42 inches long and used approximately 9 repetitions of the 10-row module after the initial setup. For a shorter runner, repeat fewer times; for a table length match, repeat until length is achieved. Maintain 76 stitch placements each row.
Info :
When approaching your target length, plan to finish with the cream dividing stripe (Color D) so the border contrasts evenly on both ends. Take time to ensure the last few repeats mirror the beginning of the runner to create a harmonious plaid panel.
— Prep for Border & Edging :
Round 77 :
Last Panel Row: With cream (Color D) work one final sc row across to bring solidity to both ends (76 sc). Fasten off if you prefer, or continue with border in next color (burgundy) as shown in photo. For continuity, we will switch to burgundy (Color C) for the border.
Info :
Before starting edging, turn the runner so both ends match in sequence. Block gently if you have time to even out stitches and set pattern; pin to size and steam lightly or wet-block as fiber permits.
— Zigzag Scalloped Border (side edging) :
Round 78 :
With Color C (burgundy) join with sl st at lower left corner. Ch1, sc evenly up the long side edge in the sides of rows (approx 120 side sc depending on length) placing 1 sc in each row edge and 2 sc in corner rows. This creates a firm base for the scallop. Count to ensure even placement and that the total number of side scs is divisible by 12 for repeat scallops; adjust by adding 1 sc every several inches if needed.
Info :
Evenly spaced sc along the side edges are essential to make uniform scallops. If your runner is longer or shorter, adjust the number of scs to keep scallop pattern neat; a repeat every 6-8 sc typically works well.
Round 79 :
Top Edge Repeat: Once along both long sides you will have a base row of side scs. Now work scallop units around each side. Sc into first 3 sc, *skip 2 sc, (5 dc in next sc) - this creates a shell, skip 2 sc, sc in next 3 sc* repeat across entire side to create shells. (Approx shells every 8 sc producing zigzag peaks and troughs.)
Info :
Work shells tightly enough to sit flat but not so tight they pull the runner inward. You can reduce shell size to 3 dc shells if your yarn is heavier to avoid bulky edging.
Round 80 :
Corner Points: At the short ends, work shells in a V formation to form a triangular point: sc in last 3 side sc, (3 dc, ch1, 3 dc) into corner st, continue shells across short end with single sc between shells. This creates the squared zigzag corner seen in the photo. Repeat on opposite end.
Info :
Make corner triangular points symmetrical by counting shells across the short end. If you want a more pronounced sawtooth, use (5 dc, ch2, 5 dc) for corner clusters but plan for extra yarn consumption.
Round 81 :
Edge Stabilizer: With Color C, work a round of sc around all shells placing 1 sc in center dc of each shell and 2 sc in the top of each shell peak to stabilize. This evens the edge and prepares it for a decorative final picot round. (Maintain counts to keep scallops flat.)
Info :
This stabilizer round reduces ripple in the scallops; keep tension even and make sure peaks are not pulled too tight or left too loose.
— Decorative Point Trim (final border detail) :
Round 82 :
Change to burgundy mixed with a small contrast of cream carried (optional): Ch 1, sc into first stabilizer stitch. *Ch3, sl st into 3rd chain from hook to form picot, sc into next stabilizer stitch* Repeat across the edge placing a picot at each shell peak and at each corner point. This produces tiny decorative points along the scallop edges similar to the serrated look in the photo.
Round 83 :
Optional Raised Detail: Work one more round in Color A (burnt orange) using the back loops only (BLO) around the runner just inside the shell row: ch1, 1 sc BLO in each stitch across the entire perimeter. This creates a subtle raised ridge that frames the scallops and adds visual definition.
Info :
Back loop only rounds produce a neat ridge that visually separates center panel from border; it also helps hold the scallop shape. This is optional but recommended for a professional finish.
Round 84-88 :
Finishing Rounds: Work 1-2 rounds of sc evenly around the entire runner with Color C, then finish with a final round of slip stitches in Color C to create a clean edge. Fasten off and weave in all ends using yarn needle. Weave color tails into nearby stitches and trim close to the fabric.
Info :
Weave ends with duplicate stitch method on the wrong side for secure finishing. Go back and tidy any areas where carrying yarn may have been caught; you want the wrong side to be as neat as possible for longevity.
— Blocking & Final Finishing :
Round 89 :
Blocking: Gently wet-block runner by pinning it to a blocking mat to the desired rectangle size. Stretch so scallops are evenly spaced and edges are flat. Allow to dry completely before use. For acrylic yarn, use steam blocking lightly and do not press directly with iron.
Info :
Blocking evens tension and opens the scallops. Pin each scallop peak individually for the best results so that the scalloped edge sits crisply.
Round 90 :
Final Inspection & Touchups: Inspect for loose tails, uneven edges, or missed stitches. Re-stitch any loose shells or reinforce any corners with 4-6 extra sc stitches to hold the point. Trim excess tails and hide them in the border rows for durability.
Info :
If your runner will receive heavy use, sew a light backing or use a non-slip runner pad underneath to protect fibers. Clean gently following yarn care instructions: usually cool hand wash and lay flat to dry unless yarn specifies otherwise.
— Customization & Sizing Tips :
Round 91 :
To make longer or shorter: Repeat the 10-row color module in the central panel until you reach desired length. Add or subtract full modules (10 rows) so the border aligns symmetrically on both ends. For wider runners, increase starting chain in multiples of 6+1 to maintain repeat alignment.
Round 92 :
Alternate Border Option: For a simpler border, work 2 rounds of sc in Color C around the runner and finish with a small crab-stitch (reverse single crochet) round for a rope-like edge. This is less ornate but durable for everyday use.
Info :
Swapping colors across the module will change the dominant plaid—try swapping mustard and burgundy for a softer, more autumnal look or use jewel tones for winter holiday runners.
Round 93-100 :
Optional Embellishment: Add small crocheted leaves or pumpkins and sew them to the runner center or corners as applique. To make a small leaf: ch4, sc in 2nd ch from hook, hdc in next, dc in last, turn and work along opposite side hdc, sc, sl st to join. Make 8-12 leaves and sew in clusters at the ends for extra seasonal interest.
Info :
Applique pieces should be sewn securely through several base stitches and reinforced with a few extra threads on the wrong side to prevent snagging and loss during washing.
Round 101 :
Congratulations! Your runner is complete. Make notes of any color placement changes you made so you can reproduce the piece exactly if desired. Keep a yarn sample swatch with the pattern for reference.
This autumn plaid runner brings cozy seasonal charm to any tabletop with warm colors and a hand-stitched scalloped edge. The repeating plaid modules are both meditative and satisfying to crochet, while the finishing border gives a polished, heirloom feel. I love how easy it is to customize the length and colors to match your home or gift recipient. 🧶🍁 Spread a little handmade warmth across your table and enjoy every stitch of the process. ✨