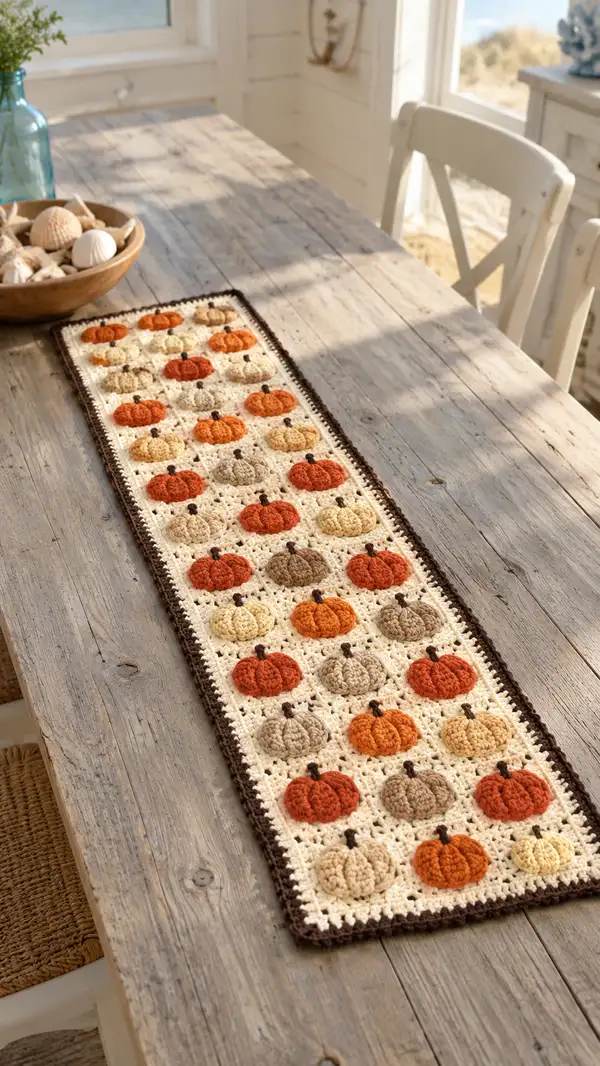
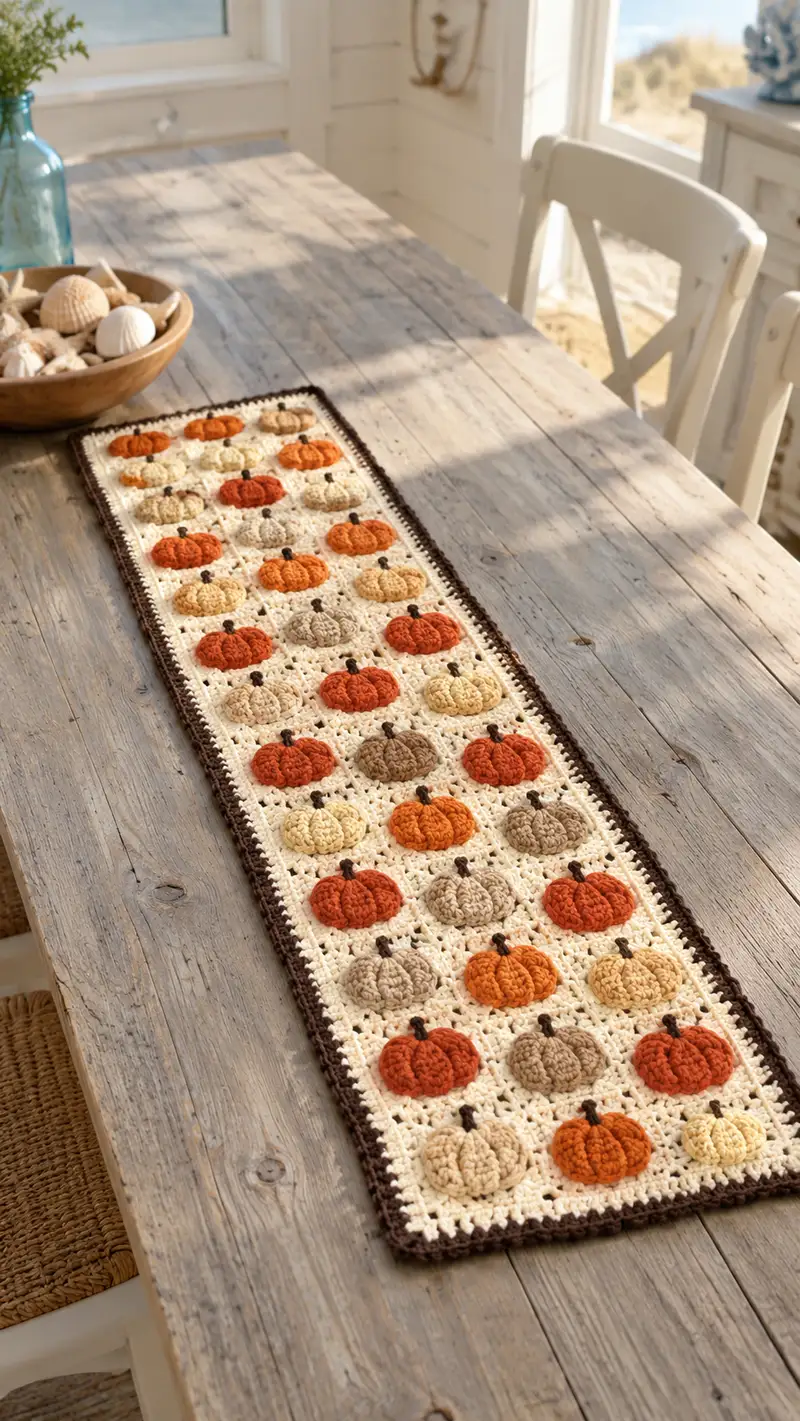
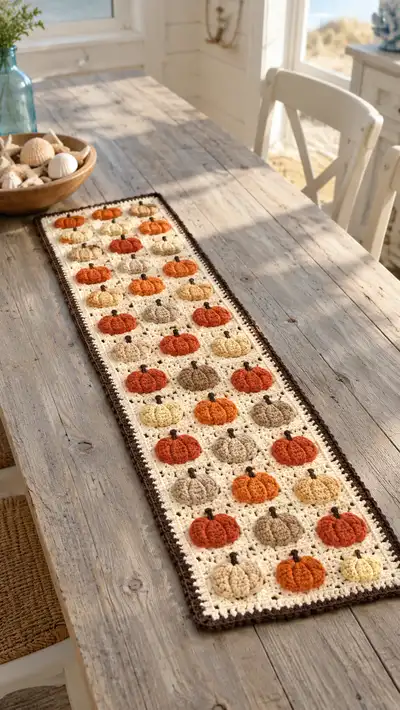
Bring cozy fall charm to your table with this Pumpkin Patch Table Runner Pattern. The runner features rows of raised, textured pumpkins in warm autumn shades (orange, rust, tan, cream) set on a creamy lattice background and finished with a deep brown border. Each pumpkin is crocheted as a small 3D motif and framed with a lacy square, then joined into a long rectangular runner to create a beautiful seasonal centerpiece.
Progress Tracker
0% Complete
— Notes & Techniques :
Info :
This runner is constructed from 40 pumpkin-centered squares arranged in a 5 (width) x 8 (length) grid. Each pumpkin motif is made and finished (including a small stuffing) then framed with a cream lacy square. Squares are joined with whipstitch or join-as-you-go; a multi-row brown border finishes the piece. The pattern below is written for worsted weight yarn and a 5.0mm hook. Puff stitch instructions are included; if you prefer clusters, substitute cluster stitches with equivalent height.
Info :
Puff stitch: yarn over, insert hook into stitch, yarn over and pull up a loop; repeat this 3 more times into same stitch (you will have 9 loops on hook). Yarn over and pull through all 9 loops, ch1 to secure the puff. Counts assume a 4-loop puff (i.e., 4 pulls) unless otherwise specified.
— Pumpkin Motif (make 40) :
Round 1 :
mr, ch1, 6 sc in magic ring (6)
Round 3 :
(1 sc, inc) x6 (18)
Round 4 :
(2 sc, inc) x6 (24)
Info :
Change to your pumpkin color on the last yarn over of the previous round if you started in a contrast color. Work tightly to create a compact base for puff work. Place a stitch marker at the start of each round to keep orientation consistent; the start stitch will be used later for stem placement.
Round 5 :
(puff in next st, 2 sc) x8 (24) — You will make 8 puff clusters spaced by 2 sc between each puff. Puff uses 4-loop method as defined above. Counts stay at 24.
Round 6 :
1 sc in each st around working into top of each puff cluster and sc (24)
Round 7 :
(puff in the top of each puff from Round 5, 2 sc) x8 (24) — this builds additional height to your pumpkin ribs
Info :
By alternating puff rounds with sc rounds you create strong vertical ribs that mimic a pumpkin. Keep puffs consistent in height and tension so segments look uniform. If your puff is too large, use 3-loop puff instead of 4 to reduce bulk.
Round 8 :
1 sc in each st around (24)
Round 9 :
(puff in next st, 2 sc) x8 (24) — final puff round to give the pumpkin a plump crown
Round 10 :
1 sc in each st around (24)
Info :
At this point your pumpkin will be a shallow dome. If you want a puffier pumpkin, add an extra pair of puff + sc rounds before starting decreases. Keep a small ball of fiberfill ready — you will stuff lightly before closing or sewing to the square.
Round 11 :
(2 sc, dec) x6 (18) — begin gentle shaping of the underside of the pumpkin
Round 12 :
(1 sc, dec) x6 (12)
Info :
Begin light stuffing through the opening. Use small amounts and press stuffing slightly into segments to maintain the ribbed look. You want the pumpkin to be slightly firm but still squat enough to sit well on the square.
Round 13 :
6 dec (6) — close most of the opening, leaving a small hole for sewing; fasten off leaving 20-25cm tail for sewing to square (6)
Row-Style Info :
Sewing tip: Use the long tail to sew the pumpkin to the center of the framed square (instructions follow). Use small mattress-stitch-like passes around the opening so the base is secure but the pumpkin still keeps some three-dimensional volume.
Info :
Stem: With brown yarn and a 4.0mm hook, ch4, join to form ring (or make a small 6 sc in MR tube), then work 6-8 sc in spirals to make a tiny stem approx 1-1.5cm tall. Fasten off leaving long tail for sewing. Alternatively, embroider a stem by wrapping yarn into a tiny knot and stitching into place.
Round 14 :
Optional finishing: If you prefer an open-bottom pumpkin (to glue or applique), stop after Round 10, do not stuff or close, and sew open base to square with whipstitch so the base sits flush. Otherwise proceed with closed pumpkin already fastened off.
Info :
Make 40 pumpkins in assorted colors. Vary the number of puff rounds (Round 7 and 9) to create pumpkins of slightly different heights and shapes for a natural look across the runner.
— Framed Lacy Square (make 40; frames pumpkin centers) :
Info :
Each pumpkin will be sewn to the center of a cream lacy square. The square measures approximately 8cm per side when using the stated yarn and hook. If you want a larger runner, increase hook size or add rounds to the square.
Round 1 :
With cream yarn, ch4, sl st to first ch to form ring, ch3 (counts as dc), 11 dc into ring, join (12 dc total) (12)
Round 2 :
Ch3, dc in same stitch, ch2, *2 dc in next st, ch2* around, join to top of ch3 (24 dc, 12 ch-2 spaces)
Round 3 :
Sl st to the first ch-2 space, ch3 (counts as dc), 2 dc in same ch-2, ch1, 3 dc in next ch-2, ch1, *3 dc, ch1* around for each corner space; at the end, you'll have 4 groups forming a rough square; join (48 dc approx with 4 corner ch-1 spaces)
Info :
This construction creates a loose lacy square around the pumpkin. The counts can vary slightly depending on puff bulk; the aim is a centered motif with a lacy frame that will join easily to neighbors. Keep corners even by working cluster groups in corner ch-2 spaces.
Round 4 :
Work a round of 1 dc, ch1, 1 dc in each dc across, and (1 dc, ch1, 1 dc) in each corner ch-1 space. This evens out sides while maintaining lacy holes (approx 56-64 sts depending on previous counts)
Round 5 :
Switch to a more defined lacy border: *dc, ch2, skip 2, dc in next* across each side; in corners, do (dc, ch3, dc) to form a neat corner (maintain stitch counts to keep square shape)
Info :
Before completing the square, place your pumpkin centered on the square and pin it. Use the long tail from the pumpkin (or a yarn needle with matching yarn) to stitch the pumpkin base to the center of the square. Take small stitches through the underside of the pumpkin and into the center of the square so the stitches are hidden and the pumpkin sits snugly.
Round 6 :
Round of sc around entire square in BLO to create a slightly raised frame: 1 sc in each st BLO; work (1 sc, ch1, 1 sc) in corner spaces (counts vary but keep even)
Round 7 :
Optional for tighter join: 1 sc in each st around (including into ch spaces) to make the square edges more solid for joining (approx 64 sc)
Info :
Make all 40 framed squares. Pin pumpkins before final securing stitch so centers are consistent. If a pumpkin feels lopsided, adjust stuffing or re-stitch to center before proceeding.
— Layout & Joining :
Info :
Lay out your 40 squares in 5 columns by 8 rows. Double-check color placement for a balanced look: alternate pumpkin colors across rows and columns so no two identical pumpkins are adjacent unless you prefer a clustered look.
Joining Method Option A :
Whipstitch join: place two squares right sides up, align edges and with cream yarn, whipstitch through back loops only to create a slight ridge. Use mattress or slip-stitch join if you prefer a crocheted seam.
Joining Method Option B (JAYGO) :
Join-as-you-go: when working the final sc round on a square, slip stitch into corresponding sc of the adjacent square to join. This saves sewing but requires planning the joining order. For a straight runner, join squares across each row left-to-right, then seam rows together.
Round-like Info :
If using whipstitch, sew each square to its neighbor starting in the center of the side and working out to the corners to keep edges even. Pin edges before stitching to maintain straight lines. Keep seam tension even to avoid puckering.
Joining Step 1 :
Join squares in rows of 5. Sew seam between adjacent squares along sides using ladder stitch or whipstitch through both thicknesses at once. Repeat for all 8 rows.
Joining Step 2 :
Sew rows to each other: align row seams so joins fall in the same vertical line; stitch through corresponding stitches across to keep runner flat and square. Add extra catch stitches at corners for strength.
Info :
When seaming rows, check that pumpkins sit upright and not twisted. If a seam pulls a square inward, ease a few stitches open and re-space seam to flatten runner. Keep a measuring tape handy to ensure consistent width across the whole runner.
— Outer Border (multi-row) :
Round 1 :
With brown yarn, attach in any corner st, ch1, sc evenly around entire runner edge, working (sc, ch2, sc) in each corner to keep runner flat. Work 1 sc in each row end stitch and 1 sc in each stitch across sides. This creates a neat foundation round; counts will vary with final runner size.
Info :
Place 3-5 stitch markers along each long side to keep track of even spacing between corners, especially if your runner edges are slightly irregular after joining. Adjust stitch frequency for even shaping (for example, sc every 1 or 2 sts along sides depending on side length).
Round 2 :
Ch2 (counts as hdc), hdc in each sc around, in corners work (hdc, ch2, hdc). Join to top of ch2 with sl st. This builds a slightly raised frame for the final decorative row.
Round 3 :
Ch3 (counts as dc), *skip next st, 3 dc cluster in next st, skip next st, dc in next st*; repeat around so you form little scalloped clusters across the border; in corners work extra dc to maintain shape. Join with sl st to top of ch3.
Info :
Test the scallop density to ensure the border doesn't ripple. If the scallop pulls too tight, replace 3-dc clusters with 2-dc clusters or increase the number of skipped stitches between clusters.
Round 4 :
Optional second color round: switch to cream to echo the center, ch1, sc around across scallop tops; this creates a crisp, lighter outer edge. Work (sc, ch2, sc) in corners. Join and fasten off.
Round 5 :
Final decorative round in brown: attach brown yarn, ch1, work crab stitch (reverse sc) around entire edge for a rope-like finish; this gives a neat, slightly twisted edge. Fasten off and weave in ends.
Info :
Blocking: Gently steam-block or pin-runner to shape if needed. Only very lightly dampen as wool/ acrylic combos behave differently. Allow to dry flat. Blocking evens edges and squares and helps the pumpkin details sit nicely.
— Alternate Decorative Variations :
Info :
Variation A — Make pumpkins larger by adding additional puff + sc rounds in Rounds 7 and 9 of the pumpkin motif. If pumpkins get much larger, increase the framed square rounds to keep proportion. Variation B — Use join-as-you-go visible seam by working slip stitch join in contrasting color for a decorative ladder seam. Variation C — Add small crocheted leaves or vine embroidery in green around stem for extra detail.
Info :
Care instructions: Hand wash gently in cold water and lay flat to dry to preserve puff texture. Avoid tumble drying. Spot clean stems and small details when possible.
This Pumpkin Patch Table Runner brings autumn color and texture to any table, combining classic crochet motifs with charming three-dimensional pumpkin details. Each pumpkin becomes a tiny work of art nestled in a lacy cream square, and rows of these motifs create a cozy, handmade centerpiece you'll reach for every fall. I hope this pattern inspires you to crochet, customize, and celebrate the season with every stitch. Happy hooking and enjoy your seasonal tablescape! 🎃🧶