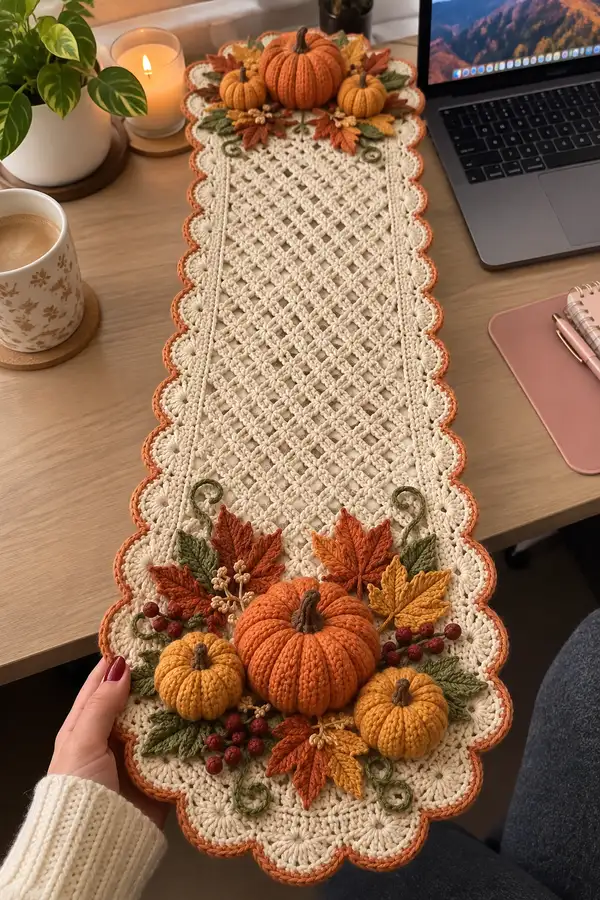
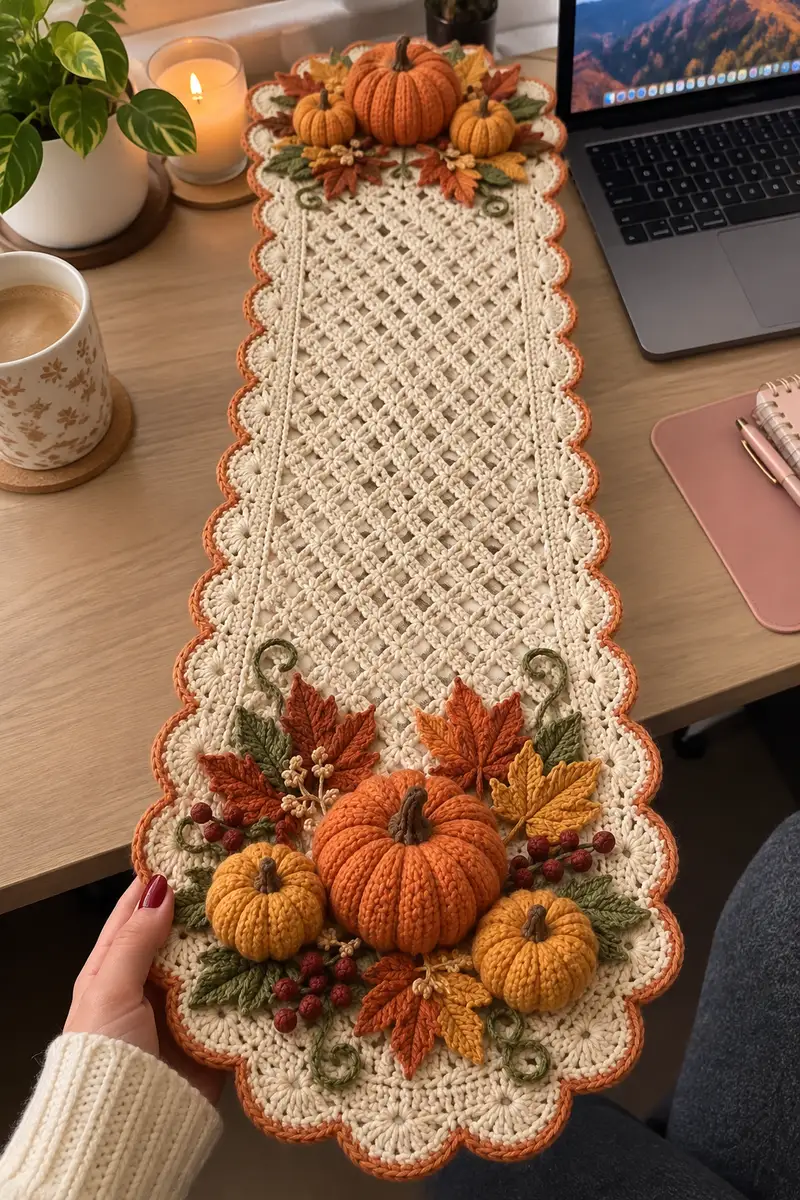
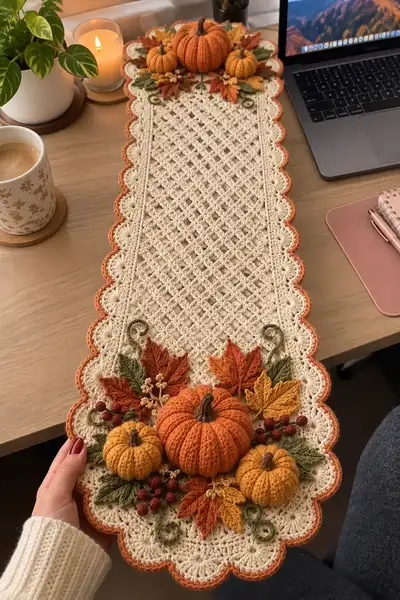
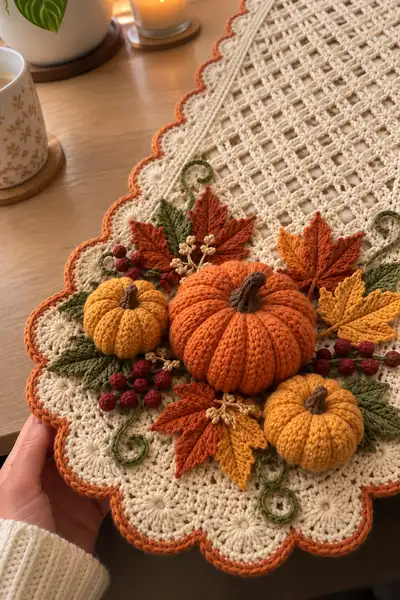
Create a warm, harvest-inspired table runner with delicate lattice work, scalloped edges, and dimensional pumpkins, leaves and berries. This pattern recreates the cozy neutral center, rust-orange scallop trim, and mini 3D pumpkins with stitched stems and leafy appliques as shown. Suitable for an advanced crocheter who enjoys textured stitchwork and detailed assembly—perfect for seasonal decorating or a thoughtful handmade gift.
Progress Tracker
0% Complete
— Notes & Gauge :
Info :
This runner is worked flat for the central lattice panel then edged with a scalloped border; all decorative pumpkins, leaves, berries and tendrils are crocheted separately and sewn on. Gauge for lattice portion using 4.0mm hook in worsted cotton: 10 dc clusters (as described) x 8 rows = approximately 4 inches (10 cm). Adjust hook size to match tighter fabric if using stretchy yarn. Work with consistent tension; block the base before applying embellishments for best results.
— Center Lattice Panel :
Foundation Row :
Ch 85 (this will produce a runner body approximately 10.5-11 inches wide; adjust chain by multiples of 4+1 to change width)
Row 1 :
In 4th ch from hook (counts as dc), dc in same ch, *sk 3 ch, (dc, ch2, dc) in next ch; rep from * across until last 2 ch, dc in last ch and turn (count: 1 shell at start + lattice shells across ~21 shells)
Row 2 :
Ch 3 (counts as dc), turn, *(sk next dc pair from shell), in ch2 space work (dc, ch2, dc), sk next set of 3 chains, dc in next single dc); rep across, end with dc in top of turning ch (approx same stitch count as Row1)
Row 3-14 :
Repeat Row 2 to build lattice panel to desired length, ensuring lattice shells line up to create diamond openings. For the runner pictured make 42 rows of lattice total (Rows 1-42) to reach approximately 26-28 inches in length for a narrow table runner.
Info :
Check that lattice openings are consistent and that shells align vertically. If your runner is narrower or wider, adjust foundation chain by multiples of 4 and increase or decrease total rows to reach desired length.
Row 15 :
At one short end, work a finishing row to create a solid turnaround: ch1, sc in each stitch and in each ch-2 space across (approx 85 sc). This creates a stable edge for scallop attachment later.
Row 16 :
Turn piece and continue even sc edge rows on both long sides for 2 rows: ch1, sc evenly across the sides to compress the lattice slightly and create a straight edge (85 sc).
Rows 17-42 :
Repeat Rows 1-14 mirror for the other half of the panel (or continue lattice until the full central length is achieved), leaving last short end with same finishing sc row to mirror the start. Final center panel should measure approximately 26-30 inches long depending on row count.
Info :
At this point block your panel by pinning it flat on blocking mats, gently stretching to square off lattice diamonds; allow to dry. Blocking dramatically improves scallop placement and seam accuracy for applique placement.
— Scalloped Border (Work around entire panel) :
Round 1 :
Join rust-orange yarn at one short end's center, ch1, evenly sc around entire perimeter placing (sc, ch2, sc) in each ch-2 space and sc in each single st. Work 3 sc in each corner to maintain curve. (Approx perimeter count depends on panel - maintain consistent spacing; for 42-row panel expect ~340 sc around.)
Round 2 :
Ch2 (not counted as st), dc in same st, *sk 2 sc, in next sc work (5 dc) shell, sk 2 sc, dc in next sc; rep around, placing 3 dc in each corner to maintain shape (approx shells around edge: 34 shells)
Round 3 :
Switch to working scallop definition: ch1, sc in same st, *in center dc of 5-dc shell work (2 sc, ch2, 2 sc) forming small shell, sc in next dc; rep around. Fasten off, weave tails. (Shell count matches previous round)
Info :
Edge shells create the scalloped curve you see. Keep tension even to avoid a ruffle or flaring. If scallops curl up slightly, a light steam-blocking will flatten them gently.
Round 4 :
Optional accent: join rust-orange to front loops only around scallops; sc evenly in FLO around scallops (one sc per scallop center and one sc between shells) to create a neat orange trim line. Fasten off and weave in ends.
Info :
If you prefer a two-tone scallop like the sample, work Round 3 in cream then switch to rust for Round 4. Carry yarn along wrong side or use small bobbin to avoid bulk.
— Large Pumpkin (Make 1) :
Round 1 :
Using bright orange yarn and 3.5mm hook, mr, 6 sc in magic ring (6)
Round 3 :
(1 sc, inc) x 6 (18)
Round 4 :
(2 sc, inc) x 6 (24)
Round 5 :
(3 sc, inc) x 6 (30)
Round 6 :
(4 sc, inc) x 6 (36)
Round 7 :
(5 sc, inc) x 6 (42)
Info :
Switch to shorter hook (3.0-3.25mm) if you want very tight ridges for a pronounced pumpkin look. Starting with increasing round counts produces the bulbous center of the pumpkin.
Round 8-11 :
1 sc in each st (42) (work 4 rounds to build height and roundness)
Round 12 :
(5 sc, dec) x 6 (36)
Round 13 :
(4 sc, dec) x 6 (30)
Round 14 :
(3 sc, dec) x 6 (24)
Info :
Begin stuffing pumpkin firmly but not rigidly. Use small amounts of fiberfill at a time, pushing into center to avoid lumps. Continue shaping while decreasing rounds create bulbous ribs.
Round 15 :
(2 sc, dec) x 6 (18)
Round 16 :
(1 sc, dec) x 6 (12)
Round 17 :
6 dec (6) - fasten off leaving long tail for finishing
Info :
Using long tail, weave through remaining 6 sts and pull closed. Secure tightly and knot. To create ribbed pumpkin segments, wrap a long piece of strong yarn (matching color or dark brown) around the pumpkin 8-10 times, crossing over the top and bottom to form evenly spaced ribs, then pull until creases form and secure under the stem. This gives the defined ridged look shown.
Round 18 - Stem :
Using brown yarn and 3.5mm hook, ch6, join to form ring, work 6 sc into ring (6), 1 sc in each st for 4 rounds (6). Fasten off leaving long tail. Sew to top center of pumpkin. Add a few extra sl st in brown to create tapered look and secure.
— Medium Pumpkins (Make 2) :
Round 1 :
Using golden yellow yarn, mr, 6 sc in magic ring (6)
Round 3 :
(1 sc, inc) x 6 (18)
Round 4 :
(2 sc, inc) x 6 (24)
Round 5 :
1 sc in each st (24) - work 2 rounds to build height (Rounds 5-6 both 24)
Round 6 :
(2 sc, dec) x 6 (18)
Round 7 :
(1 sc, dec) x 6 (12)
Info :
Stuff pumpkins lightly, close with 6 dec (Round 8 below). For a more squat shape, add an extra even round at full count before commencing decreases.
Round 8 :
6 dec (6) - Fasten off and close. Create ribs using the same technique as large pumpkin: wrap 6-8 crosses of strong yarn to form ribs, pull snug and secure underneath stem.
Round 9 - Stem :
Using brown yarn, ch5, join into ring, 5 sc in ring; work 3-4 rounds of 5 sc to make a short stump. Sew to center of pumpkin top and weave in ends.
Info :
Make two medium pumpkins; vary height by adding or subtracting one round at full stitch count before decreases to make one slightly more squat like the reference photo.
— Leaves (Make 8 assorted sizes) :
Leaf A (Large Maple-style) Round 1 :
With rust-orange and 3.5mm hook, ch 12, sc in 2nd ch from hook and next 3 (4 sc), hdc, dc in next ch, tr in next ch (center point), tr back down opposite side, dc, hdc, sc in remaining 4 chains. (Total approximate peak stitches = 12)
Leaf A Round 2 :
Working along both edges: sl st into next st, *ch2, (dc, ch1, dc) in next st to form pointed lobes, sl st to next base st; rep across to form 5 lobes per side; fasten off (create symmetrical lobes for maple-like silhouette)
Info :
Use surface slip stitches and short lines of backstitch with tapestry needle to create central veins. Block lightly to open lobes. Make at least two large rust-orange leaves and one golden yellow leaf for layered cluster.
Leaf B (Medium Elm-style) Round 1 :
With olive green and 3.5mm hook ch 14, sc in second ch from hook and next 5 (6 sc), hdc, dc, hdc, sc in remaining 6 chains. Round 2: In each side st work (sc, hdc, dc, hdc, sc) to create slight scallop; fasten off and shape with a row of embroidery vein stitches down center.
Leaf B - Make 3 :
Repeat above to make three medium green leaves (for underneath pumpkins and to add variety).
Leaf C (Small accent leaf) Round 1 :
With golden yellow or small-color contrast ch 8, sc in 2nd ch and next 6 (7 sc), then sc back along opposite side decreasing by 1 sc at tip to form taper; fasten off. Make 3-4 small leaves.
Info :
For crisp edging, make leaves with slightly smaller hook (3.25mm) than main yarn to keep edges firm. Add shading by dry brushing with a darker color of yarn or using light embroidering on veins.
— Berry Clusters and Small Flower Sprigs :
Berry Cluster (Make 4) Round 1 :
Using deep red yarn, mr, 6 sc in magic ring (6), sl st to join, fasten off leaving long tail for sewing. Make 4-8 berries per cluster and sew them in a tight triangular arrangement to replicate the photo cluster. For texture, lightly stuff each berry with a tiny fiberfill nub before closing.
Small Flower/Seedhead Sprig (Make 4) Round 1 :
Using beige/tan yarn, ch 6, in 2nd ch from hook work 5 picots: (sl st, ch3, sl st) across chain to create beaded seedhead; fasten off leaving tail and sew into cluster center.
Info :
Arrange berries in clusters of 4-6 and sew to a small felt or crocheted circle backing if you prefer a sturdy cluster to attach to runner. Use warm glue sparingly if needed to hold arrangement during assembly.
— Tendrils & Curled Vines (Make 4-6) :
Tendril Round 1 :
With olive green and 3.5mm hook, ch 40, sl st back along chain to create a crochet rope. Remove from hook and coil into a spiral; sew the coil in three or four places to retain shape. Trim to desired coil size. Make 4-6 tendrils for playful curly accents.
Info :
For sturdier tendrils, work a 3-chain i-cord: using 3.5mm hook, ch 3 and sc in each ch for 24 rows without turning - this produces a tube that can be stuffed with a tiny wire for poseability.
— Assembly Prep :
Info :
Block runner and ensure scallops are flattened and evenly spaced. Lay runner on flat table. Decide placement of decorative cluster(s) - the reference has a large cluster centered near one end and a mirrored smaller cluster near the other end; you can choose symmetrical or single-end placement.
Info :
Pin large pumpkin first: place central big pumpkin so its widest rib falls inline with scallop centers to visually anchor it. Then arrange medium pumpkins at slight angles to create a natural grouping where pumpkins overlap without flattening one another.
— Detailed Sewing & Positioning Steps :
Sewing Step 1 :
Using yarn needle and matching yarn tails, tack the underside of each pumpkin in 6-8 evenly spaced spots to secure. For the large pumpkin use 10 stitches through the base and up into the scallop foundation to prevent wobble. Sew through the runner's stitches at the scallop edge rather than the open lattice to avoid pulls.
Sewing Step 2 :
Place large rust leaf behind the large pumpkin at approx 11 o'clock; sew along base of leaf with small hidden stitches. Layer a green leaf behind at 9 o'clock and a golden leaf at 1 o'clock to create depth. Continue adding berry clusters in small groups tucked between leaves using small whipstitches to hold them down.
Info :
If you plan to wash runner, reinforce attachment points by sewing through multiple lattice threads and knotting inside to avoid loosening. Use differently colored threads to blend with yarn color for invisibility.
Sewing Step 3 :
Sew tendrils and small curled vines last, tacking them down at 2-3 strategic points so they remain raised but secure. Trim any protruding tails and weave into underside of runner to hide them.
Info :
When sewing berries, place a small felt backing disc under clusters and sew through felt into runner to spread stress over more stitches; this will keep clusters from pulling through the lattice under weight.
— Final Finishing Touches :
Finishing Step 1 :
Inspect both sides of runner. Weave any remaining tails into adjacent stitches; trim close. If scallops or leaves feel soft, lightly steam-block once more to set shapes—avoid direct contact with steam on stuffed pumpkins.
Finishing Step 2 :
Optionally, add a few small beads or wooden seed embellishments to berry clusters to accent shine. Apply a tiny dot of fabric glue under bead to secure if needed. Allow to dry fully before use.
Info :
For long-term storage, detach pumpkins and store separately to avoid crushing; small velcro tabs can be sewn into underside of runner and matching loops into pumpkin bases for removable decorations.
— Alternative Construction Notes :
Info :
If you prefer working in motifs instead of rows, create individual 3.5-4 inch square lattice motifs and join them with whipstitch or join-as-you-go method to form the central panel, then work the scalloped border as directed.
Info :
To change size, alter foundation chain by multiples of 4+1 for width and increase or decrease rows of lattice for length. Proportionally increase yarn amounts for larger runners.
This Autumn Pumpkin Table Runner brings cozy harvest charm to your table with layered texture and three-dimensional pumpkins that pop right off the scalloped edge. The delicate lattice center provides a classic crochet look while the warm orange and gold accents make it perfect for fall gatherings. Whether you keep it for yourself or gift it to someone special, the finished runner becomes a treasured seasonal accent. 🧶🍂 Add a couple of candles and a mug of tea, and your space instantly feels like autumn. Happy stitching! 🎃