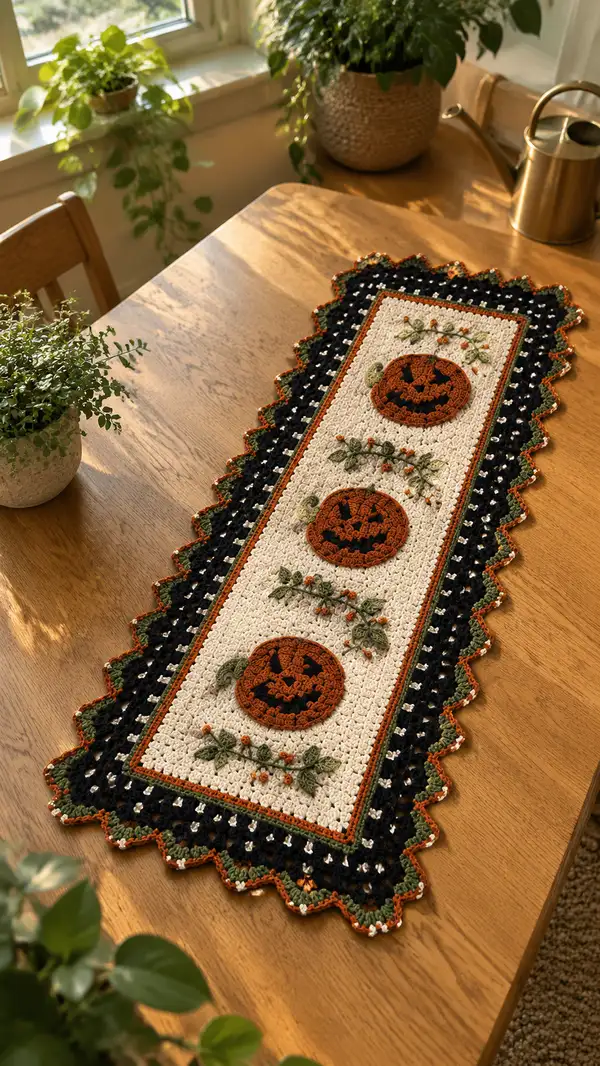
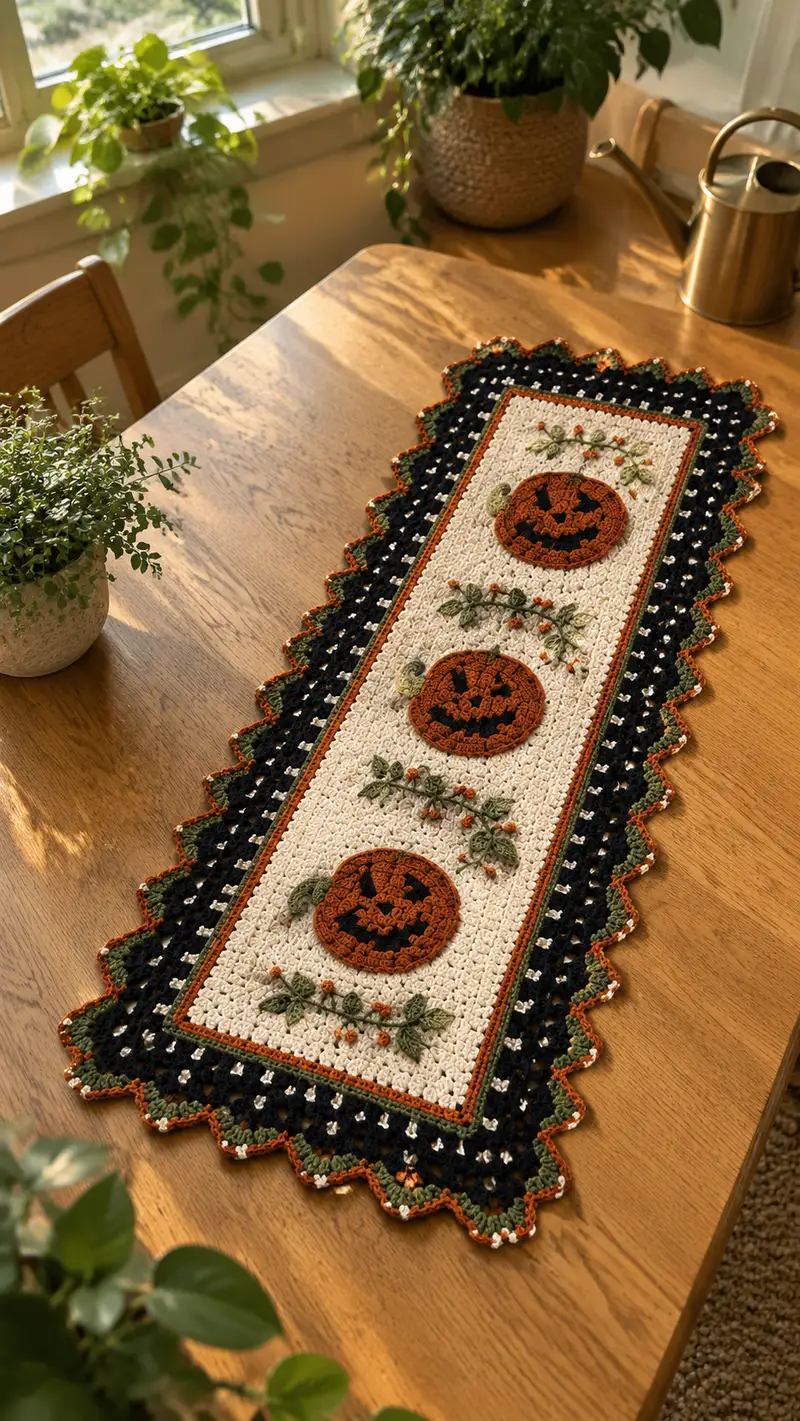
A warm, decorative table runner featuring three crocheted jack-o-lantern appliques set on a textured cream panel, framed by a deep black lattice border and a scalloped green-orange edge. Subtle embroidered vines and tiny orange bobble berries add handcrafted charm. This pattern uses a mix of textured stitches, applique work, and simple embroidery to create a cozy fall centerpiece perfect for seasonal decorating.
Progress Tracker
0% Complete
— Center Panel :
Overview :
This is worked flat in rows to create a textured cream panel that will host the appliques and embroidery. The pattern uses a simple alternating textured stitch so the fabric is stable and dense enough not to sag under appliques. Foundation chain is 111 for a working width of 110 sc across; adjust multiple of 2 for wider or narrower runners.
Row 1 :
Ch 111. Sc in 2nd ch from hook and in each ch across. (110 sc)
Row 2 :
Ch 1, turn. Sc in BLO in each st across. (110 sc)
Row 3 :
Ch 3 (counts as first dc), turn. *Sk next st, dc in next st, ch 1, dc in skipped st (makes a crossed dc cluster)*. Rep from * across, ending last stitch worked into top of ch from previous row. (55 crossed clusters plus initial ch3)
Info :
The crossed double clusters create a subtle diagonal texture; keep tension even. Use a stitch marker to mark the first stitch of each row for consistent edge tension.
Row 4 :
Ch 1, turn. Sc in BLO across (110 sc).
Row 5 :
Ch 3, turn. Repeat crossed dc cluster row across as in Row 3.
Row 6-60 :
Repeat Rows 4-5 alternating sc BLO row and crossed cluster row until you have a total of 60 rows (this yields a center panel approx 28-32 inches long depending on gauge). Maintain edge stitches by working first and last st of every sc row as sc in both loops for a neat edge. (110 sts wide; row count remains 60)
Info :
Row counts and final size will vary with yarn/hook. Block the panel lightly after completing rows to square and flatten the fabric before appliques and embroidery. This helps the appliques lie flat and keeps the finished runner tidy.
Row 61 :
Ch 1, turn. Sc around entire rectangle to prepare for joining and border. Work 1 sc into each end-row (60 end rows on each side) and 1 sc in top and bottom row sts (110 each), placing 3 sc in each corner to avoid tight corners. (Perimeter count 324 sc)
Info :
When working across the long top and bottom edges, you will be inserting into the horizontal top loops—treat each row's turning ch as a stitch when necessary so counts remain consistent. Mark the start of this round to track rounds around the perimeter.
— Pumpkin Applique (Make 3, identical) :
Overview :
Each pumpkin is worked in the round from the center out, producing a slightly domed, flattened disk with subtle ribbing created by working alternating FLO rounds and front post stitches to imitate pumpkin ridges. Work pumpkins in Rusty Orange yarn. The facial features are crocheted separately in Black and sewn on for a crisp jack-o-lantern face.
Round 1 :
With Rusty Orange, make a magic ring. 6 sc in magic ring. (6)
Round 2 :
Inc in each st around. (12)
Round 3 :
(1 sc, inc) x 6. (18)
Round 4 :
(2 sc, inc) x 6. (24)
Round 5 :
(3 sc, inc) x 6. (30)
Info :
Use gentle tension—these increases set the pumpkin diameter. Flatten the circle between your fingers occasionally to keep even shaping.
Round 6 :
(4 sc, inc) x 6. (36)
Round 7 :
(5 sc, inc) x 6. (42)
Round 8 :
(6 sc, inc) x 6. (48)
Round 9 :
1 sc in each st around. (48)
Round 10 :
1 sc in each st FLO across to begin ribbing texture. (48)
Info :
Working in the FLO conveniently leaves a ridge on the surface. This ridge will help the next round of post stitches pop and create the pumpkin ribs.
Round 11 :
Ch 1. *Fpdc around next st (US fpdc = front post dc), sc in next st; rep from * around to create alternating fpdc and sc. (24 fpdc + 24 sc = 48)
Round 12 :
Ch 1. Sc in each st around in BLO to help the fpdc sit proud. (48)
Round 13 :
Repeat Round 11 (24 fpdc + 24 sc = 48). This deepens ribs.
Round 14 :
Sc around. (48)
Info :
If you prefer a flatter pumpkin for a runner, do not stuff. If you want a slightly raised applique, add a very small handful of fiberfill before closing—no more than 5-8 grams to keep it flat.
Round 15 :
(6 sc, dec) x 6. (42)
Round 16 :
(5 sc, dec) x 6. (36)
Round 17 :
(4 sc, dec) x 6. (30)
Round 18 :
(3 sc, dec) x 6. (24)
Round 19 :
(2 sc, dec) x 6. (18)
Round 20 :
(1 sc, dec) x 6. (12)
Info :
Close opening with tapestry needle, weave tail through the front loops to flatten the back. Leave a 20-25 cm tail for sewing the pumpkin onto the panel. Make 3 identical pumpkins.
— Pumpkin Face Features (Make for each pumpkin) :
Overview :
Faces are small black appliques worked flat in rounds and sewn onto the pumpkin surface to form eyes, nose, and mouth. This yields crisp shapes that contrast against the orange.
Eye (Make 2 per pumpkin) Round 1 :
With Black, ch 5, sl st to first ch to form a loop. Ch 1, work 6 sc in loop. (6)
Eye Round 2 :
(1 sc, inc) x 3. (9)
Eye Round 3 :
Sl st into next 2 sts, fasten off leaving tail for sewing to shape into a triangular eye; flatten slightly when sewing to create triangular silhouette.
Nose :
Make 1 small triangle using ch 4, sc in 2nd ch from hook, hdc next, sl st last. Fasten off and leave tail for sewing.
Mouth :
Chain 10. Starting in 2nd ch from hook, sc 8 across. Fasten off leaving long tail for sewing and shaping into jagged mouth when attaching; secure with small stitches to form the toothy curves.
Info :
Pin faces onto each pumpkin to audition placement before stitching. Position eyes roughly centered across the top third of the pumpkin disc with about 6-8 sts between them, nose centered below, and mouth below the nose with some curvature. Use small, even stitches when sewing to avoid pulling the pumpkin surface out of shape.
— Leaves & Vine Embellishments :
Leaf Motif (Make 12) Round 1 :
With Olive, ch 6. In 2nd ch from hook: sc, hdc, dc, hdc, sc. Fasten off. (5 stitches across leaf)
Leaf Assembly :
Block leaves lightly on a pin to shape pointed tip and base. Use white pva or a light starch if you want them to hold curl. Make 12 leaves total—3 per vine section between pumpkins and at runner endpoints if desired.
Vine Embroidery :
Using Dark Brown or Olive on tapestry needle, stitch a gently curved chain-stitch or embroidered chain between pumpkins. Attach leaves by sewing the base into the vine thread. Add tiny French knot berries in Rusty Orange at intervals of every 8-12 stitches to echo the center motif.
Info :
Mark vine placement on the center panel using pins or a removable fabric marker before embroidering. Keep vines light and airy so they don’t overpower the pumpkins.
— Border: Lattice Frame in Black :
Round 1 :
With right side of panel facing, join Black in any corner sc with sl st. Ch 1, work 1 sc in same corner, then evenly work 1 sc into each sc around the perimeter, placing 3 sc in each corner to turn. (324 sc)
Round 2-6 :
Ch 1, turn, sc in each st around, placing 3 sc in each corner. (324 sc)
Info :
These rounds create a firm framing edge. If your perimeter count differs, keep the same number of stitches in each round by working 3 sc in corners and one sc per top/bottom/side stitch.
Round 7 :
Ch 3 (counts as dc), *skip next st, dc in next st, ch 1; rep from * around, adjusting final spacing so there is a ch-1 space at the last corner; place 2 dc in corner ch-1 to turn. (Pattern uses 162 dc + 162 ch-1 spaces ≈324 positions)
Round 8 :
Ch 1, turn. In each ch-1 sp: sc, ch 1, sc (creates small mesh squares). In each dc: sc. Keep corners neat by working sc-ch1-sc into corner ch-1. (324 patterned positions)
Round 9-12 :
Repeat Rounds 7-8 twice more (two mesh rounds), finishing with Round 12 as sc round to stabilize the lattice before scalloped edge. (Stable stitch count 324)
Info :
The alternating dc-ch1 mesh produces the open lattice look you see in the photograph. Work loosely enough to produce small open squares but not so loose the appliques sag. Blocking after border rounds helps open the mesh evenly.
— Narrow Inner Trim (Rusty Orange) :
Round 1 :
Join Rusty Orange in the seam between the center panel and the border. Ch 1, sc in each st around, placing 3 sc in corners. (324 sc)
Round 2 :
Ch 1, sc in BLO around to create a subtle ridge between center and border. (324 sc)
Info :
This orange ridge frames the center and provides a visual break between cream and black. Change colors tidily by carrying yarn along wrong side or weaving in ends cleanly.
— Scalloped Outer Edge :
Overview :
The scalloped edge alternates olive green shells with a small rusty orange picot highlight and a final speckled cream slip-stitch round to soften the silhouette.
Round 1 (Green Shells) :
Join Olive in any sc along the outer edge. *Shell: (2 dc, ch 1, 2 dc) in next st, skip next 5 sts; rep from * around. Make sure total scallop repeats = 54 (324 perimeter sts ÷ 6 = 54). Adjust slightly if your counts differ; work extra single crochet in a corner area to preserve pattern repeat. (54 shells)
Info :
Each shell uses 6 sts of the previous round space; dividing the perimeter by 6 yields the number of shells. If needed, add 1 sc before a corner to make the repeat divisible by 6.
Round 2 (Orange Picot) :
Join Rusty Orange in the ch-1 spaces between shells. *Sc in center ch-1 sp, ch 3, sl st in last sc to make a tiny picot; rep from * around. Fasten off and weave ends. (54 picots)
Round 3 (Cream Tip) :
With Pale Cream, sl st evenly across shell tips and picot bases to create a speckled highlight. Work 1 sl st in each of the 54 shell peaks and 54 picot bases for a tiny dotted finish. Fasten off and weave ends.
Info :
Blocking the scalloped edge will open each shell and set the shape. Pin lightly and steam or wet-block to flatten and set the waves.
— Assembly & Attachment :
Info :
Lay the blocked center panel flat on a table right side up. Measure and mark three centers for pumpkin placement: mark using pins as follows—first pumpkin center 6 inches from one short end, second centered at the middle of the panel, third 6 inches from the opposite short end. Horizontal centerline is at the horizontal midpoint of the panel's width.
Attach Pumpkin 1 :
Position first pumpkin onto marked area. With long tail from pumpkin, stitch down using a whip stitch around the pumpkin's outermost round, picking up both pumpkin and panel loops. Use small, even stitches to keep the applique flat. Secure tail and weave in.
Attach Pumpkin 2 :
Repeat placement and stitching for middle pumpkin. Ensure vertical alignment with first pumpkin; use a ruler or measuring tape to confirm spacing between pumpkins is equal.
Attach Pumpkin 3 :
Repeat for third pumpkin. Check that all three are oriented with faces upright and centered visually down the runner. Weave in all ends to the wrong side of work for a neat finish.
Info :
Sew facial features onto pumpkins before attaching pumpkins to panel if you prefer controlling the face placement better. Pin faces on, stitch, then attach pumpkin to panel.
Embroider Vines :
Use a tapestry needle and Dark Brown yarn to stitch vines connecting the pumpkins. Use chain-stitch embroidery or a braided couching stitch with the yarn. Sew on leaves at intervals and secure tiny French knot berries in Rusty Orange—approximately 3-6 knots per vine depending on length.
Info :
Keep embroidery anchored to the dense center panel (sc rows) to avoid pulling through the mesh of the border. If necessary, add small securing stitches behind the panel on the wrong side to keep long embroidered threads flat.
— Finishing Touches :
Blocking :
Lightly block the finished runner—pin edges in shape and mist with water, allowing to dry fully. Use low steam if necessary to flatten appliques and set scallops.
Weaving Ends :
Weave all tails at least 6-8 cm into the wrong side or into adjacent colorwork so they lie flat and cannot be seen. Trim close to fabric after securing.
Final Inspection :
Check that all pumpkins are firmly sewn, embroidered vines are secure, and the scallop repeat is even across the perimeter. If a scallop looks shallow, add one more small sc behind it for lift.
Info :
Store the runner flat or rolled; avoid folding to prevent creasing of the scallops and appliques. Spot clean small areas with a damp cloth; hand wash gently if necessary and re-block to shape.
Completing this Autumn Pumpkin Table Runner is such a cozy reward — a beautiful combination of texture, appliques, and embroidery that elevates any table. Every stitch adds character, and the layered border gives the runner a handmade heirloom feeling. I hope you love how the three pumpkins and winding vines come together as much as I do! 🍁🎃🧶