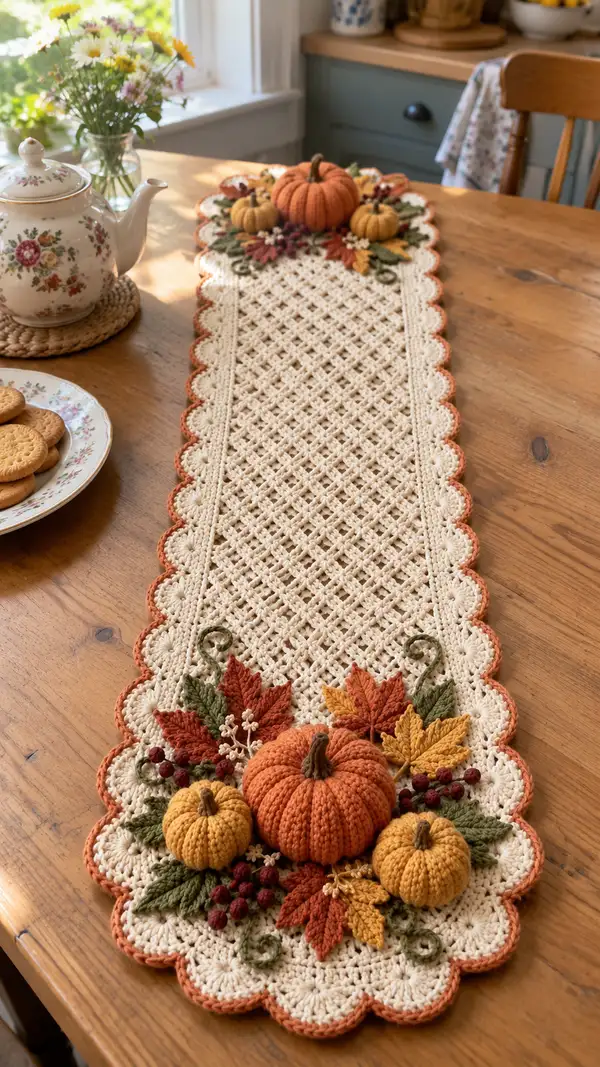
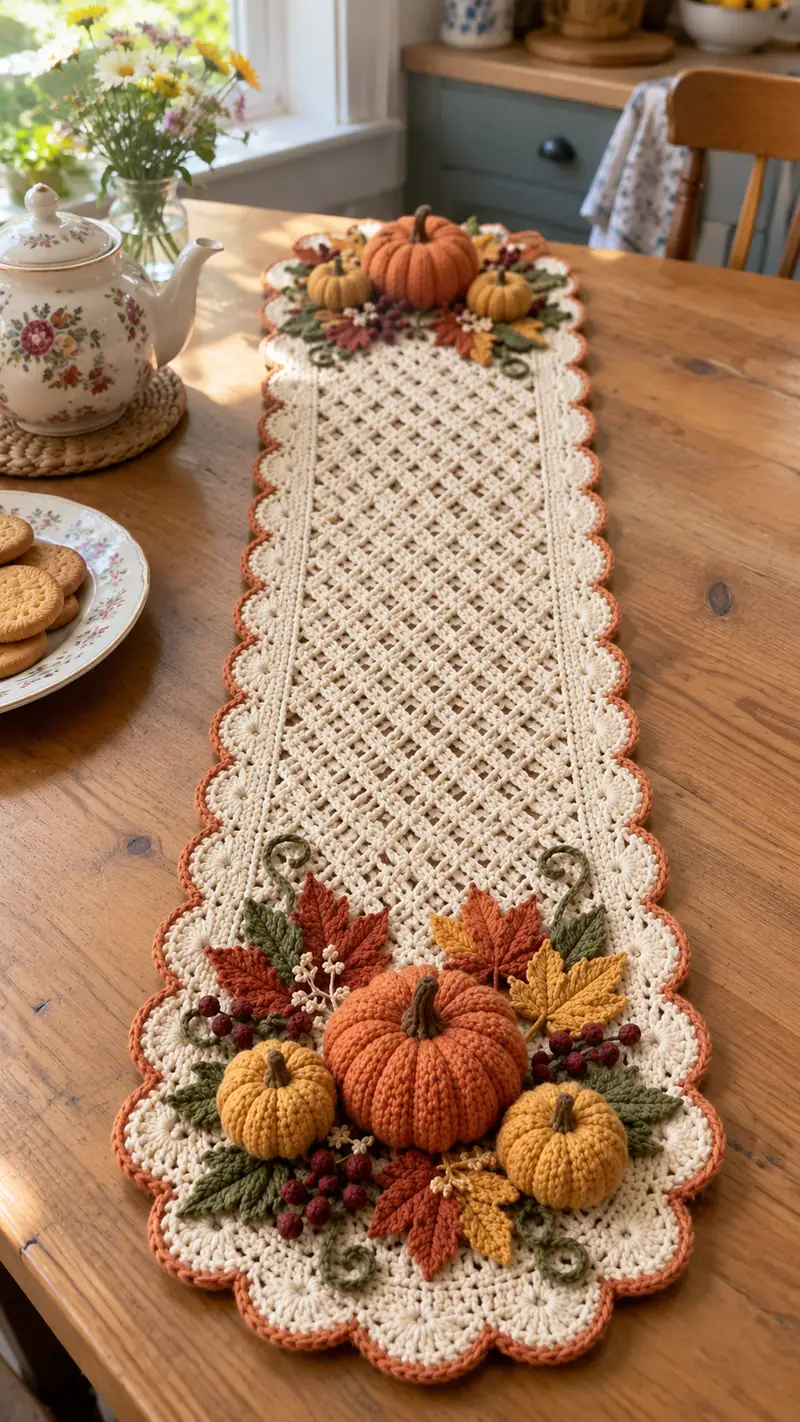
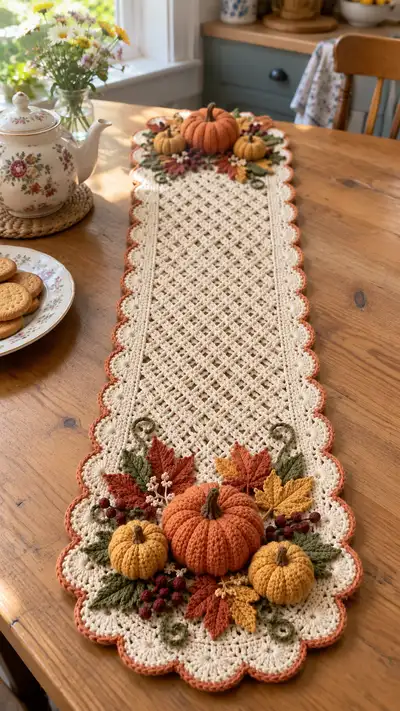
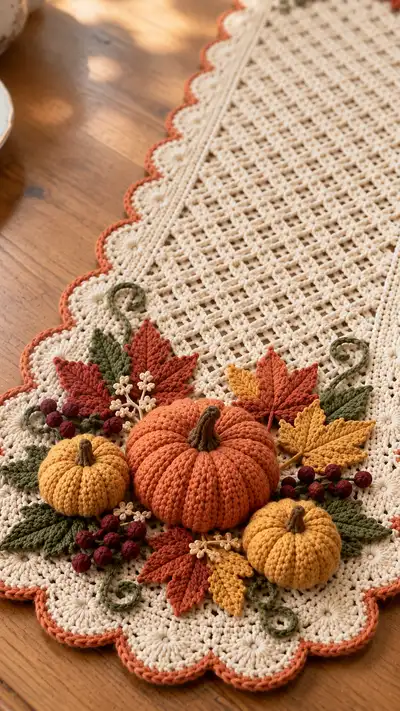
Create a warm, rustic autumn table runner featuring a lacy lattice center, scalloped edges, and a clustered pumpkin and leaf arrangement. This runner combines textured stitches, raised motifs, and sculpted pumpkins for a cozy seasonal centerpiece. The pattern includes step-by-step instructions for the runner base, scallop edging, three pumpkins, multiple leaves, berries, tendrils and stems with clear assembly notes.
Progress Tracker
0% Complete
— Runner Base (Lattice Center) :
Info :
This runner is worked as a long rectangular lattice panel built of repeat blocks joined across the width and extended to desired length. Gauge and exact length depend on your chosen starting foundation chain. The example shown uses a repeat foundation of 68 chains to yield an approximate finished runner width of 11.5 inches. Adjust multiples of 6+2 for your width. Work with cream yarn throughout this section.
Round 1 :
Foundation: ch 68 (multiple of 6 + 2). Join with sl st to first ch to form large loop or work back and forth if you prefer rows. For this pattern we'll work in joined rounds to create a neat edge (68)
Round 2 :
Ch 1, sc in each ch around, join with sl st to first sc. Place marker at first sc. (68)
Round 3 :
Ch 3 (counts as dc), *ch 1, skip next st, dc in next st; rep from * across to end, join with sl st to top of ch-3. Creates the first row of mesh (34 dc, 34 ch-1 spaces)
Round 4 :
Ch 3, dc in first ch-1 space, *ch 1, dc in next ch-1 space; rep across, join. (34 dc, maintaining ch-1 spaces)
Round 5-8 :
Repeat Round 4 to build a rectangle of lattice. Keep tension even; do not increase or decrease. (34 dc)
Info :
After every 6 rounds stop and check width; if you want a longer runner you will continue rounds until desired length. Place stitch markers along both long edges every 12 stitches to track alignment for the scalloped edge later.
Round 9 :
Switch to 'lattice cross' pattern: Ch 3, *skip 2 ch-1 spaces, dc in next ch-1 space, ch 3, dc around the post of the dc from two rows below to create the crossed lattice; rep across, join. This creates a raised crossed lattice texture. (approx 22 cross points)
Round 10-16 :
Continue working the lattice cross repeat: ch 3, cross over by anchoring each ch-3 loop to the appropriate stitch from two rows below with a dc. Keep pattern consistent; adjust tension for flat fabric. (width constant)
Info :
If you prefer a more open mesh, reduce dc anchors to every 3rd space. For dense lattice anchor every 2nd space. The photographed runner uses anchors every other space to create small diamond windows.
Round 17-28 :
Work even in the lattice cross repeat maintaining the same stitch count across. Continue until your runner length reaches approx 30-34 inches for the pictured size. Count rounds and aim for 24 lattice rounds in the center section. (no change in stitch count)
Info :
To create the interior linear 'rail' on each side seen in the photo, after 8 even lattice rounds stop and work 4 rounds of sc in BLO along both long edges (worked as continuous rounds) before returning to the lattice. This produces a subtle vertical border that frames the mesh.
Round 29-36 :
Work 4 rounds of 1 sc in each st BLO along the long edges only: join to first edge st and work the round back to the other side, finishing both long edges with a neat ridge. Maintain the lattice pattern central area by skipping edge stitches as you work each round. (width constant)
Info :
At the runner ends you'll work a slightly modified fan base to support the scallop applique. Mark the center stitch at each short end for aligning the scallop pattern later. Make sure ends are flat; block if necessary before attaching motifs.
Round 37-48 :
Continue lattice rounds until final center length is reached. The total number of lattice rounds in this example is 48 rounds including the initial sc foundation. End after an even lattice round; fasten off and weave ends. (width constant)
Info :
Blocking tip: Wet block your panel lightly and pin flat to straighten diamonds before adding scalloped edging. While cotton will relax slightly, blocking helps scallops sit evenly.
— Scalloped Border :
Info :
The scalloped edge is worked around the entire perimeter after the lattice panel is completed. Use rust/copper color for a warm frame as in the photo. Work evenly spaced scallops around the short ends and long sides with 10 scallops per long side in the sample width. Before beginning, place 12 pins evenly around each long side and 6 on each short end to mark where scallops should be worked.
Round 1 :
Join rust yarn at a marked edge point, ch 1, sc in same st and around edge 2 sc per marked stitch evenly to prepare base (approx 136 sc around perimeter depending on width)
Round 2 :
*ch 3, skip 2 sts, sc in next st; rep around to form spaced picot bases for scallops; join. The number of picot bases equals the number of scallops you plan to make. (approx 68 picot bases)
Round 3 :
Work scallops: In each picot base: (sc, hdc, 3 dc, hdc, sc) all in same base; join. This creates a pronounced scallop. (one scallop per base)
Round 4 :
Edge finish: With same rust color, work 1 sc evenly around each scallop to tidy and flatten points; join and fasten off. Weave in ends neatly on the back side. (perimeter maintained)
Info :
If your scallops buckle, go back with a hook one size larger and ease the tension across each scallop, or add an extra sc in the picot base to expand the scallop slightly. Blocking after scallops helps set curved shape.
— Large Pumpkin (Make 1) :
Info :
Pumpkin is worked in continuous rounds using orange worsted cotton with a smaller hook (3.5mm recommended) to create tight stitches that resist showing stuffing. We will create a rounded sphere with defined ribs using a running stitch around the finished tube to form segments. Stuff firmly but not overstuffed so the ribs pull evenly.
Round 1 :
MR, 6 sc in MR (6)
Round 2 :
6 inc evenly (12)
Round 3 :
(1 sc, inc) x 6 (18)
Round 4 :
(2 sc, inc) x 6 (24)
Round 5 :
(3 sc, inc) x 6 (30)
Round 6 :
(4 sc, inc) x 6 (36)
Round 7 :
(5 sc, inc) x 6 (42)
Round 8-15 :
1 sc in each st around (42) - work evenly for 8 rounds to build pumpkin body height, do not join; use marker to track start
Info :
Begin stuffing carefully by adding small amounts of fiberfill into the tube. Keep the bottom round slightly less stuffed until the final rounds allow closing cleanly. Even distribution ensures symmetrical ribs when you gather.
Round 16 :
(5 sc, dec) x 6 (36)
Round 17 :
(4 sc, dec) x 6 (30)
Round 18 :
(3 sc, dec) x 6 (24)
Round 19 :
(2 sc, dec) x 6 (18)
Round 20 :
(1 sc, dec) x 6 (12)
Info :
Fasten off leaving a long tail. Pull tail to close the opening tightly and weave through center to secure. Use remaining tail to thread through the slotted channel between ribs to create a deep indentation for the pumpkin top if desired.
Round 22 :
Using a long length of matching yarn or upholstery thread, run a strong gathering stitch around the 'equator' to create ribs. For 12 ribs, weave thread through the center of every 3rd stitch along the widest circumference, gather tightly and knot. Shape the pumpkin by pushing stuffing toward openings and tightening ribs evenly.
Round 23 :
Make stem: With brown yarn, MR 6 sc (6), (inc) x 6 (12), 2 rounds 1 sc in each st (12). Fasten off leaving tail; fold and sew into short tube. Stuff minimally and sew to top center of pumpkin.
Info :
For extra realism, surface crochet a few spiral ridges from stem to equator using contrasting darker brown yarn with slip stitches worked across the rib lines. Sew securely to runner later.
— Small Pumpkins (Make 2) :
Info :
Small pumpkins use the same technique as the large pumpkin but are worked to a smaller final circumference. Use mustard/gold yarn to create two smaller pumpkins for layered composition.
Round 3 :
(1 sc, inc) x 6 (18)
Round 4 :
(2 sc, inc) x 6 (24)
Round 5-8 :
1 sc in each st (24) - 4 rounds to build small pumpkin height
Round 9 :
(2 sc, dec) x 6 (18)
Round 10 :
(1 sc, dec) x 6 (12)
Round 12 :
Fasten off leaving long tail. Stuff firmly. Gather with running stitch to form ribs; knot and hide ends. Make small stems as for large pumpkin using brown, MR 6 sc, 2 rounds of 1 sc each, fasten off. Attach stems centered on top.
Info :
For squat pumpkins, stop increases earlier (24 sts) and add extra even rounds. For taller pumpkins, add rounds before decreasing. Keep stitch counts consistent if you want matching rib counts across pumpkins (we used 12 ribs on large and 12 on small for cohesive look).
— Maple/Shaped Leaves (Make 6-8 total varying sizes) :
Info :
Leaves are worked flat starting from the base with a center vein using post stitches to create texture. Use rust, mustard and olive for a mixed fall palette. Make several leaves in two sizes: large maple-style (approx 10-12cm long) and medium pointed leaves (approx 7-9cm long).
Leaf Round 1 :
With chosen leaf color, ch 11 (foundation chain for a medium leaf). Sc in 2nd ch from hook and across until end; do not fasten. (10 sc)
Leaf Round 2 :
Ch 1, turn, sc in first st, hdc in next, dc in next 2, tr in next 2 (creating point), dc in next 2, hdc in next, sc in last (10 stitches making a symmetrical peak).
Leaf Round 3 :
Working along opposite side of foundation ch: sc in first, hdc in next, dc in next 2, tr in next 2, dc in next 2, hdc in next, sc in last. Fasten off. The two rounds form the basic leaf silhouette. (10)
Leaf Round 4 :
Rejoin in center with contrasting green or same color and work 1 rnd of FLO slip stitch rib: *fpdc around corresponding dc on top side, fpdc around corresponding dc on bottom side to form a raised vein; rep to point and back. This creates a raised midrib texture.
Leaf Round 5 :
Edge shaping: With same color, sc evenly around leaf edge working 3 sc in point to create fullness. Fasten off and weave ends. Block leaves slightly to shape lobes. (approx 28 sc around)
Info :
For maple-style leaves with lobes, increase the foundation chain to 15 and shape three points along the top with clusters of tr and dc to create the classic lobed silhouette. Add small surface slip-stitch veins to emphasize texture.
— Elongated Serrated Leaves (Make 6-8) :
Round 1 :
Ch 14, sc in 2nd ch from hook, sc in next 11, sc in last (12 sc)
Round 2 :
Ch 1, turn, sc in first, (hdc, dc) working increases to shape tip: at center work 3 dc as peak then decrease symmetrically along the other side; end with sc. (continue considering 12 major points)
Round 3 :
Edge: sc around leaf, working (sc, ch1, sc) at serrated teeth every 2 stitches to make a small scalloped edge for a textured leaf. Fasten off and block lightly.
Info :
After creating multiple leaf shapes, starch very lightly or use a small amount of diluted craft glue for a sturdier applique if your runner will be used under heavier items. Sew leaves strategically around pumpkin cluster creating layered depth.
— Berries (Make clusters: 12-16 small berries) :
Info :
Berries are tiny spheres crocheted tightly and then sewn into clusters of 4-6 berries. Use burgundy or deep wine yarn and a small hook (3.5mm or smaller) for dense berries.
Round 1 :
MR, 6 sc in MR (6)
Round 2 :
Inc in each st (12)
Round 3 :
1 sc in each st (12) - work two rounds evenly to create a small ball
Round 4 :
Dec around: (1 sc, dec) x 4 (8)
Round 5 :
4 dec (4) - stuff lightly and then close: 2 dec (2); fasten off leaving tail; pull through and secure. Weave tail to back and compress berry to desired roundness.
Info :
Sew berries in clusters using short lengths of yarn so they appear attached in small bunches. Tuck berry bases under leaves so clusters appear nestled and secure well with several stitches to the runner base.
— Tendrils (Make 6-8) :
Round 1 :
With olive green yarn ch 30 (or desired length for curl). In 2nd ch from hook, work 1 sc in each ch across. The natural tendency will curl; to increase spiral, use smaller hook or work several sc in each chain for tighter curl (ch 20 for short tendrils).
Round 2 :
Fasten off leaving long tail for sewing. Optionally wrap a thin wire inside the tendril before closing to make it poseable; cover wire ends with tape or small loops of yarn to prevent sharp edges.
Info :
To make a perfect spiral, work 3 hdc in each chain for the first 12 stitches then 2 hdc in each remaining to produce a tighter spiral on one end. Arrange curls by winding around a pencil, steaming lightly to set and pin until dry.
— Stems and Small Flower Sprigs :
Round 1 :
Stems: With brown yarn ch 6, sl st back along chain to create a tight cord, fasten off leaving tail for sewing. For thicker stems work MR 6 sc and 2 rounds of 6 sc (6) to create a short tube. Attach to pumpkin top with multiple whip stitches.
Round 2 :
Flower sprigs: With cream or very light yellow, ch 4, join to form small ring, 6 sc in ring, then ch 3, sl st in same st repeating 6 times to make micro flower cluster. Fasten off and sew into gaps for delicate highlights.
Info :
Make numerous small sprigs to tuck into the pumpkin clusters — they add a delicate, finished look and break up color blocks. Use a small crochet hook for tidy micro elements.
— Assembly & Applique Preparation :
Info :
Before sewing, block all motifs lightly and arrange on one short end of the runner. The photographed composition places a large pumpkin center and two small pumpkins to one side overlapping slightly, with leaves and berries layered behind and tendrils curving outward. Pin each piece securely before sewing to check balance and scale.
Tip :
Place small scraps of felt under pumpkin bases during initial pinning to raise pumpkins slightly for a 3D effect if you want them more pronounced. Remove felt before final stitches or leave if you prefer added stiffness.
Info :
Sewing notes: Use a blunt yarn needle and matching thread to sew motifs. For pumpkins, sew several running stitches through the base of the pumpkin and anchor through the lattice panel beneath. Use ladder stitch or whip stitch for invisible joins on leaves and stems.
Round 1 :
Position the large pumpkin centered on the short end within the scalloped edge. Pin through the scallop holes and the base of the pumpkin making sure the scallop frames the pumpkin as pictured. Sew with a length of yarn making 10-12 secure passes around the base and through runner fabric. Knot and weave ends on the back. (secure)
Round 2 :
Place smaller pumpkins beside and slightly overlapping the large pumpkin. Sew in same manner ensuring stitches anchor into multiple lattice threads underneath to prevent sagging when handled. Add additional stitches around the equator area if needed for stability.
Info :
Attach leaves starting with the largest in the back layer, tucking edges under pumpkins and sewing into the runner base using hidden stitches. Add berries last, bundling small clusters and attaching them so they nestle between leaves for depth.
Round 3 :
Attach tendrils last by sewing one end into the underside of a leaf or near a stem; twist and arrange curls so they exit naturally from the cluster. Secure with stitches at two points if a longer tendril will be handled often.
Info :
Final touches: Add a few surface slip-stitch veins or a light dry-brush of craft paint to highlights if desired. Ensure all ends are woven at least 3 inches into the back of the runner to prevent unraveling with use or washing.
Finishing this runner is one of those truly satisfying crafty moments — watching the lacy center and scalloped border frame a plush pumpkin cluster gives instant cozy vibes. The layered leaves, tiny berries, and winding tendrils add a crafted, artisan look perfect for autumn tables. This piece makes a lovely hostess gift or a centerpiece that can be enjoyed year after year. 🧶🍂✨