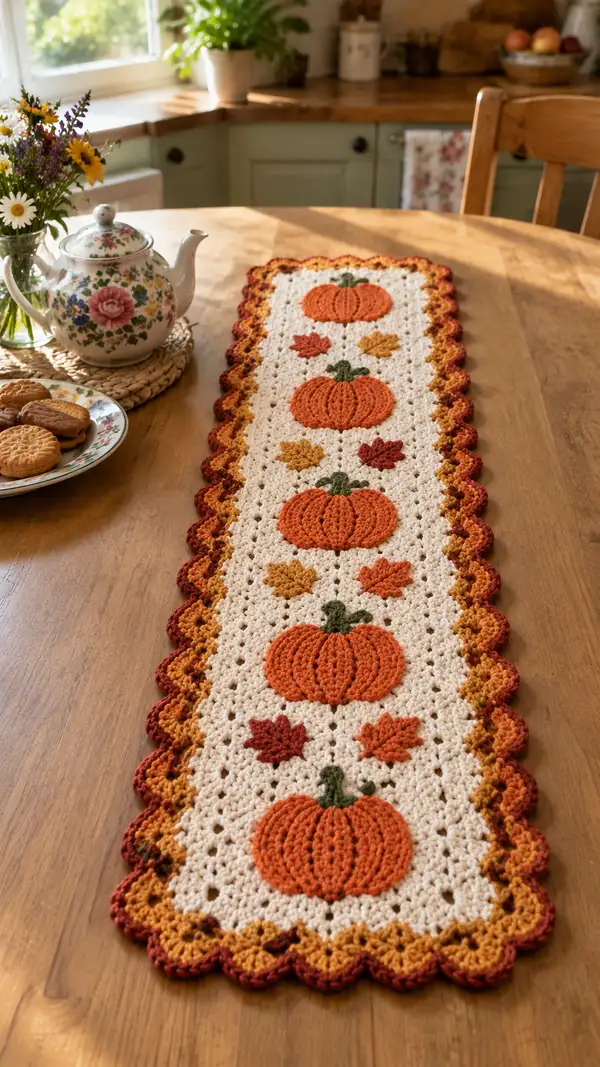
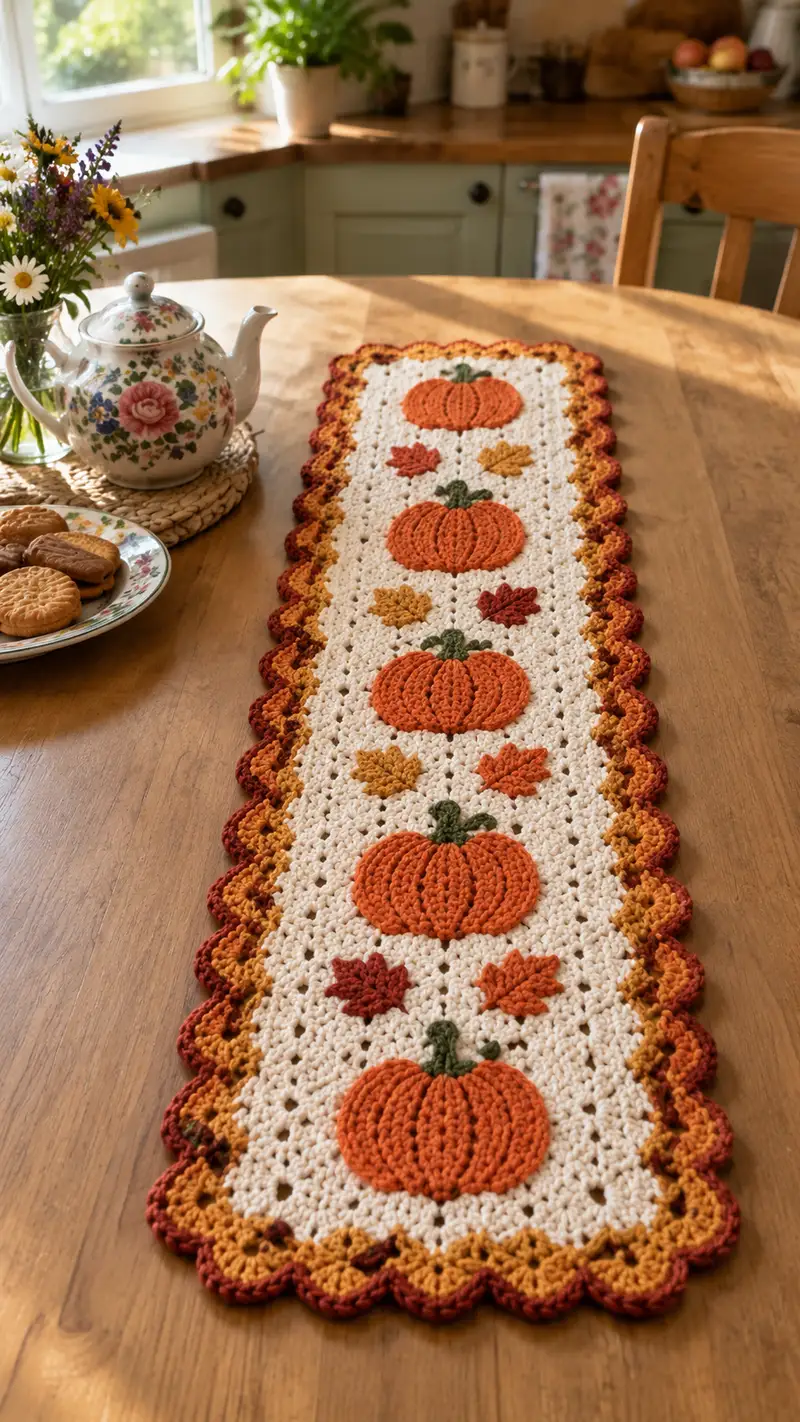
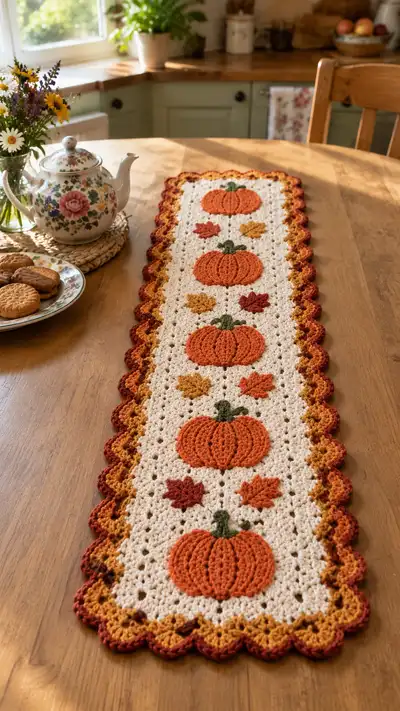
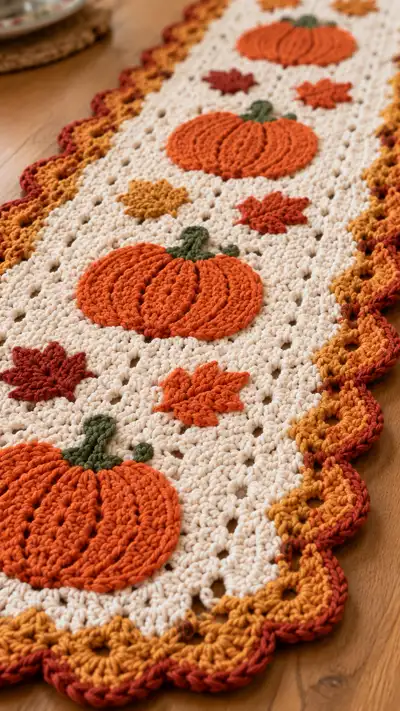
A cozy rectangular table runner decorated with raised pumpkin appliques and scattered maple leaves, perfect for autumn décor. Worked in warm cream for the background with rich pumpkin orange, golden yellow and rust accents, finished with a scalloped multi-color border. This pattern uses simple granny-style rows for the field and worked-applique pumpkins and leaves applied afterward for a charming textured finish.
Progress Tracker
0% Complete
— Center Panel (work flat in rows) :
Round 1 :
Foundation chain: ch 101 (this is a multiple of 3 plus 2 for turning; adjust by adding/removing multiples of 3 for a wider/narrower runner).
Round 2 :
Row 1 (RS): dc into 4th ch from hook (counts as first dc), *ch 1, skip 1 ch, (3 dc) in next ch; rep from * across to last 2 ch, ch 1, 2 dc in last ch; turn. You should have 33 clusters of 3-dc separated by ch-1 spaces (count clusters to verify).
Round 3 :
Row 2 (WS): ch 3 (counts as dc), *skip next ch-1 space, (3 dc) into next ch-1 space, ch 1; rep across placing last 2 dc into the turning ch; turn. Maintain 33 shell clusters across (3-dc shells).
Round 4 :
Row 3 (RS): Repeat Row 2. Work even pattern of shells and ch-1 spaces; the ch-1 spaces create the little holes that appear in the field. Keep tension consistent for a flat fabric.
Info :
This foundation and repeat creates a soft lattice that matches the photographed runner. If you change the foundation chain, ensure number of shell groups stays consistent so border rounds sit evenly.
Round 5 :
Row 4 (WS): Repeat Row 2/3. After 4 rows, the pattern is established; from here you will repeat the shell row for the field until you reach placement rows for pumpkins. Count your rows as you work so pumpkins align evenly down the center.
Round 6-10 :
Row 5-9: 5 rows even in shell pattern (3-dc shell, ch1 spacer) maintaining 33 shell clusters per row (approx total width remains consistent). Keep these five rows flat and even on the RS and WS.
Info :
Measure as you go. The pictured runner has four pumpkin motifs spaced evenly down the center; plan to work until you have room for four pumpkin placements with 10-12 background rows between them.
Round 11-16 :
Row 10-15: Continue working even rows in shell repeat for 6 more rows (total so far: 15 rows). Check work for cupping - if edges curl, block gently before continuing.
Round 17 :
Placement Row for Pumpkin 1 (RS): Work Row pattern but pause after completing center 11 clusters. Mark the center cluster of the panel with a removable stitch marker; this will be center placement for your first pumpkin applique. Finish row to end as previously (33 clusters across).
Info :
To position pumpkin precisely, count clusters from each side to the center marker. Each pumpkin sits centered across the width and between two shell rows vertically. You will sew the applique to cover approximately 7-9 clusters in width and 6-8 rows in height.
Round 18-23 :
Rows 16-21: Work 6 even shell rows (3-dc shells separated by ch-1). These rows create background space under the first pumpkin. Keep edges straight by using a stitch marker at the first dc of each row.
Round 24 :
Placement Row for Pumpkin 2 (RS): Repeat the placement technique used on Round 17 — mark the center cluster for Pumpkin 2 which will be located approx. 12-14 rows below Pumpkin 1 depending on how much spacing you prefer. Maintain same shell counts across the width (33 clusters).
Round 25-30 :
Rows 22-27: Continue working even shell rows for 6 rows after placement row. Repeat spacing for Pumpkin 3 and 4 after alternating groups of 10-14 rows of background until you have reached the desired length (aim for around 60 total rows in the field before beginning border rounds).
Info :
For the photographed sample the field contains approximately 60 rows of shells including spacing rows; you can stop earlier or add more background rows to alter runner length. Always end with a RS row before starting border join for a tidy edge.
Round 31-60 :
Rows 28-57: Work even rows in shell pattern until the total number of rows equals approximately 60 (including the placement rows). Check length against table and adjust as needed. Keep both short edges ending square by counting turning chains and placing last cluster consistently.
Info :
When the panel measures desired length (approx 36-40 inches for the photographed runner depending on yarn/hook), fasten off leaving a long tail for joining the border if you will slip-stitch join a border round directly.
— Pumpkin Applique (make 4 — work one, repeat) :
Round 1 :
With pumpkin orange and the 4.0 mm hook, make a magic ring. Work: ch 1, 6 sc in magic ring (6). Pull ring tight.
Round 2 :
Inc round: (inc) x 6 = 12 sc. Place a stitch marker at start and move up each round.
Round 3 :
(1 sc, inc) x 6 = 18 sc.
Round 4 :
(2 sc, inc) x 6 = 24 sc.
Round 5 :
(3 sc, inc) x 6 = 30 sc.
Info :
These rounds create a small flat disc which will become the center of the pumpkin. Keep stitches evenly placed; do not over-increase or the shape will become too broad for a pumpkin applique.
Round 6 :
(4 sc, inc) x 6 = 36 sc.
Round 7 :
(5 sc, inc) x 6 = 42 sc.
Round 8 :
(6 sc, inc) x 6 = 48 sc. Fasten off and change to 5.0 mm hook for shaping rounds (optional — changing hooks makes the applique sit flatter on thicker yarn runner).
Round 9 :
Join pumpkin orange into any st on the edge with a sl st, ch 1 then hdc in same st, *ch 1, skip 1 st, 3 hdc in next st; rep around to last st, ch 1, hdc in last st; sl st to join. This introduces texture around the rim.
Round 10 :
Round of elongated front post ribs (this gives the pumpkin ribbing). Attach yarn with sl st behind one of the 3-hdc groups. Working from RS, place 12 front post treble crochet (fptr) stitches evenly spaced around the circle into the top of alternating shell groups: *fptr around the post of shell 1, skip next shell; rep to end (12 ribs total). Slip stitch to join.
Info :
These tall post stitches create the vertical ribbing seen on each pumpkin. If your yarn is bulky, use fphdc (front post hdc) instead for slightly lower ribs.
Round 11 :
Round of surface slip stitch rows: ch 1, sc evenly around working in the tops of stitches, placing 2 sc at the base of each fptr rib to secure; sl st to join. This flattens the ribbed surface slightly and forms a round pumpkin face.
Round 12 :
Shaping round: In order to make the pumpkin slightly oval, work (sc in next 4 sts, dec) x 6 = 42 sc. This tucks the edges slightly and begins pumpkin silhouette.
Round 13 :
(sc in next 3 sts, dec) x 6 = 36 sc.
Round 14 :
(sc in next 2 sts, dec) x 6 = 30 sc.
Round 15 :
(sc in next 1 st, dec) x 6 = 24 sc. Do not fasten off.
Info :
Stop decreasing early to maintain a slightly flattened bottom; the applique should be a low-domed shape about 3.5-4 inches across (depending on yarn/hook). Adjust rounds 12-15 to make the pumpkin wider or narrower.
Round 16 :
Surface detail: Using a separate length of the same pumpkin orange, and a yarn needle, embroider 6 vertical ribs from center top to bottom by making tightly spaced surface slip stitches following the front post ribs. Start at top center and bring needle out at the bottom edge; these lines should divide the pumpkin into 6 equal segments. Secure ends and weave in tails on WS of applique.
Round 17 :
Stem join: With olive green, attach to top center with a sl st, ch 1, sc in same st, (sc in next 2 sts), ch 2, sl st back into base to form a short stem bump. Fasten off leaving a long tail for sewing.
Round 18 :
Sewing info: Position pumpkin on the runner using pins before stitching. Sew around the outer edge of the pumpkin with small whip or blind stitches through both applique and background loops so the front remains neat. Weave in all ends on back side.
Info :
Make four pumpkins in total. To vary size slightly (as in the image), make the topmost pumpkin with one fewer increase round (omit Round 7) for a slightly smaller applique.
— Leaf Applique (make 8 small leaves and 4 medium leaves) :
Round 1 :
With golden yellow (or rust) and 4.0 mm hook, ch 9. This will form the center foundation for a small maple/leaf shape.
Round 2 :
Row 1: sc in 2nd ch from hook, hdc in next, dc in next 3, hdc in next, sc in next, sl st in last ch. Turn to work back along opposite side: sl st in next, sc in next, hdc in next, dc in next 3, hdc in next, sc in last. Fasten off and leave tail for sewing. This forms a simple leaf with slight points.
Round 3 :
Small leaf shaping: Using a tapestry needle, pinch center and add a couple of running stitches across the base and pull slightly to create the lobed look. Optionally use sc around edge in a contrast color to define leaf shape.
Round 4 :
For medium leaf make foundation ch 13 and follow same increases: sc, hdc, dc x5, hdc, sc around to create a larger maple-like silhouette. Add small center veins with a few surface stitches in contrasting color and leave long tail for sewing.
Info :
Make 8 small leaves and 4 medium leaves in mixed colors (golden yellow, rust, deep rust) and position them between pumpkins as in photo. Sew them down with small stitches, catching only the stitch loops of the background so the front remains neat.
— Pumpkin Stem Detail (make 4) :
Round 1 :
With olive green, ch 6. sc in 2nd ch from hook, sc in next 3, hdc in last ch; rotate and work 4 sc across the opposite side to form a short tube. Fasten off leaving tail for sewing. Optionally add a small curl: ch 8, sl st back along chain to make a tendril.
Info :
Sew the stem to the center top of each pumpkin applique. Tuck the base of the stem slightly under the top ribs so it looks part of the pumpkin, then secure with small hidden stitches. Add a small green tendril where shown.
— Scalloped Border (worked in rounds around panel) :
Round 1 :
Prepare to border: With RS facing, join rust color with a sl st to any side post at corner. Work 1 rnd of sc evenly around panel across row ends with 2 sc in each corner to keep corners flat. Count to ensure even stitches; approximate total stitch count around should be around 220-240 depending on your gauge.
Round 2 :
Switch to golden amber: ch 3 (counts as dc), *skip 2 sc, (5 dc) in next sc, skip 2 sc, dc in next sc; rep around. At corners work (5 dc) into corner increase to keep scallops even. Sl st to join.
Round 3 :
Switch to deep rust: sl st into the center dc of the 5-dc shell, ch 1, sc in center, ch 3, sc in center (this creates a picot-like raised center), move to next scallop center and repeat around. Sl st to join.
Round 4 :
Final outer shell round with rust: *shell in center of previous shell: (dc, tr, dc, tr, dc) all in same center st to create pointed scallop crest; sl st to next shell center; rep around. Fasten off and weave ends. This creates the multi-color scalloped edge shown in photo.
Info :
For the photographed look there are two border colors: golden amber as a wide scallop body and rust as a narrow outer edge. You may add a third darker round for contrast. If your panel width varies, increase or decrease shells evenly along long edges to maintain scallop symmetry.
— Assembly & Placement :
Round 1 :
Block center panel lightly (steam or wet block depending on yarn) to flatten background and make applique placement easier. Mark the center placements with pins — the pumpkins should be centered across the width and spaced evenly lengthwise. The sample spaces the pumpkins approximately 10-12 rows apart with leaves in each gap.
Round 2 :
Positioning pumpkins: Place each pumpkin over approximately 7-9 shell clusters wide and centered vertically across the marked placement rows. Pin securely with rust-proof pins so the applique lays flat without stretching the background stitches.
Round 3 :
Sewing pumpkins: Using matching orange yarn and a yarn needle, sew around the outer edge of the pumpkin with tiny whip stitches catching one or two threads of the runner at a time (do not sew through the shell gaps or you will distort the background). Sew close stitches for a secure hold and to prevent lifting.
Round 4 :
Sew stems and leaves: Attach stems at the center top of each pumpkin using spare olive green tail and secure with several stitches. Position leaves around pumpkins and secure with small hidden stitches catching only back loops of the background where possible to maintain a neat front finish.
Info :
Take care to sew appliques to a flat, unstretched fabric. Use short, even stitches and check the front frequently so your visible sewing remains invisible. Weave all tails to the WS and trim close.
— Variation Notes & Finishing Tips :
Round 1 :
Variation: To create a denser textured pumpkin, make the fptr ribs with two passes: fptr around post then fptr around same post again to double the rib height. This increases thickness but creates pronounced ribs.
Round 2 :
Color change tip: When changing to border colors, work the last stitch of the round in the old color and finish the last yarn-over with the new color to avoid knots and ends; weave the short tails into the border rounds for a clean finish.
Round 3 :
Cleaning and blocking: After sewing, gently wet-block the entire runner, pinning scallops flat and shaping each pumpkin slightly as you dry to encourage a uniform look. Cotton blends respond well to steam blocking and will relax into a neat shape.
Info :
Store runner flat to avoid curling of edges. For holiday presentation, add a thin felt backing glued to the underside if you plan to use strong heat or place hot objects on it.
This autumn table runner brings seasonal charm with textured pumpkins, warm leaves and a scalloped frame — a perfect handmade centerpiece. Each stitch adds a cozy, vintage feel that will brighten your table for fall gatherings. Enjoy the meditative rhythm of the shells and watching the appliques come to life as you work. 🧶🍁 When you’re finished, share your creation and smile at how your home has instantly become more welcoming. Happy crocheting! 🎃