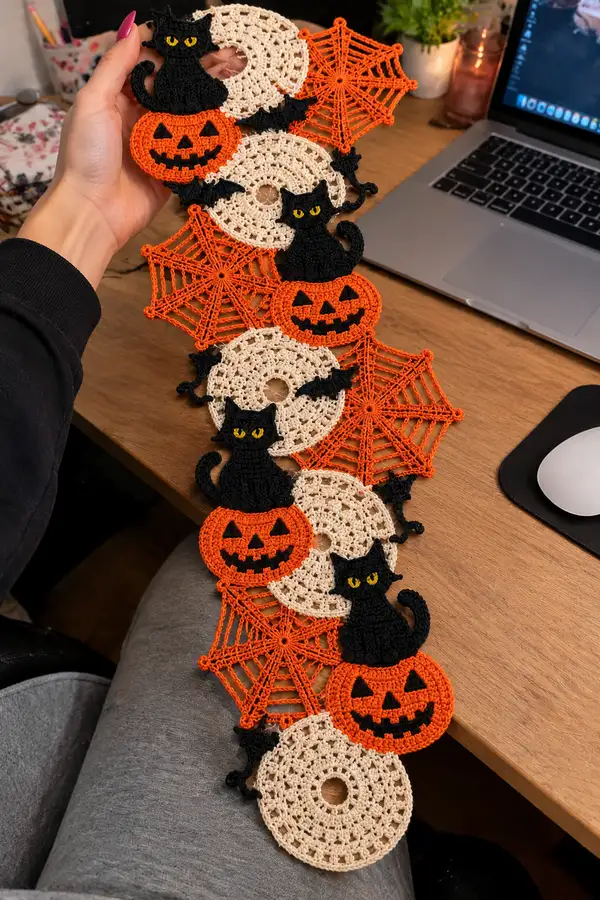
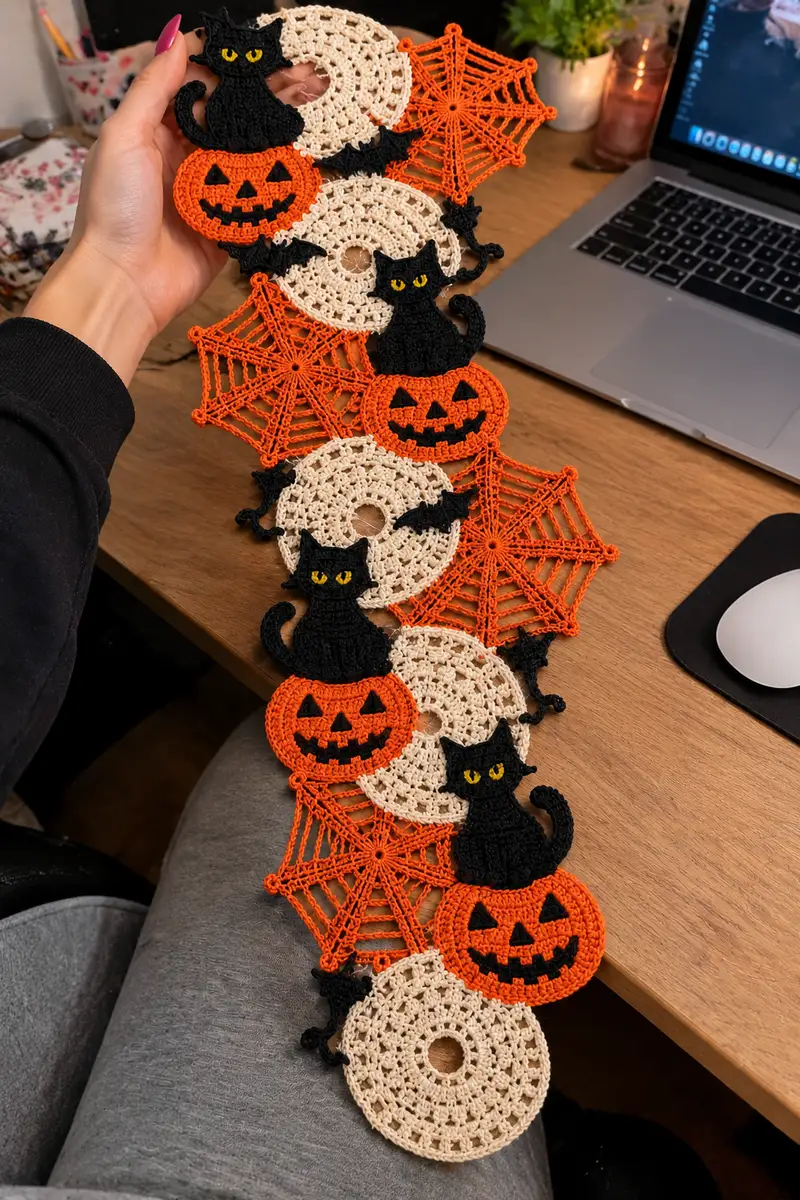
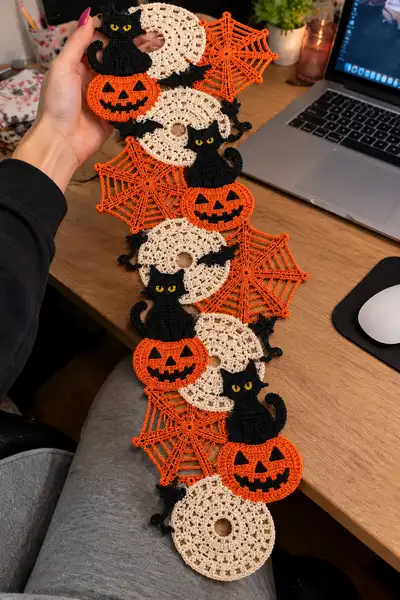
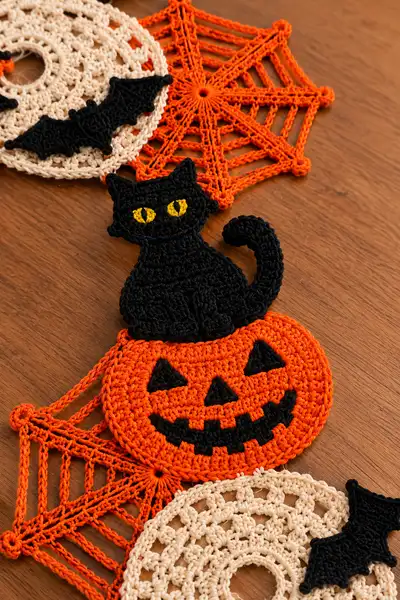
Create a festive Halloween table runner composed of linked crochet motifs: classic orange jack-o-lanterns, black cat appliques with bright yellow eyes, cream openwork circles, lacy orange spiderwebs and little bats. This pattern uses worsted/light-weight cotton yarn for crisp stitch definition and creates a flat, decorative runner perfect for fall mantel or table accents. Clear step-by-step rounds, assembly notes and tips included for a polished finish.
Progress Tracker
0% Complete
— Pumpkin Motif (make 4-5) :
Round 1 :
6 sc in magic ring (6)
Round 3 :
(1 sc, 1 inc) x 6 (18)
Round 4 :
(2 sc, 1 inc) x 6 (24)
Round 5 :
(3 sc, 1 inc) x 6 (30)
Round 6 :
(4 sc, 1 inc) x 6 (36)
Round 7 :
(5 sc, 1 inc) x 6 (42)
Round 8 :
(6 sc, 1 inc) x 6 (48)
Round 9-11 :
1 sc in each st (48)
Info :
Work these even rounds to build the flat disc. Use a stitch marker at the first stitch of each round to keep track; do not join rounds—work continuous rounds for a smoother edge if you prefer.
Round 12 :
1 sc in next 4 sts, BLO 1 sc in next st, repeat across if you want subtle ribbing (48)
Round 13-14 :
1 sc in each st (48)
Info :
For a slight cupped pumpkin, add one round of BLO single crochet to create a ridge that mimics pumpkin grooves. Keep tension consistent for flatness.
Round 15 :
(6 sc, 1 inc) x 6 (54) — little outward flare for outer pumpkin edge
Round 16 :
1 sc in each st (54)
Round 17 :
(7 sc, 1 inc) x 6 (60)
Info :
Stop when disc diameter matches your desired pumpkin size—these rounds create a larger pumpkin. If you prefer a smaller pumpkin, stop after round 14 or 15.
Round 18 :
1 sc in each st (60)
Round 19 :
(7 sc, 1 dec) x 6 (54)
Round 20 :
(6 sc, 1 dec) x 6 (48)
Round 21 :
(5 sc, 1 dec) x 6 (42)
Info :
Begin preparing flat surface for facial applique. Fasten off, leaving a long tail for sewing or embroidering the face. You may block the pumpkin lightly to flatten and shape the edge.
Round 22 :
Edging: join in chain space and ch1, sc evenly around keeping stitches slightly loose to avoid edge pull (42)
Round 23 :
Optional picot edge: *sc 3, pic*, rep around. Fasten off and weave ends.
Info :
Make 4-5 pumpkins to create the runner pattern as pictured. Leave them unjoined until finishing and applique facial features last so you can place faces symmetrically.
— Pumpkin Face Applique (make 4-5) :
Round 1 :
Using black yarn: Start with mr, 4 sc (4)
Round 3 :
(1 sc, inc) x 4 (12)
Round 4 :
Form triangle eye: ch2, sl st into base forming a triangle tip, fasten off. Repeat to create 2 eyes and 1 nose and small zigzag mouth pieces; alternatively embroider directly using satin stitch for smoother lines.
Info :
Cut small triangular patches for eyes and nose then sew in place with hidden stitches. For the mouth, embroider a zigzag using backstitch to match the jack-o-lantern smile in the photo.
— Cat Applique (make 4-5) :
Round 1 :
6 sc in magic ring (6)
Round 3 :
(1 sc, 1 inc) x 6 (18)
Round 4 :
(2 sc, 1 inc) x 6 (24)
Round 5 :
1 sc in each st (24)
Info :
This motif is worked as a single flat silhouette: start by creating a round base that will become the mid body region. We'll shape the head/ears and the body by working partial rounds and directional increases/decreases.
Round 6 :
Work FLO for body ridge: 1 sc in each st FLO (24)
Round 7 :
Increase along top edge where head will form: 3 sc, inc, (4 sc, inc) x 5, 3 sc (30)
Round 8 :
Even round: 1 sc in each st (30)
Round 9 :
Begin shaping head: dec at 6 evenly spaced points to narrow top: (4 sc, 1 dec) x 5, 2 sc (25)
Info :
Mark center top stitch to align ears later. When you reach shaping rounds, count frequently so both sides are symmetrical.
Round 10 :
(3 sc, 1 dec) x 5 (20)
Round 11 :
Work across top half only to form ears: ch1, turn, work 10 sc across half of the round then stop (ear base started). Leave remaining stitches unworked—do not join—we will return to them after ear shaping.
Round 12 :
Ear shaping (first ear): 1 sc in next 2 sts, (1 hdc, 1 dc) in next st, 1 hdc, sc back down next st, sl st to base of ear (ear tip formed). Fasten off ear temporarily or continue without fastening.
Info :
Work the second ear by reversing the procedure on the other side of the head. If preferred, make two small triangular ear appliques separately and sew on later for precise symmetry.
Round 13 :
Rejoin and continue around body: pick up at base and 1 sc in each remaining st to continue body edge (20)
Round 14-16 :
1 sc in each st (20)
Round 17 :
Start forming tail base: at back-right quadrant, 1 sc in next 3 sts, ch10, sl st back along chain to base creating curled tail loop, continue 1 sc in remaining sts (20)
Round 18 :
Reinforce tail: work 2 sc in each chain back across tail loop, sl st into base, 1 sc around body edge (26) — this adds stitches along tail area
Round 19 :
Flatten and shape lower belly: (1 sc, inc) x 6 (32)
Round 20 :
1 sc in each st (32)
Info :
Cat is intentionally slightly raised with a subtle ridge on the back formed by FLO rounds earlier. For a sturdier applique, work a duplicate reverse piece and sew together, leaving a small opening to stuff flatly if desired.
Round 21 :
Edging: sc evenly around, add picots at points (ch3, sl st to base) to create decorative edge if desired. Fasten off and weave ends.
Round 22 :
Eyes (make 2): with yellow yarn, mr, 5 sc (5), sl st, fasten off leaving long tail for sewing. Sew into place and add black vertical slits with embroidery floss or backstitch.
Info :
Position eyes between rounds 8-10 of your cat applique so they sit near the head. Use a small amount of stuffing behind eyes if you want a slightly raised look.
— Cream Openwork Round (Doily) (make 4-5) :
Round 1 :
Ch 10, join with sl st to form ring, ch3 (counts as dc), 15 dc into ring, sl st to top of ch3 (16)
Round 2 :
Ch3, dc in same st, *ch2, skip next dc, 2 dc in next dc*, rep around, sl st to top of ch3 (16 shell spaces)
Round 3 :
Sl st into ch2 sp, *(dc, ch2, dc) in ch2 sp, ch1, sk shell, dc in next shell center*, rep around (32)
Round 4 :
Ch1, sc in each st and ch sp around to create solid ring (approx 32)
Info :
This round work produces the airy look of the cream rings in the photo. Keep stitches relaxed to produce lace-like openness; cotton yarn shows this beautifully.
Round 5 :
*Ch4, sl st into next ch1 space to form decorative loops across the round*, rep around (creates circular loops)
Round 6 :
Ch3, dc in each ch4 loop around, join (32)
Round 7 :
One more lace round: *ch3, skip next dc, sc in next dc*, rep around. Fasten off and block gently to open lace.
Info :
Make enough cream rounds to alternate with pumpkins and spiderwebs in your runner. Blocking is essential to make the central hole and the openwork neat.
— Spiderweb Motif (make 4-5) :
Round 1 :
Ch6, join to form ring. Ch3 (counts as dc), work 15 dc into ring, sl st to top of ch3 (16)
Round 2 :
Ch8 (counts as long spoke), sl st into next dc to form eight spokes across the circle, *ch8, sl st into next dc*, rep 15 more times (8 spokes)
Round 3 :
Working from center outward, *sl st into spoke base, ch6, sl st into same spoke 4 times to create a small ring*, rep into each spoke (8 small loops)
Round 4 :
Round of connecting chains: start at any spoke, *sl st into next spoke 3 dc down, ch10, sl st into next spoke at equal level* rep around to create web outer rings. The chains form the web lines as in photo.
Info :
To replicate the spiderweb shown, keep chain lengths consistent. Pull gently on chains to open into an attractive hex/octagon. Picot the outer tips for little rounded tips (ch3, sl st into base).
Round 5 :
Add reinforcement: sl st into each spoke and chain bridge, then add decorative picots at each outer spoke join. Fasten off and block flat.
Round 6 :
If desired, highlight web with a second round of slip stitch along chains to add subtle textural ridge.
Info :
Make spiderweb motifs in orange for contrast. Work loosely to allow the web lines to sit atop adjacent motifs without bunching.
— Little Bat Applique (make 6-8) :
Round 3 :
(1 sc, inc) x 6 (18)
Round 4 :
Form wings: ch5, sl st to body, ch5 other side, sl st to base, 1 sc around body to anchor (18)
Round 5 :
Work wing scallops by 1 sc, hdc, dc in each chain loop then sl st to body, repeat for other wing. Fasten off and weave ends.
Info :
Bats are small decorative pieces used between motifs. Keep them flat and slightly stiff by using tight tension or starched light spray if desired.
— Connectors and Joining Chains :
Round 1 :
With orange yarn for main runner chain: ch 12, sl st into first motif outer edge at a pre-determined picot point, ch 8, sl st to next motif, continue chaining and slip stitching to join motif to motif. Make chain lengths uniform across entire runner.
Round 2 :
Reinforce joins: from the sl st, work 1 sc around that join on each motif edge to secure connection. Add 2-3 sc around holes to stabilize.
Info :
In the photographed runner, small raised knots and picots anchor the motifs to each other. Place joins so pumpkins slightly overlap cream doilies and spiderwebs for dynamic visual layering.
Round 3 :
At points where motifs overlap add extra 3-ch loop connectors: *sl st to motif A, ch6, sc in last ch, sl st to motif B* to create decorative bridges that mimic the photo. Repeat for each overlapping point.
Round 4 :
Finish edges by going around entire runner with 1 sc in each exposed stitch, adding picots where the photo shows little round bumps (ch3, sl st to base). Fasten off and weave in ends.
Info :
Make the runner as long as you'd like by repeating the motif sequence: spiderweb - cream round - pumpkin+cat - cream round - spiderweb, etc. Keep count of motifs to balance the final layout.
— Extra Reinforcement and Surface Embroidery :
Round 1 :
Embroider cat eyes: with yellow yarn sew small round disks (as made in cat round 22) and use two vertical black satin stitch lines for pupils. Secure ends behind the applique with small neat stitches.
Round 2 :
Use black yarn to embroider pumpkin mouths if you did not make applique shapes—use satin stitch to fill triangular nose and eyes and a chain-stitch zigzag mouth.
Info :
Surface embroidery gives crisp facial features without adding bulk. Keep stitches small and anchored in several places to prevent shifting in use.
— Finishing Touches :
Round 1 :
Block motifs gently: dampen and pin flat to desired shape. Use steam-blocking if your yarn allows, but be gentle to avoid melting or deforming twist in cotton blends.
Round 2 :
Weave all tails into backs of motifs, trimming close. If any joins feel loose, secure with a few extra whip stitches through both layers, bury knots inside motif edges.
Info :
Check runner on a flat surface and adjust join tension so it curves naturally without bunching. If runner is too floppy, consider adding a lightweight interfacing sewn to underside or a backing fabric attached with slip stitches.
This Halloween runner brings together playful faces, sleek black cats, and vintage-style doilies into a striking seasonal accent. Each motif is a small work of art—blocking and joining carefully ensures the runner will lay flat and look polished. I hope making this brings you as much seasonal cheer as displaying it will! 🎃🖤 Happy crocheting and have a spooky, cozy autumn crafting session!