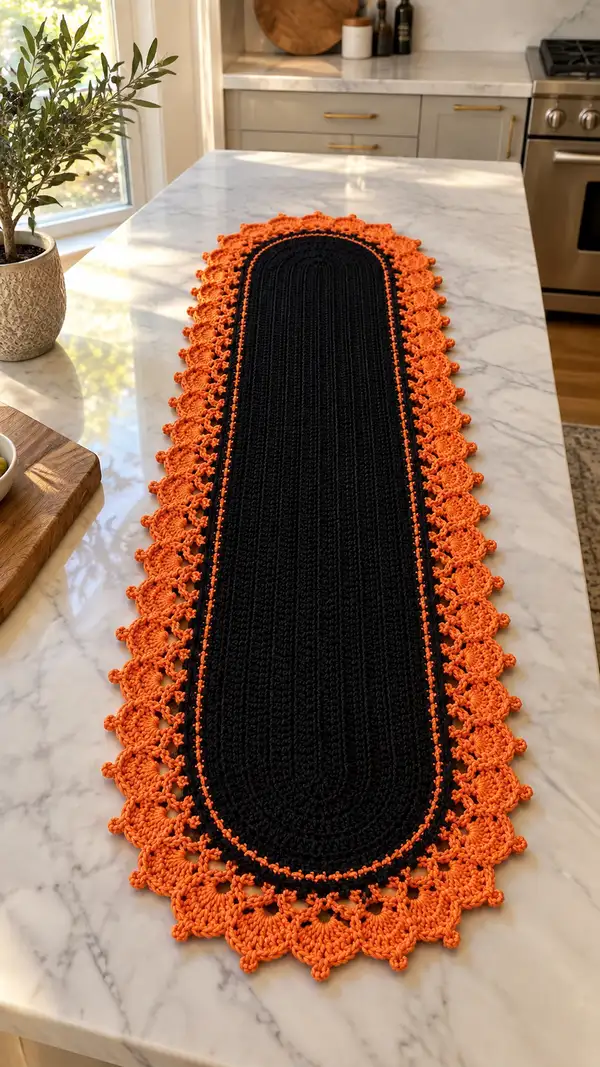
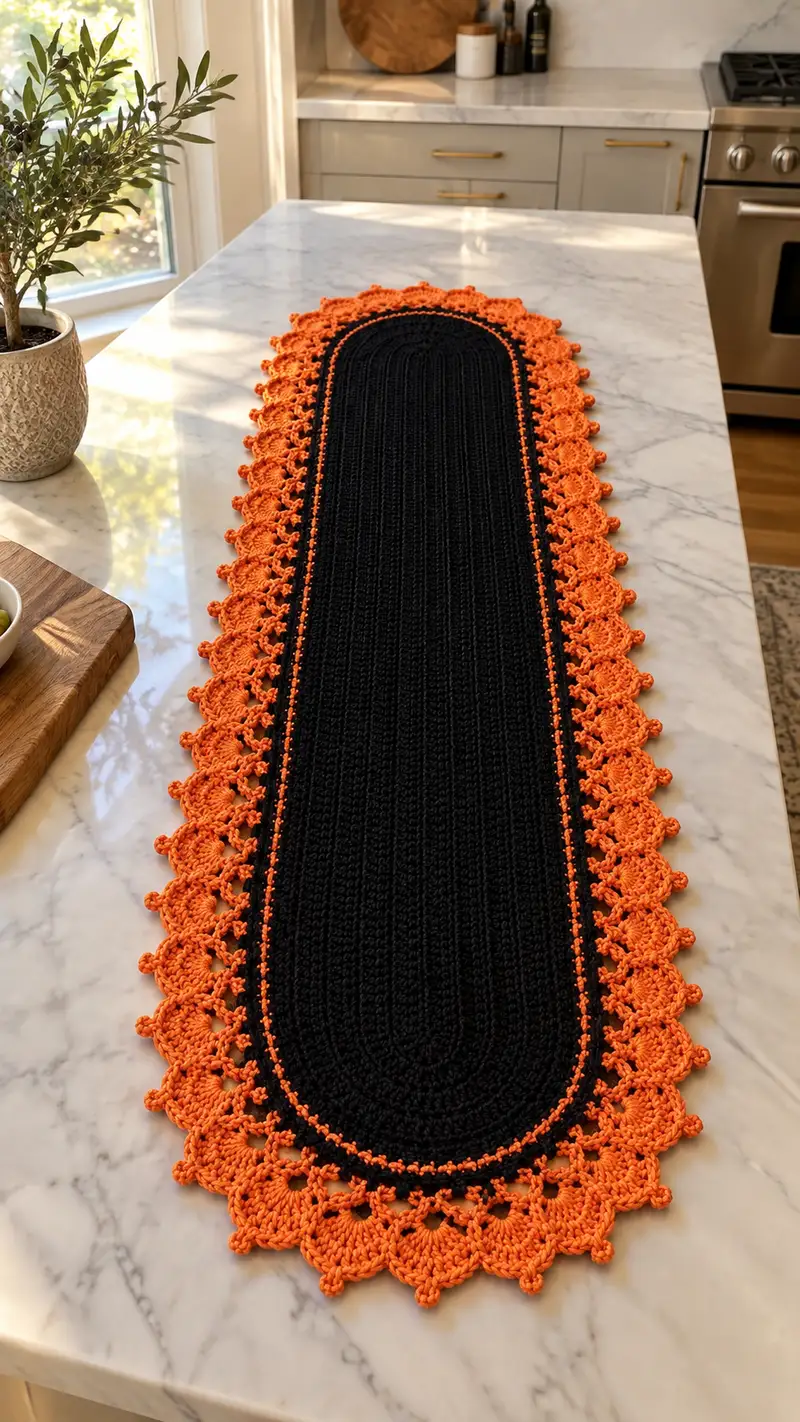
This elegant long table runner features a deep black ribbed center with a bright orange scalloped lace border — perfect for seasonal decor. Worked in rounds for a neat oval shape, the runner shows a narrow orange accent row and an intricate shell-and-picot edging that frames the piece beautifully. The finished runner lies flat with a delicate, airy border and dense, durable center ideal for tabletops. Detailed instructions and tips make this project approachable yet striking.
Progress Tracker
0% Complete
— Notes & Gauge :
Info :
This runner is worked in continuous rounds to create a long oval shape. Gauge is not critical but for reference: after 10 rounds of the center (BLO ribs) you should have approximately 6 cm (2.5 in) height; adjust hook if you want a looser or firmer fabric.
Info :
Final approximate finished size using worsted weight and 4.0 mm hook: Width about 10-12 in (25-30 cm), Length about 48-52 in (122-132 cm) depending on how many center rounds you make. Adjust center rounds to lengthen or shorten the runner.
— Materials :
Item :
Worsted weight yarn in two colors: Black (main) and Bright Orange (accent). Use cotton or cotton blend for best drape and table durability.
— Foundation Oval (Round 1) :
Round 1 :
Chain 38. 1 sc in 2nd ch from hook and in each ch across until last ch (37 sc), 3 sc in last ch to form the rounded end, now continue working down the opposite side of the foundation chain placing 1 sc in each ch (37 sc), 3 sc in the final chain (the turning chain) to complete the first round. Join with sl st to first sc if you prefer a joined round or place marker and work continuous rounds for a seamless, ribbed look. (80)
Info :
Count = 80 sts. This count is chosen so the border repeat (see edging) divides evenly into 80. If you alter starting chain, recalculate border repeats so shells sit evenly.
— Center Panel: Ribbed Oval (Rounds 2-60) :
Round 2 :
Work 1 sc in each st around but work the round in BLO to create a vertical rib texture: 1 sc in each st BLO (80)
Round 3 :
1 sc in each st BLO (80)
Round 4 :
1 sc in each st BLO (80)
Info :
Work Rounds 2-10 in BLO to establish the ribbed center. The BLO creates subtle vertical ridges that read nicely along the length of the runner. Place a stitch marker at the beginning of Round 2 and move it up each round to keep track of the start point.
Round 5-10 :
1 sc in each st BLO (80)
Info :
Continue working in BLO through Round 10. If you want pronounced ribs, you may alternate BLO rounds with regular sc rounds every 2 rounds. This pattern uses consistent BLO for even, vertical ribs.
Round 11-20 :
1 sc in each st BLO (80) — repeat for each round (80)
Info :
Work evenly until your center panel reaches approximately the desired length less 6-8 rounds that will be used to transition into the edging. For the pictured runner we worked Rounds 2-60 to achieve roughly 48-50 in overall length before edging.
Round 21-40 :
1 sc in each st BLO (80) — repeat each round (80)
Round 41-50 :
1 sc in each st BLO (80) — repeat each round (80)
Info :
At Rounds 51-54 add a thin contrast line: before Round 51, change to Bright Orange using a standing sc or change on the last pull of the previous round, then work Round 51 in orange, Round 52 in black, creating a two-row stripe effect which appears as a thin accent on the runner.
Round 51 :
Change to Bright Orange. 1 sc in each st BLO (80)
Round 52 :
Change to Black. 1 sc in each st BLO (80)
Info :
If you prefer a subtler accent, work only a single orange round then return to black. Carry the unused color loosely along the inside to avoid long tails.
Round 53-60 :
1 sc in each st BLO (80) — continue in black for even rounds leading up to the edging (80)
Info :
When you are satisfied with the overall length of the center (we stopped at Round 60 for the sample), stop after a full round in black and prepare to add the lace edging in Bright Orange. Count the current round and ensure you have 80 stitches — the shell repeat for the edging is based on this number.
— Transition to Edging (Rounds 61-64) :
Round 61 :
1 sc in each st (80). Change to Bright Orange on the final yarn over of Round 61 to prepare for the first orange row. Work this round in black and switch color on the last stitch if you prefer a clean join.
Round 62 :
With Bright Orange, 1 sc in each st around (80)
Info :
This establishes an orange inner border. Keep your tension even so the orange rounds sit flat without pulling the black center in. If you want a raised ridge between colors, work Round 62 in BLO instead.
Round 63 :
1 sc in each st (80)
Round 64 :
1 sc in each st (80)
Info :
Rounds 61-64 create a neat band before the lace shell rounds. We recommend leaving these two to four rounds to give the lace something to anchor to.
— Lace Shell Edging — Layout & Repeat Math :
Info :
The lace shell motif is built to repeat 10 times around the 80-stitch oval (80 ÷ 10 = 8). Each repeat consumes 8 base stitches. Our repeat motif will be: sc6, Shell (5 dc in one base st), sc1 = 8 sts per repeat. The shell will be built over several rounds to create the large scallops visible in the photo.
— Shell Foundation Round (Round 65) :
Round 65 :
With Bright Orange: *Sc6, shell in next st (5 dc in same base st), sc1* — repeat 10 times around. (80)
Info :
Work the shell (5 dc) into the single base stitch indicated. By placing shells evenly you create 10 large scallops around the runner. Be consistent with placement to keep scallops evenly spaced.
— Shell Build Rounds (Rounds 66-71) :
Round 66 :
*Ch3 (counts as first dc), 2 dc into top of shell (same stitch), dc in next 4 sts across shell area to shape, sl st into the sc that follows the shell (this helps fan the shell), sc1 in that sc* — Repeat 10 times. (80)
Info :
Round 66 increases the shell height and fans it slightly. Keep counts tight so each repeat still uses 8 base sts overall. If you find you consumed more stitches per repeat, reduce the dc in the inter-shell area accordingly to maintain 80 sts.
Round 67 :
*Ch2, 3 dc in top of shell spaces to deepen fan, ch2, sl st to anchor to the sc between shells, sc in next sc* — Repeat 10 times (80)
Info :
Round 67 adds body to the scallop and creates an open space beneath the shell where decorative arches will be worked in the next rounds. Keep tension even and block lightly if shells want to curl.
Round 68 :
*Working into the spaces you created beneath each shell: (sc, ch4, sc) in the arch space to create a small openwork loop, then sc in the sc that separates repeats* — Repeat 10 times (80)
Round 69 :
*Slip stitch into the top of the shell, ch5, sl st back into same top stitch to create a small loop on top, sl st into the sc that follows, sc in next sc* — Repeat 10 times (80)
Info :
Rounds 68-69 introduce airy arches and small top loops that create the lacy bobble texture visible between the scallops in the photo. You can adjust ch length for bigger or smaller openings.
Round 70 :
*Work 7 sc evenly across the fan area (or 1 sc in each base st across that section), then into the next sc (base stitch that received the shell) work a bobble cluster: [dc, ch2, dc] all in same st to create a raised motif. Then sc1 in the next sc separating repeats.* — Repeat 10 times (80)
Info :
Round 70 begins to define the scallop edge and produce bobble-like knobs between the large scallops similar to the small round bobbles visible in the runner photo. Adjust ch2 to ch3 to make the knob slightly larger if desired.
— Outer Picot & Scallop Finish (Rounds 71-78) :
Round 71 :
*In the outermost top of each built shell work: sc, ch3, 5 dc cluster across the rounded edge to give fullness, ch3, sc into the top of the same shell — this creates the scallop curve. Then sc1 in the next sc between shells* — Repeat 10 times. (80)
Round 72 :
*Work a picot edging: in each sc along the outermost scallop edge: sc2, (picot: ch3, sl st into the 3rd ch), sc1 into the space between shells* — Repeat evenly across scallop edges. (80)
Info :
Picots are made as ch3, sl st into the first ch or the main stitch depending on the look you want — the sample used ch3 sl st into the third ch to form small three-loop picots that look like bobbles around the scallop perimeter.
Round 73 :
*Reinforce each scallop by working (sl st, ch1, 3 sc) into the outer peak of each scallop; sl st into base to anchor then sc across the small connecting sc* — Repeat 10 times (80)
Round 74 :
*Finish by working 1 sc in each visible stitch across the scallops to tidy edges and flatten the lace slightly; when you reach the points with picots, work sc, picot, sc to re-establish bobbles* — (80)
Info :
Rounds 71-74 are about building and securing the large scallops and the small picot bobbles. Check that the border sits flat; if it pulls up, work an additional sc round in black or orange (as you prefer) to balance tension.
— Final Decorative Popcorn Row & Blocking (Rounds 75-82) :
Round 75 :
Switch to a slightly smaller hook (3.5 mm) if desired. Working into the base where shells attach, create a decorative popcorn row: *sc3, popcorn (5 dc togethers or 5 dc cluster worked and closed), sc2* — repeat evenly 10 times around. Ensure popcorns align centrally on each scallop. (80)
Info :
Popcorns add that small round knob seen on the sample near each scallop. If you prefer clean scallops without knobs, skip the popcorns and simply finish with a picot round.
Round 76 :
Work 1 sc in each st around to even out counts and tidy bobbles (80)
Round 77 :
Work 1 sl st in each st for a flat finish if you prefer a neat mounted edge; otherwise work 1 sc in each st (80)
Info :
Weave in loose ends as you go or after blocking. Do not pull ends too tight. If your lace has become slightly slack, wet-block the runner to open the lace and flatten scallops. Pin scallops to shape while drying.
Round 78 :
Optional last decorative round: With black (or orange for contrast) work 1 sc in each st around to define the border (80)
Info :
Final finishing tip: wet-block the runner laid flat, pinning each scallop evenly spaced and straightening the ribbed center. Allow to dry completely before removing pins to preserve shape.
— Alternate Shorter Runner Option :
Info :
If you want a shorter runner, reduce the number of center rounds before adding the edging. Each center round (sc in each st) measures approximately 0.75-1 cm lengthwise; reduce by 10-20 rounds to shorten proportionally. Maintain 80 stitches so border repeats still divide evenly.
— Troubleshooting & Stitch Counting :
Info :
If you notice an extra stitch accumulation on long runs, check your increases at the start and end of the first foundation round. Recount before starting the lace so your 80-st basis is correct. Use markers to mark the start of each repeat when working shells so you don’t drift.
Info :
If the scallops flare outward unevenly, adjust the number of arch chains in Rounds 66-69 or add a final sc round in black to pull the edge slightly inward. Blocking will also even out irregularities.
— Care Instructions :
Info :
Wash cotton runners gently by hand or on a delicate cycle in cold water. Re-shape and block while damp. Avoid high heat when drying to preserve shape and color contrast.
This festive table runner balances a bold, modern black center with an eye-catching orange lace scallop edge — ideal for seasonal styling! The ribbed center works up quickly and the lace edging adds a handmade flourish that elevates any table. I hope this pattern invites you to slow down, enjoy each round, and celebrate the small details. 🧶✨ Whether kept for seasonal decorating or given as a handmade gift, this runner brings warmth and charm to your home. Happy stitching and don’t forget to share your finished runner! 🎃