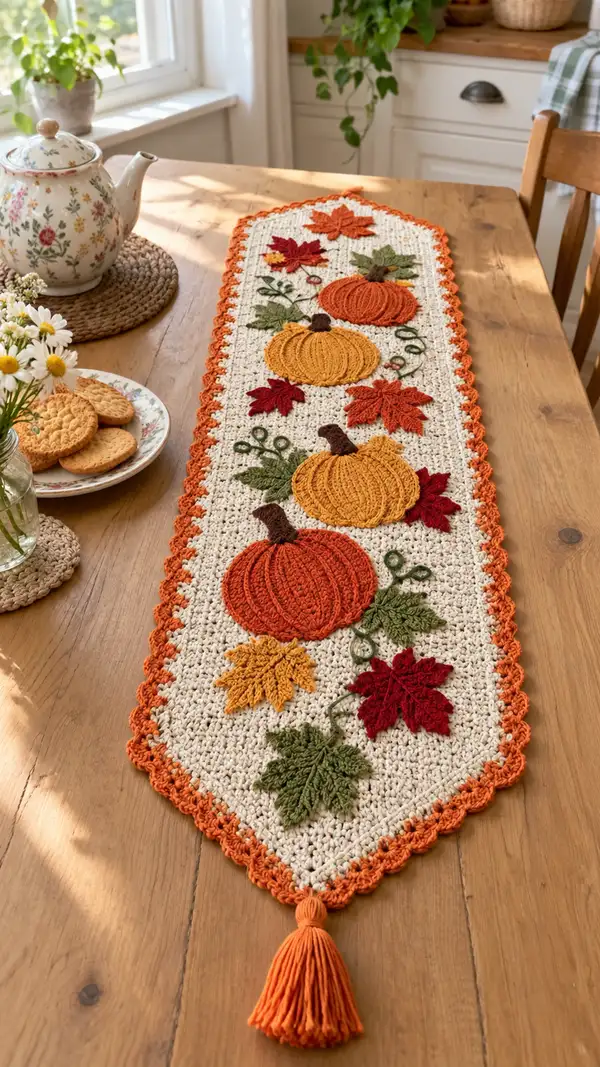
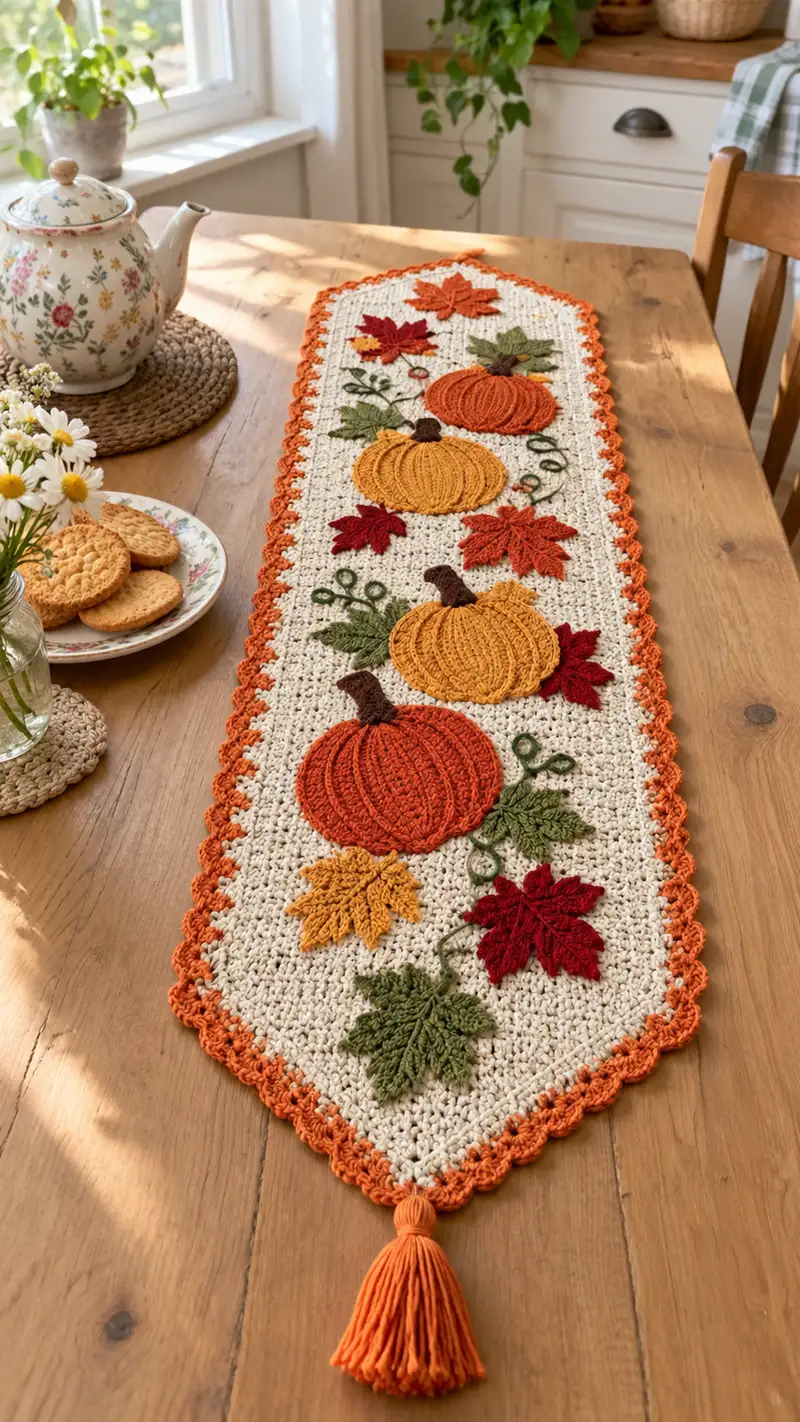
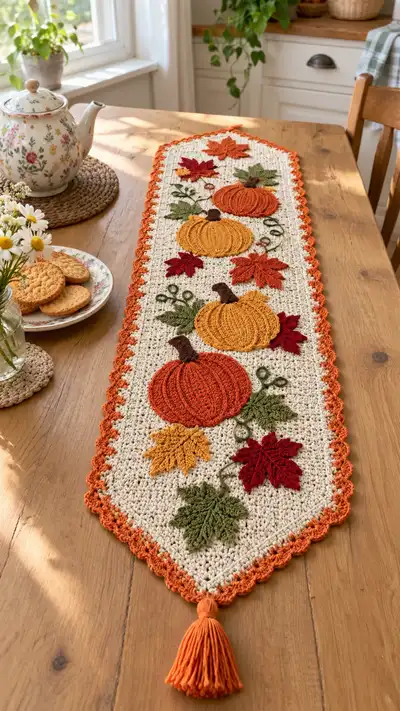
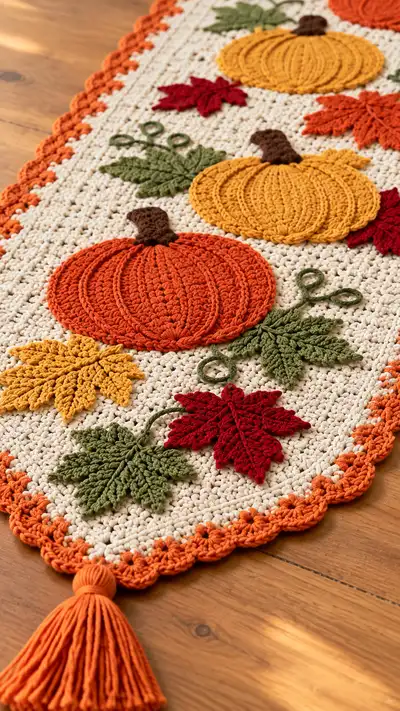
Bring cozy autumn charm to your table with this textured crochet table runner featuring layered pumpkin appliques, maple-style leaves, curling vines and a scalloped orange border. Worked in a neutral cream ground with warm rust, mustard and olive accents, the runner is finished with tassels for a handmade, farmhouse look. Step-by-step instructions guide you through the base panel, appliques, ribs and assembly so you can create a beautiful seasonal centerpiece.
Progress Tracker
0% Complete
— Base Runner :
Info :
This runner is worked flat in rows to create a dense, slightly textured background. Gauge is not critical but using worsted cotton and a 4.0mm hook will give a firm fabric for appliques to sit on. The pattern below produces a runner approximately 10-12" wide (excluding border) and 36-40" long before tassels depending on yarn tension. Begin with a foundation chain; chain count should be an odd number to make the border scallop and edge shaping consistent.
Round 1 :
With cream yarn, ch 73. Row 1: hdc in 3rd ch from hook and in each ch across (71 hdc). Turn. (71)
Round 2 :
Ch 2 (counts as hdc), hdc in each st across to last st, hdc in last st. Turn. (71)
Round 3 :
Repeat Round 2. Keep tension even; this establishes the base fabric. (71)
Round 4-8 :
Work 5 rows even in hdc (ch2, hdc across) to create a stable rectangular band. (71 each)
Info :
Use a stitch marker at the first stitch of each row to avoid accidental stitches in turning chains. If your fabric is curling, work one row in sc at the edge to square it up before continuing.
Round 9 :
Begin shaping the left pointed end: ch2, hdc in next 3 sts, hdc2tog (over next 2 sts), hdc in each st across until 5 sts before row end, hdc2tog, hdc in last 3 sts. Turn. (69)
Round 10 :
Ch2, hdc2tog at start (over first 2 sts), hdc across until 2 sts before end, hdc2tog, hdc in final st. Turn. (67)
Round 11 :
Ch2, hdc2tog, hdc across until 2 sts before end, hdc2tog, hdc in final st. Turn. (65)
Round 12-20 :
Work even in hdc (ch2, hdc across) for 9 rows (65 each) to build length toward the center. This forms the narrow end area and starts the long central rectangle.
Info :
Check your length periodically. The runner should have roughly three pumpkin motif positions; the central rectangle portion will be long (work as many even rows as needed to reach desired spacing between motifs). For the photographed runner, work 38 rows in this central section total (including previous rows) before beginning the opposite pointed end shaping.
Round 21-44 :
Continue working even in hdc (ch2, hdc across) for 24 rows (65 each). Use stitch markers to mark the intended positions for appliques: mark center row for each pumpkin and additional marks for leaf clusters. Place them approximately 9-11 rows apart vertically for balanced spacing.
Round 45 :
Begin shaping right pointed end: ch2, hdc in next 3 sts, hdc2tog, hdc in each st across until 5 sts before row end, hdc2tog, hdc in last 3 sts. Turn. (63)
Round 46 :
Ch2, hdc2tog, hdc across until 2 sts before end, hdc2tog, hdc in final st. Turn. (61)
Round 47 :
Ch2, hdc2tog, hdc across until 2 sts before end, hdc2tog, hdc in final st. Turn. (59)
Round 48 :
Ch2, hdc in each st across to last st, hdc in last st. Turn. (59)
Round 49-50 :
Work 2 rows even in hdc to level the pointed end and firm the edge. (59)
Info :
If your final length is shorter or longer than desired, add or remove 2-4 even hdc rows in the central section. Blocking will also slightly lengthen the fabric.
Round 51 :
Edging prep: ch1, sc evenly around entire runner edge placing 3 sc in each point at the very tips to turn the corner smoothly. Join with sl st to first sc. (Even number around; count should be close to 280-300 sc depending on row counts)
Info :
Count your edge stitches. You will use these counts to place the scalloped border evenly. If you have 288 sc around, you can work a scallop pattern repeat that divides into that number for even spacing.
— Pumpkin Applique (Make 4) :
Info :
Each pumpkin is worked in rounds to create a flat, slightly domed disk that will be textured with raised ribs. Make four pumpkins in two colors (e.g., burnt orange x2, golden mustard x2) and vary sizes slightly if you like by adding or omitting one increase round.
Round 1 :
With pumpkin color, make a magic ring, 6 sc in ring. Pull tight. (6)
Round 3 :
(1 sc, inc) x6 (18)
Round 4 :
(2 sc, inc) x6 (24)
Round 5 :
(3 sc, inc) x6 (30)
Round 6 :
(4 sc, inc) x6 (36)
Round 7 :
(5 sc, inc) x6 (42)
Round 8 :
1 sc in each st around (42)
Info :
At this point you have a flat disk roughly 3.5-4" across (depending on tension). To create a slightly plump pumpkin, we’ll add a shallow dome with an extra round of dc clusters and then work ribs with front post stitches.
Round 9 :
Ch1, (hdc in next 2 sts, 2 hdc in next st) repeat around (42) — this adds gentle curvature.
Round 10 :
1 sc in each st around (42)
Round 11 :
Switch to 3.5mm hook if comfortable and want tighter ribs. Work 1 sc in each st BLO for one round to create a subtle ridge for the rib foundation (42)
Info :
Ribbing will be created with fpdc rows anchored into these stitches and with surface slip stitch ribs as an alternative. Choose whichever method you prefer; both instructions follow.
Round 12 :
Rib method A (post ribs): *fpdc around same post, (skip next 3 sts, fpdc around next post)* repeat 14 times to create 14 raised vertical ribs. Finish round with sl st to first fpdc. (14 ribs)
Round 13 :
Between ribs: work 1 sc in each remaining st to firm the base and even the spacing. (42)
Round 14 :
Surface slip stitch ribs (alternate method): ch1, using same color and yarn tail, work surface sl st lines from center to edge by inserting hook from front of work and pulling loop through, creating long upright ridges. Make 10–12 surface ribs evenly spaced. Secure and weave in ends.
Info :
For deeper ribs, use a second round of post stitches or repeat surface slip stitch lines offset slightly. You can also add a small circle of stuffing to the center before closing to give a plump look; use minimal stuffing so the applique remains flat enough to sew on.
Round 15 :
Fasten off leaving a long tail for sewing the pumpkin onto the base panel. For a slightly larger pumpkin, add an extra increase round before Round 8: (6 sc, inc) x6 to move from 42 to 48 stitches).
— Pumpkin Stem (Make 4) :
Round 1 :
With dark brown, make a magic ring, 6 sc in ring. (6)
Round 3 :
1 sc in each st (12)
Round 4 :
(1 sc, dec) x4 (8)
Info :
Stuff the stem lightly if you want it to have body, or leave flat for a stitched-down look. The stem can be sewn to the top of the pumpkin with the last tail for a neat finish.
Round 5 :
Fasten off leaving a long tail for sewing. Curve the stem slightly by folding as you sew to the pumpkin top to mimic a natural curve.
— Pumpkin Ribbing Detail (Surface Crochet Method) :
Info :
Choose one rib method. The surface slip stitch method is easier and creates clean ridges. The fpdc method creates deeper, sculpted ribs. Both are included; pick one per pumpkin or mix for variety.
Round 1 :
Surface Rib Option: With same pumpkin color, attach yarn at center top by sl st, ch1, work a series of surface sl sts from center outward by inserting hook from front to back through the pumpkin, pulling up a loop, then pulling hook along surface and inserting again to create elongated surface stitches until you reach edge. Pull gently to create a raised ridge. Repeat at 8–12 evenly spaced positions around the pumpkin.
Round 2 :
Post Rib Option: With same color, make 10–14 fpdc around posts as described in the Pumpkin section; these will encircle the pumpkin adding vertical ribs. Work each fpdc evenly spaced; count posts and aim for symmetric spacing. Finish with sl st and weave in ends.
Info :
Ensure ribs are anchored well at both the center and outer edge by working small catch stitches (sc) at the center and sl st on the outer edge. This prevents ribs from shifting when sewn to the panel.
— Leaf (Make 6 - Mixed Sizes) :
Info :
Make maple-style leaves in olive, golden mustard and rust. Leaves are worked flat and then blocked lightly for crisp veins. Below is a 9-round leaf that produces a mid-size leaf. Vary rounds or yarn weight for different sizes.
Round 1 :
With olive, ch 8. Row 1: sc in 2nd ch from hook, sc in next 5 ch, 3 sc in last ch; working on opposite side of foundation chain, sc in next 5 ch, sl st to first sc. (16)
Round 2 :
Ch1, (sc, inc) in first st, sc in next 4, (sc, inc) in center 3-sc cluster, sc in next 4, (sc, inc) at end. This creates a slightly pointed tip. Count: 20 sts
Round 3 :
Ch1, sc in next 2, hdc in next 4, dc in next 3 (center ridge), hdc in next 4, sc in last 2. (20)
Round 4 :
Work picot edges for serrated leaf look: *sc, ch3, sl st in 3rd ch from hook (picot), sc* repeat across each side, mirroring the other side. Fasten off leaving tail for sewing. (approx 28 picots total)
Info :
To create the prominent vein, embroider a central line with contrasting green or with the same yarn using a surface slip stitch or chain stitch. Block leaf flat and press gently for best results.
Round 5 :
Large Leaf Option: add one more increase round before Round 3: (2 sc, inc) x repeat to bring count to 24 sts, then proceed with shaping for a larger leaf.
— Small Pointed Leaf (Make 6) :
Round 1 :
With rust or mustard, ch6; sc in 2nd ch, sc in next 3 ch, 3 sc in last ch; work back along foundation chain sc in next 3 ch, sl st to first sc. (12)
Round 2 :
Ch1, sc in first 2 sts, hdc in next 4, sc in last 2. Fasten off leaving long tail for sewing. (12)
Info :
These small leaves tuck nicely behind pumpkins and create layered depth. Block lightly to open up stitches and make them lie flat.
— Tendrils (Make 6-8) :
Round 1 :
With olive, ch 30 for a long tendril, or ch 12–18 for shorter curls. Row 1: sl st in 3rd ch from hook and each ch across to create a twisted cord look. Fasten off leaving a long tail for sewing. Curl by wrapping around a pencil and spritzing with water, then pin to dry for a coiled appearance.
Info :
Vines can also be made by making i-cord or crocheting a thin tube (sc in back loops or sc in continuous rounds around 3 ch), then stuffing very lightly for volume. Position under pumpkin edges and secure with small whip stitches.
— Leaf Vein Embroidery Details :
Round 1 :
Use matching or contrasting yarn and yarn needle to stitch a central vein on each leaf: bring yarn up at the base, make straight stitches toward the tip, adding small diagonal stitches outward to mimic leaf vein structure. Secure ends and weave through to hide.
Info :
For extra texture, use a darker green for veins on light olive leaves or a slightly lighter shade for highlights on dark leaves. Make small stems by stitching a short chain-like series of lazy loops onto the panel under leaf bases.
— Border Scallop :
Round 1 :
With orange, join with sl st to any sc of the base edge. Ch3 (counts as dc), *skip 1 sc, (5 dc) in next sc to create scallop, skip 1 sc, sl st in next sc* repeat around. Adjust repeats to fit evenly. Join with sl st to first ch3. (Scallop repeats ~48-52 depending on edge count)
Round 2 :
For a ruffled scallop, ch1, sc around each scallop cluster placing 3 sc evenly across the outer edge of each scallop. Join and fasten off. Weave in ends neatly on the wrong side.
Info :
To make the border crisp, block after adding the scallops. If you need to decrease the number of scallops for a smaller runner, reduce by removing some scallop repeats evenly from both long sides.
— Tassels (Make 2 or 4) :
Round 1 :
Make large tassels with orange cotton by wrapping yarn around a 3" cardboard template approximately 70-90 times depending on desired fullness. Tie securely at top, fold and trim bottom to even. Attach tassel to each pointed end of runner by threading the top loop through edge and sewing securely with strong yarn.
Info :
Make smaller coordinating tassels in mustard or olive for extra corners or to hang as optional decorative extras.
— Finishing & Assembly Notes :
Info :
Before attaching motifs, block all leaves and pumpkins lightly so they lie flat and have crisp edges. Pin motifs to the runner on the marked rows to mimic composition shown in photos — pumpkins staggered along the center length with leaves and tendrils filling negative space. Take photos of pinned layout to reference during sewing.
Round 1 :
Position the largest pumpkin at the lower third of the runner, the next pumpkin at the center, and the third at the upper third. Use pins to place small and large leaves around each pumpkin; ensure the stems and tendrils flow naturally up the runner.
Info :
Sew each pumpkin on with a long tail using a whip stitch around the outer edge only, catching the base panel and the outermost round of the pumpkin. For very secure appliques, sew through the pumpkin disk every 6–8 stitches pulling slightly to anchor but not pucker.
Round 2 :
Sew stems on last, tucking the base of each stem slightly under the pumpkin top and using small secure stitches. Attach leaves and tendrils with small stitches at leaf bases and along vine lines. Hide knots and tails on the wrong side or inside leaf backs and weave in thoroughly.
Round 3 :
Once all appliques are sewn, give the runner a final gentle steam block (do not press directly if using cotton blend—use a cloth between iron and yarn). Attach tassels firmly and trim stray ends. Your runner is ready to style on a table.
Info :
Label and store extra motifs and yarn scraps so you can make matching napkin rings or coasters later. Small changes in pumpkin placement or leaf colors let you customize for different table lengths and looks.
This Autumn Pumpkins Table Runner pattern is a joyful way to welcome the harvest season into your home. Each stitch builds texture and color — from raised pumpkin ribs to layered maple leaves and curling tendrils — resulting in a charming, hand-crafted centerpiece. The thoughtful modular approach lets you enjoy instant results as each applique is completed and pinned into place. I hope this pattern brings cozy, handmade warmth to your table this fall. Happy stitching! 🍁🧶